Wednesday, July 27, 2016

The Springfield Top by Cashmerette

Y'all know how this goes, I tested this pattern for Jenny.  So drop out now if you don't like pattern tester reviews...


First, I have to tell you that this didn't work for me. Which is a first for me. I am selective about what styles I pattern test for Jenny because I don't want to waste her time or mine. I sent her an email detailing all of the things that didn't work for me. She sent me back this amazing email with some suggestions YET she said if it really didn't work she understood.

Her email was so kind and understanding that I was like, "dayum, I need to put on my big girl panties and see if I can make this work." So I recut the front, fixed the armhole on the back curve and added some lace to the hemline and got this ~


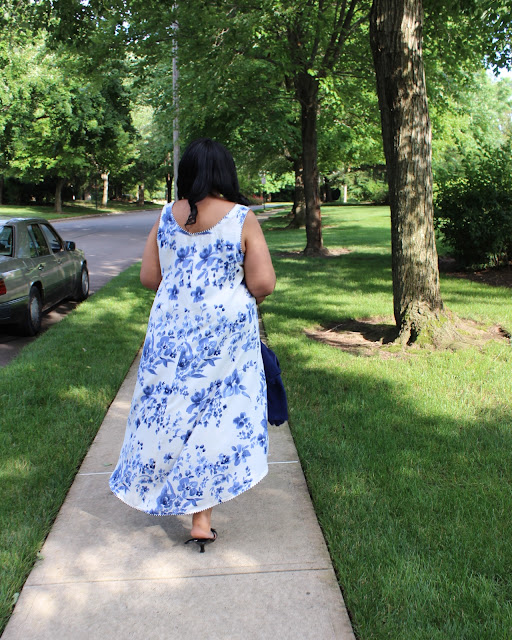
A workable Springfield made from a washed silk duppioni that I added a 6" embroidered lace to the hemline. I like the fit on the back the best. It's what drew me to the top - that back detailing. The front still needs some work because it's pulling on the sides but it's wearable.

I want to remake it in a drapier fabric to see if this really will or won't work for me. Honestly though, you shouldn't decide whether to purchase this pattern based upon my experience. I know we as testers usually rave uncontrollably about a pattern - hey I shouted from the rooftops about the Concord Tee! 

I think you should decide to purchase this pattern based upon whether you'd like to have this type of garment in your wardrobe, using a pattern that will need the least amount of pattern alterations for a plus size woman. A pattern that was tested by a variety of women like Grandmaelaine's version - here...or Megret's version.  Need more convincing, Weboughtamanor made three amazing versions.  

In all honesty, I want a woven tank top but every time I make one I realize that it's not a style that I like to wear or even likes the way it looks on me. I like casual clothing but not this casual. Those are my issues - not the pattern's issue. So if you're a plus-size, curvy, big busted woman who wants a woven tank top and wants it cut in your cup size (C-H) and your garment size (12-28), give this tank a try.  Jenny even makes it easy for you to try this out because she's selling kits to make your own.

Mine is nice and I probably will try another one but seriously try this pattern out for yourself. You will be happy you did!

Now to leave you with one more pic of me in the tank...but look at the background and see that no matter how hard my daughter and I try...we just can't keep the little people out of the shots!


...as always more later!


Sunday, July 24, 2016

Miscellany

This post is a conglomeration of things that are too short for their own post but have too much info for Instagram...my two social media outlets. As a digression, I admire all of y'all that Instagram, Facebook, Tweet, Periscope, Snapchat and then remember to write a blog post or two. That's just a little too much social media exposure for me but power to you for getting yours in!

Next....so as I started to say, this is a bunch of little things that have been hanging out and I'm putting them all together in this post. I need to clear out the space...get these talked about and move on.

So first up is a Washington Hack: 

Let's state this upfront, if you have problems with pattern testers you can hop out now!  I was one of the pattern testers for the Washington Dress. I know it was released awhile ago and loads of versions have shown up on social media. When Jenny first sent out the test versions for this dress, I thought I would be able to incorporate this pattern into my new lifestyle but honestly I was still very challenged by the casual workstyle at my job.

So even though I love, love, love this pattern - I never moved pass the testing stage until later last summer when I needed a new maxi dress. I was tired of wearing the McCalls 6559 versions I'd made and was looking for a new silhouette. So I hacked my test version into this:


I really loved the fit of the top of the Washington Dress. I'd never had such a good fit without jumping through hoops with other patterns and seriously this fit is out of the envelope. So I added a yard of a knit floral print again from Fabric Mart to the bottom of the top. This made a great casual maxi to throw on and wear through the last of the hot and sultry summer days.

Just for comparison here is a very bad pic I sent to Jenny along with my comments on the pattern:


As you can see the pattern with the band fit me well. I do have plans to make another one this summer with the band and a maxi length skirt, even have the fabrics set aside to make it. Just need time! 

So a few more pics ~


Jenny has a gift for fitting the shoulders, neckline and bustline of a plus size sewist. I highly recommend that you give her patterns a try because they are wonderful as is or as a jumping point for whatever you can imagine. You will see more versions of this pattern on the blog!


* * * * * * * * * 

Mentioning Jenny, I highly recommend that you sign up for her weekly newsletter on her blog. I love the weekly roundups that The Foldline does, or Fiona's Indie Pattern Review and especially Heather's of Closet Case Files...seriously wait for Heather's every Sunday. However, as much as I love those round ups, they don't predominantly feature all of the plus-size/curvy girls going-ons. Yes, we're mentioned every once in awhile but if you're looking for ALL plus size/curvy girl doings ALL the time, Jenny has it! Sign up on her blog - Cashmerette.com.


* * * * * * * * * 

I love Instagram, truly I do but I love blogs too! I try to read all that I can and leave a comment to let the author know that I stopped by.  I'm not always successful at leaving a comment but I try. I know that commenting on blogs is down these days since it's so much easier to hit a "like" button on other forms of social media. It's just that sometimes it's I have a little more to say. At those times, I turn to my blog.

I've been sewing a lot this summer. Moving fabric out of the collection into my closet and reigniting my creativity has made this a very calming time for me. When I was working on my latest garment, up on the blog soon, I realized that either I have a Fabric Mart, fabric.com or a tag by me on almost all of my fabrics. I love that those tags tell me the history of the fabric. Because as we can all admit I own ALOT of fabric! *smile*


It's amazing the value of some of the pieces that are in the collection! Take the cost per yard of this rayon suiting that I bought from Fabric Mart - seriously $2.40 per yard - that I used in the McCalls 7385 maxi dress, coming soon to the blog. That little tag just thrills me.

Since I've been sewing primarily from the collection this year, I've accumulated several of these fabric tags, pictured below ~


I've just been hanging them on the edge of my sewing table by the serger. It's silly but I like seeing the collection of them there. It's like a testament to my resolve to sew from my fabric collection and it makes me happy. Happy that I'm fulfilling my resolve and also that I'm sewing garment after garment.


* * * * * * * * * 

Even though it's hotter than Hades here, I have to be honest, I've started to make a fall sewing list. Yeap, I've started a new page in my notebook writing down new ideas to sew. I know, I know but I don't want to lose any of the ideas...so I've officially started thinking fall...but I will be sewing summer until at least the beginning of October. Y'know why? Because I love sewing for spring & summer...dresses...need I say more!


* * * * * * * * *

Of course, I've sewn quite a few pieces since these photos were taken so look for more outfits on the blog soon. And if you want to keep up with my sewing in real time, there's always my Instagram account where I post quick pics of what I'm making, as well as, progress shots.


...as always more later!


Wednesday, July 20, 2016

A Thought or Two on Pressing

Have you ever seen the movie, "Real Women have Curves"? America Ferrara plays one of the main characters who works in a sweatshop in Los Angeles. The thing that I always remember about that movie is that Carmen (America Ferrara) begins working in the sweatshop as a presser.  She wanted to be one of the sewing machine operators but they started her at the pressing machine. Explaining to her that pressing was one of the most important steps and the last step before the garment was hung to be shipped out.

Now we as sewists know that "Press As You Go" is the golden rule. However, do you do it every time? I thought about this as I was making those simple t-shirt dresses. I know that I doubled the amount of time it took to make those dresses because of the amount of pressing that went into making them.


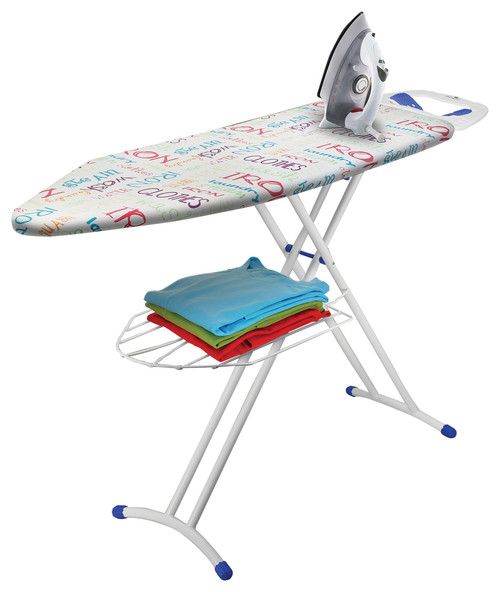
Bonita Pride Ironing Board, Bright Text

So is pressing important to you?  Do you follow the golden rule?  Do you press every seam flat, then open?  Do you know not to cross sew seams until the first seam is pressed? Have you invested in the best pressing tools there are? The best iron you can afford? Pressing tools like a sleeve board, a ham, a clapper?

Do you spend as much time pressing your garment while making it as you do with pattern alterations, fitting challenges & changes, as well as, sewing the garment? It's like if you had a tent with tent poles, your tent can stand without that fourth pole but it stands so much better with it.

Now there have been some great articles written about pressing but I personally love the series that Ann of Gorgeous Fabrics has written about it. My two favorites are, "Pressing: When you care enough to sew the very best!" and "Pressing Impressively without Impressions." 

I know there is so much information available on the internet because you can google how to do anything. However, I think it's important to visit the sites that give you the best advice to take your sewing to the next level. I love Ann's pressing advice and hope that it will help you step up your press game too.

That way whether you are making a simple "Learn to Sew" garment or an involved tailored one, using good pressing techniques can make the difference between a Becky Homecky garment or the statement, "Did you really make that? It looks like RTW!"

That's today's ramble...let me know what you think, okay?!

...as always more later!

Sunday, July 17, 2016

McCalls 7348 - A Couple of T-Shirt Dresses

I grew up in the 70's and Jacqueline Kennedy Onassis was a style icon at the time. To me one of the most fascinating things about her was that she bought multiples of pieces that she liked. Found a t-shirt that worked for her in a French boutique, she bought it in all colors...7 or 8 if that's what they had. Somewhere in my teenage mind, I held onto that.

Years and years later, I always think in multiples. I love a pattern that I can make 4 or 5 garments from...an example of such is the multitude of dresses I made from McCalls 6559 or Vogue 1250. I know this is boring sewing to a lot of sewists but it's a huge wardrobe builder when you're starting from scratch again. Also it really let's me explore a pattern through fabric and changes to the pattern itself.

Here are my versions of McCalls 7348 all made during the mini-sewcation I had the 4th of July weekend. My first post on this pattern was about my wearable muslin where I determined how I wanted to alter the pattern. These next three dresses reflect those pattern changes and design opportunities.


Dress One ~ Blue & White Ltwt. Ponte

  • This is my second wearable muslin because this one has the excess fabric removed from the dress giving it the slimmer yet loose fit that I was looking for. I've also lengthened the cap sleeve and made it a little longer for my bodacious biceps.
  • I've realized that this dress needs a center back seam for future versions.
  • And I will shorten the dress' hem because I serged off 1.5" before turning under 1" for the final hem.


The ponte fabric is a recent purchase from Fabric Mart and besides a little twill tape in the shoulder seams, there are no additional supplies used to complete it. While this is my first version of this dress using the altered pattern, it's not perfect but it's perfectly wearable!

Dress Two ~ Black 'n White Herringbone Ltwt. Ponte


Dress number two went together easily. I had a little practice! For this version I added a white neckband and sleeve bands to make it look more like a t-shirt which these dresses are based upon. However, as I was sewing it I decided I should share a few of the techniques I used. Even though it's a "Learn to Sew" pattern, better techniques will give you a more professional result.

I added a center back seam to the dress to give it a little more definition. Okay this is not a tight fitting or even a close fitting dress. This is a loose fitting dress but adding a back seam means there's not a lot of fabric hanging out in the back. Seam tape was added to the shoulder seams to stabilize them.

Supplies ~
Lightweight herringbone ponte - a recent purchase from Fabric Mart
White ponte from the collection
Twill tape

The Neckband ~
I only used a 1/2" seam on the neckband to stitch it together. I determined the 4 quarters of the neckband and pinned it to the center back, center front and side seams. Then stretched and added alot of pins. When sewing it on, I stretched and sewed like the pattern instruction says. However, I think it's important that you pin it well. My first dress I just pinned it and the application was sloppy. I had to take the band off and put it back on.


Next good pressing with a lot of steam is involved. I even used a clapper to hold the press in. Then I added the stitching the pattern recommends. Even though this is an easy pattern, I took my time.


The Sleeve Band ~
I shortened the sleeve by 1" and serged finished the edge. Then I added a band by using the width of the neckband. It was folded in half and stitched to the sleeve. Serged finished the edge and pressed the seam up towards the sleeve. Next topstitching was added to the seam and it was pressed flat.

A few photos of the finished dress ~


These details make this dress different from my other versions and I love this dress because of them!

Dress Three ~ Black 'n White Floral Print


This version is all about the ponte print fabric. I chose this one from the collection because it had a little weight to it and I liked the print. But I knew the fabric would need something to make it sing so I added some black ponte to the neckline and for the sleeves. Both of these fabrics are from the collection and have been around for a minute waiting to be used.

That is the only thing that is different about this dress. All of the sewing techniques are the same as the first two dresses in this post. I think it has a little closer fit but that's due to the fabric and not to anything that I did differently.

A couple of pics ~


Conclusion ~
I know that these are loose unfitted dresses. It's the look I'm going for because it's become really hot around here. I want some throw on dresses that can be accessorized, dressed up or down for whatever. Mostly though I wanted some casual dresses that will fit into my work atmosphere, yet have the styling details that are me. 

Originally I thought that I would make five of these but after these three and the wearable muslin, I'm done with this pattern for now. That's not to say I might not revisit it later. However, I now have more garments on my to-sew list that I'd like to get off my fabric shelves and into my closet.

I'm still sewing especially since I think I've finally found my groove. There are a couple of skirts and another dress or two coming up!

...as always more later!


Friday, July 15, 2016

McCalls 7348 - A T-Shirt Dress Wearable Muslin

I've been passing women on the streets of NYC wearing easy t-shirt dresses and sneakers.  While it's not exactly Chicos Chic, it is a look that appeals to me because it's casual, comfortable and perfect for my office. So I want not one but a few. I have loads of fabric and just need to perfect a pattern.

So I pulled McCalls 7348 from the overflowing pattern pile and then I pulled a couple of pontes from the overflowing fabric pile ~ notice a pattern here ~ to make a couple versions of t-shirt dresses.

The pattern pieces are simple for this pattern. Just four pattern pieces - a front, a back, a sleeve and a neckband are all that is required to make a variety of dresses. Now I'd read a review where a slimmer sized sewist (say that 3x fast!) made the longest version and had to take ALOT of the excess fabric from the sides. But being the plus size honey that I am, I thought great I can use the extra ease and there will probably be less fitting issues - WRONG!

I started with an extra large and traced the pattern pieces off for the short dress, the high/low dress and the maxi dress. Then I took a piece of ponte fabric that I'd pretreated, which turned out badly, to use for my wearable muslin. This is a simple sew because it's a "Learn to Sew" pattern.


However, there is just toooooo much space in this pattern. Now I need you to realize that the pattern highlights that. It is something I knew going in. I just thought the extra ease would work for and not against me. To make the top shown above, I had to remove sooooooo much extra fabric from the sides (and there is still some there that bothers me) as well as re-angle the front to get the high/low effect.

Personally I think if you have another knit dress pattern like McCalls 6889, you should use that one instead of this one. There is just so much space and for a "Learn to Sew" pattern it could frustrate the h*ll out of a beginner. I hate when that happens to new sewists because they think it's them and not the pattern.

I am going to wear it as a tunic and not the dress I was hoping for so I didn't put a lot of sewing effort into it. There's no band at the neckline. It's turned under, pressed and topstitched with a double needle. There is also the high low effect where the high is too high for my chubby knees so it will only be worn with some kind of leggings. 

A few more pics of this one ~


Conclusion ~
At first I was going to let the pattern go and just wear the tunic I managed to sew from the pattern. I mean I don't have a lot of casual clothing and since I can actually wear it to work, it's a great I don't feel like getting dressed today outfit. Also, surprisingly my daughter really liked this outfit.

So I decided that since I'd already traced all of those dayum pieces, I wasn't going to let a simple pattern beat me. I made some changes to the knee-length dress pattern pieces to get a workable pattern. Future makes from the altered pattern are up next on the blog.

...as always more later!


Wednesday, July 13, 2016

Revisiting Simplicity 1621

I made the high/low dress in this pattern last September, late in the summer season. Because of that it was hard to figure out if I wanted more of them or not. I wasn't even sure if I was at the tail end of the high/low trend or not. Since it was late summer when I completed the dress, I only wore it once or twice.

So this year when I moved around some clothing - spring/summer more to the front of the closet and fall/winter towards the back - I moved this dress up to wear. After wearing it in June, I knew I had to make more of these. It was so comfortable and fit the casual yet sophisticated style I'm still seeking. Because I made the blue/white seersucker one last year, I'm starting these with version 2 and 3.


Pink Floral Stretch Rayon or Version 2:
I pulled this pink floral stretch rayon linen blend from the collection. It's funny because when Gaylen visited the cave and touched this fabric on the shelf, she questioned that I bought it. She thought it didn't look like me. At the time I told her that it was for the grandbabies but I did secretly covet it for me. Fast forward and here it is...


Supplies ~
3 yards of pink floral stretch linen blend from the collection via Fabric Mart
2 yards of polyester fold over grass green braid from Daytona Trimmings
twill tape

Construction Info. ~

I did make a few changes for fit to this version. I hated the center front seam so I cut the front on fold. I also cut the front neckline a little closer because I feel like it's just a little loose on the original version. The bustline area was also cut a 1/2" closer to snug it up a little. Finally I left all of the length on the back of the skirt.

I sewed it up and added the bias binding to the neckline and armholes. And...the fit was still a little off...so I made some more adjustments to my pattern. I raised the underarms 1/2" on the front and back pattern pieces. Then I made snips in the upper armhole and folded over 1/4" and taped it down. Another snip was made in the neckline and folded over 1/4" then taped down. This was done to both the front and back pieces. I believe those changes will finesse the fit for my next one.

Unlike my first version, I only added binding to the neckline and armholes. I was going to add it to the hem too but thought it would affect the drape of the dress. The hem was turned up a 1/2" all the way around, pressed down and stitched.

A few more pics ~


Floral Blue and White Lightweight Crepe or Version 3:
This floral blue and white floral lightweight crepe was bought from Fabric Mart last Christmas. I know because I actually documented this fabric's arrival. Also, as much as I love this dress, it is an example of how taking a simple dress and adding a couple of embellishments turns it into a project! Cause this was a project! The pink floral dress took a couple of hours to make. This one has a good eight hours of work in it.


Supplies ~
2.5 yards blue & white floral lightweight poly crepe from Fabric Mart
2 yards ivory rayon bemberg lining from the collection via lowprice fabric
5 yards blue/white striped polyester piping from Daytona Trimmings
5 yards jacquard binding from the collection

Construction Info. ~
There are more techniques in this dress because not only was the fabric lightweight but it was also semi-sheer so it needed a lining. I puzzled over how to make this work and finally decided to add a full lining to the dress. I cut the lining using the original dress pattern pieces making it shorter by a couple of inches yet including the low part of the hemline.

The order of construction was:
~Sew the dress together
~Add piping to the neckline and armholes
~Sew the lining together and hem
~Baste the lining to the dress at the neckline and armholes
~Add the piping to the dress' hem
~Sew bias binding to encase the piping in the hem, neckline and armholes
~Topstitch close to the binding to finish off the hem, neckline and armholes

These are not difficult steps...just time consuming...but I think all of that effort was worth it...

Pictures of the dress...


Worn with a short sleeve RTW sweater


Conclusion:
I'm thrilled with these two new versions and I'm putting this pattern away now. It's time to move onto something else. I'm happy that I have three of these in my summer wardrobe. Although after seeing Anne Whalley's on PR, I may pull it back out during the holidays and make a lacy version for Christmas parties.

...as always more later!


Sunday, July 10, 2016

Another Remake...

So last year I gave away 5 large construction garbage bags full of clothing. They were mostly filled with dresses and pants. I held onto most of my sweaters, tops and tanks. I thought they could always be taken in or refashioned.

Fast forward to this summer and my drawers are overstuffed and I'm a little annoyed so I've decided to remake some of the pieces or donate them. I'm going through a drawer at a time (cause that's all I can handle) putting some things in a donate pile, a piece or two in a refashion pile and refolding the rest and putting them back in the drawer.

I'm slowly but surely clearing things out...which brings us to this refashion.

I sort my drawers by color because if I'm looking for a white top/sweater, I don't want to sort through 8 drawers to find one. I started this adventure with the white drawer first because it was the top drawer in my bureau. I had two of these tanks. They were part of twinsets that I purchased from QVC about 7 or 8 years ago. Somewhere I lost one of the cardigans but still had both tank tops. Since I don't need both tank tops, I decided to remake one of the tanks into a maxi dress.

This is another one of my easy breezy maxidresses that is simple to make. This time I used a bright floral rayon that I bought from fabric.com in 2011/2012. They were a part of the Van Gogh series from the Free Spirit Collection. I fell in love with these rayon prints and bought two from fabric.com and three of them from Low Price Fabrics. You can read all about it here since I actually documented their arrival. Again more pieces of fabric that I bought because I loved them and not because they actually fit into my work wardrobe at the time.
  • To make this one, I cut two pieces of the fabric 45" long and serge finished both edges. 
  • Then I stitched 3/4" side seams making sure to include all of the selvage markings.
  • I added a line of gathering to the front and the back separately and then gathered each one about 1/2" from the side seam on either side.
  • Gathered the fabric to match the front and back pieces and sewed it together.
  • Pressed the seam up.
  • Stitched a 1" hem into the skirt.

Construction Pictures ~
The top before I cut it off
The top after I cut it off

The dress at this point had a nice look but it was kind of loose fitting and I was seeing a closer top with a wide skirt in my mind's eye. So I went looking for a green striped ribbon that I knew was in the notions collection.


I added it to the dress right beneath the empire seam line, stitching it to the side seams. It added some interest and it allowed me to tie the bodice closer. I was worried that the ribbon with the bow was too juvenile looking for me but I think it works.

A few pictures of the completed maxi dress ~


There is a lot of fabric in this skirt and the wind blew it out so beautifully.

With the matching cardigan ~


Sometimes I think I should apologize for going my own way and not always using a pattern because it makes it hard to duplicate an item. BUT I know that I have to sew for me and this fits my lifestyle now. It was so worth it refashioning a piece that would have otherwise been donated. 

Plus I LOVE all of the extra fabric in this maxi dress. The black crochet/striped maxi dress that I recently remade has a slimmer look so I have to take smaller steps in it. I wanted something that moved & flowed and this dress more than meets that requirement. This dress makes me happy. Seriously, it's just a fun dress!

I do have a lot more sewing from the 4th of July weekend and this pass weekend to share with you. Most of it is actually from a current pattern - hahahahaha! So more items up on the blog soon.

...as always more later!


Monday, July 04, 2016

It was a good sewing weekend!

This year I'm not taking a week off to sew since my firm has summer fridays. Our offices close at 1pm on Fridays so I decided to take 1/2 vacation days for July and work from home during August. That way I will have a summer of 3 day weekends - plenty of time to create and also have a few adventures with my daughter and the grandkids!

My first weekend was this four day weekend due to Independence Day falling on a Monday. After a quick trip to the grocery store Friday afternoon, I've pretty much been in the sewing cave the entire time. Now I know this is a big "outdoors" holiday but I honestly hate these days. There's always so much traffic, so many people and so much involved in getting to and from the beach, the fireworks, etc. that I no longer enjoy going.

However, I have had the most relaxing weekend in the sewing cave and quite a few new pieces to wear to work. 

So this is what I made this weekend ~

Three t-shirt dresses from McCalls 7348:

A maxidress refashioned from a tank top, a TNT dress from a great linen print and a tank top. 

Here's a pic of all seven pieces:

I have a back log of garments to be photographed and talked about here on the blog. Due to the holiday weekend, pics won't be taken until next Sunday so everything will show up on the blog after that.

I had a great weekend! It was relaxing, creatively fulfilling AND I added some much needed variety to my wardrobe. I have a lot of McCalls 6559 dresses from last summer but I'm already bored wearing them. It will be nice to wear some new pieces. Also my to-sew list has a few more "DONE's" on it which is always encouraging!!!

...as always more later!


LinkWithin

Related Posts with Thumbnails