Showing posts with label SW Mission Tank. Show all posts

Sunday, October 17, 2010

Flower Power Twinset

I love fabric that comes in and goes out just as quickly.  So here's a look at the Flower Power Twinset:


Fabric:
Rayon/lycra blend border print from Fabric Mart

Patterns:
Cardigan - Burda 8869 (OOP)
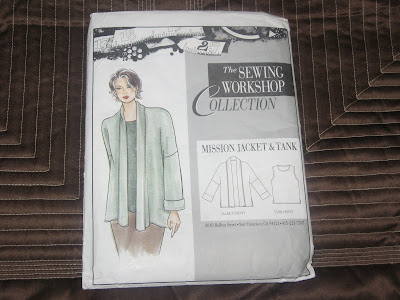
Tank - Sewing Workshop Mission Tank (OOP)

Notions:
5 - 20L 2-hole mother of pearl buttons
1/4 yard beige nylon tricot lining

Construction:
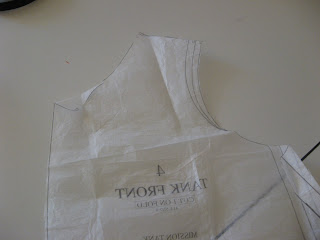
First the tank ~ this is a lightweight fabric.  Almost slinky like in fabrication so it needed special attention.  Because of that I wanted to make sure there wouldn't be any sheerness issues so I lined the front of the top with a tricot nylon lining fabric.


Otherwise the construction was very straightforward and basic.  Turned under the hems and stitched them down.  I used this top because it would best showcase the fabric.

The cardigan is autopilot sewing now since I've made it so many times and it is a standard in my wardrobe.  The main concern was making sure that I utilized the border print creatively and matching it up so that the pattern flowed from front to back in a pleasing fashion. (Gigi I thought about you as I was laying it out!)

The back did end up with a little more white space at the bottom than the fronts but hemming solved the problem so that the back and front melded well.  I really like the fact that more of the black flowers flow further up the back of the cardigan...


...versus the front where there are more white spaces at the shoulder line.  I think it just wears better especially with the coordinating tank under the cardigan.


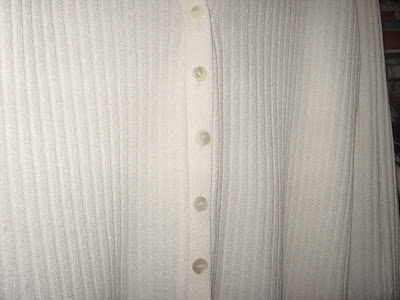
The final touch was to use a thinner white band on the front of the cardigan.  I've noticed that more RTW cardigans have a thinner band and smaller buttons than I've been using, so I've adapted my front band to reflect those changes.  I cut my white band from one of the sections that separated the border prints.  I liked the idea of not having to pick which section of the border print to use for the band and the white band does tie it all together.

I love the finished result.  My daughter thought it was a little loud!  So it will only be worn with black pieces and on days where there are no meetings in the office.  However, I did stop for a minute and consider making up a yellow pencil skirt from a wool crepe in the collection that coordinated with this fabric. *LOL*  But then decided that was just a little too colorful for my office!

Here is the SW Mission Tank under the black suit that I made using S3631 and my TNT 4-gore skirt.  Three years later and that suit is still a workhorse in my wardrobe.


I've started working on finishing up the Simplicity 2958 jacket.  It's been hanging waiting for me for too long!  Especially now that the weather is perfect jacket wearing weather, it needs to be completed so that it can have it's moment in the sun!

...as always, more later!

Wednesday, September 09, 2009

Another Black Suit

As much as I try not to wear black all the time, there are situations at work where a good black suit is necessary. Presently I have two black suits for fall/winter in my closet. This summer I realized that I need a spring/summer one and maybe a transitional one. Well I did purchase the fabric for the spring/summer one but just never got around to it...however, I can now take the transitional black suit off of my list.


The suit is comprised of the jacket from Simplicity 2570:


The top is the Sewing Workshop Mission Tank:


And the skirt is a version of my TNT skirt pattern.


Some stats:

Fabric:
black wool doubleknit from Metro Textiles
paisley eggplant silk from Marji - a piece from her clean-out

Notions:
8" black invisible zipper
12 - one inch silver buttons
5 - 1/2" silver buttons
a pair of 1/2 shoulder pads
4 yards of black satin bias binding
3 yards black rayon hem tape

Simplicity 2570 Jacket
I love yoke front jackets. That's one of the reasons why I chose this pattern. It also reminded me of my favorite black sweater which was worn with the black/white eyelet dress I just made. I thought that this jacket would be great with the dress as well as with a skirt. However, my jacket looks nothing like the jacket on the pattern envelope. And that's because when I went to add width to the jacket, I not only sliced and diced the pattern pieces but I added some to the front band. When I did a quick baste together of the jacket pieces for fit purposes, I liked how the larger front band looked and kept it...thus changing the overall look and feel of the jacket.

Also, I moved the pockets from the chest area (do I really need emphasis there?! *LOL*) to down by the hem. By encasing them in bias binding and adding a button to the top of the pocket, I gave them an emphasis that was lacking in the original version. My sleeves were also changed from a one piece sleeve, to a bracelet length sleeve with a center seam. I typically make this change on sleeves to make room for my bodacious biceps. The original jacket is unlined and remains so in my version. I did add some topstitching to unite the jacket and skirt.

Finally, this jacket took a full two days to sew! And for someone who was trying to make quick pieces this one was anything but quick! Then to add insult to injury not only did I have a lot of handsewing - yoke, hem and sleeve hems but there were 14 buttons to sew on which also is not part of the pattern - it recommends snaps! But all of the effort was worth it...here it is with the black/white eyelet dress:


Sewing Workshop Mission Tank
This is my go-to, TNT tank top. There is nothing different in this constuction process except that I didn't take the easy way out and turn and stitch the edges of the neckline and armholes. They are both self bound to give it a more finished look. This was not originally scheduled to be sewn but after using the fabric for the lining of the skirt, I could just "see" the tank. I'm glad that I took the time to make it because it completes the outfit!

TNT skirt
I haven't used this version of the skirt in years. But after making it this time, I will definitely sew it again this fall/winter season. I chose it because I already have a straight black skirt and a 4 gore version for fall. I didn't really want another one of the these versions and the choice was between this one and the one Gaylen has called "The Carolyn Skirt". (Simplicity 5914) Besides the three panel front and a thinner waistband, there is no other difference between it and my straight skirt. The pattern pieces are actually taken from my straight skirt, just sliced at the darts and 5/8" seam allowances added to come up with two separate front pieces. However, I did tape the waistband with twill tape to insure that it didn't grow on me during the day...especially since it is made from a double knit fabric. The finished skirt sports an invisible zipper, 2 silver buttons on the waistband as closures, as well as topstitching on the front seams. It is the perfect skirt for the jacket.

One more pic of me in the outfit...


...my next garments are made from a cotton/linen twill out of a soft sagey green. I'm tired of black...the black fuzz is everywhere...and I need a little color in my life now! *LOL*

...as always, more later!

Thursday, September 11, 2008

Fabric Scraps

Have you ever worked with a piece of fabric that you just loved? I mean a piece of fabric that has such a wonderful hand that your scissors sliced through with ease? A piece that just felt so luscious in your hands? And it sewed like a dream?

Well I cut a piece like that this past weekend. It was so very soft and so very luscious that I had a hard time parting with the scraps.

And there were only scraps left after cutting out the garment...no real usable pieces that I could hold onto and dream about...so I let them sit on the cutting table in a pile until I finished making the garment. 'Cause the fabric was so special that I just didn't want to let it go...regretfully, I finally did put those precious scraps in the trash.

So has this ever happened to you? Have you ever been tempted to hold onto some precious scraps because the fabric was so dear?

Today's Parting Shot:
Since it feels like early fall here in the NY/NJ area, I wore the argyle vest today...however, I definitely hemmed this to wear with pants and may have to revisit the vest's hem to make it more versatile...


Tuesday, June 10, 2008

Coat Sew Along and other things...

Not only have I committed to sewing four pieces or a mini-wardrobe for the June Capsule Contest but I'm also participating in the Great Coat Sew Along...

Now you wouldn't know that I was participating if you are reading the blog, 'cause I've barely posted there...but I do have plans to follow along and make a coat.


I ordered a chocolate wool flannel from Gorgeous Things...it seems like quite a few of us have gotten our coat fabric from there and I'm using Vogue 7978 as my coat.


However, I don't have a lining fabric or the innerworkings yet...and somewhere I am going to have to scrounge up some heavier weight muslin to make a coat muslin...

I also promised you a picture of the Sewing Workshop Mission Tank that I made this weekend to wear with an existing skirt - so here is the outfit I wore to work today.


It was so hot and humid outside today, that it was hard to breathe and this was the perfect outfit for the awful weather...of course I stood out in the sea of blackness that is my office...but it was just too danged hot to care!

I have now used up the last piece of that fabric and will be moving on to the 2nd and 3rd pieces of my JCC...and btw, I just found out that there is a prize for the first 30 finishers...ummmm, why was I spreading my sewing out over 4 weekends?!! *LOL*

Thank you everyone who commented on my optical illusion dress. I know its a little different especially for a "big girl" like me...but it was a perfect dress for work in the heatwave we're having....

More later...


Sunday, May 04, 2008

Tie One On

I am really having a love affair with bow ties and bow tie blouses...

This fabric was on Emmaonesock's site last week for about a minute...literally...it was there the day I bought some and gone the next...you can't snooze on that site, 'cause if you do, you lose!!!


I purchased the rayon deconstructed fabric to make another SW Mission Tank with a tie:


The only difference in construction of this tank was that I left the armhole edges, the hem and the tie edges serge finished. It just works with the deconstructed fabric so I let it be.

Originally I saw the tank in this outfit:


Black cardigan made from OOP Burda 8869,
TNT pants from a vanilla microfiber (all made several years ago)
and the new tank

But then I tried this RTW sweater on with it and love this version too:


Finally, I realized that I haven't shown one picture of me in the tank with a bottom by itself, so here I am, bodacious armflaps and all!


And to further the cause of the bow tie look, I purchased two new patterns from Lanetz Living with the bow tie look. One is for inspiration. I love how much information is contained in the instruction sheets. And one is to make "as is" and add to my work wardrobe.


So I'm "Tie-ing One On" for my first May project!

Thursday, May 01, 2008

A Brief Bit...

For someone who thinks about sewing all the time, I really have nothing to say today. However, I stumbled across this picture in the June issue of Lucky magazine...


and thought of this...


Guess I'm right on top of this trend...

And that was your brief bit for today...

More this weekend...

Sunday, April 20, 2008

Sewing Workshop Mission Tank

I have written entries about other TNT patterns that I've worked with time and time again. After a few questions posed about the Sewing Workshop Mission Tank, I decided to share how this one came to be a TNT for me.

This is the pattern:


I found the pattern when I went to a sewing expo in Worcester, MA at the Vogue Fabrics booth. I had just come from a class with Fred Bloebaum and she was selling her patterns at the booth. In my mind, I was going to purchase two of her patterns, and I did (which btw I still haven't sewn!) when I saw this pattern. At the time I was still on the search for the "Great Tank Pattern".

After three children, I didn't necessarily have a lithe, young body anymore and was starting to dress to cover some areas of my body rather than expose them. I had stopped tucking in tops and needed one that would give me style but flatter my larger than I liked abdomen. Thus began the search for the great tank pattern...the one that would fit, flatter and work easily into my work wardrobe.

Since I am not a huge fan of indy patterns, I kinda stumbled onto this one. I saw several made up in the booth at the expo and thought, "Why not?" Famous last words...since this is one of my all time favorite TNT patterns. I will admit that the first few attempts at making this pattern were barely wearable. I made wrong fabric choices. The fit wasn't great. I didn't really have a vision yet...but I preserved and continued to work with it.

First, the pattern contains 4 pieces ~ a front piece, a back piece which are both cut on the fold and two binding strips...one for the neckline and one for the armholes. A very simple piece...however, it contains no darts...so on a plus size woman that's like wearing two big ole pieces of fabric...making you look like you are wearing either a tent or a very short muu-muu. I ain't no muu-muu girl.

When I began working with this pattern I should have been discouraged because the first few pieces weren't that great, but for some reason I was intrigued...and then I decided to make changes to the pattern. The first change I made to the pattern was to remove the excess fabric around the dart area...no I did not do a FBA (full bust adjustment) wasn't on my radar yet...I just sliced the pattern at the armhole and overlapped the pieces to form a dart. Now I don't know if this is "good" patternmaking or not but it took care of that excess fabric hanging out in the armhole area and gave me a better defined bustline.

This was the last version of the tank that I made with the binding at the neckline and sleeves...it was a part of a collection called "The Burda Six"


After that I got really bold with the pattern...I added a center back seam. I stopped using the binding pieces. I omitted the vents and added some more width to the bottom of the tank. I changed the neckline - giving it a lower more u-shaped neck. Then I started experimenting with knits because this tank pattern was designed for wovens.

My first experiment with knits was a single cotton knit purchased from Fabric Mart that I used as part of another collection and also as part of a twinset...I think this was its first incarnation as a 2 piecer...


A simple basic top with the neckline and armholes turned down and stitched, the neckline altered to have more of a v-neck, that center back seam and it cut just a little closer to the body to allow for the fabrication of the knit.

I have now made this top about 15 times. It has appeared in every SWAP collection I have sewn, most prominently featured in my last entry in the 2007 Timmel SWAP contest, the "Corporate Chic" collection.


This pattern is so versatile that I have made it in everything from all kinds of knits (single cotton knit, rayon knit & the beautiful St. John knit), to a cashmere/wool blend, silks (sueded, twill, woven), linens and embroidered cottons.

Now we come to this pattern's present evolution ~ the bow-tied tank. About 18 months ago, I switched jobs from a busy casual environment to a more corporate atmosphere. My clothing requirements changed drastically and I have spent the last 18 months sewing at a break neck pace to have enough garments to wear for all office occasions. I am finally at the place where I can stop and breathe and part of the reason is this tank top.

Somewhere and I don't know where I saw one similar to this latest incarnation. It could have been in a magazine or catalog...on a website or even on the street...but somehow the look stuck in my mind. I thought I could make one more morph or adjustment to the SW Mission Tank to accomplish this look...and it worked! Boy did it work! Here's a picture of my three latest versions of the SW Mission Tank with a bow tie:


This was a simple alteration...the neckline had already been changed from the straight u-neck to more of a v-neck.

• I added ties by cutting long rectanges 3" wide by 30" long.

• The tie was then sewn to the neckline leaving a 2" opening at the u-neck.

• At the ends of the seams, a piece of rayon seam tape is sewn to the pieces to provide some support.

• Then the seam is pressed up.

• The other end of the tie is sewn down from the right side of the fabric by stitching in the ditch.

• The 2" front piece is clipped at either ends and sewn down.

• The tie is either folded onto each other and stitched down or sewn right sides together and then pulled through using some hand stitching to finish off the edges.

That was it! A new version of the SW Mission Tank was born...and I must admit my favorite version of it so far.

A final picture of a dozen or so of the working pieces in my closet...


I know its redundant, probably a little excessive but it works so well in my wardrobe that I will continue to make more of these tanks. Hopefully, you will find a pattern that you love, that works well in your wardrobe ~ whatever your lifestyle, and will bring you as much sewing joy as this one has brought me!

Sunday, April 13, 2008

A Couple of Tops

Saturday morning dawned bright and early and I woke up ready to sew. And I knew just what I wanted to make...

See two weeks ago I had a horrible, horrible week - from Monday through Friday there wasn't one day that something in my personal life didn't go wrong...don't ask, I ain't gonna tell you! *smile* However, I did share with a good friend what was going on and a few days later this arrived in the mail!


It was the perfect gift to lift my spirits! And I had to wait until this weekend to use it! There was just enough fabric for it to become this twinset (worn with the skirt from the Easter Suit).


The pattern is my TNT Burda Cardigan along with the Sewing Workshop Mission Tank. The cardigan is made from the ribbed knit and the tank from a smoother knit. The smoother knit was also used for the sleeve bands and the neck/front bands for the cardigan.

Some 2-hole mother of pearl buttons from the collection were added to the front to finish it off. The buttonholes were a little difficult to make on this fabric. My sewing machine just wanted to eat the knit, but I pinned a little lightweight pattern paper to the back of the band. No more problems, the buttonholes sewed up great. I also made thread shanks for the buttons since they were flat 2-hole buttons. I know that this is a very simple technique but this time it worked wonderfully for each button that I sewed on.


I have fallen in love with the bowtied version of the Sewing Workshop Top. It works perfectly in my corporate work environment and it makes up quickly. So quickly that I also made another one this evening.

I used this rayon knit from Fabric.com:


It was the deal of the day last weekend so I picked up a couple of yards because I thought it would make an interesting twinset. I do have the coordinating cardigan cut out (with a few differences from the white one) and will finish that up next weekend. However the top works well as a single piece in my wardrobe right now.

So that's what I did this weekend what did you do?

And congratulations to all of you who have finished your SWAP garments! I can't wait to see the unveiling and what has been created!!!!


Monday, February 18, 2008

Oooops I Did It Again!

Used a TNT pattern that is...

The Pattern:

Fabric:
Purchased from Emmaonesock - here is the description ~ From Jones NY, this is a lovely knit, very drapey and silky with 2-way stretch, and the print is beautiful medallion design with a double border (each border is about 4" wide). The colors are paprika (18-1447), a super-dark espresso-black, with ivory highlights. Lighter weight, opaque, great stretch recovery, nylon/lycra blend, 57" wide.


Changes to Pattern:
I added a bowtie to the neckline of the tank top. I also used a knit fabric for this pattern which was originally drafted for a woven fabric.

Backstory:
This is my FAVORITE tank top pattern that I have made a gazillion times in all types of fabrications. I have made it from a wool/cashmere/lycra blend, a silk duppioni, linen, and several smooth silk fabrics in solids and prints. This pattern is such a hardworking piece in my wardrobe because it goes so well with my suited looks as well as my business casual ones.

I know that blouses are back and are all the rave right now but I need a top that doesn't tuck in yet still gives me a professional appearance. This tank top pattern and subsequent renditions fit my wardrobing needs perfectly.

For this tank, the Fall 2007 Sew Stylish Magazine that featured Simplicity 3631 on its cover, influenced the tie decision. The instructions in the magazine on how to add a tie to a top made from the dress pattern, is the inspiration for this garment. This inspiration has shown up in my sewing before, when I made this dress using the instructions in the Sew Stylish issue.

Construction Details:
First to construct the tie, I did not use the measurements provided in the article. I knew that I wanted the tie to be comprised of just the border tile print so I carefully cut it out. However, since I was squeezing two garments out of three yards of fabric and the pieces were cut on the crosswise grain to take advantage of the border print, I had to piece together leftover sections to get enough length for the tie. Thank goodness it is a busy print so that you can't see where the piecing is.

The other important construction tidbit is that when the tie is first sewn to the neckline of the tank, I added a flexible twill tape that Nancy's Notions sells to the seamline. This was done for two reasons - to provide stability to the neckline and to stop it from stretching during wearing. I have to admit that I was a little concerned after I applied it because I wanted to make sure that the top still went over my head easily and it did!

There is one other construction detail to note in this top. The original SW Mission Tank has a rounded neckline. As instructed in the Sew Stylish Magazine an alteration needs to be made to the neckline to lengthen it before adding the tie. I did this by folding down 1" at the center front and gradually folding less until it got to the front curve. Since a picture is worth a 1000 words, I will include one...


Otherwise the tie was applied using the Sew Stylish directions. Finally, I know most sewists apply Steam A Seam 2 to the hems of their knit garments but my preference is stitch witchery. Maybe its because I buy a lighter version of it from Steinlauf & Stoller (on a 50 yard roll) that doesn't give that heavy, hard appearance to the hem that the packaged version of stitch witchery does. Or maybe I've just gotten use to it...but that is what I use to seal the hems closed before I topstitch them.


I love the fit on this top and I especially love the funky print. It is not really a "corporate" type print but it will work well on Casual Fridays or down time work days. However, it is me and I'm thrilled to have finally been able to make a "truly me" piece for my work wardrobe.

LinkWithin

Related Posts with Thumbnails