Showing posts with label unselfish sewing. Show all posts

Saturday, June 09, 2018

Little Girl Dresses from Hobby Lobby Fabric

Even though Hobby Lobby is about 20 mins from me, I rarely go to the store. Working in the middle of the Garment District in NYC and online pattern sales allow me to purchase what I need without going to the brick 'n mortar stores.   

Last weekend I was out with my Mom, Daughter and the grandbabies for some birthday/late Mother's Day shopping and we found ourselves on that side of town. So we made a trip to the store. Of course I made a beeline to the fabric section, while everyone else checked out the other merchandise. And of course I found fabric to buy...


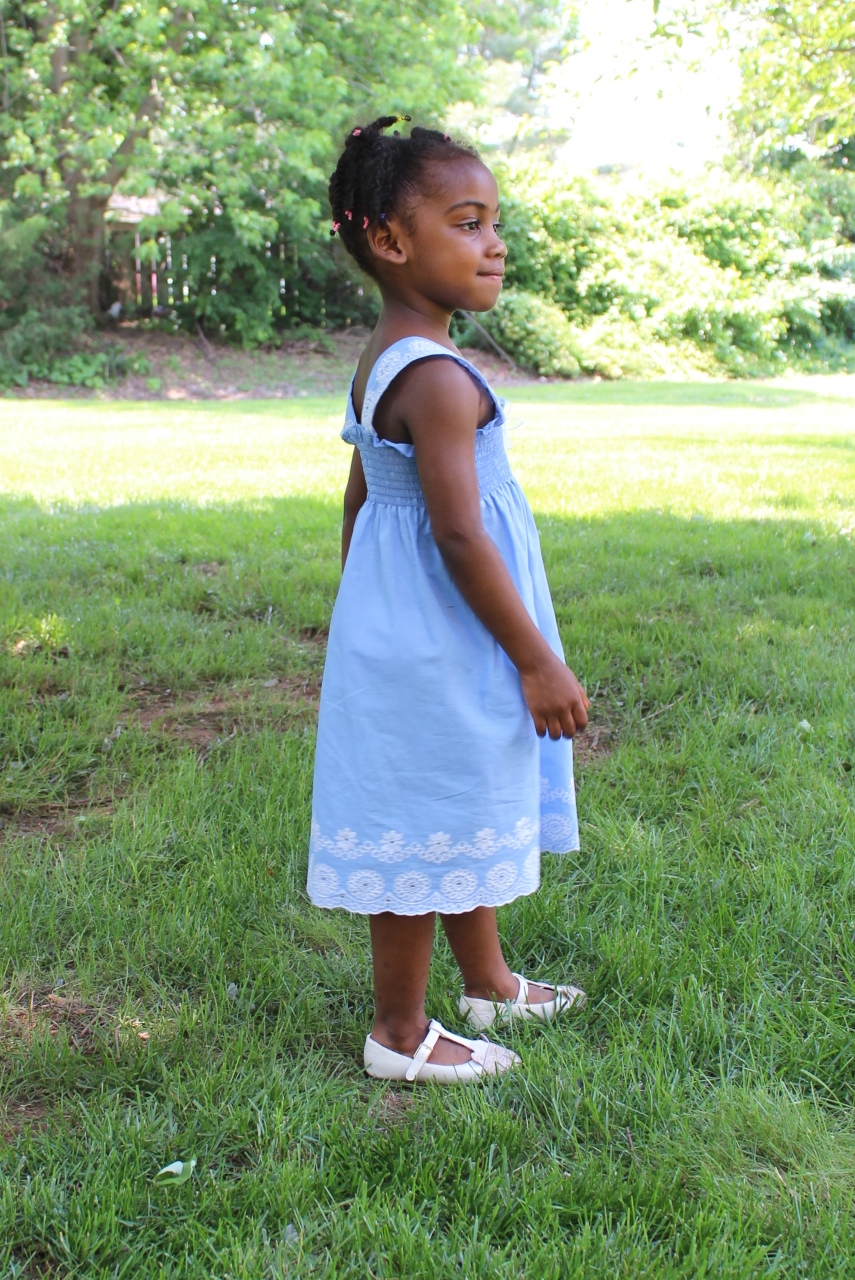
I also found elasticized yardage that I thought would make excellent dresses for the girls in pink and blue cotton with embroidered edges. 


Because Saturday was "Picture Day" for all of my Sewcation makes, I sewed the dresses up so the girls could have their pictures taken too.

The Supply List ~
1. One yard of the elasticized cotton embroidered lawn
2. Floral Organza Trim appliques purchased from the notions stash by way of Pacific Trimmings
3. 1 - 1" gold snap from M&J Trims

Construction ~
A simple seam up the back finished the body of the dress. I pinned the fabric onto the girls with the wrong side out. Then stitched it closed. I had to go in again and take deeper seams on both girls to make sure it was tight in the bodice.

With the leftover fabric, I cut straps for both girls.  I had enough to make Samantha single straps that met near the center back. For her straps, I folded the edges over and stitched down, then stitched them to the dress front and back.


For Aleena I had to make a halter strap with a snap closure because the remaining fabric wasn't long enough to make straps for her.


To finish the strap on Aleena's dress, I didn't want to fold over the edges and lose length, so I stitched a piece of white organza ribbon onto the edge to finish and strengthen the fabric for the snap. The snap was then stitched onto the straps. The weight of the snap actually worked as a stabilizer and helped hold the dress onto Aleena better.

The organza floral ribbon applique was stitched to the center of each dress to give them a little something extra and each dress was done since I didn't need to hem them.

Pictures of the girls in the dresses ~


Aleena's Pink Dress ~


Samantha's Dress ~


...and the thrill was gone...


Conclusion ~
I bought 10 yards of fabric (5 pieces) from Hobby Lobby because most of the things I liked were 50% off. At least these 2 pieces are no longer on my cutting table but headed home with the girls. 

Hopefully you can see from the pics that they really liked their dresses! Since it will be hot this week (temps in the 80s), these dresses will get worn to school. They were happy. My daughter was happy and so was I!

p.s. ~ 
Both girls and their little brother were here, so of course he had to get in on the picture taking!


...as always more later!


Wednesday, December 20, 2017

McCalls 6886 - Fitting the Pattern Again

I've used this pattern several times to make my daughter a couple of dresses. Once I made a series of dresses for her to wear while working in a salon underneath her smock. This is my favorite version of the dress for her - made in a stretch woven - and made to match the grandbabies:

From the Fashion Show two years ago...

My daughter sews and sewed a lot when she was younger.  However, with a full time job, four kiddies, a partner and a household to maintain, my daughter has stopped sewing.  Her sewing machine is still set up but she uses it to fix a hem or take up a seam for the kids.  She's worn all of the dresses I previously made into the ground.  She's also lost ALL of the baby weight and then some, so she's been belting them and wearing them with a cardigan.

I agreed to sew a couple of new dresses from ponte & ITY knit from the collection...gotta love that fabric collection!  She picked ten different pieces of fabric. We had to adjust the pattern slightly because she is smaller in the top but wider in the hips (babies) and barely has time to eat. 

This is part one of the possibly two or three posts about her new dresses, because I don't think I can get all of the dresses, fitting and construction information into one post.

Fitting Changes ~
I had to make some alterations to the original pattern pieces for her post babies body:

Side view - that back fold lies flat when she puts her arms down

Back adding space for her hips

Front pinned at the sides

Close up of the front neckline

Here is the pile of fabric I will be using to make new dresses for her...


There are a number of fabrications here and we will be changing up the length, necklines and sleeve lengths. Also, there are two wovens in the pile that I will add a little ease to the pattern, use a zipper and add a lining. The good thing is that she's not expecting these all at once. So I'm sewing a couple at a time. This is what I was referring to in my last blog post.

I didn't sew for the grandbabies this year because they grow to fast! However, I am sewing for their mother and her sister in 2018. So look for finished versions of the dresses on the blog sooner rather than later!  

...as always more later!

Saturday, December 17, 2016

It's Christmas in the Sewing Cave

So until the day after Christmas, I'm primarily sewing Christmas gifts and buying fabric. Because even though I say I'm not buying another piece until 2017, somehow I manage to find one more piece I just need to have!  But that is not the topic of this post...

This post is just to let you know what's happening in The Sewing Cave. First up my daughter and I spent last Saturday working on pjs for the grand babies.
  

We have three pairs completed and nine more pairs cut out. More sewing will happen this week to get these finished up in time for Christmas. I'm so grateful that Christmas is on Sunday this year because it gives me another Saturday to sew.

I'm sewing velvet lined infinity scarves for friends this weekend. The first of them are pictured below. I have a few more to make...

Fabric is from Fabric Mart and Smugglers Daughter

So that's whats going on in the Sewing Cave! Next week I will share my Top 5 Sewing Hits and Top 5 Sewing Misses for 2016. I haven't decided if I'm going to write a goals post yet or not since I regularly review what and why I'm sewing what I'm sewing here.

I'm off the week between Christmas and New Years' so there will be some sewing going on. However, I do have plans to visit friends for a few days that week so I won't be sewing the entire vacation.

Before I started sewing for Christmas, I did cut out a few cardigans from Simplicity 8059, so those will be first up when I go back to sewing for me. 


...as always more later!

Sunday, October 09, 2016

A Girls Cardigan from FreeFleece.com

I found this free little girls cardigan somewhere on my internet travels and I decided I'd give it a try. I'm building a wardrobe for the granddaughters and wanted to add several different types of garments to it. Believe it or not, it's hard to find a basic cardigan in the Big 4 pattern catalogs...probably why I went looking for one.


This one works well for late summer/early fall but will need some updating to go into winter because I believe in long sleeves for winter. Also, I chose to make this version from ponte fabric. I wanted something to go over t-shirts and long sleeve t-shirt tops but will be current and a little funky!

One of the goals of sewing for my granddaughters is to give them not only a new wardrobe but to make it a little fashion forward. So I'm making fabric choices for them like I'd make for myself. That's why this cardigan was made with a solid navy ponte and a coordinating navy/white print. It's a little funky and fun and will work with most of the leggings and jeans that I made.

This pattern was easy to use and even though it's a pdf pattern, taping it together was quick. Little people mean little pieces meaning a small amount of paper needed to tape it together. I traced the pattern pieces off in a size 3 for Miss Lena, however, after trying it on her, I'm going up 2 sizes. This one will go to Sammy.


Originally I was going to only use this pattern for Lena because I thought it was a little too much for a 2.5 year old who is still rolling around the floor in temper tantrums. But Sammy tried it on during the fashion shoot and loved it. So this one and the other version I've cut out in chocolate ponte but haven't sewn yet will become Sammy's. I've also figured out how to lengthen the sleeves on the pattern so Lena's ponte versions will have long sleeves.  Now while Sammy loved it, I only photographed it on Lena.

Here are the pics ~


Lena is wearing the cardi with a white t-shirt and blue jeans   
made from a Kwik Sew pattern that's up next on the blog.


If you have a little girl that you sew for, I would recommend downloading the pattern and giving it a try. I really like this pattern and it's versatility!

...as always more later!


Friday, October 07, 2016

Boden Kids Inspired Top

The top was totally inspired by this dress from Boden Kids ~


I'd already made a pair of black 'n white checked leggings. So I pulled some black ponte knit scraps and Vogue 8086 which I've used for Miss Sammy before, to make a top to go with the black 'n white gingham Burda leggings. 

After gathering all of my supplies, I kinda went my own way.  There is stitching down the front because I had to make a front seam due to my use of scraps. The topstitching appeared to highlight the seam. Then I added it to the center back seam to tie it all together. The pockets are the only thing that are similar and there are no sleeves. I went back and forth over adding sleeves and then decided not to. Sammy is wearing a top from Old Navy under the top.

Here are a few pictures of Miss Sammy wearing her top and leggings ~


This ended up being Samantha's favorite outfit.  She even jumped up on the piano bench and asked me to take her picture there. Sammy was the one I worried about the most when taking pictures and you will see that she was the easiest one to shoot. Way easier than her sister!

There are a few more back to school sewing posts. I've condensed them and highlighted the pieces that I'm going to do specific pattern reviews for. So, one more time if kids clothing isn't for you...check back in about two weeks. I will have some pics of me wearing me-made garments then.

Also isn't my Sammy the cutest!

...as always more later!


Wednesday, October 05, 2016

BurdaStyle Little Girl Leggings

I was intrigued by the kids clothing in the August 2016 Burda Style magazine. I really wanted to make those jean leggings (Burda 8/16 #138) for my granddaughters. Seriously, I really had to want to make them because I put up with trying to find those very small pattern pieces on that pattern sheet! Truly I have gained a new respect for those of you who sew from those Burda pattern sheets. It's a jigsaw puzzle to find the pattern pieces you need and I HATE jigsaw puzzles!

photo credit: doctortdesigns


After rising above that hurdle, next came the scanty instructions. Now I know this has been discussed time and again but I'm grateful I have a little sewing knowledge. Since I NEVAH found instructions on how to make the waistband. I read those instructions a couple of times and nuthin! Seriously, nuthin! So I added 2" to the top of the front and back pattern pieces for a foldover waistline casing.
The girls wearing the trial/first pairs of the leggings

Pattern Alterations ~
Next I didn't add seam allowances. I couldn't decide if I needed them or not. After an initial fitting on Miss Lena and Miss Sammy, I learned several things:

1. This pattern is great as is for leggings but NOT jeans for Miss Lena.
2. However, it works as both for Miss Sammy who is a couple inches shorter than Lena.
3. I needed to make a bunch of adjustments for Lena once the elastic was added.
4. The pattern was lengthened another 2" at the top because the leggings hit under her belly button and she asked for them to be raised to cover it.


The length was an easy adjustment. Although I will need to add a little width for jeans - even if they are skinny jeans. Lena wouldn't be able to get them on without a little more width. So I added a 1/2" on the outer seam, making new patterns for the leggings. 

Construction Tidbits ~
To add the elastic to the leggings, I used the technique where I stitch the elastic to the waistband - stretching it to fit.  Then I folded it over and stitched it flat on top of the original stitching line. My first efforts were a little sloppy but make 10 pairs of leggings (5 for each girl) and you start to get very efficient with this technique.

For my first pair I constructed them totally on the serger but these are small pieces, especially for Sammy's, and I found I had more control if I stitched them first on the sewing machine. I used a 3/8" seam to stitch them. Then I serged the seam over the stitching line. Again repetition makes you more accurate and faster. Construction ended up being only an hour for the majority of the leggings after I figured out a construction order, and pre-cut the leggings and elastic.

Fabric Choices ~
I chose fabrics from the collection for the leggings - pontes (both solid and printed), a cotton knit and a ITY lycra. Since they are more legs than body, both pairs of leggings were able to be cut from 1 yard of fabric.

Here are a few pics of the girls wearing some of the leggings ~

These were made from a ponte fabric from Fabric Mart
The top is from Old Navy


Lena's black leggings are ponte from Metro Textiles
I made the tops both girls are wearing and they will be in upcoming posts.

The denim like ponte for both pairs of leggings is from Metro Textiles
Both Sammy and Lena are wearing Old Navy tops in these pics.


As I stated above I ended up making 5 pairs of leggings for each girl. Part of it was that once I started pulling fabrics, I couldn't believe how much of the collection would work for them. So I went for it because a lot of the clothing you see for little kids in RTW, doesn't necessarily use little kid's fabric anymore.

Speaking of that, I spent quality time on the following RTW sites to determine the types of outfits I wanted to make for the girls: Old Navy, Gap and Boden Kids. I was even inspired by some of the styles there and incorporated those looks into what I made for the girls. Of course there are quite a few patterns for leggings in the Big 4 children's pattern catalog so if you don't have access to Burda magazines, you can make your own from them. 

This is the first of the Back-to-School posts, there are a few more to come. I'm doing them as pattern reviews since I used several patterns to achieve the girl's wardrobe. However, if little kids clothing is not your thing, come back in a week or two when I will be showcasing my own me-made garments!

...as always more later!


Wednesday, March 23, 2016

LGDresses - Butterick 6314

I made two of the dresses that I like the most from this pattern.


I will admit that the pattern cover influenced my version for Miss Lena but I went with a solid color for the top of the dress. I also made my first version a little big - starting with a size 4. Of course we noticed it after I'd sewn the floral embellishments to the front and hand stitched everything down.


So some info on this one ~
Fabric:
Black and white cotton pique polka dot fabric
White cotton pique fabric

Notions:
9" black invisible zipper
floral embellishment
white cotton broadcloth

Construction Info ~
Since I'd never made this dress before, I had to follow the instruction sheet. This is difficult for me because I can always think of a way that the dress should be constructed better - well at least to me! hahahahaha! The dress was originally supposed to have sleeves but I ended up turning the lining to quickly and after finishing it, just didn't want to remove the stitching. Those little girl armholes are S-M-A-L-L!

Otherwise it was an easy sew and I love how the pleats were done in the skirt. I was going to remake the dress but my daughter said to let it be. It will give Sammy room to grow into! Miss Lena will wear it with a white sweater so that solves that!

This means that Lena and Sammy now have coordinating black polka dot dresses...

The second version of this dress was made from a silk remnant pulled from the fabric collection. I used a size 2 bodice for this one and achieved a better fit. It was influenced by this dress I pinned from Pinterest.


Fabric:
Silk twill from the collection

Notions:
Pink Rayon bemberg to line the bodice
9" pink invisible zipper
Blush striped ribbon
Floral Embellishment
Pink rayon seam binding

Construction Info ~
I used the bodice from the pattern and then 45" of fabric cut to the dimensions of the skirt pattern piece. The pleats were added about every 5" to mimic the pleats in the inspiration dress.

The finished dress does have the sleeves added. The dress is hemmed at the same length as the black and white one. It is hand hemmed with pink rayon seam binding added to the hem. A blush pink striped ribbon and a mauve colored flower was added to the dress as an embellishment.

Since Miss Lena didn't wear this one in the fashion show I only have fitting pictures of the dress on her.


...and a group shot of the finished dress...


Conclusion ~
However, to me these were the prettiest dresses I made and I'm holding onto the pattern. It will be good to use in the years going forward since the girls are only 2 and 5. I'm sure there will be plenty more dresses being made for them in the years ahead.

I really enjoyed making all of these dresses and love that all of the materials were in the Sewing Cave. This reinforced to me why I collect things as I happen upon them because you just never know when you're going to make magic with a stored piece!

The other night I wrote a spring sewing list. I have a plan and the materials on hand so now all I have to do is sew!

...as always more later!


LinkWithin

Related Posts with Thumbnails