Wednesday, July 27, 2022

A Simple Summer Maxi Skirt

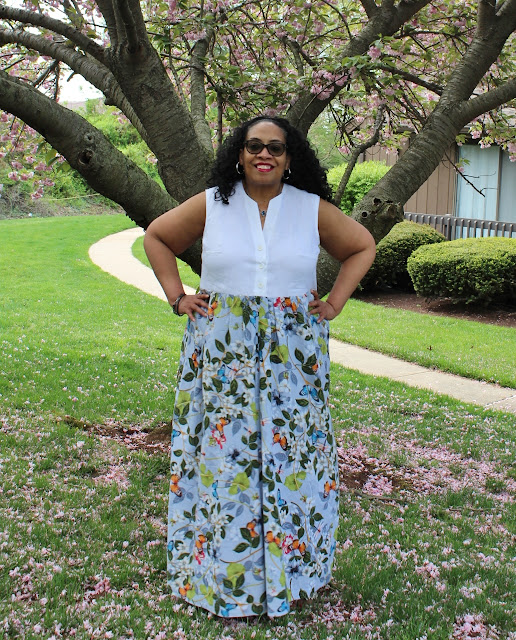
Are you looking for that simple to sew garment with a lot of style?  One that's easy to make at the last minute for a holiday?  Or one that dresses up and down for any occasion?  Well, I've been making a version of this simple to sew summer maxi skirt for years. 

Skill Level:  A beginner to advanced sewist

Machine used for this project:  Janome 9450QCP   

Materials ~

  • 1 to 2 yards of fabric of 45" wide or 60" wide fabric based upon your measurements.
  • A tape measure, tracing paper, pencil
  • A yard or two of 1" wide elastic based upon your waist measurement


Prep ~

Fabric:

Please wash and dry your fabric before starting this project. This skirt is perfect for any fabric type you want or have on hand. A knit, a stable ponte, a woven, silk or cotton. Whatever you want to use is fine. 

Measurements:

1. Take your waist and hip measurements and record them. 

I'm going to emphasize making this for a plus size sewist. When taking your measurements, take them sitting down. You will notice a difference of 1" to 5" because the larger we are the more we spread. I'm strongly suggesting that you use the sitting measurements to make the skirt.

2. The next measurement you should take is a waist to floor measurement or waist to ankle measurement if you want an ankle length skirt.

Again, this skirt can be any length you want. Mini, knee-length, calf-length, tea length or maxi. I've made a maxi skirt because that's my jam now.

3. Make a pattern using your measurements or trace them right onto the fabric.  

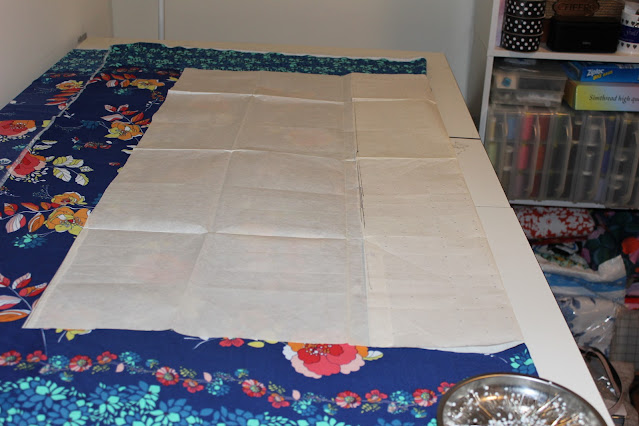
I usually make a large square (pictured above) using my hip measurement and the length I want for the pattern.

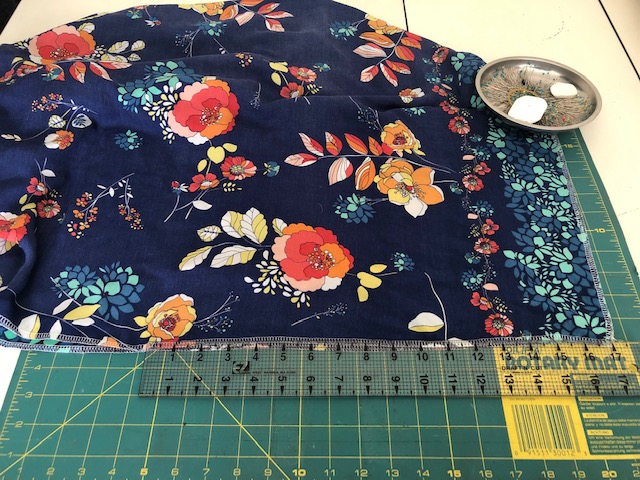
- I add 5" of ease and 2.5" for seam allowances for 5/8" wide seams.

- To finish the square I add the length measurement plus 2.5 inches for the elastic casing at the waist. 

- You can change the amount of ease you want on the sides if you want it a tighter fit by adding less ease. You can also do this after you've cut the skirt out and tried it on.  Make larger seams if you want a tighter fight or smaller seams if you want your skirt a little looser.

- If you're in a hurry and need this quickly by all means trace your measurements onto the fabric and then cut. However, I suggest making a pattern because once you see how easy this to make you will want to make more.

Construction ~

o  After the fabric squares are cut out mark the front/back and top/bottom of the squares.

o  I like to finish all of the seams using my serger prior to constructing the skirt. 

o  Pin the side seams together.

o  Hold up the skirt to you to determine where you want the side seam slits to begin.  Mark and pin that.


o  I use a pin with a different colored head, so I know to stop stitching right there when sewing the seam.


o
  Sew the skirt using a 2.8 straight stitch on your sewing machine and an 80 universal needle.

o  When you sew the side seams, stitch in a piece of stabilizer. It can be seam tape, twill tape, or selvage edge piece to prevent the seam from tearing when you walk.

o  Press seams open making sure to press the side seams flat below the slits too.

o  Turn down 1.5" for waistline casing.  Press.  A tip, stitch the side seams flat prior to stitching the waistline casing. The thread will melt into the casing and it will make it easier to pull the elastic through the casing.


o  Stitch waistline casing flat leaving a 2" opening in the side seam.

o  Measure the elastic to fit your waist.  Subtract 2-3" depending on how tight you want the elastic to be then cut it.

o  When inserting the elastic into the casing, I use an extra large safety pin at the end of the elastic.  However, you can also use a bodkin to do this. 

o  I also pin the end of elastic to the casing so I don't accidentally pull it into the skirt.

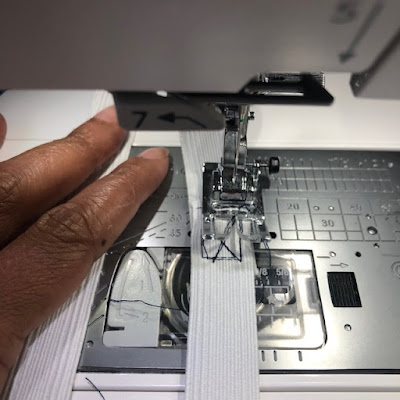
o  Once the elastic is inserted, layer the elastic 1" over each other and stitch down. I use a lot of stitching on this piece because I don't want it separating during wearing.

o  After you've stitched the elastic together, distribute the gathers around the skirt. Another tip, if you're plus size and carry your weight in the front like I do, put less gathers there.

o  Next stitch the elastic down in the ditch of the side seams. This will prevent the elastic from moving around in the waistline casing.

o  Add a piece of ribbon or a tag to the back of the skirt so you know the front from the back.


Finally press up a 1" hem and machine stitch the hem and side slits flat...and you're DONE!

In 2-3 hours, depending on how quickly you sew, you will have a fun and flirty skirt.

Wanna see my version ~


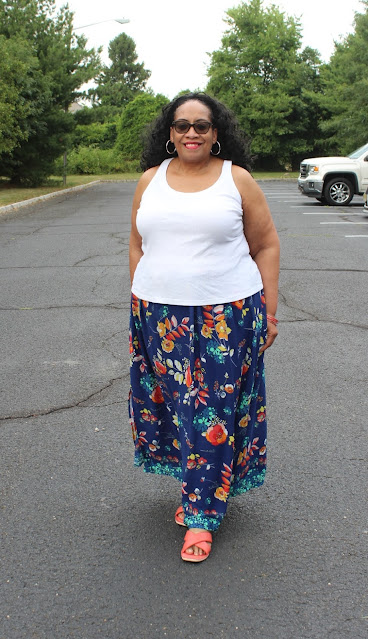
I used a crepey rayon border print to give the skirt so oomph and paired it with a tank top and cardigan. Perfect for work, dinner with friends or a casual date. I hope you will give this a try because it's a lot of bang for the buck and a quick and easy sew!

This was my July Janome project which you can see here.  Sharing it here to the blog too.  I've started a new cut pile so will have new outfits to share soon.


...as always more later!


Friday, July 22, 2022

Learning not to be frustrated with the process...

While I was making my cut pile for summer sewing I've been frustrated at times at how slow some of the processes are. I don't remember feeling this way before. Instead of being thrilled that I'm pulling a new piece of a fabric out of the dryer, I'm dreading the ironing part. Because of that I had a pile of pretreated fabric that's unironed waiting it's turn.  That was never part of my process.

Some days, I'm impatient about threading my serger and sewing machines. Prior to purchasing my Babylock serger I use to dread it but that was related to dealing with the stitch tension.  These days it automatically corrects every time, so why do I dread threading it?  Same with my sewing machine. When I got to making bobbins and threading the sewing machine I use to be gleeful because that's when the fun start would start!  Not so much some days.

We all know I hate to cut.  Ain't nothing changed there EXCEPT when it comes to cutting out border prints.  Probably why I've been cutting so many of them lately. I love the puzzle of making this extraordinary print work as a distinctive garment. Twisting the options around in my mind, choosing and then rejecting layouts. So give me ALL the border prints.

Even the sewing process is challenging now and that use to be my favorite part. Like I have to take 3 or 4 breathes before I sit down to sew. I guess you could chalk it up to loss of sewjo but it's more particular than that.  I have the desire but lately I hate that I have to cram my sewing into weekends or a couple of days off. I'm truly envious of sewists and quilters who have all the time to just sew. Who plan their days around making a new quilt, trying out a new pattern, or making up a toile.  I want that!

I know some of it is because my retirement date is getting closer.  Not so close it will happen in the next year or two but close enough that I know I need to be preparing for it. Some of it is because truly how much clothing do I need at this stage of life, and contrary to the lap quilt I made a couple of months ago, I don't really want to quilt.  I will be adding in some sewing for the granddaughters but again, how much of that can I do. They're already getting to the point where they want to look like their friends!

When I really ponder this...it's because I want more time.  Now I can hear you saying oh I retired and I don't sew that much! I believe you. But when you do choose to sew, YOU choose the time.  You don't stuff it into a weekend or between meetings, or even take a few vacation days off to do it. I want that. I want that freedom to just create...and it's affecting me now.

Anyway, this is just a post.  Not even a question of the day and not quite a filler post.  Though there are completed garments coming after this one. Just wanted to talk about how I feel about my crafting and wondering if anyone else has experienced this too,


...as always more later!


Monday, July 18, 2022

The Replacement Three

My favorite summer dress is my TNT hacked to death version of the Deer & Doe Myosotis Dress. I've made over two dozen of these. I slowed down a bit in the last 2 years because I owned so many.  Well I'm retiring a few now and needed a couple to replace them. To me it is the most comfortable summer dress EVAH and I can't imagine dressing for summer without them. 

Construction Information ~ 

o I did enlarge the bodice pieces a couple of inches and I lowered the bust darts due to my widening yet aging body. 

o The sleeves were also widened to encompass my arm girth. 

o I deliberately used smaller buttons in these three.  One of the things I noticed in some older versions is that the buttonholes stretch out more with the bigger buttons. I want these to last even longer so that's why I switched.

o I also made sure to add a snap between the bodice and skirt seam to insure that the fronts won't separate when wearing. It's not a major deal but it annoys me so I will make sure to include one in future versions too. 

Here are my new ones ~

The Navy & White Floral Version

The main fabric is a rayon/linen from fabric dot com and is no longer available.  However, they do have it in a rose color that I may also own! The white accent linen is from JoAnns. The white buttons are from my button stash.


The Heart Version

The rayon/linen fabric is from Fabric Mart and is no longer available. The buttons were purchased from JoAnn's.


The Rivera Version

The cotton voile fabric is from Mood and is still available. The yellow buttons are from my button stash.


...and these are the ones I'm retiring. I've grown out of them and they will be donated.


Before & After because this one had already been altered once

I've also cut apart this one and altered another one. Those revisions will show up in future posts.

I have two more that I want to make this summer to round out the replacements. I will probably never retire this pattern...just make it as inspired going forward!

The sun is shining, the days are longer, it's warm outside but cool inside so my sewjo is back in residence. All this to say that there are more finished garments to share soon.


...as always more later!


Friday, July 15, 2022

Simplicity 8658 Again

I will admit that I purchased this fabric as I was working on my last version of Simplicity 8658. I loved the pattern that much.  Also there were all these versions floating around in my mind in a variety of colors and yes, more border prints.  However, since my sewing is wayyyyy slower than my fabric shopping these days this means I'm just getting around to it.  Also some of the design elements of my original idea have changed.

Materials ~

A cotton double sided borderprint from FM - purchased the end of 2021


11" beige zipper from the notions collection

Design & Construction Details ~

I used this border print differently from the last one.  I wanted the body of the shirt to have a more solid appearance. I didn't want the border print to be the featured aspect. So I chopped into the border print a bit.

Using the floral print for the neckline and raglan sleeves and the striped portion as a band around the bottom of the top.


After playing around and getting the design I wanted, this sewed up quick. If I'm being honest, it was finished in May. It missed the last photo shoot because I get tired after shooting too many outfits...just tired of the process. However, my daughter & family are going on vacation and she won't be available again until the end of July/beginning of August. So I put on my big girl panties and had her take pictures of everything I have completed.

A Few Photos ~


I may make this again come fall...but it's shelved for now because I still have a bunch of summer dresses to sew! It's a very versatile pattern and I highly recommend it.

A Reminder ~

If you leave a comment as Anonymous, please sign your name at the end of it. I don't respond to comments that don't have any name attached to them.


...as always more later!


Monday, July 11, 2022

It's all about the fabric...

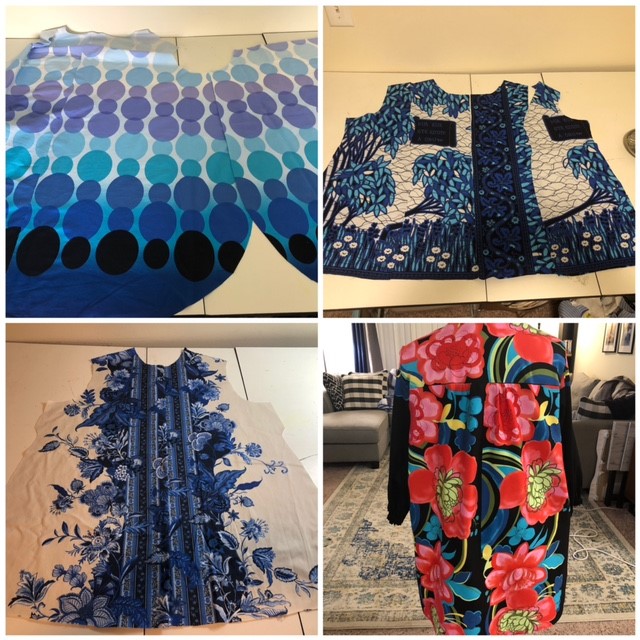
I saw this fabric online back in late January when I was making my housedresses. I thought it would make an excellent one to wear around the house.

It's a cotton/spandex jersey knit. I purchased some...but I thought I was buying by the panel...and it ended up being by the yard. So the fabric sat while I waited for the weather and my attitude to change. It ended up being just a tad expensive to wear around the house. While I deserve to look good ummm not this good.

Now I thought this was an amazing panel print, I just didn't realize how amazing it was until I sewed it up. But may I state here that it was challenging to control the rolled edges and I cursed the fabric out several times during the construction stage.  

But it was soooooooo worth it...

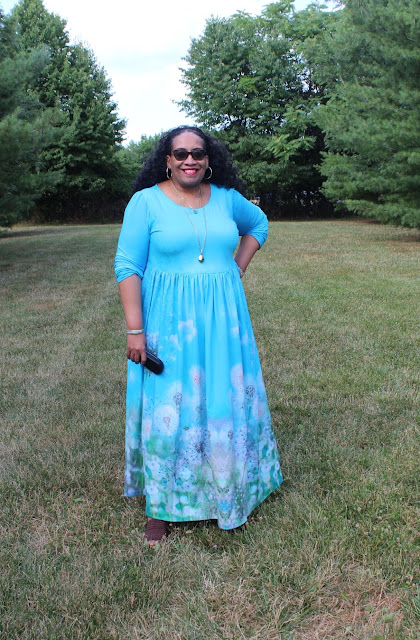
This is my fourth version and I have nothing new to add to it's construction. The bodice is from Cashmerette's Washington Dress, the sleeves are from Cashmerette's Pembroke wide bicep version. The skirt is just the full width and the length of the fabric (42" for me) gathered onto the skirt and hemmed. This is a really easy sew. The finished dress is amazing because of the panel print.

A few more photos ~


I have fabric to make more of these when fall/winter returns. Indoor fabric! LOL! However, this one turned out so well that I'm planning to wear it to the NYC Frocktails in October!


...as always more later!


LinkWithin

Related Posts with Thumbnails