Showing posts with label Lace Dress. Show all posts

Thursday, March 21, 2013

MSN Lace Challenge - The Reveal

Here is the original Oscar de la Renta dress...


Here is my version of the dress...


The original dress cost $2,990.00.  The materials for mine cost approximately $350.  This wasn't the cheapest designer interpretation I've made but I think it was worth every penny!

The components ~
Pattern ~
TNT dress pattern

Fabrics ~
2 yards of lightweight wool tweed from Mood
2 yards of guipure lace from Mood
2.5 yards of silk charmeuse from Mood

Notions ~
beige silk organza
22" peach invisible zipper
ltwt. fusible interfacing
1 1/2 yards of lace for lining hem
rayon seam binding 

All of the construction details can be found in these posts.  As I stated previously, this was a very involved sew and actually involved more hand sewing than machine sewing.  However, the journey was worth it.  I've cut out all of the pieces for the jacket that I want to wear with this dress on Easter Sunday.  It will be the perfect compliment to the dress so expect to read more about the jacket's construction.

A few more pics...
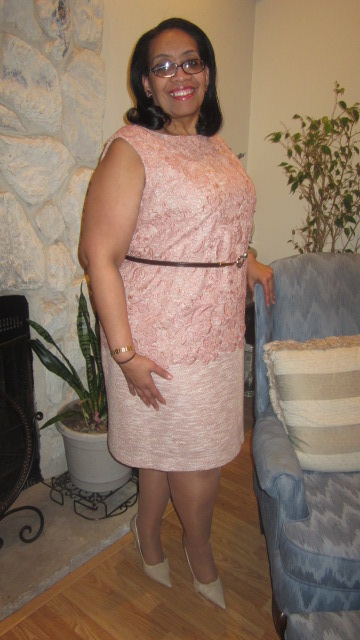

Dress with belt - wanted to see if it would work for me!
...mmmmm, no!  *LOL*


At one point during the picture taking we were getting junk...just couldn't get the lace to play well...so we took some up close pictures of different portions of the dress. Here I am in pieces - bodice first, middle of the dress (notice I don't say waistline - hahahaha!) and the skirt and hemline of the dress.


...and a back shot...


For a closing shot, here is picture of the purse and shoes that I will wear with the Easter combo...haven't decided if I will wear a hat or not...


...as always more later!


Monday, March 18, 2013

MSN Lace Challenge ~ Applying the Lace & Last Thoughts

This will be the last installment in the construction of this dress.  Because the lace has been totally applied, the lining and hem are done - so pics will be taken tonight. Then the big reveal will be on the MSN Blog Tuesday.

General Information...
The reason I've given this part of the construction it's own blog post is because it's the most prominent aspect of the dress and applying the lace was a very involved process. First it took 25-30 hours of hand stitching to get the lace applied to the top of the dress.  AND there is a lot of hand stitching in the dress...so much so that it has changed the weight of the dress. As each piece of lace was sewn to the dress, it got heavier and heavier.

Now I'm not a couture sewist or a tailor. I'm just a sewing enthusiast who enjoys the process and loves to create. Anyone could have made this dress because I started with my TNT dress pattern which had already been fitted to me. When I took the fit application out of the equation, all that was left was sewing techniques...all of which are pretty simple, just time consuming. I truly believe anyone from an advanced beginner to an advanced sewist could make this dress. It just took a lot of time and the willingness to take my time and use a needle and thread more than my sewing machine.

Lace Application...
Besides the fact that it took 25-30 hours to apply the lace, there were a few things I was grateful for and here's some more info on the application of the lace and building the dress...

1.  The Susan Khaljie class that I took at Mood NYC was a lifesaver.  There were so many little tips that she shared about applying lace to a garment that really helped me get this dress finished.  If you get an opportunity to take this class with her, I highly recommend it.

2.  The silk organza was the best foundation to add to the dress. Not only was it a great underlining for the dress but it was the perfect base for stitching the lace into.  It added body and structure to the wool tweed and guipure lace.  It was the second wisest decision I made when constructing the dress.

3.  I kept four needles threaded at all times.  It made the hand stitching go faster.  It also didn't seem as overwhelming when I didn't have to constantly thread a needle and helped me get into a rhythm.  Also at the end of each sewing session, I made sure the four needles were re-threaded and waiting for the next sew.

4. When I went to add the lace to the back of the dress, I realized that I'd attached the lace on the wrong side to the front.  The wrong side had no luster and was a more matte color/finish and I was fine with that.  I would have been a big shiny mess if I'd used the "right" side!

5.  The lace was applied with basting stitches in a bright neon color at the neckline and the side or back seams so that I would know where to start and stop stitching.  I removed the stitching at the sides and the back once the lace was all stitched down.  It wasn't removed from the neckline because it would be encased in the seamline and at that point I was just too lazy to remove something that didn't need to go.

6.  Putting the lace on the front was the easiest part.  I draped it over the front and smoothed it out over the darts, left extra around the neckline and the armholes and basted it down there.


7.  Getting the lace on the back was a little more involved because I had to match the lace at the hemline, at the sides and the zipper.  Now I understand why designers use a lapped zipper instead of an invisible zipper ~ easier to match and no worries about the lace getting caught in the zipper tape.


8.  When I started stitching the lace to the dress, I started at the bottom by stitching the edge flat first.  Then I stitched rows from one side to the other side sewing from the bottom to the top.  It made it easier to figure out where to stop and start on the stitching since it took me an entire week of sewing (even some evenings after work) to get the lace stitched down.  


9.  About halfway through hand stitching each piece, I steam pressed the piece.  Now in Sandra Betzina's, More Fabric Savvy, she says to cover the lace and then to hover 1/2" above the fabric and steam.  Then steam and pat flat, never touch the lace with the iron.  Okay I tried that and honestly it looked better when I lightly pressed the lace.  I'm stressing lightly pressing the uncovered lace because I got a better press/finish that way.  Maybe it's because I'm using the wrong side of the lace.  I don't know if this technique would have worked if I had used the shinier side of the lace.

10.  I used my normal technique of adding bias binding to the armholes because I find that the dress wears better for me with this technique.  This is a personal preference not a sewing rule.  Now for this dress I didn't want to use another fabric for the bias binding.  So I made some bias binding from the silk charmeuse so that everything matched inside the dress.  But as you know silk charmeuse is thin and can stretch out of shape so I added a lightweight fusible interfacing to the fabric prior to cutting it into strips.  Then I applied it to the dress' armholes.


11.  Because I'd already gone all the way with the construction, I also added a lace trim to the hem of the lining and of course, rayon seam binding to the fashion fabric's hemline.  The dress deserved it.


12.  Finally, the designer dress has the lace edging at the neckline and armholes.  Originally I was going to replicate that...now I don't care.  I like the clean neckline and armholes on my dress and I'm going with that.

Last thoughts...
Lace is H-U-G-E right now.  It can be very dressy like these Tadashi Shoji evening/cocktail dresses or everyday like these plus size dresses from Macy's. Lace has been made into tops, pants and shorts...just everything.  So including some in one of your new summer garments is a must.  You don't need to get as involved as I did, but add something lacy to your spring/summer wardrobe...it will be worth it!

I hope you made it this far because there's alot of instructions above, but just in case someone wants to walk in my shoes, I've left you a roadmap!   Like I said earlier next up is the reveal...

But can I tell you that my next two pieces are going to be easy schmezy!  I've already picked them out cause I need some quickies after all of this involved sewing.  Then I will work on the jacket/coat to wear over the dress Easter Sunday.  I've made the pattern several times before so I'll be able to put it together quickly.

...as always more later!


Saturday, March 16, 2013

MSN Lace Challenge - Still Not Done!!!!

This lace dress has turned into an epic project!  I've spent 8 hours today working on it and it's still not finished...

Let's go to the photo evidence...

The lace hand stitched to the front of the dress

One side of the back hand stitched down

My daughter showed up earlier tonight to see if I was ready to take pictures...ummmm NO!  At that point I was just sewing the lining in...and for a hot minute I truly thought of taking some short cuts and finishing the dress up so that I could get the pics taken...

But then I came to my senses...let me tell you why.  

  • See I have between 25-30 hours of hand stitching in this dress to make the lace, wool tweed and silk organza underlining act as one piece.  
  • I've used both my February and March Mood allowances for the fabric, as well as about $120 of my own money.  
  • Yes, this does include the materials for the coat too but peoples there is a small fortune invested in this project.  So I'm only doing my best sewing.

On the honest tip, this project has challenged me because it's made me sew outside of my comfort zone.  I usually sew to have clothes so I don't always use involved techniques - mostly I just sew.  Hey I like clothes and I like having a lot of them.  I get bored wearing the same thing over and over and since I have the ability to make as many as I like, I do.  Call it the fulfillment of a childhood dream, or greedy or consumerism, whatever...  

However this project didn't NEED to be this involved or epic I could have chosen a simpler lace project...but going along with my intent of using this opportunity as a Mood blogger to stretch my sewing skills and to sew as many different types of fabric as I can, I went there.  

So my daughter went home and no pictures were taken.  She made me take a break and have dinner with her.  I'd been in the sewing cave since 10 am and had been sewing non-stop. She encouraged me to keep working on the dress without taking any shortcuts!  Love that child!!!

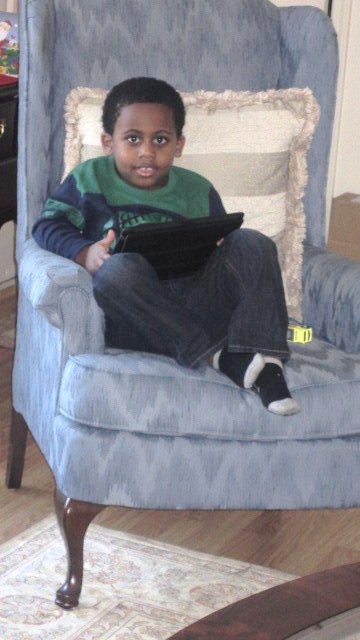
She won't be available for pics tomorrow since it's The Little Prince's fourth birthday!  Hard to believe that he's four already!!!


See those toy cars in both pictures, 
he goes nowhere without them!

I've been excused from the birthday party (Thank God! - because a room full of four year olds and younger at the bouncy place is not my idea of fun! *LOL*) so I will take my time and finish the dress.  I'm actually looking forward to sewing the jacket because it's going to be a breeze compared to the dress.

Photo shoot will be Monday evening allowing me to just make my deadline for publishing on the MSN site Tuesday.  I swear next month I'm sewing something easy!  *LOL* I need a break from epic projects!!!

A few more pics...

Inside showing the hand stitching and the silk organza underlining

Full shot of the front stitched together

Trimming the lace around the 
invisible zipper in the back


...as always more later!


Sunday, March 10, 2013

MSN Lace Challenge - The Construction

It took me a while to get started on this even though I know there's a ton of work involved in making the dress and I do have a deadline.  Lately I've noticed that when I have a time frame to complete something that I drag my feet getting started.  *sigh*  You would think that I would have been working on this first thing Saturday morning...yeah, right.  Let's try it was closer to midnight when I finally got into working on this dress.

Let's start with the pieces...
I decided to underline the wool tweed with silk organza since the wool tweed is a loosely woven fabric. So there are four layers to this dress...

* wool tweed base fabric
* silk organza underlining
* silk charmeuse lining 
* guipure lace

After I cut everything but the lining out, I machine basted the silk organza to the dress pieces.  I went back and forth over whether I should hand baste the silk organza to the wool tweed but finally realized that I would never be finished with the dress in time if I hand basted the two pieces together. Especially since I'm going to serge finish the pieces because the tweed is starting to ravel like the dickens. I've decided that I'm going for well constructed not couture sewn.

Then I sewed the dress together.  The challenging part now is getting the lace stitched to the front of the dress so that it's flat...which involves a lot of hand stitching...and a lot of concern.  Gawd, why do I do this to myself? So I'm watching television and hand stitching and praying.  Well at least Jesus will be happy that I'm staying in constant contact while I attempt to make this dress work...

A few photos of the dress in progress...


Back piece with silk organza underlining basted together

Back piece with seaming and invisible zipper installed

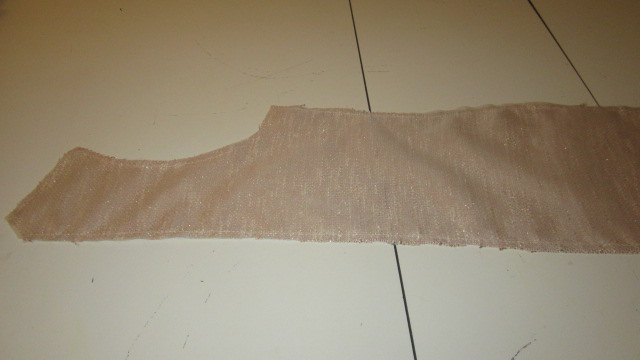
Tweed dress base on Lulu

Pinning the lace to the dress

Dress on the hanger

Basting the lace onto the front of the dress


...as always more later!


Sunday, March 03, 2013

MSN Lace Challenge - Part One

For the month of March the initial nine bloggers at MSN have been challenged to use lace, any type, for their garment. I've been pondering, thinking and worrying about what garment to make and how to use lace.

My first idea was to copy a Dolce & Gabbana dress that I found online...


But the desire to interpret that garment faded when I found this Oscar de la Renta dress at Neiman Marcus...


Close up of lace dress

The silhouette is similar to the D&G dress but the lace that Oscar used is what caught my eye.  See I've made several lace pieces before...


However, I've never made one using Guipure Lace.  One reason being the price ~ because it ain't cheap!  The second was because I'd only thought of Guipure Lace used in formal dresses and wedding gowns.  Even though the outfit that I'm planning is a little on the dressy side, there has been so much lace of all types showing up in designer and regular RTW lately, that I decided to go for it.

Here are the fabrics that I'm using for my interpretation minus the peach silk charmeuse (for the lining) that I still have to purchase...


Wool Tweed & Guipure Lace in Peach

This will be my Easter Dress.  The good thing about it is that it won't be too dressy to wear to church where you can rarely be overdressed.  Okay a ball gown might be a little over the top there but otherwise dressy works.

I will start with my TNT dress as the basis.  However, after taking Susan Khajie's lace class at Mood NYC there will be a lot more handwork in this dress than in the two pictured above.  That's just one of the techniques that I learned during that class that I will incorporate into the making of this dress/outfit.

A coat may also make an appearance...not sure if it will be a part of the Mood garment or added later on.  It depends upon how much time I have but since Easter is the last Sunday in March, I'm sure it will be a little chilly.  I'm starting on the dress today, cutting out the wool tweed.  The plan is to use the back seaming of the CK Dress and my regular dress front with side darts.  Next up will be more construction info...

...as always more later!


LinkWithin

Related Posts with Thumbnails