Showing posts with label Butterick 5821. Show all posts

Tuesday, August 05, 2014

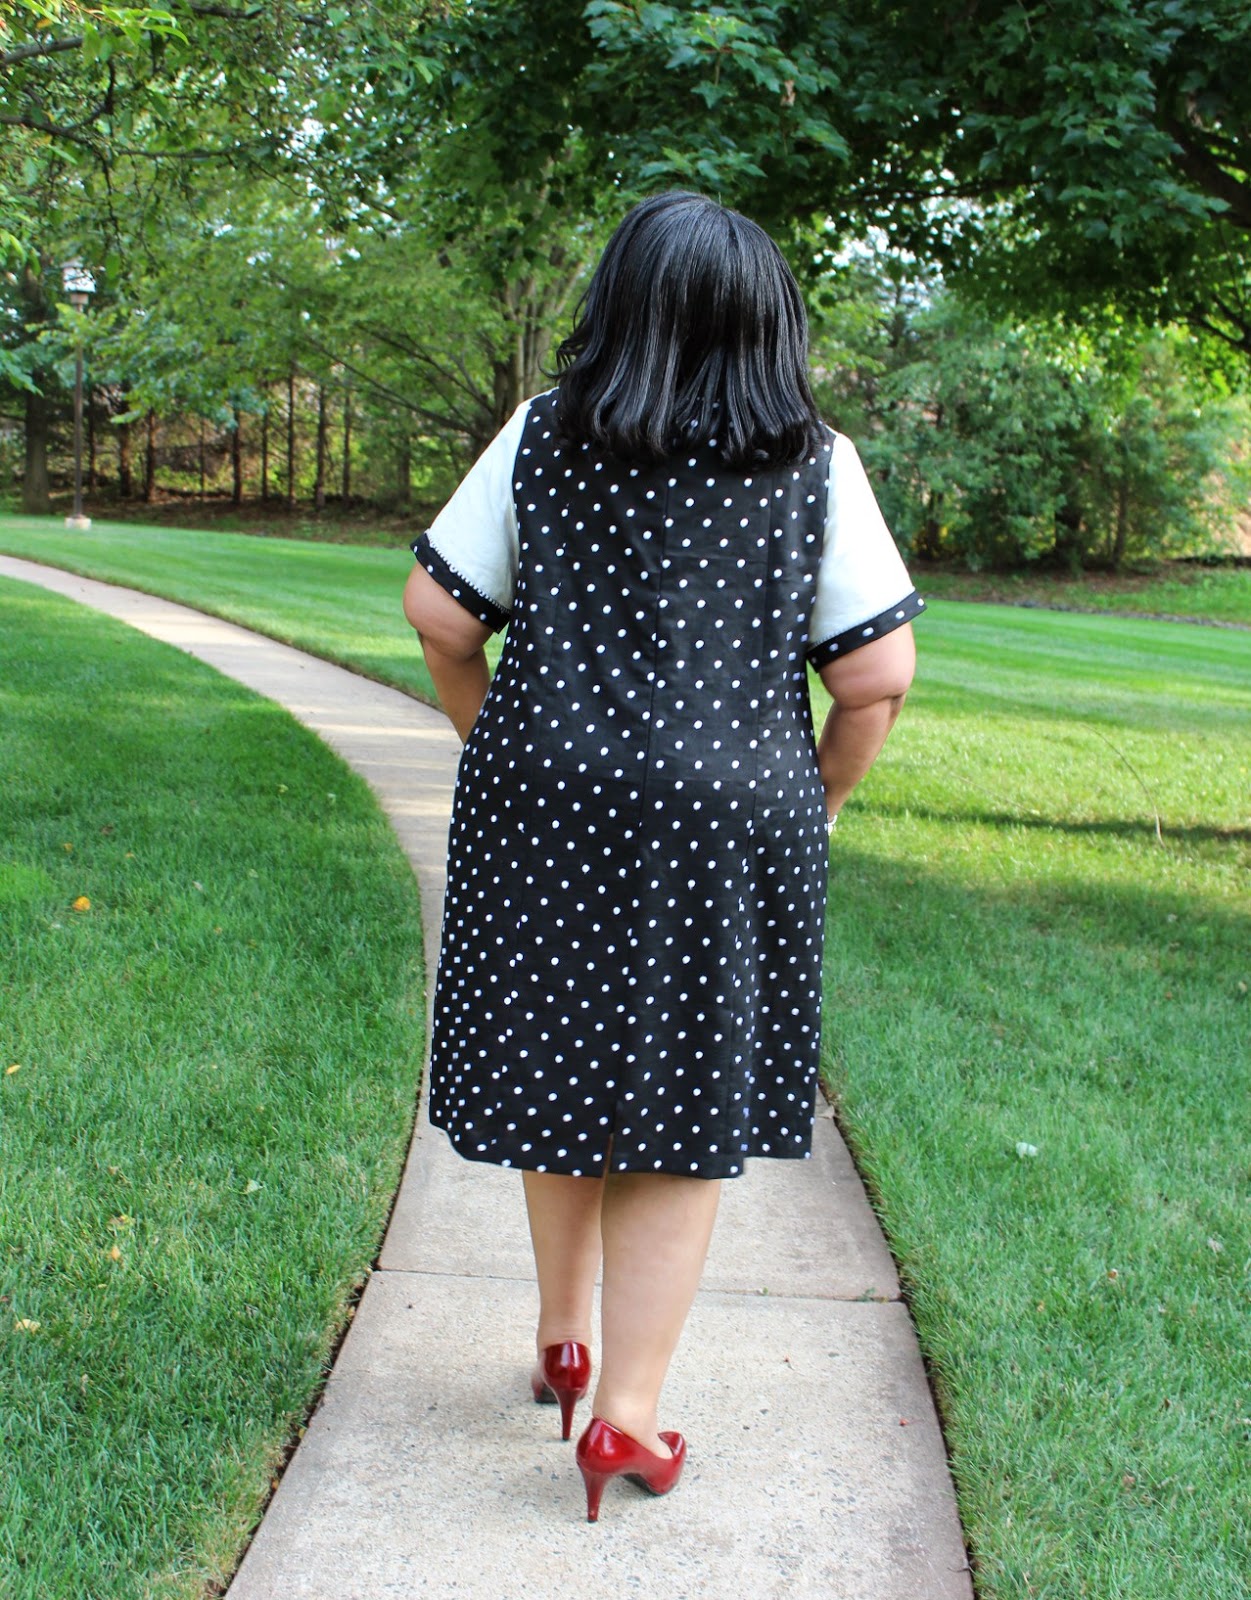
Butterick 5821 - Summer Version

My winter version of this dress was made in January 2013.  I used a laminated ponte knit for the first one.  This version is all linen with a little sumthin' sumthin'.


Supplies ~
Fabric ~
Black 'n white polka dot linen from Fabric Mart
White linen from Mood Fabrics

Notions ~
White bemberg rayon lining
Black bemberg rayon lining
22" invisible zipper
black/white striped piping
black rayon seam binding

The Fabric ~
I bought this fabric from Fabric Mart a couple of months ago. As with most of my Fabric Mart purchases, they disappear from the site as soon as I buy them. But this piece is a wonderful medium weight black linen with white polka dots that are embroidered onto the fabric. Seriously for a fabric ho like me, this fabric is heaven!


The Beginning ~
This is not the dress I was originally going to make with this fabric.  Originally I was going to make my TNT dress and a jacket/topper from Vogue 8982. However, I only had 3 yards of fabric when I thought I had 5.  As the GPS Unit says, recalculating, recalculating.

I really wanted to use the black 'n white polka dot fabric because it was up next in my creative rolodex.  So after flipping through my TNT patterns, still getting my sewing mojo back so I didn't want the adventure of something new, I touched Butterick 5821.  Let me remind you of what the line art of the pattern looks like although sadly the pattern is out of print.


I realized that there were some creative options to be had using this pattern again.  I fiddled around and drew up this...


Then when I laid the fabric onto the cutting table, I was moved to go in a slightly different direction. Originally I was going to sew a seam down the dress bodice front and make one panel black linen and the other from white linen. As I started to handle the fabric, I realized that I didn't want that much color blocking.  A simple white linen top would suffice with an interesting piping detail.

Construction ~
  • Both the dress front bodice and skirt were cut on the fold where the pattern instructions tell you to sew a center front seam on the bodice.
  • I switched the pattern's back pieces out and used my 4-piece back pattern pieces instead which fit me so much better.
  • For this version I added sleeves from the white linen.  I also added a band of the black 'n white polka dot fabric and the black 'n white striped piping.
  • I've had this piping in the collection forever and had forgotten about it. It wasn't until a visit to the sewing cave by some sewing friends that it was uncovered...and even though some of this went home with a friend...I did keep a little for myself.
  • I used both white and black lining for the dress. The white bodice has a white bemberg lining and the dress skirt front and the back is all in a black lining from the collection. It's not bemberg but a slippery lining that I had just enough for this dress.
  • Since the polka dots were embroidered onto the fabric, the serger and the sewing machine had to work a little harder at times to sew through them or serge them in half.
  • There were no challenges constructing this dress...unlike the first time where I omitted the sleeves because the fabric wouldn't ease. Since I was using linen it was a dream to sew. See how sewing the same pattern from different fabrics can affect the construction process?
  • I'm going to do a follow up post on how I constructed the sleeves, in case you want to add this color blocked sleeve to one of your garments.

Some Construction Photos ~
Dress lining front and back and the dress before the lining is added

Unlined dress without the sleeves

The sleeves with piping and black linen fabric

A few more pictures of the dress on me ~


Conclusion ~
This dress brought my sewing mojo running back home to me. So much so, that I have another dress and a skirt to show you. However, I must share something with you, I don't know how this dress is going to launder. I know I should be worried but I'm going with the flow and hoping that I don't spill anything on it during it's first outing.

Also, this dress cost about $40 to make. All of the items used in the dress were already residing in the sewing cave. I came up with the idea on a Saturday afternoon and spent that Saturday night and Sunday working on 90% of it.  The rest was finished during the week but seriously I bought NOTHING to make this dress. It all lived in either the fabric collection or the notions stash. That's the power of a well curated stash! *LOL*

Finally, I know the last couple of posts have been longer than usual and all inclusive. It's because I really did just want to sew during my final days of vacay. So I made the "editorial" decision to give as much detail, as well as, posed pictures all in one post. This won't become a feature here because I like process posts.  When I pull a pattern out to use again and reread those posts, it helps to see all the notes & info contained in the process posts.

Just one more thing...I took the sleeves out of the dress and put them in again. I didn't like the way they were hanging in the photos so they had to go. Again, this is the power of choosing a good photo...you can't see the problem in all the shots because those chosen don't show it. The other good thing about taking pictures of garments all gussied up, you can see things that you don't normally see.

I hope you're not tired of new garments because like I said earlier, I still have another dress and a skirt to share.

...as always more later!


Friday, January 11, 2013

Valentino Inspired ~ Butterick 5821

Every time I visit the Mood NYC store, I stroll by the ponte aisle and lately I haven't been disappointed.  I always find something new and unusual there. When I found this fabric, which I'm calling a laminated ponte, I knew immediately that I wanted to make a dress with it using Butterick 5821.


Now the pattern envelope isn't that inviting but the line drawings highlight a dress with so much potential.   I knew the laminated ponte and a stud trim that I picked up from Mood's trim department would yield an amazing dress.  All of my musings on how I was inspired to make this dress can be found in this post.


Some stats:
Fabric ~
Laminated Ponte from Mood Fabrics NYC Store

Notions ~
22" brown invisible zipper
black bemberg lining
Stud & Pleather trim also from Mood Fabrics NYC Store
1" black lace 

Construction Details ~
As usual there were quite a few pattern alterations done to the pattern to make it fit me. I started with my TNT dress pattern, making a pattern sandwich with it, the pattern pieces from Butterick 5821 and some tracing paper.

New pattern pieces were made insuring that the most important things from my TNT dress pattern, like making sure the bust dart was in the right place and that the pattern was wide enough for my body were copied to the new pieces.

After pattern alterations were done, I moved onto cutting out the fabric.  I knew I wanted to highlight both the "right" and "wrong" sides of the fabric on the front of the dress, sort of like a checkerboard.  So I used a single layout to cut the dress front pattern pieces to achieve that look.

Applying the Trim ~
My first step was to add some Steam-A-Seam2 to the back of the trim, then hand press it down to the dress front to hold the trim in place while I applied it to the dress front.  Then I added a few pins in strategic places to further insure that the trim didn't move on the dress front while it was being applied.  I did try to apply the pleather/stud trim to the front of the dress by using my zipper foot to stitch it down...but the zipper foot kept hitting the larger studs so that was a no go.


Handstitching ended up being the only way to get the trim added to the front of the garment in an unobtrusive way...but how? Slipstitch the edges or use small stitches down the front? I went with handstitching it down using very, very small stitches on the front and longer ones on the back.  This was perfect.  The pics above are close ups of the application.  The good thing is that it works and isn't very obvious unless you're very close to me.  I can live with it!

Working with the fabric ~
I'm calling this a laminated ponte...I don't know if that's it's real name but that's what it seems like to me...because the fabric has a shiny front and a dull back. It's just like working with regular ponte. I didn't do anything differently except for lowering the temp on my iron, otherwise it sewed just like any other ponte I've worked with. I used a straight stitch length of 2.9 on my Janome 6600P, a size 80 Universal needle and serge finished all of the pieces prior to construction.

Additional Construction Details ~
Besides the checkerboard application on the front of the dress, the rest of the dress' construction was pretty straightforward. I did end up omitting the sleeves. I made them and even started to put them into the dress but they weren't working. So since I'm always hot anyway I will wear a cardigan with this dress, sleeveless works.


I did have to use the zipper foot to stitch the lining to the dress and to edgestitch the lining into the dress to avoid the first stud on the trim ~ it's a bigun.  


I also added lace to the hem of the lining.  It just seemed like the perfect complement to the rocker chic front of the dress.  Y'know hard and soft! 


The Finished Dress ~
I was really pleased with how the fabric and trim made this dress shine.  It's a little edgy but not too edgy for my very corporate work atmosphere...though I won't be wearing this dress on the days that we have important clients and meetings going on in the office!

A few more views...


This was actually my first finished garment of 2012 but since it was my Mood garment for January, I'm just now sharing it here.  With this dress' reveal that brings my sewcation total to four pieces...not as much as in sewcations past but except for the last dress...they were all very involved projects.  I had a great wallow in my creativeness and am thrilled with my final pieces.  I'll have a wrap up post next and I promise I will answer all of the questions you left!

...as always more later!


Friday, December 28, 2012

Valentino Inspired

Well this is it!  Today was my last day at work until Monday, January 7th and I'm trembling with excitement.  Which of course makes me just a tad nervous.  My last sewcation did not go well and I'm so filled with anticipation for this one that I'm worried it might not meet my expectations...*sigh*

Okay, now that I've gotten that out of my system, back to my first project. Valentino's design team for Fall 2013, created a series of accessories using stud accents.  Handbags, shoes and boots all have been accented with studs.


Ad from Dec. 2012/Jan. 2013 Bazaar Magazine

Valentino handbags and shoes from Bergdorf Goodman.com

Those studs inspired me to purchase this trim from the Moods NYC store...


...which I'm going to use as an accent on Butterick 5821.

B5821

This pattern has been on my to-sew list since it was issued. I understand why it hasn't attracted much attention because the design crew at ButtMcVogue picked the fuggliest fabric EVAH to make this up in.

However, if you look at the line drawing, you can see that this pattern has a lot of potential.  Add to it the laminated ponte that I also purchased from Mood's NYC store and I think I have the opportunity to make an amazing dress.  

Line Art

As I stated earlier, this will be my first sewcation project. I'm hoping that by using my TNT dress pattern as the basis for pattern alterations that this will go together quickly.


Of course I will share all of the details, so stay tuned.  Yeah, my sewcation is starting now!

...as always more later!

LinkWithin

Related Posts with Thumbnails