Showing posts with label Tops. Show all posts

Saturday, April 22, 2023

Dueling Wexfords

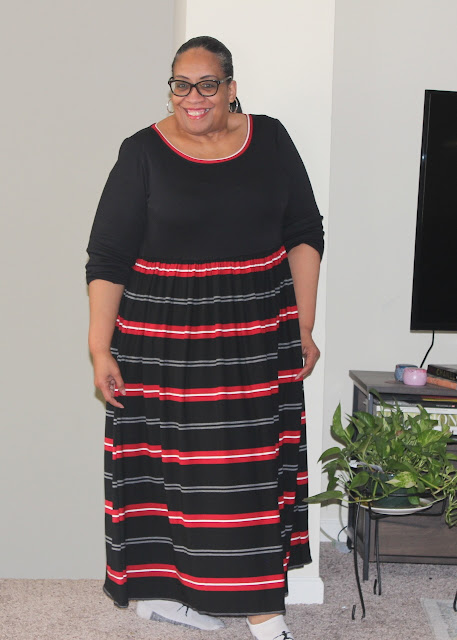
As I stated in my fabric fail Wexford, I was definitely making the pattern again. While the fabric shred as I wore it, the silhouette held up really well.  So I made 2 more unintentionally making them both in the black family.

In the first post, I didn't talk about any of the changes I made to the pattern or the size I used. I cut a size 24 and added 1" to the hemline...though I may add another inch for future versions.

While I've only used this pattern as a top, I will be making the dress portion later this spring. It's such a relaxed and comfortable wearing garment that I can see a longer version of this for summer wearing.

Wexford One:

The first Wexford is made from a black & white rayon knit purchased from Fabric Mart's brick & mortar store.  The changes to this one are that the neckline and sleeve hems are bound in some black knit scraps. As with the first one this is an easy sew. 


Wexford Two:

The second Wexford is made from a luxurious rayon knit that was purchased from Elliot Berman's shop pre-Covid.  This means that it was from the old place and not the new one.  Also the hand on this fabric is lush. I chose this fabric in an attempt to replace the pleather version.  

For this one, I used a black fold over elastic trim instead of the binding piece included with the pattern.  Other than that there were no changes.  Again a quick sew that let the fabric do the talking.


Besides making the dress version of this pattern, I have a few more top versions floating around in my head - a lace one, maybe a mesh one and finally I have several cool knits that would look amazing in this silhouette.  So sooner or later more of these will show up here.

Don't forget this is a Cashmerette Club pattern so if you want a copy of the pattern you will need to join the club either monthly or yearly. Oh and they're PDF only patterns...


...as always more later!


Saturday, March 11, 2023

Floral Pleather & Black Knit Wexford

I've hoarded this pattern since it was introduced for the Cashmerette Club. While it debuted last summer, I always knew I wanted The Wexford for a winter top. It reminds me of my Pembrokes and this white cotton top that I wear all the time.

Rambling through the fabric collection, I found this floral pleather that I used in a denim dress in 2016 and some black knit I bought from StyleMaker fabrics in 2021. I've used the black knit before in one of my house dresses.  

Seems like this black knit was purchased to be the assist in garments instead of the star player.  

Here are the players for this version...

This is an easy sew complicated only by the pleather fabric I chose for the front.  I like everything about this even though I did lengthen it 2" and may lengthen it 2 more inches for future versions.

I use to have a policy where I wouldn't wear a garment until it had been photographed.  Since I'm no longer always up to pictures, I wore this to work 2 weeks ago.  This was one time I wished I'd taken the pictures first because then I would have realized that my pleather was bad.

The pleather separated from the knit backing at the side seams and it fractured in other places on the front. It was so much that I was shedding white confetti or pieces of pleather EVERYWHERE.  The black knit pants I wore with the top were covered in white sprinkles.  Even my black sneakers looked like a box of confetti had blown up on them.

A Few Pictures of the Damaged Top  ~


This was definitely a fabric fail and not a pattern fail.  This top was very comfortable to wear and I will be making more. Actually have one cut out to sew now. 

This pattern is part of the Cashmerette Club of which I'm a member.  I don't download the pattern every month but the ones I do I really like. I really like this one so plan on seeing several more versions of it.  


...as always more later!


Friday, July 15, 2022

Simplicity 8658 Again

I will admit that I purchased this fabric as I was working on my last version of Simplicity 8658. I loved the pattern that much.  Also there were all these versions floating around in my mind in a variety of colors and yes, more border prints.  However, since my sewing is wayyyyy slower than my fabric shopping these days this means I'm just getting around to it.  Also some of the design elements of my original idea have changed.

Materials ~

A cotton double sided borderprint from FM - purchased the end of 2021


11" beige zipper from the notions collection

Design & Construction Details ~

I used this border print differently from the last one.  I wanted the body of the shirt to have a more solid appearance. I didn't want the border print to be the featured aspect. So I chopped into the border print a bit.

Using the floral print for the neckline and raglan sleeves and the striped portion as a band around the bottom of the top.


After playing around and getting the design I wanted, this sewed up quick. If I'm being honest, it was finished in May. It missed the last photo shoot because I get tired after shooting too many outfits...just tired of the process. However, my daughter & family are going on vacation and she won't be available again until the end of July/beginning of August. So I put on my big girl panties and had her take pictures of everything I have completed.

A Few Photos ~


I may make this again come fall...but it's shelved for now because I still have a bunch of summer dresses to sew! It's a very versatile pattern and I highly recommend it.

A Reminder ~

If you leave a comment as Anonymous, please sign your name at the end of it. I don't respond to comments that don't have any name attached to them.


...as always more later!


Saturday, September 28, 2019

Print Mixing Simplicity 8984

I'm trying to be more specific in my pattern buying.  Not just buying patterns because they're on sale, or I might want to make one because of how it looked on another sewist, or I want to read the instructions. So from the latest Simplicity Fall offerings I only bought three patterns.


All of them are on my fall to sew list. As I was choosing garments to add to my cut pile, I thought it would be great to add one of the new patterns. This one really jumped out at me.


I chose a lightweight pinstriped denim shirting purchased from BlackBird Fabrics last year for the tunic's base. Originally I was looking for a pleather scrap to add as an accent but touched the leftover scraps from this shirt and an idea was born. I love a floral/pinstripe match and there's just enough white in the background of the floral to "tie" both fabrics together. 


That was the genesis for this project. However, this is a new pattern so I'm sure you're wondering about pattern alterations. I started out by measuring my pattern pieces and cut a size 22. Got the top put together and realized that my head would never fit easily through the opening. Tried the top on and struggled to get it on and off. I needed an opening in the back so it's not such a struggle to get the top on.

I had to figure out how to make it work cause I wasn't giving up that print mix! I ended up adding strips that were the length of the bodice and 1.5" wide. Then I added a 11" invisible zipper which opens up the back and allows me to put the top on easily.


The raglan sleeves were wide enough for my bodacious biceps so no alterations were needed there. I didn't need to worry about a waistline since it's gathered. It is a relaxed fit pattern and one of the reasons I chose it.

(Just excuse the junky sewing cave background photos)

I was sure the tunic would fit now...ummm no!  This is how it looked on Daphne, the dressform, because I'm not putting a picture of how it looked on me on the interwebs. It was tight...a little too tight for my comfort. I was pissed! Pissed I tell you. I used good fabric and the last of my floral scraps to make this and now it wasn't wearable. 

So I folded it up and put it on the edge of my cutting table. As I was turning out the lights to go upstairs for the night, the pattern starting whispering to me to not give up on it. Long story short, I pulled another piece of fabric and decided I would make pattern alterations and remake the tunic. However that was the last night of my short vacay and the tunic/fabric/pattern sat.

Last weekend, I picked the tunic up to move it from the cutting table. I needed the space and realized maybe I didn't have to ditch it. Maybe it could be saved. I removed as much as I could from the side seams and the piece I inserted into the back. It gave me an additional 2" and took the bodice from tight to looser fitting.


It meant that I had to take the tunic apart...
- open and resew the side seams with a 3/8" seam allowance instead of 5/8"
- rip open the back side inserts
- reinsert the invisible zipper
- resew the seams with 3/8" seam allowances instead of 5/8"
- added the skirt back but put in small pleats instead of the gathering and like it so much better!


Tried it on and yes it works. It's not as loose as I've been making things (well in my head cause when I look at my back pics my dresses are fitted) but it works.


A couple more things...
* I omitted the pockets. I cut them out but it just seemed like too much on the tunic front.
* The back facings had to be recut since I changed the back opening. I made them longer to cover the zipper.
* After the facing was added, I topstitched it down.
* Two inches were cut off the bottom of the tunic and it was machine stitched with a one inch hem allowance. 

A Few Pictures ~


I'm glad I took the time to alter it and make it work. Honestly, when I finished I wasn't loving it. Though after my daughter photographed it, I was a lot happier with the top. I probably won't make this pattern again. There are just too many patterns and shirts to be made to work on a pattern that I'm only so-so about.

Along with finishing this up, I washed, dried and ironed a pile of fabric that will become more shirts and tunics. They will be coming to the blog soon.


...as always more later!


Tuesday, April 23, 2019

A Roscoe Dress or Top?!

This post has a backstory but let's start with a picture first.  


So what happened was...I did not make or sew this Roscoe. Grace (@wzrdreams) made it. She made it last year before her breast cancer diagnosis and while she likes the style, it was a little too nightgownish on her. After several discussions, I told her I would take it. So I traded her some selvedge denim for the dress.

I'm sure you're wondering why I would take a dress that someone else has sewn. Well I've loved this dress pattern since Kelly designed it BUT I thought I was larger than her pattern sizing AND it was a PDF pattern only. Then two things happened, I lost weight and Kelly started selling paper patterns. I snatched one up in a sale but stalled on it because I wasn't sure how I would look in the dress.

So having an already well-made dress (Y'all Grace can sew and her dress had her "Restless Grace" tag in the back too!) to try on and decide if the pattern would work for me was worth the trade. Now you're going well Grace was diagnosed a year ago and you would be correct. When I got the dress home, tried it on, I wasn't quite sure it worked for me as a dress either...so it sat for a minute.

(Grace made this in a size 16)


(Ugghhhh that face!)

(Bootylicious!)

Spring came and the trees started to bloom. Every year I want to photograph a make under those blooming trees. Especially since I'm blessed enough to live in a townhouse community that's well landscaped and everything blooms in waves.


Then I found a pair of white denim jeans I really like and it seemed like the perfect time to cut the dress off and make it into a top. I'm so grateful to my daughter who took these pictures and even scoped out the spots the day before so I could have the pictures I wanted.

May I stop here to say I KNOW this is frivolous...caring about the trees in the background of the pictures. I also know I'm very blessed to live in this community. Because once it gets green, we just walk out the front door and take pictures with an amazing background without any effort. Now that I've gone through that long-ass introduction...

Here are the pictures ~


(This is my favorite tree - you've seen it before
and you'll see it again this summer)

(Different tree & a back shot)


I will be making a Roscoe top of my own using a blue sandwashed silk from the collection. In the meantime, Imma wear the heck out of this one. So tell me, have you used this pattern?

Oh and we photographed two more pieces so more new garments are coming to the blog! Alright that's it. Drop a comment if you like my new Roscoe that I didn't make! LOL!

...as always more later! 

Saturday, December 08, 2018

Cashmerette's Rivermont Top - Second Version

Last year when I made the Rivermont Top I said that I would make it again.  As usual it took me a minute to get back to it...well actually it took me an entire year! *LOL* 


I also said that I would make my next version just like the pattern...mmmmmm I lied. This one is basically made like my first version. I love high/low hemlines and really wanted another version like that. The difference in this one is that the high/low peplum is made from a polyester chiffon.

Some stats ~
Fabric:
Navy rayon/lycra ponte purchased from Mood Fabrics for this project
Polyester floral chiffon purchased from Fabric Mart

Notions:
9" navy invisible zipper
Seam tape

Construction ~
This is a simple sew. I made it exactly like I did the first one. Of course, I complicated it by using the chiffon as the high/low peplum. There were two things that changed with this make. One, I added two layers of the peplum to the front to give a little more length to the front.


The second thing is that to insure the chiffon doesn't pull from the ponte (one fabric being heavier than the other) I stitched seam tape into the waistline seam to stabilize it.  Since I used chiffon for the peplum, its unlined...another difference from my original version.

That's it. There are no other changes to the construction of the top.

Then I took pictures of the top and decided that I didn't like it with the second layer. The pictures made it look like I was wearing a tutu over a onesie. Those knit pants just weren't working for me.  So I removed that layer by just cutting it out of the seams and retook the pictures with some jeans.  That's what's pictured below.

A few pictures ~


I wanted something a little casual and funky, out of my wheelhouse. I think I accomplished that with this make. I like it better with just one layer of chiffon as the peplum and I like the swish in the back. Maybe some day I will make the top as it appears on the pattern envelope. Since this is a great pattern hopefully some day soon I will make another maximized version of the dress with a flared skirt. Something else I've been thinking about for a minute!


...as always more later!


Sunday, October 07, 2018

A Katie for Late Summer

Or as a subtext, "Its all about the fabric!"  Now I know...I know I'm running this pattern into the ground. Seriously though it is one of the most comfortable garments I've made this season. I love it's flexibility. How it can be a top, tunic or a dress. I LOVE how it wears. It's comfortable yet stylish. I can use a variety of fabrics to make it, as evidenced by the Telio pebble crepe for this version.

Here is the latest one...


...and there will be one more made from some denim I picked up at JoAnn's of all places. I will probably retire the pattern after the denim top. Though I'm sure I will bring it out next spring to make a few more!

So let's discuss this version...

Supply List ~
3 yards of pebble polyester crepe purchased earlier this summer from fabric.com
10 1/2" white/beige buttons from the collection
Ltwt fusible interfacing from Steinlauf & Stoeller

Pattern Alterations ~
I removed all of the additions I made to the pattern by folding them up and pinning them down. I wanted to keep them for future renditions of the pattern.

Construction Changes ~
1. The hemline:
For this version because the fabric is so lightweight, I didn't want the large hembands. So I sewed them onto the hemline and then cut them the facing in half. That was folded and machine stitched down. It did add to the weight of the hemline without overpowering it.

2. Long sleeves with cuffs:
I used the sleeves from this Katie and the cuffs from my TNT shirt pattern. However, when I finished the shirt and tried it on the cuffs were really large. So I put a pleat on the cuff and sewed a button on each one. This worked like a charm and my skinny wrists no longer float inside the cuffs.

Those are the only construction changes made to this version.

A few pictures ~


These were taken at my job because I broke my rule and wore it to work before photographing. But I wanted something new to wear to our company meetings! This was me talking when we had to introduce ourselves.


Conclusion ~
Making this from a drapier poly type fabric totally changed the look and hang of the tunic. I also added long sleeves making it a colorful piece for my fall wardrobe.

Next up on the blog is a new blouse pattern I'm trying out...well actually its a vintage pattern that I've had for awhile but I love the silhouette.

One More Thing ~
Since I haven't heard from CarlaF - I pulled another number for the winner of the $100 Smugglers Daughter gift card - #30 Whitney Luckenbill!  Please contact me by Wednesday, October 10th!


...as always more later!


LinkWithin

Related Posts with Thumbnails