Showing posts with label April Shirt Month 2018. Show all posts

Saturday, May 05, 2018

Shirt Month Wrap Up

April was some month, huh?!  I've shown 8 shirts that were sewn either earlier this year or specifically during the month of April. I combined them all together so that they were given the platform they deserved, thus April being Shirt Month! I'm finished sewing shirts for awhile because the weather is finally changing and I have loads of spring things I want to make.


So let's review ~

First was the "Hurrying Spring Along" shirt that was made from a border print cotton sateen and a sponsored post for Elliott Berman fabrics.

Next up was a Black shirt with black 'n white gingham accents - because I don't own a black shirt and need one.

My third shirt was a mid-weight chambray shirt - the perfect casual shirt to wear over jeans and one of my personal favorites for the month.

Then there is the black/white/gray dot shirt - that had so many techniques included in it's construction and still it worked.

The fifth shirt was a designer inspired pinstripe shirt with white collar and cuffs - the one that will probably get the least amount of wear.

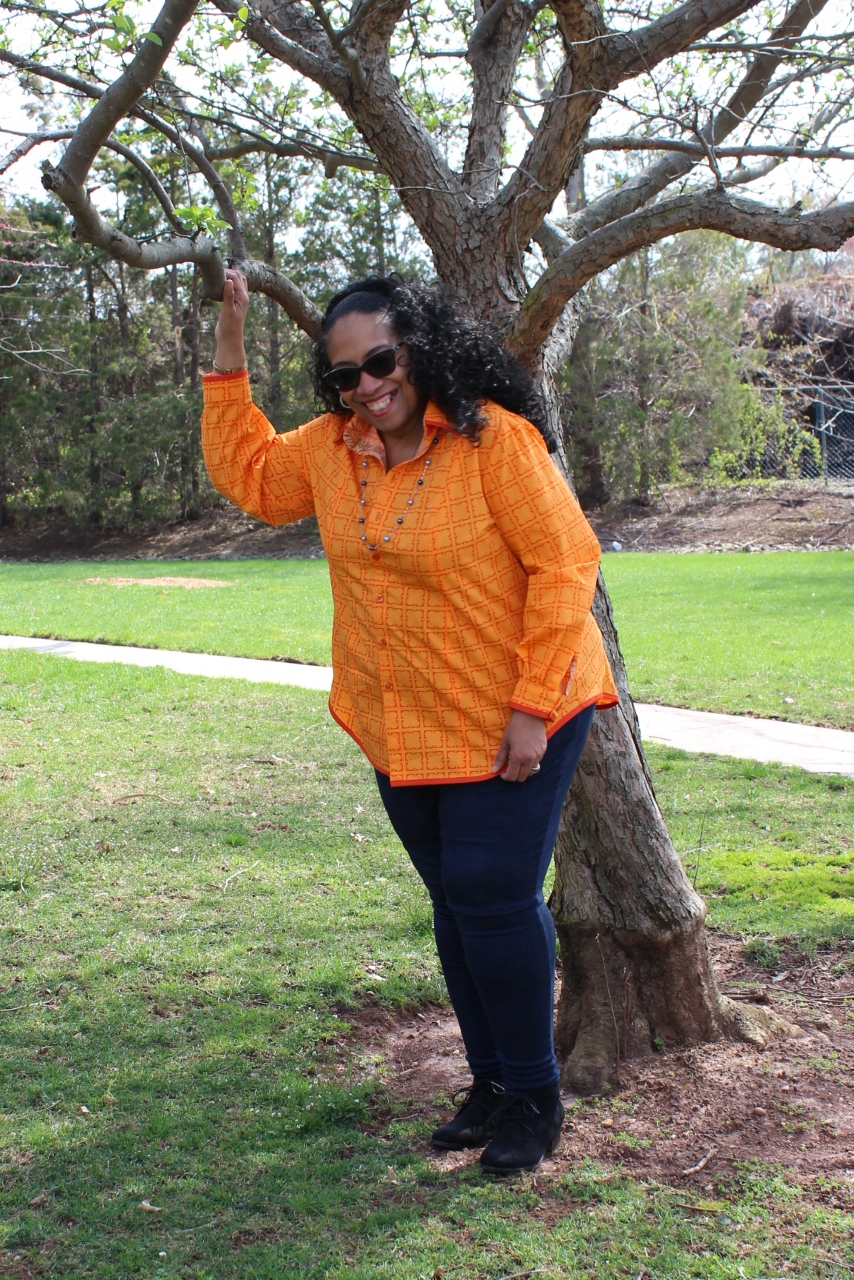
A funky orange print shirt was the sixth shirt...a lot of print matching with that one! 

Seven and eight were versions of white shirts because everyone needs one right?!


I'm happy with most of the shirts but that's due to wearability factors rather than sewing ones. I've gotten sewing the buttons on by machine down and am using two new sewing machine feet...especially my gathering foot which is a time-saver and revelation. By sewing so many of the same garment type back to back, it's caused my sewing skills to elevate to another level - so I'm thrilled about that!

I love being able to play with the design features - adding contrasting fabric to the collars, cuffs and front button bands, changing the sleeves, adding embellishments and making fabric choices - these all have contributed to making sewing so much fun this month.

Quarterly In & Out Totals ~
I've used up quite a bit of fabric - 21 yards - which doesn't include the Border Print Shirt since that was a sponsored post.  That total makes me happy because that's 21 yards out of the collection. However, my March totals for fabric in (from Sew Camp weekend) is 21.5 yards and then I bought some more shirting in April from Fabric Mart (y'know the stuff that wasn't on the website when we were there) another 14.5 yards.  Then I bought 3 yards of an amazing digital linen that was on sale at Fabric.com and 3 yards of an embroidered stripe from EOS.  

This makes my end of quarter results - 13 garments sewn, 34.5 yards of fabric out and 42 yards in.  That means I've added 7.5 yards more than I've sewn out. Imma have to be really careful for the next few months about purchasing fabric before Sew Camp. I know I can't escape buying fabric from Fabric Mart with an onsite visit but I need to be more vigilant until then. Since my main goal this year was to sew out more than I bought in at the rate I'm sewing, Imma need to burn my credit cards! *LOL*

Conclusion ~
I want to thank everyone for following along, leaving a comment and/or suggestion and appreciating my shirts.  I've enjoyed making and sharing them on social media. My shirt wardrobe has really been beefed up and I will be ready when fall rolls around. I truly hope that you gained some inspiration, maybe a few design ideas and some sewing tips/techniques from the series. Because now that it's May, I will be moving on to sew a variety of other garments.

Thanks again!!!

...as always more later!


Wednesday, May 02, 2018

Shirt Sewing Tips

I added some tips to a couple of my shirt making posts and then I decided to just put all of the tips in one post ~ also adding some more information and links to blogs and equipment in case you need them. So while this post is a little long, I'm hoping that you can refer back to it whenever you need tips on making your own shirts.

Buttons/Buttonholes ~
- Buttons
To me button placement is so important on a shirt to prevent gaping.  As I said before I use a lot of buttons on my shirts. The first button I place on the shirt, is in the valley between my breasts. Then one is placed above and below that one. This is to guarantee that there's no gaping. I typically set my buttons 3.5" apart.

This is the beauty of making your own shirt. You can use as many buttons as you like. I also used a larger button than most RTW shirts have. I hate trying to button those tiny shirt buttons so I've sized up. As a plus size woman I find that good button placement and a great fit add up to a well-fitted shirt. I highly suggest that you use the size button and a placement that works for your body, not just what the pattern suggests!


- Making Buttonholes
I use a seam gauge to mark my buttonholes down the front of my shirt. However, another method of marking is to use a simflex guide. I've made a lot of buttonholes in my sewing career. There are many ways to mark your buttonholes and loads of tutorials on the internet. 

I honestly use pins to mark the top of my buttonholes because I can line them up on the red lines of my buttonhole foot. I snug my buttonhole foot between the stitching lines on the buttonhole band so my buttonholes fall exactly in line and stitch from there. You can see a quick video of my sewing machine in action here. Let me stress that this is NOT the right way to do things. 

You should use proper markings to line up your buttonholes. A great example of this is a picture from one of the people I follow on Instagram - here.  Look at how Sarah has marked not only the start of the buttonhole but the length of it too.

I mark the way I do from experience. Although I will tell you that I start making my buttonholes from the bottom of the shirt and work up. This way if my first or second buttonhole sucks (it happens even after making a test buttonhole) I can remove the thread in an area that's not quite so noticeable.

My final tip is to use a chisel and block to cut open your buttonholes. Afterwards, I apply Fray Check to the front and back of the buttonholes. Also, I let the Fray Check dry before cutting the buttonholes open. I've found this method prevents those little flyaway threads that can occur when cutting buttonholes open.


Interfacing ~
My interfacing of choice is from Fashion Sewing Supply.  Pam has the best interfacing for garments. I used both the Pro-Woven Light Crisp fusible interfacing or Pro-Sheer Elegance Medium Fusible for my shirts. I highly recommend that you purchase an interfacing sample set from Pam so you can feel the different weights.

Otherwise, I apply interfacing following the pattern instructions. 

Making shirt collars ~
I know that Pam Erny who runs the Fashion Sewing Supply online interfacing store has a collar technique on her blog, Off the Cuff. It's the post that's dated, October 8, 2012. Sewists have successfully used her method to get great collars since she's an excellent shirtmaker so they come highly recommended.

However, I don't use her technique. I use a set of steps that I've done for years. I wanted you to have the professional way of making a perfectly pointed collar before I explained how I sew mine.

1. I sew the long side of the collar first using a 5/8th seam allowance.


2. Then I stitch each side seam also using a 5/8th inch seam allowance. However, I double stitch over the intersecting seam portion.

3. The corners are clipped.


4. Next I take the collar to the ironing board and press it over the pointed end of my clapper.


5. Then I trim the sides of the collar and the longer edge


6. I use my bamboo pointer and push the collar edges out as far as they will go


7. Another press to set the collar flat

This is my method. I'm sure others use a different method or Pam's.  Drop a comment in the comment section letting me know which method you use.

Matching Prints/Plaids/Stripes ~
You know I advocate a single layer technique when you need to pattern match. I also believe you should run your pattern pieces in the same direction to insure that you get a pattern match all the way across your garment. I've talked about this in numerous posts.

However, Gaylen of GMarieSews does an amazing job of pattern matching pockets on her husband's shirts. When we were at Sew Camp, we got to see the shirts she makes for her husband in person. So here are a few of her tips:

First - I trace my pocket pattern onto medical table paper (you can use any tracing paper you have on hand for this). I use this for my pattern work because it's easy to see through. I cut out several pocket patterns so I always have a fresh one to work with for each shirt.


Second - Once the left front of the shirt is cut out, I position the pocket pattern on the front where it needs to be sewn.  When I have the pocket where I want it, I take a pencil with a rounded point so I don't rip the paper and trace the critical elements of the design onto the pattern piece.


Third - I lay the pattern piece directly onto the fabric matching the print to my drawing, carefully pinning it in place, then cutting the pocket out.

Fourth - prepare the pocket as you normally would.  When you're ready to sew the pocket to the shirt, line up the print, pin the pocket in place and sew it down leaving the top open.


Gaylen's husband wearing the shirt

Design Changes ~
I don't know if this qualifies as a tip but I'm adding this.  I talked design inspiration in this post. However, I really want to encourage you to think outside the box on the details you add to your shirts. It's what makes each of them different and reflective of your personal style.

Embellishments like piping and binding, embroidery and ribbons can be used. Different fabric for the undercollar, cuffs and button bands really add a creative touch to shirts. The fabrics don't need to match, just coordinate which gives your shirts an artistic flair. 


Also, please realize that you can use fabrics that aren't normally used for shirts. I've made 13 now and used a variety of fabrics...polyesters, shirtings, cotton sateens. I have several more in mind that I want to make using linen, silk blends, some voile and cotton. Since you're the designer, you're not limited to standard fabric choices.

Simple Common Sense Sewing Techniques ~
1. Change your sewing needle. 
I changed mine after every two shirts. You want your stitching to be precise especially in the topstitched areas and a dull needle won't give you the stitch quality you want.  So change your needle!

2. Add a button to the side seam.
I add a button into the side seam of all my shirt makes. That way if I lose one I don't have to search through the loose button stash to find one.

3. Make sure you're using the correct foot to sew your garment. I noticed a huge difference in my stitches when I changed to a straight stitch foot and throat plate. So if your sewing machine comes with different feet try them out and see if they provide better stitches than just using the basic foot on your machine.

Sewing Library Suggestions ~
I always think you should own a book or two on sewing...or maybe even start your own personal sewing library.  To that end, I recommend the following books to help sew the best shirts you can:

1. Shirtmaking: Developing Skills For Fine Sewing by David Coffin

2. The Shirtmaking Workbook: Pattern, Design, and Construction Resources - More than 100 Pattern Downloads for Collars, Cuffs & Plackets also by David Coffin

3.  Easy Guide to Sewing Blouses: Sewing Companion Library by Connie Long.

For web inspiration, definitely read Pam's Off the Cuff ~ Sewing Style blog. It's a treasure trove of shirt making techniques and tutorials, as well as being chock full of inspirational sewing. There are pages of tutorials on Grainline Studios blog. You can access them here.

Hopefully something in this compilation of information will help you when you're making a shirt or deciding to make one. As you know there are quite a few shirt patterns out there - both from the Big 4 and from the Indies. Hopefully you will be able to develop a TNT pattern so that you can take creative journeys with your shirt pattern.

Next up on the blog is the wrap of Shirt Month...I've really enjoyed sewing these shirts. I hope you've enjoyed following along!

...as always more later!


Sunday, April 29, 2018

Everyone needs a white shirt, right?

I always knew that I was going to add a white shirt to this collection of shirts. I just couldn't decide if I wanted a classic white shirt or my TNT version with the gathered back. After some thought I went with both...I mean why not? I have the fabric and notions to create both shirts!


Materials ~
White cotton poly/lycra blend purchased from Metro Textiles 
(I bought 10 yards of this so I could make a couple of white shirts)

7 - 1/2" shell buttons from the collection for the sleeveless shirt


10 - 1/2" novelty buttons from the collection for Poet's Blouse/Shirt


A Classic White Sleeveless Shirt ~
I used the same pattern pieces that I used to make the Orange Mizrahi inspired shirt for this one. I was happy sewing it and spent all day working on it. Topstitching all the seams and getting all the details right. 

(Like adding lace to my label before adding to the back yoke)

Then I hung it up for the evening vowing to finish it during the week. When I went back and looked at it, I realized that I really liked it sleeveless. That it would work well under cardigans and jackets for spring cause spring is finally here. So my classic white shirt turned into a sleeveless white shirt.


Construction Techniques ~
- I hemmed it using a 5/8" hem allowance. 
- I bound the armholes with a 1" twill tape I had in the notions stash. 
- Then added buttonholes and some shell buttons again from the stash.

Pictures of the finished top ~
The first pictures are of me wearing the shirt with a jacket that I made in 2011. This is how I will most likely wear the shirt. The jacket is from a floral cotton sateen and you can read all about it's construction here.


Some pictures of the shirt alone ~


A White Poet's Blouse/Shirt ~ 
I really wanted this one to be more of an artiste's type shirt with a looser fit.


Construction & Design ~
a. I cut the sleeves larger than normal by 4-5" - I freestyled this alteration.
b. A longer cuff was made by not folding the cuff in half. The edge was finished by topstitching it flat. 
c. The back was cut a little wider to give the shirt a looser fit.
d. I used these funky novelty buttons for the front of the shirt to add to the artiste flair!
e. An eyelet fabric was used for the inside yoke to add interest to it.


Otherwise this shirt was constructed exactly as I made my other back yoked shirts with the looser fit. With my first shirts I pulled the gathering threads by hand. For this one I used my new gathering foot which you can see in action here. If you can buy a gathering foot for your sewing machine, I highly recommend it!

A few pictures of the shirt:


Conclusion ~
I now have two wonderful white blouses with two separate personalities to add to my wardrobe. But what thrills me most is that everything to make these shirts came from my collection. With these last two, I've made 15 shirts in the last couple of years and highlighted 8 new makes for Shirt Month. 

Now that the weather is finally warming up this is a good place to stop and move onto other garments. That's not to say you might now see another shirt or two made during this spring/summer since I have loads of shirting fabrics still in the collection. There will definitely be more shirts made come fall since this is a silhouette that I really enjoy wearing and making.

I know that in my last post I said that I would share a shirt making tips post and that will be up in the next couple of days followed by a wrap up post for Shirt Month. 

...as always more later!


Sunday, April 22, 2018

An Orange Isaac Mizrahi Shirt

I bought this fabric years ago from Fabric.com around the time they had the Vera Wang fabrics. It was purchased because I liked it not because I had specific plans for it. So it sat on the shelf waiting it's turn to be used. I went looking for it because I wanted to make a different type of shirt ~ something a little fun and funky!


What I forgot was that all of those little orange shamrocks had to be matched up. Which resulted in some very #slowsewing to get those shamrocks to match across the fronts and at the yoke and back seams.


Supply List ~
  • 3 yards of a midweight cotton stretch shirting by designer Isaac Mizrahi purchased from Emmaonesock.com also from the collection
  • 1/2 yard of gray/orange print batik from the collection
  • 12 1/2" 4-hole orange buttons from Pacific Trimmings
  • 2 pkgs of 1/2 foldover bias binding from Pacific Trimmings
  • Light Crisp Shirt Fusible Interfacing from Fashion Sewing Supply

Construction & Design ~
Most of the shirts I've sewn use the silhouette of yoke & gathered/pleated back with a straight hem. I was weary of that shirt type. It prompted me to make some changes to my existing pattern pieces. I thought I would add the back princess seams into the mix yet keep the back yoke. I also wanted the curved hemline typical of button down shirts.

After some pattern alterations, I had new pattern pieces to use for this new version of my TNT shirt pattern.

Adding space to the lower side back piece


Added space to the center back piece


Putting all the pieces together to insure they work

I know the question is, why not just use a new pattern with the features I want, because I do own quite a few shirt patterns. However, I would have to start the fitting process all over again using a new pattern. I know where to make changes for my body using these pattern pieces. I'm not starting new...I'm just adding to the pattern that's already working for me.  Plus I really don't like to fit new patterns...it's one of the reasons that I use TNT patterns over and over and over again.

After sewing the shirt together, there was excess fabric in the back seams. So I took it all out...everything that I added to the pattern pieces was taken out...*sigh!* I need to adjust the pattern pieces because I really want to make this shirt silhouette type again.


The other challenge was to get the print to match across all of these seams, as well as from the yoke back to the back princess seams. So I single cut the back pattern pieces. It took a lot pins, some slow sewing and a good layout to get it to work. It matches across all of the seams except one under arm seam and I'm good with that.

Binding ~
The design change to this shirt is that I added bias binding to the collar, cuffs and hemline. I wanted to use the binding to enhance the shirt's print. Adding it to the collar and the hemline were pretty standard. But I had to stop sewing for the night and sleep on it to come up with an idea for the application to the cuffs.

I photographed the process so when I want to use it for a future shirt, I can refer back to it. Readers if you want to incorporate this into one of your shirts, please feel free to borrow it.

Apply the band to the sleeve, then press it in half
up towards the sleeve

Align the binding next to the creased line of the cuff.
Stitch the binding down with a row of stitching on each side of the binding.

Finish and apply the cuff following the pattern instructions

I really like how the binding is applied but the cuff has a clean finished look. Which is what I wanted more than anything.

A few pictures of the shirt ~


Conclusion ~
Honestly I never thought about the logo print on the fabric when I dreamed up this shirt. I'm not sure I would have used it if I'd realized I would be matching all those stripes and the print beforehand. I just wanted to make some pretty shirts. Thankfully, I did use the fabric because this shirt is different from the previous ones I've made...though I used my seam ripper ALOT...this was slow sewing...really slow sewing!  Also, this shirt has a slimmer fit with more button down shirt features. 

This is shirt number 6 for the month and I have 2-3 more to make before I'm done. Since the weather is cooperating by just starting to warm up, I think I will get those last couple of shirts completed before it gets hot.

My next post is about my shirtmaking tips. I felt like including one tip per blog post wasn't enough. Having one blog post with all the information seemed more appropriate so that's what's coming up.

...as always more later!


Thursday, April 19, 2018

Inspired by Carolina Herrera

This is one of the shirts I took to Sew Camp and finished most of the construction there. However, I still needed to do a little bit of work to it when I got home. I was inspired by this ad I saw on Instagram. Now while the ad is actually featuring the purse, I was drawn to the shirt the model is wearing, and added it to my "shirt sewing" list.


I love the detail of sewing shirts. The many components, how the silhouette can be changed, how fabric can alter the look and especially how I can add my own touches to make each one individually mine. Cause seriously there are tons of shirt patterns out there but what makes each shirt yours?  The details you add to it of course.


Fabric & Findings ~
The fabric for the shirt is from Fabric Mart and was also purchased during one of the 60% off shirting sales. The accents are white shirting from the 10 yards I purchased from Metro Textiles.  Buttons are from Pacific Trimmings. I checked the collection and had some that would work. However, I needed to get some for a shirt I'm currently working on and stumbled upon these which I liked better. Since they were just 25 cents a piece (12 for $3) and it's the only expense I'm incurring for the shirt, I bought them. 

Construction and Design ~
  • This is the third shirt in the series where I've changed the front bands, collars and cuffs. It's a detail I really like playing with. 
  • Originally I wanted a chevron stripe on the back yoke but when I sewed it together it didn't work. 
  • So I went with the horizontal striped yoke I'd cut for the inside of the shirt and switched the mismatched yoke to the inside. 
  • When I went to put my label on the yoke, it disappeared. As I looked down into the trash box under the ironing board, I saw a scrap of Kisha's mustard stripe fabric
  • I really like the dichotomy of the black 'n white stripe and the mustard stripe together so I sewed my label to it. 
  • Then I sewed that to the yoke. It's the kind of interesting detail I really like to add to my garments and it also adds a little Kisha to the shirt!


After this one hung for awhile, I realized that I used such a conservative fabric for it that I wanted some of the "shirt" details back...so I curved the hemline to make it more shirt-like. ALL of my other versions have a straight hemline but for this one I wanted something different.

Since I'd cut the shirt originally with the straight hemline, I needed to make a change to the shirt get the new curved hem I desired. I used the original shirt pattern piece to mark the curved hemline. 


The other change to this shirt is a back pleat again to give it a more conservative look. Otherwise the shirt is sewn exactly as it's predecessors were.

A few photos of the shirt ~


Sewing Tip ~
When sewing the sleeve in I add a second row of stitching from underarm notch to underarm notch over the original stitching. I usually have the most stress on my underarm seam and by adding another row of stitching I reduce the possibility of a seam popping.

Wearability Factor ~
While this shirt looks good in photos and in person, the fabric is a little suspect. It doesn't feel or handle like a typical shirting. It actually feels a little plastic-y.  (not a word I know) Now while I like the white collar and cuffs, the pleat doesn't work in the back of this shirt because it emphasizes my backside. The gathered back doesn't do this, so I won't be using this design detail going forward. While the shirt isn't a fail, it is a disappointing wear for all of the work that went into it.

Conclusion ~
This is the fifth shirt in my shirt sewing extravangza. I have a few more to share and make before the month is over. Hopefully you are enjoying the series, if not come back in May where there will be a bunch of other garment posts!

...as always more later!


LinkWithin

Related Posts with Thumbnails