Showing posts with label Simplicity 1621. Show all posts

Thursday, August 11, 2016

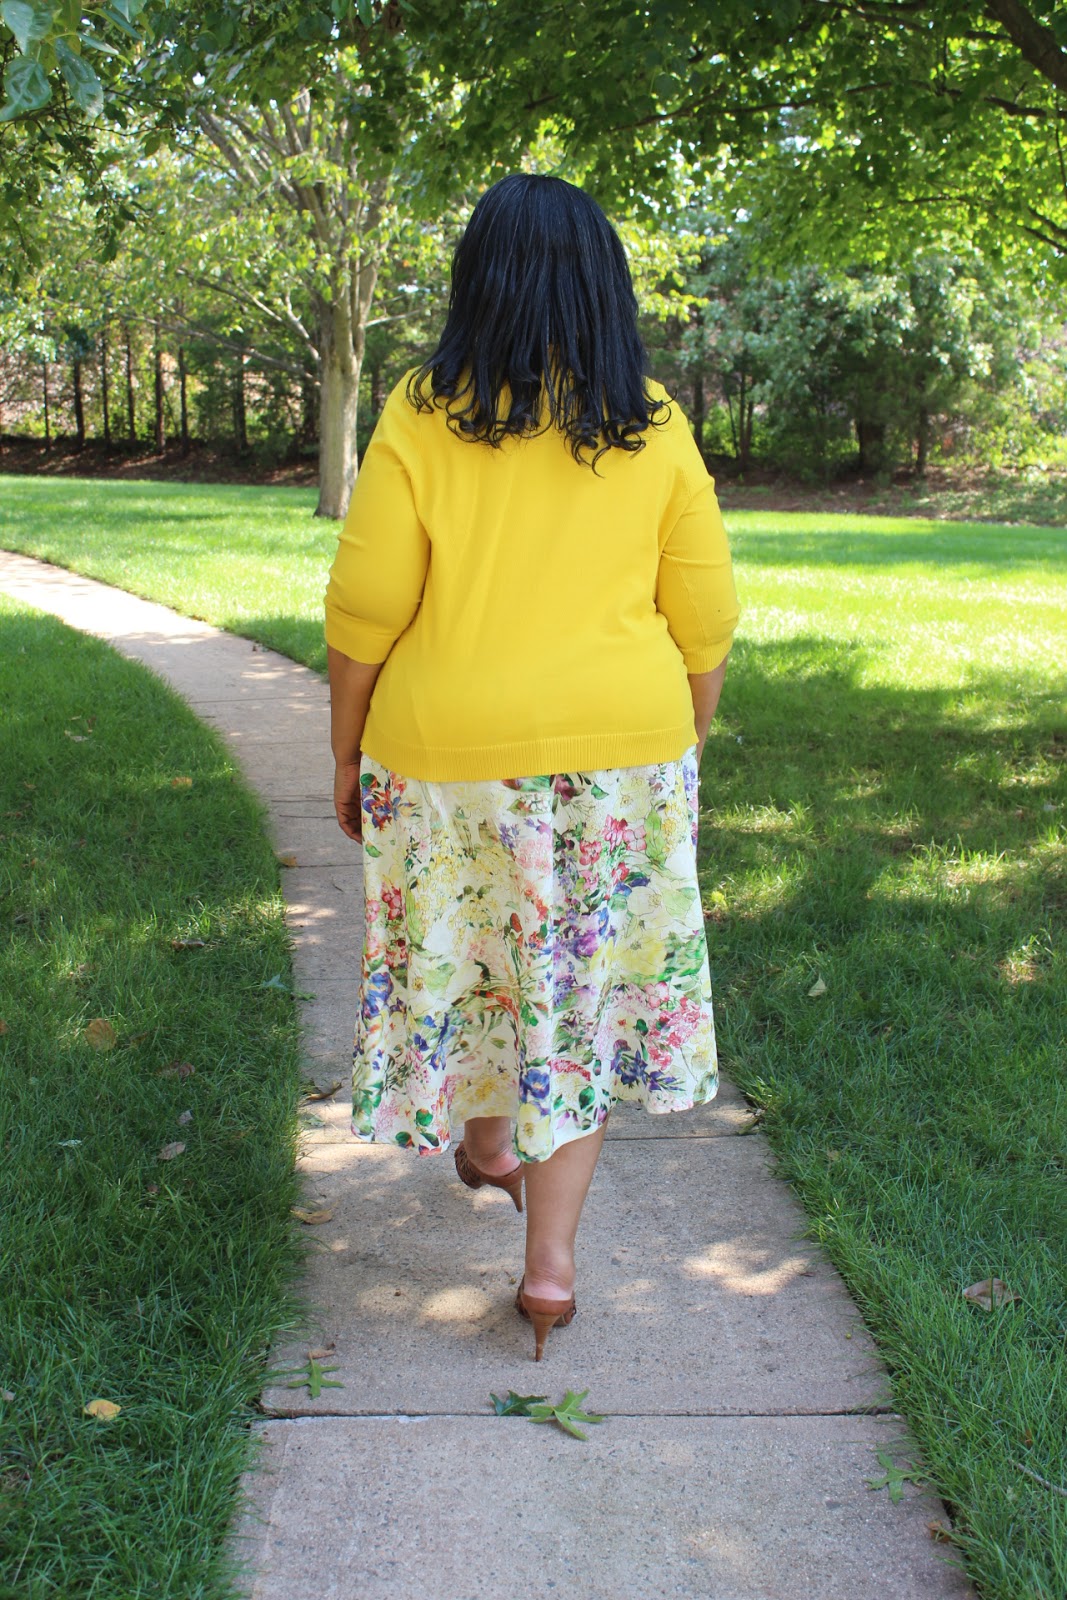
A High Low Skirt

I'm greatly influenced by what I see on the streets where I work.  There's probably so much inspiration because I work near the garment district and walk through the district every evening on the way to the Port Authority. 

This week's inspiration was an amazing high-low skirt on a pretty young thing that was walking towards me. Her high-low was so obviously high as in thigh length which made the low so dramatic because it was ankle length. Now I knew I couldn't pull that look off but I could a regular high low skirt.


I came home that Thursday evening aching for one, especially since I've worn the pink version of Simplicity 1621 to death because it's so comfortable...the most comfortable thing I've made this summer! I knew I should have looked for a pattern for this skirt but Simplicity 1621 was still on my mind. It was really easy to adjust the dress pattern to make a skirt from it.

Here's what I did ~

1. Folded both the dress front and back at the waistline markings on the skirt.
2. Laid the pattern pieces down on the fabric and added 1" to the top of the
    pieces by marking with chalk.
3. Sewed the front and pieces together and pressed the seams open.
4. Added 2" elastic to the waistline.

Sewing order ~
  • measured the elastic around my waist, pulled and cut it 3" shorter than my waistline
  • Sewed a 1/2" seam in the back to work with the elastic in the round
  • Placed pins at the 4 edges of the elastic
  • Elastic was pinned to the skirt at the four points
  • Then stitched to the skirt by slowly sewing and stretching the elastic and fabric to match.
  • After the first row of stitching, I stitched it again all the way around to insure that the stitching would hold.
  • Pressed the gathers flat
  • Stitched it down
I turned up 1/2" hem and stitched it down. The skirt was done. I used a lightweight linen that I bought from Marcy Tilton's booth at Expo in March. I'm determined to use as much of that fabric purchase as possible this year. The 2" elastic for the waistband was in the collection. I have it in white and black. It was bought a couple of years ago to make skirts like this.

A few pictures ~


...and worn with a RTW yellow sweater...


Conclusion ~
I couldn't believe that the skirt made up so quick and easy! It's nice to have a trendy, yet age and work appropriate piece. If you want to make one of your own and don't have Simplicity 1621, try one of these...


This will go into rotation this week cause it's still hot here!

...as always more later!


Wednesday, July 13, 2016

Revisiting Simplicity 1621

I made the high/low dress in this pattern last September, late in the summer season. Because of that it was hard to figure out if I wanted more of them or not. I wasn't even sure if I was at the tail end of the high/low trend or not. Since it was late summer when I completed the dress, I only wore it once or twice.

So this year when I moved around some clothing - spring/summer more to the front of the closet and fall/winter towards the back - I moved this dress up to wear. After wearing it in June, I knew I had to make more of these. It was so comfortable and fit the casual yet sophisticated style I'm still seeking. Because I made the blue/white seersucker one last year, I'm starting these with version 2 and 3.


Pink Floral Stretch Rayon or Version 2:
I pulled this pink floral stretch rayon linen blend from the collection. It's funny because when Gaylen visited the cave and touched this fabric on the shelf, she questioned that I bought it. She thought it didn't look like me. At the time I told her that it was for the grandbabies but I did secretly covet it for me. Fast forward and here it is...


Supplies ~
3 yards of pink floral stretch linen blend from the collection via Fabric Mart
2 yards of polyester fold over grass green braid from Daytona Trimmings
twill tape

Construction Info. ~

I did make a few changes for fit to this version. I hated the center front seam so I cut the front on fold. I also cut the front neckline a little closer because I feel like it's just a little loose on the original version. The bustline area was also cut a 1/2" closer to snug it up a little. Finally I left all of the length on the back of the skirt.

I sewed it up and added the bias binding to the neckline and armholes. And...the fit was still a little off...so I made some more adjustments to my pattern. I raised the underarms 1/2" on the front and back pattern pieces. Then I made snips in the upper armhole and folded over 1/4" and taped it down. Another snip was made in the neckline and folded over 1/4" then taped down. This was done to both the front and back pieces. I believe those changes will finesse the fit for my next one.

Unlike my first version, I only added binding to the neckline and armholes. I was going to add it to the hem too but thought it would affect the drape of the dress. The hem was turned up a 1/2" all the way around, pressed down and stitched.

A few more pics ~


Floral Blue and White Lightweight Crepe or Version 3:
This floral blue and white floral lightweight crepe was bought from Fabric Mart last Christmas. I know because I actually documented this fabric's arrival. Also, as much as I love this dress, it is an example of how taking a simple dress and adding a couple of embellishments turns it into a project! Cause this was a project! The pink floral dress took a couple of hours to make. This one has a good eight hours of work in it.


Supplies ~
2.5 yards blue & white floral lightweight poly crepe from Fabric Mart
2 yards ivory rayon bemberg lining from the collection via lowprice fabric
5 yards blue/white striped polyester piping from Daytona Trimmings
5 yards jacquard binding from the collection

Construction Info. ~
There are more techniques in this dress because not only was the fabric lightweight but it was also semi-sheer so it needed a lining. I puzzled over how to make this work and finally decided to add a full lining to the dress. I cut the lining using the original dress pattern pieces making it shorter by a couple of inches yet including the low part of the hemline.

The order of construction was:
~Sew the dress together
~Add piping to the neckline and armholes
~Sew the lining together and hem
~Baste the lining to the dress at the neckline and armholes
~Add the piping to the dress' hem
~Sew bias binding to encase the piping in the hem, neckline and armholes
~Topstitch close to the binding to finish off the hem, neckline and armholes

These are not difficult steps...just time consuming...but I think all of that effort was worth it...

Pictures of the dress...


Worn with a short sleeve RTW sweater


Conclusion:
I'm thrilled with these two new versions and I'm putting this pattern away now. It's time to move onto something else. I'm happy that I have three of these in my summer wardrobe. Although after seeing Anne Whalley's on PR, I may pull it back out during the holidays and make a lacy version for Christmas parties.

...as always more later!


Saturday, September 12, 2015

A High-Lo Dress from Simplicity 1621

Well I'm at the tail end of another trend. However, I've seen so much of this look on the streets this summer, that I wanted at least one of my own. Since I had three days of uninterrupted time to sew, I decided to find some fabric in the collection that would go with Simplicity 1621.


I wanted something colorful, not a solid and not a wild print. I settled on this blue & white pinstripe seersucker. To avoid the housedress look, I added white bias binding to all of the edges...the bias binding took way longer to make than it took to sew the dress.


Pattern Alterations ~
This is a very simple dress with only two pattern pieces and very little fitting required.  I cut the XXL size for the body and the large for the top of the dress blending into the XXL at the waist area.  

Construction Techniques ~
  • I used the medium bust darts for my version even though I cut the large top.
  • The neckline was cut using the small version for depth but I ended up rounding it out a little when I cut it out. I wanted to make sure that it would go over my head easily.
  • I ended up cutting about 2" off the center back of the "lo" hem. It was longer than I wanted it to be.
  • The pattern suggests that you use a flat felled seam on the center back seam because you can see it from the right side. I didn't do that because for the little bit of hem that you can see, it wasn't worth it.
  • So you can see a bit of the seamline at my "lo" seam.
This is a quick and easy sew reminding me of the sewing I used to do back when my girls were younger.  Then I sewed quick & easy items so that I'd have something to wear. Hey I had teenagers and they spent ALOT of my money! I had to make do where I could.

The other thing about this dress is that everything is from the collection ~ fabric, bias binding that I made from the bias tape roll collection, and a stash pattern from 2013.

A few more pics ~


This was the third item I made during the Labor Day weekend and it was perfect for the weather we experienced that week.

Wearability Factor ~
Even though this is the last thing I sewed, it is the first dress I wore after Labor Day weekend.  It was perfect for the heatwave we were experiencing.  

Here's how it wore...
It's a little too long in the front and could be longer in the back to improve the sweep. I shouldn't have removed the inches from the back when I first started to bind the dress. Also, if I make this again, I would eliminate the front seam and cut it on the fold. The underarm seams are a little lower than I like so I would raise them and the side darts need some work. These are all construction issues and easily fixed, otherwise it was perfect for the weather we were experiencing. 

It was so easy and comfortable to wear that I'm wondering if I should try to bang another one out maybe using a rayon before the last of the hot weather disappears!

...as always more later!


LinkWithin

Related Posts with Thumbnails