Showing posts with label Hope Dress. Show all posts

Saturday, August 15, 2026

Making Evening Wear from Every Day Patterns

While on vacation the first week of August, I made a summer formal dress to wear to a wedding that Saturday.  A family member was getting married, so I needed a new dress.

I know all of the major pattern companies have created evening wear attire.  I own a few of those patterns.  However, I like my evening wear pretty, fancy, comfortable and different from what you see on the sale racks or online.  I'm really not a sequins girl and it seems as if everything is either sequins, lace or satin in tight or close-fitting silhouettes.

I believe almost any pattern can be made up in fancy fabrics and become formal wear. I've done it in the past...


I made this Deer & Doe Myosotis dress in June 2019.  It was originally made to wear to a debutante ball but I've worn it to a couple of black tie events since then.

Last year I made this Style Arc Hope Dress as formal wear:


It was perfect for an early November evening event.  However, some of the same people were attending the wedding so I couldn't wear it again.  Well I guess I could have but that's not my style.

For the wedding this summer I used McCalls 7969 to make a summer wedding frock.


I still have to write the blog post for this one because it was an ordeal.  What should have taken me 2-3 days to make took 5.  And I was hemming the dress the morning of the wedding because my daughter had to help with the hem.  I just couldn't get it the right length by myself.

I shared this to ask, do you use formal wear patterns from the pattern companies to make eveningwear, or do you use regular patterns and eveningwear/formal fabrics?

Honestly I'm interested because I need to know if I'm a one off sewist in this?


...as always, more later!


*I know Blogger has made it more challenging to sign in but would you kindly sign your name if you use anonymous.  It makes it easier to talk back to you.  Thanks so much!


Sunday, November 16, 2025

An Elegant Style Arc Hope

I needed a dress for a Black-tie event and my preference is still classy, elegant and a touch of drama.  I wanted the fabric to do the work with a minimal silhouette. BUT I didn't want overtly sexy or anything uncomfortable and no sequins. I don't have time to deal with sequin sewing and clean up.

I went through a lot of silhouettes and possibilities and then decide to "upgrade" a pattern that I loved in my everyday life.  Also, I knew no one else would be wearing my dress.  So, I started with one of my favorite patterns, the Style Arc Hope Extension maxi dress.

It's an easy sew using complicated/fussy fabrics.

Supplies ~

2 yards of an appliqued mesh fabric purchased from Chic Fabrics in NYC

3 yards of 4ply black silk crepe from the collection via Fabric Mart (this was deep stash because it had an old Fabric Mart label on it)

2.5 yards of black rayon bemberg purchased from NY Elegant Fabrics

Less than one yard of 5/8" black elastic purchased from Cedar Grove Lane Trims in Lancaster, PA

2 yards of rayon seam binding from my trims collection

Construction ~

There was no difference in the construction sequence just added steps to account for the special fabrics.

o  Every piece except for the sleeves were cut out twice.


o  The mesh piece was basted to the front and back pieces before serge finishing the edges

o  The front skirt was cut on the fold. While the back skirt pieces were cut with a center back seam.

o  All basting was done with a single thread.

o  The hem of the dress was stitched with a single thread so no stitches would show on the dress front.

o  The lining fabric was cut 1" shorter than the main fabric and machine hemmed.

o  I added the bias binding the same way as I did for my other versions.

o  A look at the back and front of the bodice with the sleeves added.


Some photos of the finished dress

At the event...


Home afterwards in my comfy slides


My daughter and me

Conclusion ~

I know it's unusual to take a regular dress pattern and upscale it for eveningwear.  But after looking at several eveningwear patterns and online photos, I knew I wanted something that was more me.  

-  I didn't want sequins cause they're a bitch to sew and clean up.  

-  I didn't want anything tight or low cut.

-  I did want something classy and elegant with a touch of drama.

-  I did want to highlight my weight loss but not in an overbearing (to me) way.

-  I also wanted something simple to sew.  Letting the fabrics and silhouette speak.

I think my boho chic evening gown works and it elevated a pattern that I love.  I did learn that I want to make a sequin skirt (already own the fabric) and a silk blouse to wear as an eveningwear outfit, and a slimmer silhouette made from an embroidered mesh and more silk crepe I already own.  I have several nieces and nephews coming of marriage age and I want to be ready with a wardrobe I already have instead of sewing in a rush.

Parting Shot ~

How my evening ended, me in bed with a bowl of spaghetti. Why are you always hungry after one of these events?

I'm off most of Thanksgiving week and I'm not the cook, so I plan on sewing most of that week. The urge to create is strong so I'm going with it!  More fall/winter garments are coming.


*I know Blogger has made it more challenging to sign in but would you kindly sign your name if you use anonymous.  It makes it easier to talk back to you.  Thanks so much!


...as always more later!


Thursday, January 16, 2025

A Fall Hope

This is the last garment that I made in 2024 and haven't blogged.  BTW, this garment was shared on my Instagram page during it's first wearing. I was lazy and just didn't blog it. However, since the Hope extended pack has become an important TNT to me, meaning you should expect to see more versions in 2025, I wanted it shared here.


Supplies ~

4 yards of a poly blend border print purchased from Fabric Mart

Construction ~

This was my fifth Hope Dress using the extension pack. While the original pattern is pretty and I made a version of it, the extension pack really ignited my creative juices. 

Here are some construction and layout pictures...

Laying out the sleeve to get a good placement of the border for the hemline

Another view...

Stitching down the bias band on the neckline which is discussed in this post.

Checking how the border print is working on the dress bodice.

There are no construction changes. I made it exactly as the pattern states.

A few photos ~

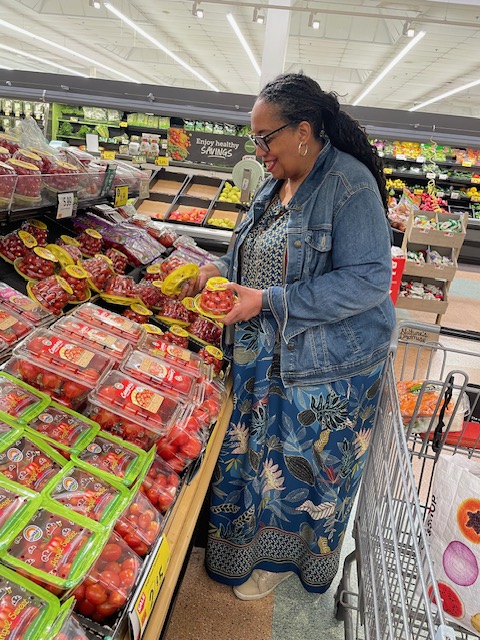
A note...getting my daughter scheduled to take pictures is challenging.  When she picked me up from the train station after work we headed to the grocery store.  It was the perfect opportunity to get some pics so we took it.

Worn with my denim jacket

I love the large raglan sleeves on this pattern.  
This print really highlighted them.

...and a back view

I'm not done with this pattern. You will see it again. I have a few ideas for fall/winter tops that I will hopefully get to this year.  And I will definitely make this as a summer dress again.

This was my last catch up post. New makes will be in future posts.


...as always more later!


Saturday, August 31, 2024

The Sunflower Dress

This pattern was featured in one of Closet Core's weekly emails. Now I'm not that enthralled with 70s styles since I lived it as a skinny teenager. A teenager who also sewed so I made quite a few patterns from that era.  However, this one hit me a little differently now.

Probably because I saw it as a cross between the Style Arc Hope that I recently made. So I would use that bodice. Then using the Style Arc Nova tiers for the dress' skirt. Once it became a must make, I went looking for a piece of fabric from the collection.  Of course, I had the perfect one...this crepe-like linen blend purchased from Mood in April 2023.

I used the Hope bodice with the tie neckline and the huge sleeves from my second Hope.  

My only other change was to add a fourth tier to the skirt bottom to emulate the tiers of the inspiration dress. I did this by using the pattern's first tier pattern piece. I cut 3" off the width to make it slightly shorter than the second tier.  I wanted to add a tier but not a lot of volume near the top of the dress.  If you've ever made the Nova, you know those tiers hold a lot of fabric giving it a lot of volume.  

Please note: 

1. While I added another tier it did not have any gathers because I added the second tier exactly like the first tier. If I was to make this again, I would add a little more length to those pieces to give it a more gathered effect.

2. By adding four tiers the dress was extra long. I needed to remove 2" from the hem before I sewed a 1.5" wide hem.

The neckline ties were cut almost double the original length. One to match the inspiration photo and two because I felt the ties from my Rifle & Co Hope were too short. I also used the same construction technique as my last one to apply the neck tie. Except for the Tetris I did to cut out the tiers (cause again this pattern requires ALOT of fabric) there were no more alterations.

Here's the dress.  Did I get a good copy?


These photos were taken while I was on vacation in Chicago.  I spent the day with Carol and Cennetta fabric shopping. They took me to The Textile Warehouse - 3 floors of fabric in an un-air conditioned space! But I found some amazing pieces that will be sewn sooner rather than later. Our next stop was Rainbow Fabrics. We ended up at Joann's for the Simplicity pattern sale. Those adventures will be a separate blog post.  However, Cennetta was kind enough to take a few photos for me to share here! 

I'm loving this combination and convincing myself that I don't need a second version cause assembling those tiers are not for the weak hearted. Seriously!!!

The supplies used:

5 yards of a crepe linen blend 

2 yards of 3/4" elastic


...as always more later!

Saturday, July 13, 2024

Rifle & Co. Hope Dress

Okay so I'm back for a minute.  I woke up a couple of days ago and thought I want to sew. I sat down at my sewing machine, turned it on and thought, "YES!"  Honestly, it's been almost a year but yeah, I want to sew.  I think there are several reasons why.  I recently found a church I like and have been going pretty regularly.  Which means I have a new place to go and a new reason to sew pretty things.  

Also, my daughter, granddaughters and I are headed to Chicago next month.  It would be nice to pack a few new pieces to wear...and I still think sew first instead of buy! So, I'm thinking of a few outfits for the trip too.  We will see what actually ends up being made.

This is my third dress from the Hope Dress extension pack.  To say I liked this extension pack is an understatement. 

Materials:

4 yards of rayon Rifle & Co fabric purchased from my local fabric store, Urban Sewciety in September 2022.

1/2 yard of 1/2" wide elastic

Construction:

Since this is my third version, I made no pattern alterations since this fits me. I chose this tie version with the banded sleeves because I haven't made it and I didn't want to make buttons and buttonholes which seem to be my kryptonite lately.  I seem to get stuck there and the garment sits unfinished.

Two things to note about my bodice:

1. I made the banded sleeves with the bodice and struggled to get it on when I tried the top on. Ummmm that's a no for me. So I removed the bands (which was a process) and added a 1" casing.  Then I inserted 1/2" elastic in the casing.

2.  The bodice tie gave me pause.  The way the instructions tell you to sew it to the bodice seemed fiddly.  Then I realized that I could use my bias binding tool to make the tie which made the process make sense to me.  Once I made it as bias binding, it was much easier to add it to the neckline.  I did cut mine with a few extra inches and I made a knot at the finished ends.

Otherwise, adding the bodice to the skirt and hemming it was the same as my other versions.  As always, fabric affects how the dress wears.  Since I used a rayon, it seems to fit a little closer but with more drape.

Here are a few photos:


This was my second completed garment.  I've several more in the queue.  Mostly items that were unfinished but I still wanted or cut out and remaining in my cut out/waiting to be sewn pile. It's been an easy way to transition back into sewing. I don't have to complete a project from start to finish. I can finish a garment that I've already dreamed up that just needs a few steps to be completed.

I've also have a few more ideas floating around that I'd like to make.  We shall see what actually makes it from ideas to my wardrobe.


...as always more later!


Saturday, May 06, 2023

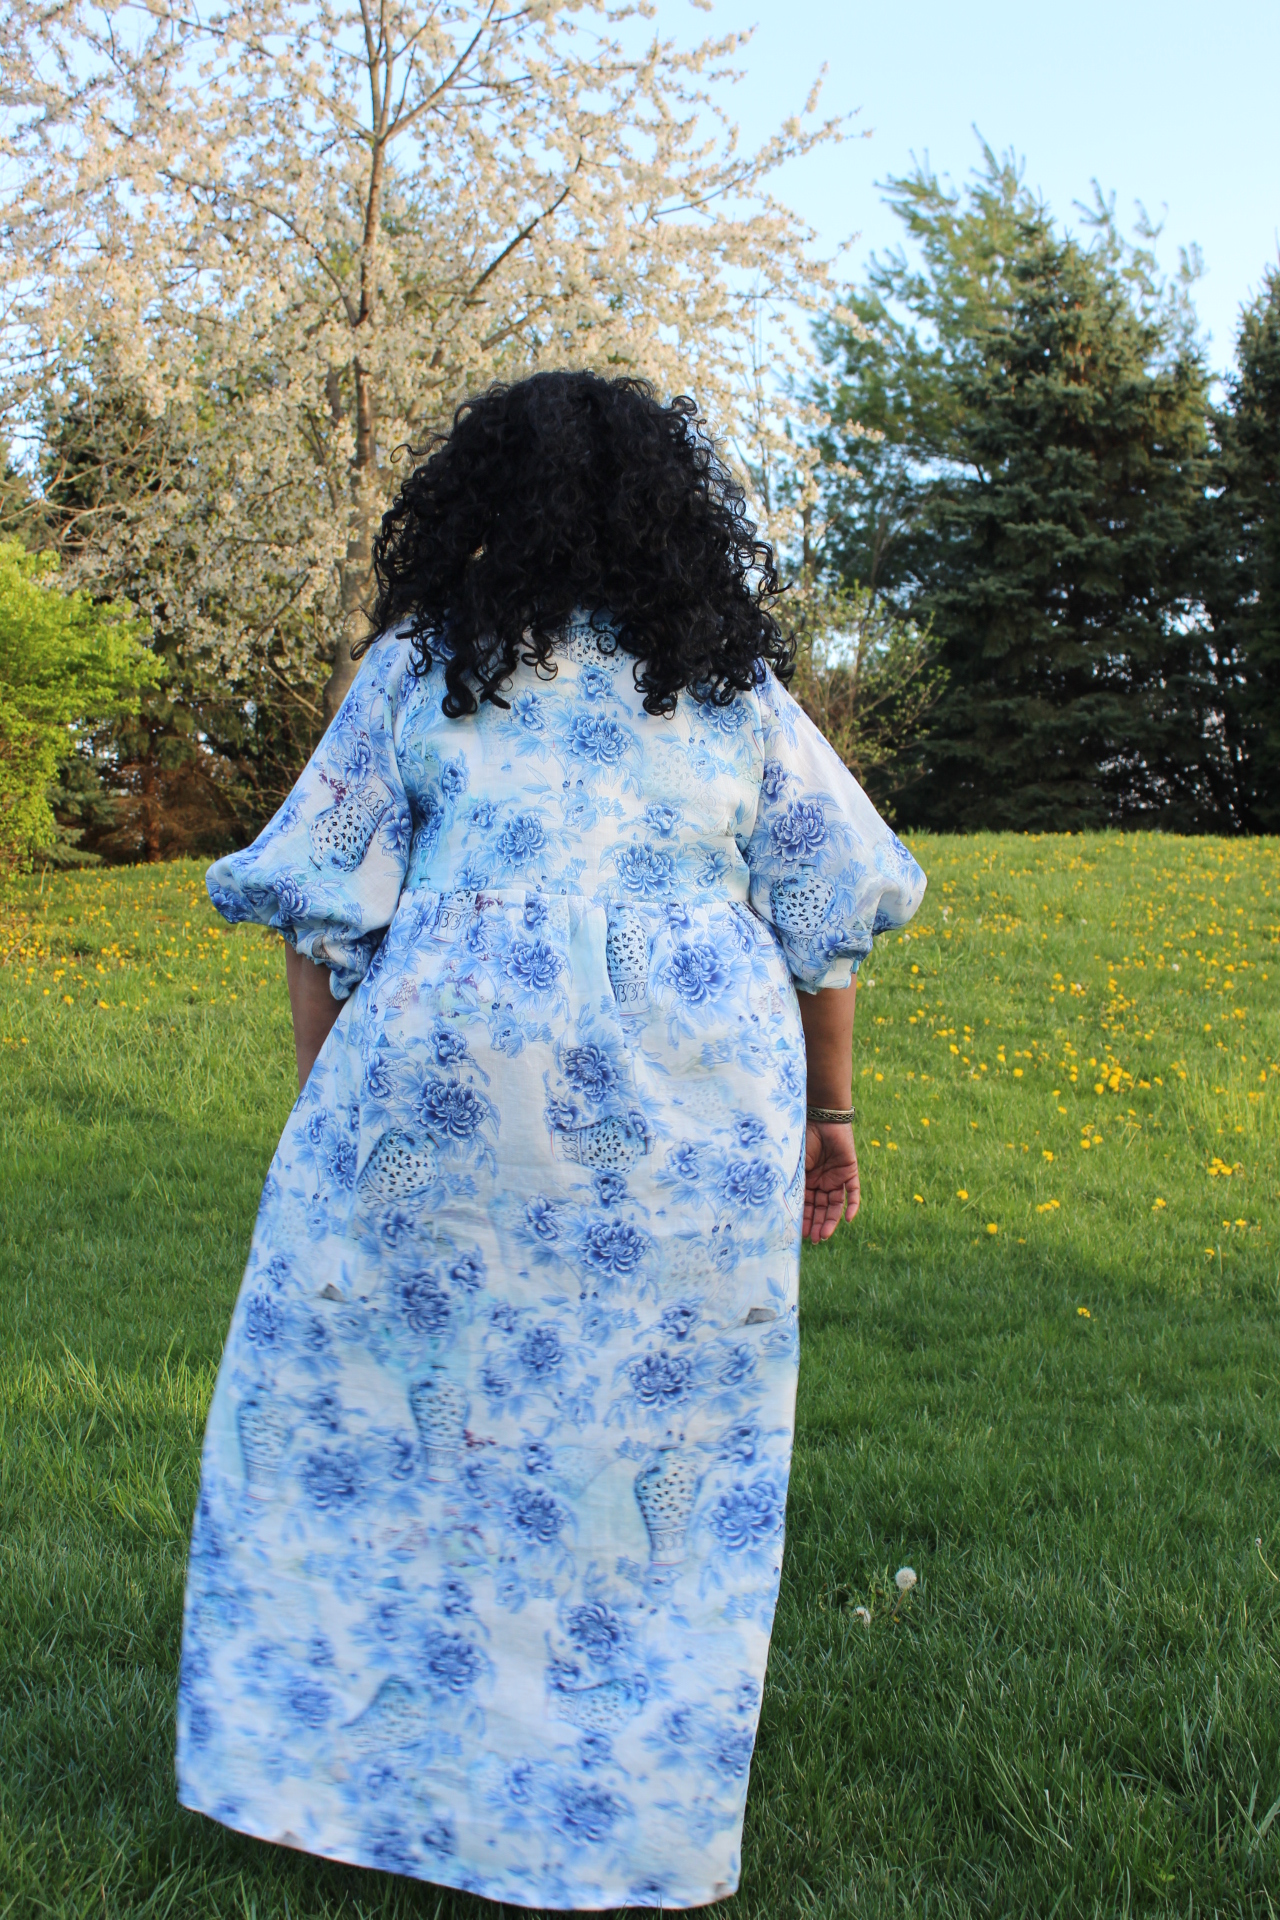
A Blue & White Hope

Last year I was on a real tear to purchase blue & white toile type prints. I ended up buying a blue & white print that was similar to a toile and an actual blue & white toile. I was really proud that I only bought two pieces! I'm even prouder that I'm using one for my next Hope.

Of course this is the Hope Dress using the extension pack and it's exactly the same as the funeral dress.  As with all remakes, I improve something with the next version.  For this one, I shortened the length of the elastic I used in the sleeve hems.  I also left the pockets off this one too.

Materials ~

The fabric is a 100% digital linen shirting from StyleMaker Fabrics purchased last year and it's still available to purchase.  

The four 3/4" white buttons are from my button collection purchased so long ago I have no idea where I bought them. 

I used 26" of 5/8" elastic for the sleeve hem casings.  The pattern recommends 1/4" but that would get lost on my body so I changed it.

That's it.  A nice, easy, relaxing sew where I just took the journey.

A Few Pictures ~


(feeling like a matron on an English cliffside with the wind blowing!)

I have fabric set aside for one more version of the Hope Dress using the bias bound, tie front bodice and the original sleeves.  That will be enough for awhile since I will have three different Hopes in my spring/summer wardrobe (not including the funeral dress).  If you don't have this pattern yet, I highly recommend it!


...as always more later!


Tuesday, April 04, 2023

A Funeral Dress

My cousin recently passed away and I realized that I no longer own a proper funeral dress.  My lifestyle is so casual now and most funerals during Covid either happened via Zoom or YouTube so I didn't need to be "dressed" to attend a funeral.  And if you don't know, a Black funeral is a celebration of life.  So not only is the funeral a celebration of the person but people of my generation tend to dress our best.

So I needed a dress.  I did have enough time to rush order some black linen from Fabric Mart because spring has sprung here on the East Coast. My pattern of choice was the Style Arc Hope Dress using the extension pack. Buttons and black bias binding came from my notions stash.

Construction was easy and didn't take long, 8-9 hours over the weekend, that was cut out to finished dress. 

  • I did add 8" at the lengthen/shorten line and another 1" to the hemline of the skirt pattern piece to maximize the dress.  Probably why the Hope Dress is so popular.
  • The other construction item was I used a 5/8" seam allowance to sew the bodice to the skirt instead of the 3/8" the pattern recommends. This was to cover the 2 rows of basting stitches.  
  • I added my label to the facing.  
  • Then used bias binding to clean finish the facing because I wanted some pretty in the dress, even if I was the only one to see it.  
  • The black & white buttons were from my notions stash and gave the dress a pop...cause seriously all black.

I made this one in a size 22.  The last time I made this dress, I chose a size 26, why? That one the fit was too loose, this one fits way better. 

I know extension packs can seem like they're not worth the money. But this extension pack is GOLD! I have plans to make several more dresses using this button front version and the bias bound neckline. There are some rayons lounging in the fabric collection that would do this pattern with the extension pack justice.

The photos below are how I wore it to the funeral. These were taken right as I got home...


As I stated, I will be making more of these for spring/summer! BTW, I will be off the week after Easter.  A short trip with my grands and then a little sewing. Since the weather is changing, maybe some pictures too...

However, I do have a question, do you have a dress or suit for funerals?

...as always more later!


Monday, November 01, 2021

Style Arc Hope Dress

Like many of you, I own a lot of patterns!  And as you know in 2021, I've been on a mission to sew more new patterns and not just use my TNT patterns.  Since I've accumulated quite a few Style Arc Patterns, they've been on every one of my to-sew lists.

This Style Arc Hope Dress is one more that made the list and my summer cut pile.

(The Model Shot - hahahaha!)

I was attracted to the embellishment possibilities and also because I love a big loose dress in the hot/humid summer.  While I cut this one out in a black/white rayon print, luckily it works well as a transition dress too.


Supplies ~

The coordinating black & white fabric was purchased in 2016 from Marcy Tilton's booth at Sew Expo in Puyallup.

9" black invisible zipper

black corded piping purchased from Daytona Trimmings

All of the supplies for this dress were in-house. I didn't purchase anything to make it happen and that makes me proud!

Construction ~

This is an easy to construct dress.  There are over 300 versions on IG.  You can see them here.  I, of course, complicated my dress. First, I added an invisible zipper to the dress bodice back. I HATE, HATE, HATE, loop and button closures on the backs of tops and dresses. They always make me feel like the button is going to pop open and my back will be exposed. So it was the first thing that had to go.

Even though honestly, I didn't need a back neck opening. My head slides into the dress easily. Meg from Cookin and Craftin did that with her version and I understand why she omitted the back closing.

I was really intrigued by Birdy's version where she added piping to the front and back bodice sleeves. I knew I had to do the same. Birdy used piping that was the same color as her fabric. I wanted piping that would incorporate the black into the white top so I contrasted mine.

Otherwise, all of the sewing construction is the same. I even added the pockets because I was intrigued by how they came together. Totally understand why other sewists are using this method when adding side seam pockets because it gives it a little more elegance.

A Few Pictures ~


Conclusion ~

This is a one and done dress.  While I like the idea of the pattern, it's not a dress I want to own several versions of. Also, mine is just a little too loose. I think I cut a size 26 and could have gone down to a size 24.  Here's a good photo of how much fabric there is...


If you're looking for a dress with a little more fitting, my version ain't it! Will I wear it?  Sure will.  Cause you know there's gonna be one of those hot, humid and sultry summer days and this will be perfect because it won't be touching any skin. Right now I'm gonna wear it with a pair of black tights, the boots in the picture and my black sweatshirt hoodie. Perfect for fall!

I also pushed my sleeves up to give them a little more puff so you can't see the elastic hemline. It is the one feature I like because I'm loving big puffy sleeves right now.

We did take more pictures today...so the Panel Print Shirt is finally up next!


...as always more later!


LinkWithin

Related Posts with Thumbnails