Showing posts with label Butterick 5760. Show all posts

Monday, October 31, 2016

The "Button" Cardigan

I started this cardigan last February right before I went to Sew Expo. It was really cold here and I had no thoughts of the warmer weather ahead. I just wanted to swath myself in wool to stay warm. That's how this cardigan came to be. However, when I got back from SewExpo, I had some unselfish sewing to do. After that all I wanted was to sew spring because Pullayup and Seattle were warm with spring-like temps. This encouraged me to put winter in my rear view mirror.

All of that made this cardigan fall out of sewing favor, so I hung it on the side of the fabric wall (with a few other UFOs) and moved on. Fast forward to last week when the temps took a dive here on the East Coast and I was looking for warm and cozy again.  I remembered this cardigan and since it was almost done tried to figure out what I wanted to do for closures.


See it's a basic brown cardigan, knee length with long sleeves, made from a heavier wool knit from the collection. Whew that was a mouthful! Here is my first idea for some unique hardware on the cardigan front. But when I went to try to install the pieces, I realized that I was missing some screws. I bought these pieces years ago...many, many years ago and there could have been screws then and I'd lost them in the meantime...but who knows. After discussing the hardware with Gaylen and her husband during Sew Expo, I knew I would have to go in another direction.

If you've been reading for awhile you know that I love Lafayette 148. When flipping through their fall selection I happened upon these cardigans with magnetic closures and fell in love. I thought this closure would work for the cardigan. Thus started my search through the notions stores in the Garment District for something similar and I found nothing like I saw in my head.  Loads of magnetic pieces but mostly for bag fronts and not really clothing.


Walking out of Botani I was a little disgusted. I wanted to finish this cardigan up and move on so I crossed the street to Lauren Trimming just to look. It's a newer notion store (up the street from Metro Textiles) and I found these buttons:


They are large but I was captivated by their unusual-ness. Because they are different they will add some zing to the cardigan front. However, I'm NOT making buttonholes for these. Buttonholes that large would be unattractive on the cardigan front. So, I have stitched the buttons to the front and added covered snaps to the backs.

A few more pics of the finished cardigan ~


Cardigan worn open with RTW ponte jeans and
Sewing Workshop Mission Top that I made in 2008.

Sweater coat closed and the buttons do make a statement


1. I have to be honest, I don't remember any of this cardigan's construction. I have no notes about it...which is unusual since I normally jot something down as I'm sewing...even if it is TNT. 

2. I think I used Butterick 5760 as my starting point and lengthened it. 

3. I know it's a wool knit from the collection that I believe is originally from Metro Textiles. 

4. I think I bought it with Ann of Gorgeous Things, years ago.
(Yes, that was me name dropping! *LOL*)

5. The buttons are from Lauren Trimmings purchased last week.

6. The covered large snaps are from Pacific Trimmings also purchased last week.

Of course it's gotten warm here again ~ so warm that we had to hurry up and take these pictures because I was sweltering in the cardigan. I probably won't be wearing the cardigan this week or anytime soon. However, the cold is coming so it will be perfect over jeans and a turtleneck for work during the winter months.

This should have been a quick finish to a UFO. Though it took me all dayum day to sew on five buttons and five pairs of snaps. I don't know what it was about this process that irked me but it took way longer than it should have.

I have a short sewing list of 4 pieces that I'm working on. The list is taken from my longer fall/winter sewing list of 25 items. These are the things that I want to sew right now...some are new patterns and two are repeats.

For my Thanksgiving break this year I'm planning on sewing for my daughter. We've already picked out the patterns, now we have to add fabric to them. So those plans and the items on my list are what I'm planning on sewing in November.  Unless of course, I change my mind!

...as always more later!


Tuesday, January 05, 2016

Butterick 5790 - A Sweater Cardigan

This is version number five for this pattern which is now out-of-print. It is also my first sew of 2016. I need this cardigan for two reasons. One, its turned seasonably cold here in the Tri-State area. I say seasonably because December was unseasonably warm and now the temps are back to normal. Since I sit near the front door at work, my back is always a little chilly. This will keep me warm during the colder temps. 

The second reason is because after a week at home sewing complicated things, I needed something easy to sew...something I'd sewn before...something that would be done in an afternoon.  I'd pulled this fabric out of the coating & heavy sweater knits bins, currently stored in the garage, earlier this fall. As I was taking down the Christmas decorations, it spoke to me...so I had to comply.


The Supplies ~
Wool/lycra blend knit purchased from Fabric Mart years and years ago!
Lightweight Fusible Interfacing from Fashion Sewing Supply
Stay Tape

Pattern Alterations & Construction ~
The last time I made this was in the spring of 2013. Of course there was a little more of me then so I made a few alterations. The main one was to the sleeve. For some reason I couldn't find my altered sleeve pattern, so I made a new one. I made a pattern sandwich using the original sleeve pattern, the one I'm currently using on my TNT dress and a piece of tracing paper. Since the TNT dress sleeve pattern has been recently altered using the Palmer & Pletsch method, I knew it would be fine. I just needed to get the sleeve cap and bicep measurements right.

The side seams were sewn a little wider than the 5/8" recommended by the pattern.  I also included a back seam to make the cardigan fit a little better. It still has a slightly loose look but I'm good with that! So other than the fact that there was ALOT of pressing and clapper usage to get all of those seams flat, it was an easy sew. I mean this is the fifth time making it!


However, I did have one challenge.  The fabric was soooooo thick that I had some issues making buttonholes. Even after I'd pulled these pretty little green glassy type buttons from the stash to use on the cardi front, I ended up omitting them because I killed my sewing machine. Yeap, my 8900 is on the way to the shop. 

Anywoo, I attempted to make the buttonholes on my Janome 6600P but it just wasn't having it. After trying the cardigan on, I decided that I would go ahead and wear it without the buttons. Later once my machine is back, I can make buttonholes or I can take the cardi to the buttonholers in NYC. Thanks Gaylen for reminding me of that!

Some photos of the cardigan in action ~


Conclusion ~
This cardigan will be perfect for the cold weather. It works with my leggings, looks stylish and Chico's Chic. Yeah, this is my new buzzword to describe my work wardrobe. So even though this was my last sew of the Christmas Break, I'm featuring it on the blog first. In an amazing coincidence, Shams interlined her new Minoru jacket with the same fabric I used for my cardi. I guess this is what happens when different sewists collect the same fabric!  However, both pieces will be used to keep us warm.

I made five items during the Christmas Break.  They will be appearing here soon, so stay tuned. Finally this was also one of the last garments we photographed on Sunday and as usual I was starting to get a little goofy by that time. 

So here are a couple of those pictures ~


...as always more later!


Sunday, December 01, 2013

Crazy 8 Outfit Planning

Lately in my blog travels, I visited Dana's blog, Lean Mean Sewing Machine. Dana was sharing her latest makes and how she was incorporating the Crazy 8 wardrobe planning into her sewing.


Stitchers Guild recently announced their 2014 SWAP competition requirements and sewists plans are showing up on their blogs.  I love SWAP and wardrobe sewing and have toyed with the idea of participating ~ but the requirements and sewing 11 garments that work together has held me back.  It just seemed overwhelming and like my sewing would be too planned when I'm looking forward to more sewing whatever.  

However, 8 pieces that will work together yet still work with my wardrobe is quite appealing to me.  I feel like this ties in with my current creative desires to sew garments that will work together but yet be separates.  Also at any point if I want to stop I can. Yet I will still end up with some wonderful new pieces in my wardrobe.

So here is what the Crazy 8 Plan is comprised of:
  1. One jacket
  2. One cardigan
  3. Two tops
  4. One blouse
  5. One pair of pants
  6. One skirt
  7. One dress

Here's what I want to make ~

Jacket 
I will be using Vogue 7975 if possible.  It's my first choice but this may change.  I really want to use this pattern before the winter is over and this plan would allow me to do so.


Cardigan 
I will use my Butterick 5760 TNT pattern.  I have the fabric picked out for this one already ~ a panel print for the fronts in red/black/white/grey and cotton black ponte for the back and sleeves.

Tops 
One will be from my TNT dress pattern.  The second one will be a RTW bow tie blouse that I bought and need to alter to make fit me well. Gotta figure out that third top. I have fabric options for only the first top.


RTW floral long sleeve bow tie blouse
with pintucks on the front

Pants 
Will be made from my TNT pants pattern.  I'm using a black medium weight/heavy weight black wool crepe that I purchased from Fabric Mart earlier this year.

Skirt 
Made in a black/white plaid wool fabric from the collection using my TNT straight skirt pattern.

Dress
I will use Vogue 8944, Version A, the sleeveless version in three different colors of wool.  A vanilla white crepe for the top, red wool double knit for the center and black medium weight wool crepe for the skirt.  Haven't decided if I will use the red or white fabric for the back top.  I think the dress will tell me as I'm sewing it.


Fabric Choices
As much as I love color in the winter... you can see that I've got a black/red/white/grey combo.  I know it's not original but it works for my corporate life. Here is the combo I'm using...


Left to right:  
polyester panel print, cotton black ponte, black/white plaid wool
mediumweight black wool crepe, red wool doubleknit, 
vanilla white wool crepe


I have to say that I'm pretty thrilled with my fabric collection right now, because all of these pieces were pulled from the shelves.  I love my fabric collection, truly I do! Pulling the fabric and choosing patterns, have inspired me and reignited my sewing mojo.

I've already started working on the pants. Hey it's cold and I wanted a new pair since I've recently put a couple of pairs in the pile to go to the dry cleaners.  There will be a lot more discussed here about this plan as the month progresses ~ especially since it fits into my sewing separates thing that I've got going on in my head.

...as always more later!


Sunday, May 19, 2013

Is Five Black Suits Enough?

My latest make is another black suit.  Hey I work in a conservative banking environment and these work.  As I said in my previous post, I have a month of meetings ahead and I wanted a new black suit to wear.  There is nothing new about the patterns or construction.  I went with TNT patterns and some ponte knit fabric to make one more black suit...


Some stats ~

Fabric:
Black ponte knit from Mood Fabrics
Polka dot cotton/silk from the collection

Patterns:
*Butterick 5760 for the cardigan
*TNT pattern for the straight skirt. 
*I would recommend McCalls 3830 if you don't already have a straight skirt pattern.

Notions:
*Buttons from Sawyer Brook Fabrics
*Loose small gray plastic pearls from Daytona Trimmings
*Black Rayon Seam Binding
*Strips of black ltwt. fusible interfacing from Fashion Sewing Supply

All of these items came from the workroom (what I'm now calling my sewing cave) except for the black ponte which was a recent purchase from Mood's NYC store.


Cardigan Jacket details...
  • The Jacket is unlined.
  • The seams are serged finished.  I was going for complete not couture.
  • I topstitched the center back seam and the shoulder seams.  The jacket front and sleeve hems are top stitched using a twin needle.
  • I thought about adding pockets to the jacket front and decided against it.

Buttons ~
I consider buttons to be like jewelry on the front of a garment. I wanted a plain black button for the front with a little pizzazz.  The button needed to not only work with the jacket but to also work with anything I chose to wear under it.

I started with these buttons...


...and added some gray plastic pearls that were in the notion stash.


I love how the finished buttons look.


Skirt details...

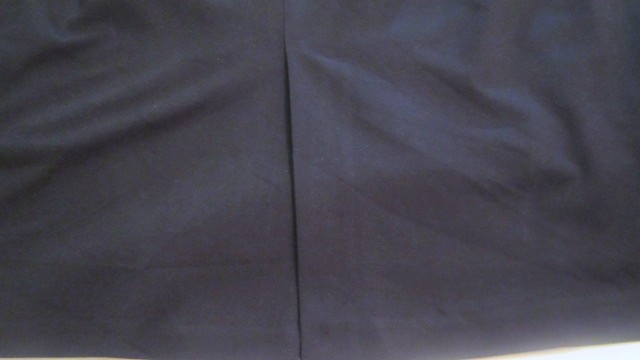
The skirt is a lined straight skirt with a back vent instead of a slit.

Silk cotton polka dot lining

Vent flipped back to show lining

Back view with vent closed

I started a Sewing Workshop Mission Top made with the lining fabric to go with the suit. I've used this idea before with another black suit and it worked so well that I thought I would give it another go. The top is not done so I will finish it during my short vacay later this week to wear with the suit at another time.  

However, when I wear this to work tomorrow, I will wear it with the white t-shirt that I used for the pictures...


It was a simple sew.  Hey, it always is when I use TNT patterns...just a little time consuming.  Another black suit that will work for several seasons has been added to my work wardrobe, just what I needed.  

Next up is the prom dress that I'm making for my niece.  It's my Mood project for June and I've already started construction on the dress using Butterick 4343.

...as always more later!


Wednesday, November 28, 2012

Let the Pictures Speak!

The garments in this post have been featured in their own respective posts, so I'm just going to let the pictures speak...

First the Butterick 5760 Cardigan, blogged about here.  

Pictures of me wearing it along with Vogue 1250 top and the wool crepe brown pants ~ all are part of The City in Winter Wardrobe.


The Vogue 1250 top was blogged about here.

This is one of my favorite summer dress patterns so it was about time that I shortened it and made it into a top.


This outfit is a holdover from a few weeks ago but this was my first opportunity to get pictures of me actually wearing it...and I have to tell you I was surprised by the weight and warmth of the cardigan.  Since this is my fourth make using this pattern, I never bothered to try it on during the construction process.  This combo is professional yet sassy and will keep me warm yet not so warm that I won't wear it...essentially it's perfect!

...as always more later!

Sunday, November 11, 2012

Butterick 5760 - a little of this & a little of that...

Sooooo, I sewed yesterday.  Or maybe I should say I did a lot of pressing then!  *LOL* I got to the sewing cave and I started working on the sweater jacket...and ended up going in a totally different direction.  First I decided that I needed pockets on the jacket front.  What?  I nevah want pockets...but in this instance I clearly saw pockets on the sweater jacket front.


But how to get them there?  And how to make them stand out on the jacket front without them fading into the fabric?  Should I use buttons?  Or a trim?  I was stumbling around a little because I had no clear plan since this was an off the cuff sew.  

To solve the pocket issue, I used the pocket pattern piece that was included with the jacket that's part of the pattern's wardrobe pieces.  This was a big pattern piece that I cut down to fit not only the front of my sweater jacket but also to allow me to jam my hands into them. 

Once the pocket pattern piece challenge was resolved, my next issue became how to make the pocket stand out.  That's when I thought of the new faux leather I just received.  I bought quite a bit of this fabric ~ to use for a piece in a dress, to make a skirt and for some embellishments.  I'm now thinking I might need to get more since there are so many pieces of leather and faux leather in the designer collections for Fall 2012.  

Anyway, I decided to use the faux leather to finish off the edge of the pocket, the hemline and the neckline.  I went back and forth over whether or not to put some on the sleeve hems and finally decided to stick with my "Rule of Three."  

Pocket being applied to sweater jacket front

Faux leather applied to the neckline

Some stats:
Fabric ~
Double sided cabled wool blend sweater fabric

Notions ~
6 - 7/8" Gold Buttons from the collection
2" strips of faux leather cut from the new yardage

Machine Settings ~
* A teflon foot was used to sew the faux leather to the jacket & pockets
* A size 14 stretch needle was used per Sandra Betzina's book, Fabric Savvy.
* Stitch length was set at 3.2, though Sandra Betzina suggests a 2.5 stitch length.

Some other construction information...
Because the fabric was so thick, all of the seams were stitched first on the sewing machine and then serge finished.  This caused the seams to be a little wavy.  To correct this, I pressed them flat using a lot of steam, a silk organza pressing cloth and my clapper, then stitched them flat.  This was done to all the seams, center back, side seams and front bands.  I need to state that this was a time consuming process.  I left the clapper on for a good 2-3 minutes for each portion of the seam to insure that the seams were flat.


While working on the front piece, I must have pulled the right side because the hemline was uneven at the front - AFTER I put the leather strip on.  I debated whether I could pass this off as a design feature, then broke down and removed a portion of the hemline so that both sides would match at the center front.  This meant also removing the faux leather and reapplying it...sewing in the original stitching so that the holes wouldn't show on the finished hemline. Even then, I had to add some stitch witchery to the back of the seam to hold it together because I just couldn't add anymore stitching.


For the buttons I went with the larger gold ones and actual buttonholes.  I know originally I said that I was going to use snaps but that's when I was making a quick and easy sweater jacket.  Once I'd fallen into complicated and complex, it just seemed natural to torture myself by adding buttonholes to the VERY thick front bands.  But the buttonholes went on easily...much easier than I'd anticipated. 

A machine stitched hem was added to the sleeve hems...then the buttons were stitched onto the sweater jacket front bands and my no longer quick and easy sweater was done.

A few more pics on Lulu.  The fashion photo shoot will happen next weekend when my photographer is available.

Sweater jacket open on Lulu

Sweater jacket partially buttoned

Side view with sleeve in pocket

Back view of sweater jacket

Sweater jacket w/Vogue 1250 top

Sweater jacket, V1250 top, TNT pants
all pieces from the CIW Collection

Another piece completed for The City in Winter Collection and I love that it's hefty and warm which I think I'm going to need this winter!

...as always more later!


Wednesday, November 07, 2012

The Next Piece in the Collection...

So Sunday night I finally got the urge to sew...yeah, I know right before I had to go back to work...but in my defense I wasn't sure I was going to work on Monday because the building had no heat...there was a chance that I would be home with the ability to sew.  However, that hope was dashed late Sunday evening.

Anyway, the dresses that I'd planned prior to Hurricane Sandy had no pull. I wanted something quick and easy.  So I went looking for the lightweight knit that I'd wanted to use for Butterick 5760 but there are ALOT of garbage bags full of fabric in the dining room...don't believe me...see for yourself...


It was just easier to put my hand in a bag and pull out a piece...this is what emerged...

It was the perfect piece because not only does it go with my current wardrobe plan but it uses the pattern that I wanted...Butterick 5760.  Here is where it stands now...

I've decided to use large snaps to close the cardigan especially since the fabric is thick. Then I will sew buttons on the top of the bands for a fancy finish.  I've yet to go through my button collection to find an appropriate button...but I know that I want something sparkly and fun...jewelry like.  This may mean a trip to the garment district but I'm hoping that there is something in the collection.  Okay I'm really hoping there is something in the collection...*sigh*

BTW, my internet service is on again so everything is back to normal...just in time for the nor'easter that arrived tonight. I trudged home in falling snow and blowing winds and they're predicting 3-6" of this stuff.  I guess I can live with it as much as I hate snow...because at least it's not rain!  I'm hoping that I can get those garbage bags full of fabric back into the sewing cave, soon...and it will be easier to do without alot of rain and flooding!

If everything remains the same, I will be sewing this weekend...here's hoping!

...as always more later!


LinkWithin

Related Posts with Thumbnails