Showing posts with label The City in Winter Collection. Show all posts

Wednesday, February 20, 2013

The last pair of pants in the City in Winter Collection

I saw this image in an email and the idea of the longer cardigan, white shirt and a pair of pants resonated with me.  As I said in my last post, I didn't have much of a sewing mojo until I decided to resolve the basics issue in my wardrobe.  So this idea touched my creative nerve and brought my sewing mojo roaring back...on the last day and a half of my sewing vacay!  *LOL*

There is nothing new in the construction of these pants.  I started with my TNT pattern...so for all of you looking for pant fitting info., I have none to offer in this post.  I started working on this pants pattern almost 15 years ago and in the interim I've enlarged it to fit my growing abdomen/behind, changed the size of the legs and added length as needed.

I did add a half inch to each side of the front pieces only.  Some days I need a little extra in the abdomen and some days I don't. But I'd rather my pants have a more trouser fit than a pants fit...me and tight aren't besties like that!  I also added an inch to the hemline because I plan on wearing higher heels with these pants (but after seeing the pics, I think I'm gonna re-hem them a little shorter). 

Finally I lined them by serging the lining to the fashion fabric and then sewing the lined fashion fabric as one piece.  I finally settled on this application for lining pants for several reasons.

1.  I used the flat lining technique on a pair of pants two years ago.  I wear the pants but only when it's really cold and when I'm pushed up against the wall. By the end of the day that seam starts to irritate the heck out of my inner thighs.  I don't experience this with the serged seam.

2.  I haven't experienced lining failure since I started using this lining technique. Seriously!  It's probably because the two fabrics no longer work against each other.

3.  I'm tired of remaking pants.  My linings are shredding right at the inner thighs and I don't have this problem when the lining is serged to the fashion fabric.

Also, I love the heft the fabric has once the lining is attached directly to the fabric.  The pants feel weighter which is what I want in a pair of winter pants.  Don't forget that I wear elastic waist pants.  They just work for me and I'm now unrepentant about that fact!  *LOL*


Me attempting to "model" like the ad!
Why did my daughter think this was a good idea ~ LOL!

One more thing...I wear trousers and not pants.  Personally I abhor when pants cup the buttocks and give me a full view of what you're working with.  I like the look of trousers...where the pants fit the buttocks but then gently flow into the legs no cupping involved.  And for one time only...never to be seen again...I'm including a picture of the buttocks on my pants so you can see what I mean.


Lord have mercy can't believe I'm sharing this view with you!  *LOL*

I'm wearing these trousers with the cardigan which was the starting piece for the City in Winter Collection.  The cardigan is also the bridging piece bringing the brown and the gray pieces together. So there are now just two pieces left to finish in the City in Winter Collection...a skirt and a jacket from this gray wool crepe.  The two dresses and blouse are going away.  I have more than enough pieces in this collection to coordinate with each other so I'm calling it done when these last two pieces are sewn.

...more views...


See nothing exciting, sexy or slimming about these pants but very much needed in this weather!  BTW, based upon your comments, which I sooooo appreciate, my next post will be all about taking apart a pair of sewn-by-me pants and remaking them.

...as always more later!


Monday, January 28, 2013

Vogue 8208 - The Jacket is Done

This jacket is part of my City in Winter Collection.  I've been sewing this collection since last October. As you know I wanted to create a versatile wardrobe that I could use for any part of my busy life ~ work, dates out with friends and church. I've finished quite a few pieces but I was dragging my feet making the jacket.


The jacket is from Vogue 8208 which is an out-of-print pattern that has been reviewed several times on Pattern Review...and now I know why there are only four reviews for it!  This jacket is a very involved sew with a lot of pieces!  I also decided to line an unlined jacket which added quite a bit of time to the jacket's construction.


I liked this pattern (notice I used the past tense here!) because the military influence was big for Fall 2012.  I thought this pattern encapsulated that trend well and it was already in my pattern collection.  It also worked with the basic bottoms I've already made.

Some stats:
Fabric ~
Brown wool crepe from Mood.  I bought mine at the NYC store but there is quite a selection online and if you specifically want brown it's here.

Notions ~
black silk organza 
brown rayon bemberg lining
10 7/8" buttons
fusible interfacing from Fashion Sewing Supply

All of the pattern alterations can be found in this post and the construction details are in the last post.


As you know, I did omit a few things. There is only one breast pocket without a flap.  I thought that all of those flaps were a little too much for my body.  The pattern calls for you to cut the back pattern piece on the fold. I added a center back seam to get a better fit.  I also shortened the length of the cuffs.  Not only did I add a lining but I also underlined the jacket in silk organza to enhance it's wearability factor.

All of that work and honestly, I HATE this jacket.  Not because it doesn't look good on me, or that it doesn't work with the bottoms, but because it's construction was difficult...too difficult!  There was no joy in sewing it.  I don't even know if I would have finished it, if it hadn't been a Mood Project.  I'm sure you're asking why since from the pics it looks decent.  Well, I removed those pockets 4x! Seriously 4x!  I measured and remeasured them before BASTING them to the jacket front several times. Even with all of that, they still had to come off again and again until I was in tears and wanted to throw the dayum thing in the garbage.

Usually it's fit that ruins a pattern for me.  This time it was the actual pattern and the degree of difficulty in achieving perfection.  Now I'm not a perfect sewist but I don't want my garments looking Becky Homecky and if I hadn't gotten the pockets right, it would have.  So enjoy the pretty pictures.  I've worn this to work and now I will bury it deep in the back of my closet until I'm no longer scarred by the trauma of making it!


I'd really wanted to make the belt that goes with this jacket but by the time I got the buttons sewn onto it, I was done.  Done and more done! *LOL*  I have about two yards of the brown wool crepe left.  My original plan was to make a dress from Vogue 8828...that's not happening now.  I'm thinking another version of my TNT dress just so that I can move onto the pieces that are going to be made from the gray fabric. 


I'm really ready for this collection to be completed and since the gray pieces are all made from TNT patterns hopefully, I can knock them out by President's Day weekend.  

So even though I worked my way through the pain and ended up with a wearable garment, it will see the back of the closet until the memories of it's birth have faded away.  Hey I have other toppers from the collection that can be worn with the basics so it's not like they won't be worn!  The jacket is done.  It challenged me.  It made me cry.  It's wearable...and now it will be put away for another day.

...as always more later!

Sunday, January 27, 2013

Vogue 8208 - Construction Details

Jackets are not easy sews for me.  I can construct them but lining them, that's a whole 'nother story. I'm just not as proficient at lining them as I am of other garments.  To make sure that I didn't screw this up, I watched a how-to video on lining jackets on the Power Sewing site. I picked up quite a few useful tips from Sandra Betzina and Ron Collins.  

As an aside, if you're not a member of Sandra Betzina's Power Sewing site, I highly recommend joining especially since she's running a special this month.  She has an awesome number of videos on her site that will assist you in taking your sewing to the next level.  I found this short video on YouTube, in case you've never seen her and Ron in action.


Construction ~
In my last post I mentioned that I was cutting out the fashion fabric, silk organza and lining fabric. I added silk organza to the construction of the jacket because it works as such a great stabilizer of wool crepe without changing the hand of the fabric.  The silk organza also helps with minimalizing the fabric's wrinkling.  It's just a great extra layer to add to wool crepe.


Pockets ~
There are a lot of pieces to this jacket.  It took hours just to make pockets and flaps and to get them situated on the jacket front.  The pattern has you apply unlined pockets to the jacket front.  I didn't want unlined pockets because I was worried that with the drapiness of the wool crepe that they would bag and sag. So not only did I line all four pockets but I also added interfacing to the upper part that folds into the pocket.  The pattern calls for you to add a button to that part of the pocket, so I wanted to stabilize that area.


I was also concerned about the placement of the pockets on the jacket.  It would be very easy to end up with crooked pockets.  To insure that didn't happen, I hand basted all of the pockets and the flaps to the jacket front before stitching them down.  Now there are two small breast pockets with flaps and two lower pockets with flaps on the jacket front.  While I like the look on the pattern envelope, I knew I didn't want that much pocketage on me!  Yeah, I know I just made that word up but you know what I mean! *LOL*  For the top pockets I omitted the flaps on the pockets and just made buttonholes in them for the buttons.


Of course I didn't get the pockets on straight the first time, or the second time or even the third time!  That would have just been to perfect...no, I had to remove two of them and reapply them after carefully measuring the fronts.  I was going to leave them a little crooked and be satisfied with good enough but as I completed an additional piece of the construction the crooked pockets stuck out like sore thumbs!  So off they came again, once even after they'd been topstitched.  Thank goodness the fabric had been underlined with the silk organza or I could have possibly ruined the fabric...*sigh*


See why one of these had to go!

Topstitching~
Each pocket was topstitched onto the jacket front.  I was a little more "perfect" with this because having the pockets basted onto the jacket front made it easier to move the jacket around on my sewing machine.


Topstitching samples
  
So you know I'm sewing this on my new sewing machine and even that is taking me a minute to acclimate myself to.  Things are similar to the 6600P but after sewing on the 6600P for several years I knew where everything was without thinking about it.  Since I'm still unfamiliar with the 8900, it takes some searching to find things.  Such was the case with my favorite topstitch pattern.  At first I couldn't find it and almost pulled out the 6600P but I kept spinning the silver wheel and finally it popped up.  

Final Construction Thoughts ~
  • I thought that the collar would be my downfall but that sucker went on easier than easy!  It topstitched up well and was easily applied to the jacket.  
  • Then it was the lining's turn.  I started this post by saying that I'm not proficient, okay let's go as far as saying, that I avoid making jackets and sewing their linings like the plague.  There are things that each sewist is good at making, mine is dresses not jackets and this lining is good but doesn't deserve a gold star.  Thank goodness for the lining video at Power Sewing because I literally watched it, stopped it, sewed and started it again.  I will definitely be renewing my subscription to Power Sewing!
  • Lining the sleeves - I didn't exactly bag the lining.  I used all of Sandra's techniques but since I was adding cuffs to the sleeves, I basted the lining to the sleeve hem and then sewed the cuff on.
  • The cuff pattern was long...way too long!  I ended up cutting an inch and a half off the pattern to get a cuff that fit me better.  I also ended up adding just one additional pleat to make the sleeve fit into the cuff.  So my pattern alterations worked.  Here's a pic of the finished cuff...

The jacket is finished and I will share it with you tomorrow...suffice it to say that I don't have much love for it...and will share this tale of woe then!

...as always more later! 


Saturday, January 19, 2013

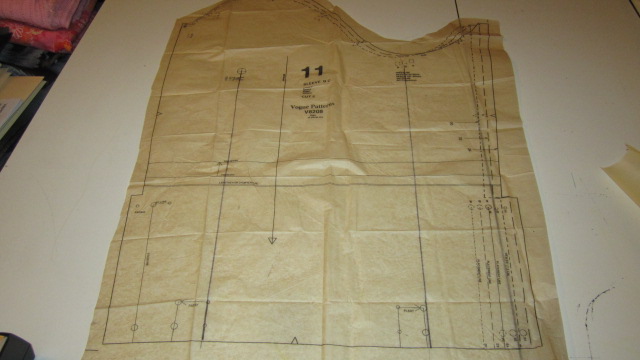
Vogue 8208 - Pattern Alterations

Vogue 8208 is an out of print pattern that was issued in 2006.  There are four reviews of the jacket on Pattern Review.


The pattern envelope's description of the pattern is ~ loose fitting, unlined jacket, below waist or below hip has collar, pockets with flaps and short sleeves with turnback cuffs or long, two-piece effect sleeves with button cuffs.

I chose to make this jacket because one of the top trends for Fall 2012 was military. I thought this jacket emphasized this look. Plus I've wanted to use this pattern for the last six years, so it's about time it took it's turn in the spotlight. Now even though this jacket has no lining, I will line it...more about that later.  I want to describe the pattern alterations in this post.

Of course, there were several alterations to the body of the jacket because the finished hemline measurements were 53" and I wanted a little more space in the jacket.  This jacket is being made to coordinate with the skirt and pants already sewn for "The City in Winter Collection", as well as, a future dress.  So I wanted some additional width in the jacket for turtlenecks, tops and dresses to fit under it comfortably. 

However, the most extensive alterations were made to the sleeves.  You see the fact is that even though the treadmill is strengthening my legs and helping with the measurements on my bottom half, my arms/biceps are increasing in width...incremental 1/4 inches but growing just the same.  Now I don't want to turn this into an exercise/surgical discussion because they are what they are but it is requiring me to rethink how I do pattern alterations to sleeve pattern pieces.

Last year I took the easy way out.  I used jacket patterns with raglan sleeves because the sleeve has a lot of design ease that I used as fitting ease.  I also think it's why I'm unhappy wearing jackets...the need to get sleeves to fit without binding my arms throughout the day.  Sweaters and cardigans from knit fabrics are just easier to wear and probably accounts for my current love affair with them.

All of that to say that I'm experimenting with how to get more ease into the biceps area of a pattern without adding a lot of space at the sleeve's hemline, especially since I have smaller wrists.  Please realize that this is my journey.  I'm not sure if this is the correct way to make these alterations.  I'm borrowing from a whole lot of places to get the pattern to work for me and honestly that's what I'm most concerned with...getting a sleeve pattern that will work for my body! 

The good thing about this sleeve pattern is that it has tucks in the pattern to assist you with inserting it into the cuff.  This is fantastic because any additional space at the hemline can be pleated into the cuff. Yes!

Here are my sleeve alterations:

Original sleeve pattern

Sleeve folded to figure out where to add
space to the sleeve

Lines made in the pattern to add space in 2 places

New sleeve traced out after adding to the biceps

New sleeve pattern over sleeve pattern
that was cut & spread

I was reading how Lynn made some changes to a sleeve pattern on her blog, "Wonderfully Made" and had an aha moment.  You see Lynn made this wonderful Chanel-esque jacket and she had some challenges with the sleeve.  Her solution is in this post and upon reading it I thought I can use that. Using her idea is how I added the needed space to the bicep area of my sleeve pattern ~ pictured above. Thanks Lynn for sharing that!

I've moved onto cutting out the fashion fabric, lining and silk organza underlining. Yeah, I'm going all out in sewing this jacket...mind you sewing a jacket not tailoring one!  I'll be back tomorrow with construction info. Hope you're having a wonderful sewing weekend!

...as always more later!


Wednesday, November 28, 2012

Let the Pictures Speak!

The garments in this post have been featured in their own respective posts, so I'm just going to let the pictures speak...

First the Butterick 5760 Cardigan, blogged about here.  

Pictures of me wearing it along with Vogue 1250 top and the wool crepe brown pants ~ all are part of The City in Winter Wardrobe.


The Vogue 1250 top was blogged about here.

This is one of my favorite summer dress patterns so it was about time that I shortened it and made it into a top.


This outfit is a holdover from a few weeks ago but this was my first opportunity to get pictures of me actually wearing it...and I have to tell you I was surprised by the weight and warmth of the cardigan.  Since this is my fourth make using this pattern, I never bothered to try it on during the construction process.  This combo is professional yet sassy and will keep me warm yet not so warm that I won't wear it...essentially it's perfect!

...as always more later!

Sunday, November 11, 2012

Butterick 5760 - a little of this & a little of that...

Sooooo, I sewed yesterday.  Or maybe I should say I did a lot of pressing then!  *LOL* I got to the sewing cave and I started working on the sweater jacket...and ended up going in a totally different direction.  First I decided that I needed pockets on the jacket front.  What?  I nevah want pockets...but in this instance I clearly saw pockets on the sweater jacket front.


But how to get them there?  And how to make them stand out on the jacket front without them fading into the fabric?  Should I use buttons?  Or a trim?  I was stumbling around a little because I had no clear plan since this was an off the cuff sew.  

To solve the pocket issue, I used the pocket pattern piece that was included with the jacket that's part of the pattern's wardrobe pieces.  This was a big pattern piece that I cut down to fit not only the front of my sweater jacket but also to allow me to jam my hands into them. 

Once the pocket pattern piece challenge was resolved, my next issue became how to make the pocket stand out.  That's when I thought of the new faux leather I just received.  I bought quite a bit of this fabric ~ to use for a piece in a dress, to make a skirt and for some embellishments.  I'm now thinking I might need to get more since there are so many pieces of leather and faux leather in the designer collections for Fall 2012.  

Anyway, I decided to use the faux leather to finish off the edge of the pocket, the hemline and the neckline.  I went back and forth over whether or not to put some on the sleeve hems and finally decided to stick with my "Rule of Three."  

Pocket being applied to sweater jacket front

Faux leather applied to the neckline

Some stats:
Fabric ~
Double sided cabled wool blend sweater fabric

Notions ~
6 - 7/8" Gold Buttons from the collection
2" strips of faux leather cut from the new yardage

Machine Settings ~
* A teflon foot was used to sew the faux leather to the jacket & pockets
* A size 14 stretch needle was used per Sandra Betzina's book, Fabric Savvy.
* Stitch length was set at 3.2, though Sandra Betzina suggests a 2.5 stitch length.

Some other construction information...
Because the fabric was so thick, all of the seams were stitched first on the sewing machine and then serge finished.  This caused the seams to be a little wavy.  To correct this, I pressed them flat using a lot of steam, a silk organza pressing cloth and my clapper, then stitched them flat.  This was done to all the seams, center back, side seams and front bands.  I need to state that this was a time consuming process.  I left the clapper on for a good 2-3 minutes for each portion of the seam to insure that the seams were flat.


While working on the front piece, I must have pulled the right side because the hemline was uneven at the front - AFTER I put the leather strip on.  I debated whether I could pass this off as a design feature, then broke down and removed a portion of the hemline so that both sides would match at the center front.  This meant also removing the faux leather and reapplying it...sewing in the original stitching so that the holes wouldn't show on the finished hemline. Even then, I had to add some stitch witchery to the back of the seam to hold it together because I just couldn't add anymore stitching.


For the buttons I went with the larger gold ones and actual buttonholes.  I know originally I said that I was going to use snaps but that's when I was making a quick and easy sweater jacket.  Once I'd fallen into complicated and complex, it just seemed natural to torture myself by adding buttonholes to the VERY thick front bands.  But the buttonholes went on easily...much easier than I'd anticipated. 

A machine stitched hem was added to the sleeve hems...then the buttons were stitched onto the sweater jacket front bands and my no longer quick and easy sweater was done.

A few more pics on Lulu.  The fashion photo shoot will happen next weekend when my photographer is available.

Sweater jacket open on Lulu

Sweater jacket partially buttoned

Side view with sleeve in pocket

Back view of sweater jacket

Sweater jacket w/Vogue 1250 top

Sweater jacket, V1250 top, TNT pants
all pieces from the CIW Collection

Another piece completed for The City in Winter Collection and I love that it's hefty and warm which I think I'm going to need this winter!

...as always more later!


Wednesday, November 07, 2012

The Next Piece in the Collection...

So Sunday night I finally got the urge to sew...yeah, I know right before I had to go back to work...but in my defense I wasn't sure I was going to work on Monday because the building had no heat...there was a chance that I would be home with the ability to sew.  However, that hope was dashed late Sunday evening.

Anyway, the dresses that I'd planned prior to Hurricane Sandy had no pull. I wanted something quick and easy.  So I went looking for the lightweight knit that I'd wanted to use for Butterick 5760 but there are ALOT of garbage bags full of fabric in the dining room...don't believe me...see for yourself...


It was just easier to put my hand in a bag and pull out a piece...this is what emerged...

It was the perfect piece because not only does it go with my current wardrobe plan but it uses the pattern that I wanted...Butterick 5760.  Here is where it stands now...

I've decided to use large snaps to close the cardigan especially since the fabric is thick. Then I will sew buttons on the top of the bands for a fancy finish.  I've yet to go through my button collection to find an appropriate button...but I know that I want something sparkly and fun...jewelry like.  This may mean a trip to the garment district but I'm hoping that there is something in the collection.  Okay I'm really hoping there is something in the collection...*sigh*

BTW, my internet service is on again so everything is back to normal...just in time for the nor'easter that arrived tonight. I trudged home in falling snow and blowing winds and they're predicting 3-6" of this stuff.  I guess I can live with it as much as I hate snow...because at least it's not rain!  I'm hoping that I can get those garbage bags full of fabric back into the sewing cave, soon...and it will be easier to do without alot of rain and flooding!

If everything remains the same, I will be sewing this weekend...here's hoping!

...as always more later!

Tuesday, October 30, 2012

Vogue 1250 as a top

I love Vogue 1250 as a dress.  It's comfortable and easy to wear.  It sews up quickly and can be made out of several different types of knits...I know because I've made it in everything from a ponte knit to a silk jersey.  So for awhile now I've been thinking of altering this pattern and using it as a top.

You would think that I would be concerned about the drapey neckline in a fall top but I've decided to add a camisole beneath it ~ layers are always great in the fall. I've also found that lately it has to be extremely cold for me to wear something close-fitting at my neckline...especially now that my internal thermometer is doing it's own thing!


So when I found this rayon knit and realized that the print would work with both the brown (already completed) and the gray (yet to be sewn) pieces for the CIW wardrobe, I leapt at the chance to make V1250 as a top.


I made new pattern pieces for the top.  I added a hemline 9" from the waistline curve on the front piece, then traced the top of the dress piece out.  I placed the back top and skirt piece together, then traced the back as one piece straightening out the curved hemline.

Otherwise the top was constructed the same way that I made the dress.  There is a center back seam.  I used the same stitch witchery tip for the back neckline as I did with the last two dresses I made from this pattern.


Front view with lace camisole

Close up of the neckline

Back view

Twin needled hemline

I topstitched the armhole seams and used a twin needle on the hemline.  It was a quick sew but it will be a great top beneath the planned jackets and my solid color RTW cardigans.  

So one more garment is completed in the CIW collection...which makes that six garments done.  Next up is a cardigan from B5760.  It will be a second cardigan in the collection but since I like a cardigan so much more than a jacket, I figured two wouldn't hurt!

...as always more later!

LinkWithin

Related Posts with Thumbnails