Showing posts with label Vogue 8995. Show all posts

Tuesday, February 17, 2015

Vogue 8995 - It's All About Refitting and more Refitting

I've made Vogue 8995 before.  It made my top five of 2014 garments. It should be an easy sew because the pattern alterations have already been made - BUT - and there always seems to be a but! My weight loss means that nothing fits like it use to.


So I started with the pattern alterations I made for the spring linen version. I've had to make several more alterations to make the dress fit me now. Thank goodness for a lot of seams because it made the alterations easy. As an aside, I'm now wondering if the original dress will fit come spring. *sigh*


Anyway, I've taken the back waist seams in an additional half inch on either side to give the back a closer fit. I'm sure that many would say that I could take it in even more but to be honest, I'm just not that comfortable with such a close fit yet. I also keep thinking what if I gain some weight back...what will I wear then? I'm straddling a fine line here and one step to either the left or right could end me up in the soup - so I'm straddling it and being cautious.

On the front I've pegged the center piece so that it looks more like the original pattern and not my hybrid above. I probably could peg the side seams a little to give it a bit more defined fit but more of that line straddling - y'know!

Okay how about some stats:

Fabric ~
2.5 yards of light pink worsted wool crepe purchased from Fabric Mart eons ago.

Notions ~
22" pink invisible zipper
1" lace that was tea dyed and left over from this dress
2.5 yards pink bemberg rayon lining purchased from Elegance Fabrics in NYC
Silk organza used to underline all of the pieces
Pink rayon seam binding

A few construction pics and info:

As stated in my previous post about this dress, I underlined each piece of the wool crepe with silk organza. I went back and forth about adding piping to the neckline and sleeve hems and finally decided not to. The bemberg rayon lining was added to the dress.  Some of the construction details are shown in the collage below...
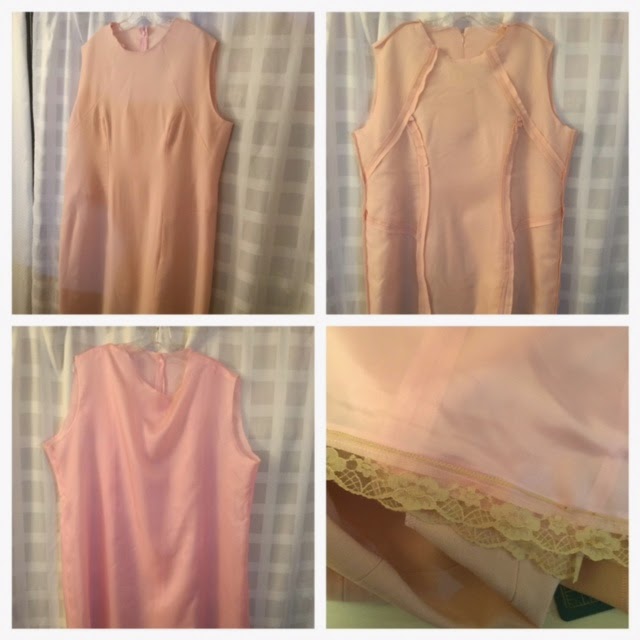


The other interesting part of my construction is the sleeve bindings. I bought Vogue 1435, the new Tom and Linda Platt dress and jacket (it's in the queue, btw) and I was reading the instructions.  For the jacket they have you bind the edges of the sleeve openings. I really liked the technique and thought I should add it to the construction of my dresses especially since I prefer unlined sleeves.

So I used the rayon seam binding that I normally use for hems to bind the sleeves. First, I serged the seams close to the stitching line. Then I folded the seam binding in half over the seam and machine stitched it on. However, after pressing I didn't like the way it covered the seam. So for the second armhole, I hand stitched it down. I liked that coverage better. Now I really should take the first one out but honestly it's not bad enough to take out. Though I will be hand stitching the binding down in the future.


Otherwise, I have nothing new to say about the construction of the dress. Any other pertinent information is contained in the original posts

The theme of this dress is fit, fit and more fit. I did a lot of trying the dress on and then ripping out seams and resewing them. I think this is going to be a reoccurring theme throughout my sewing this year especially if I lose any more weight. 

Here are the pics of me wearing the dress:


Jacket made in 2010 - Simplicity 2958


Conclusion ~
This dress fits looser than my original version which was a little tight on me. I will probably end up taking in the side and front seams next fall if I continue to lose more weight but it works for right now.


BTW, my shoes are by Tahari.  I bought them two years ago and wore them once in real life and once on the blog...my feet were just too fat to wear them comfortably...and I paid too much for them to give them away.  Fast forward two years and they now fit comfortably again. They're a little higher than what I've been wearing but I will add some comfort pads to them. Okay this benefit of losing weight I can get with cause I have some amazing shoes sitting in boxes waiting to be worn!

Next up is a "Throw Back Thursday" outfit. As I was checking the closet for wearable garments, I tried on this dress and couldn't believe it fit again. So I will be sharing it next. Again...thank goodness I couldn't give it away!

...Miss Sammy was visiting for the day and her Mom took some amazing pictures of her.  Here is just one...


Saturday, February 07, 2015

Vogue 8995 - Take Two

I've wanted a pink wool crepe dress for fall/winter for several seasons...and of course the pink wool crepe lived in "The Fabric Collection."  I knew that I didn't want to use my TNT dress for the dress but that's the only thing I did know.  I definitely was suffering a case of "fraid to cut" the fabric...not something I'm acquainted with as a sewist. See I've been pretty fearless with fabric and taking chances with it but I've had a few wadders lately and I was worried.

So worried that I went on the wide webs looking for a similar weight and color of pink wool crepe to purchase as a back-up. Yeah those wadders really shook my confidence. After deciding to just go for it...I decided to use a pattern that I'd used before so that I could eliminate the not fitting/working aspect of this puzzle.

Here is the combination I'm working with...


I've gotten the fabric cut out and I've started to assemble the dress. However, in the process of working on the dress, I read Leisa's blog posts on handsewing a Grainline Archer shirt. Yes, you read that right, she's hand stitching the blouse together and it got me to thinking. Why am I rushing through the process? Didn't my sewing hero, Cynthia Guffey tell me to slow down and enjoy the process?

With those thoughts in mind, I decided to sew the best dress I could make. So each piece of this dress is underlined with silk organza. Yes, the silk organza was basted to each dress piece and then the two pieces are serged together.  Not couture I know but I've previously admitted my serger addiction so let's just flow with that okay? *smile* Plus I didn't promise couture - I just said I would slow down!

I'm working on the lining now so sooner rather than later I will have a new dress to share with you.

BTW, thanks everyone for all of the emails, facebook messages and posts left here.  I truly appreciate each and every one of them...and they are the reason that I decided to start posting sooner than I'd anticipated. I don't know if I will be posting at the rate I was before but posts will be more frequent than they have been for the last two months.

...as always more later!


Saturday, May 31, 2014

Vogue 8995 - The Reveal

This dress was a joy to make ~ truly!  It was a challenging sew but not a frustrating one.  You know the challenging ones where things just don't go as planned vs. the ones that are challenging because the construction is so involved. Challenging but fulfilling...


I definitely plan to make a fall/winter version of this using pleather inserts and a wool crepe.  I mean all of that pattern work shouldn't just sit in the pattern envelope/folder!!!

Some stats ~
Fabric:
A mediumweight linen from Ebad Fabrics from the collection

Notions:
22" beige invisible zipper
nude bemberg rayon lining
seafoam green rayon seam binding
yards and yards of white piping

All of the pattern alterations and construction information is in the previous posts. The highlight of this dress is the piping. It was a lot of work and time consuming but so worth it in the end. This was the perfect dress to sew over a three day weekend because I had time to enjoy the journey.

Some more pics ~


Originally I was going to add a cardigan to the dress. I'd picked an amazing paisley cotton knit from the collection to use for the cardigan. I've put the knit back on the shelves. This dress deserves to be worn on it's own.  You need to see all of the piping work that I put into the dress.

I have to tell you that this dress is a closer fit than I normally wear. I'm not sucking in my stomach that much ~ hahahahaha! I'm counting on the linen fibers to relax and give me a little more space. Also, the curved seams which the piping highlights, give definition and shaping to the dress. IF Vogue graded past a 24, I would probably be a 26/28...yeah I ain't a skinny chick at all! However, this silhouette works for any size woman...so if you need a pretty new summer dress...I highly recommend this pattern to my plus size sisters.

One last picture of the dress' piping details...


...as always more later!


Thursday, May 29, 2014

Vogue 8995 - Construction Details

First I need to say that my alterations worked using the smaller of the waistline inserts...and I was totally thrilled!  I will make a note on the file folder so that I know for the future which version of the pattern piece to use when I make this dress again...because yes I will be making this again!!!

Working with the pattern pieces was like putting a jigsaw puzzle together. I had to fiddle with the side pieces a little before I could get them to work together well. Then I basted all of the pieces together to get a visual and to see if the sizing was right.


Again it worked...*sigh of relief*...so the basted dress was taken apart and I started to add the piping to all of the seams.

Adding the piping ~
The part that makes the dress sing is the white piping...which took quite a bit of work because each piece of piping had to be pressed flat, then hand stitched to the seam prior to stitching the seams together. Finally I added a little topstitching on the top of the seam to insure that the seam stayed flat. 

Let's not forget the pressing time needed to insure that all the seams were laid flat, as well as, a little heat and pressure to make sure the joins weren't bulky.

As previously stated, piping was added to every seam, as well as, the neckline and the sleeve hems. For the piping at the sleeve hems, I added a band to the bottom of the sleeve hem for a clean finish.


Adding piping to dress front

Adding piping to front seam with the join

For how I add piping to a seam, please check this post. I wrote this back in 2008 and I still add piping the same way.

Other construction info. ~
The pattern instructions tell you to cut the lining pieces from the same pattern pieces that you use to make the dress. I've never understood that. Personally I want a lining to cover the seaming, not compete with/rub against it, and is smooth next to my body. So I did what's considered a no-no and cut the lining from the front and the back dress pieces. 

I understand the reasoning, not wanting the lining to be distorted by using the fashion fabric as the pattern. I've just never had a problem when I've chosen to go this route. However, I'm not encouraging you to follow in my rebellious footsteps!


There were three choices in my lining stash that I could have used for the lining.  I went with the nude lining because it wasn't as opaque as the white and the green made the fashion fabric look weird. It's a straight forward lining. No lace at the hemline, just a double stitched hem.


Otherwise, the construction was pretty straightforward. I didn't need the pattern instructions after completing the dress front. Although the pattern tells you to line the sleeves, my personal preference is unlined so that's how I sewed them.

Conclusion ~
I love the detailing on this dress. All of the additional time and work needed to add the piping was so worth it. The embellishment really gives the dress that extra special something.


Close up of the piping on the neckline & front of the dress

Piping and banded hemline on the sleeve

Here is a picture of several pieces of the dress with the piping added...

So the final post about this dress will be the reveal...I have to admit that all of the work was worth it...the finished dress is pretty awesome.

From the Vault ~
The young me as a senior in high school. I was 18 years old. The white dress photo is from my Debutante Ball, the suit my Easter Outfit that year made by me, the center pic is of me and my cousin after church at his "Going To The Army" party. Gawd, I was thin wasn't I?


...as always more later!!!

Wednesday, May 28, 2014

Vogue 8995 - The Start of the Journey

I knew I wanted to sew this pattern as soon as it appeared online.


Especially since it reminded me of Vogue 8799 which I made in August 2012...though I was never thrilled with my interpretation. I mean I finished the dress and wore it then and again last summer, but it really wasn't the silhouette I wanted.  The line drawing above is the silhouette I was attempting to create.

So for this version, I couldn't decide if I wanted a black and white combo or a single color with some type of embellishment.  I finally decided that I wanted my dress to say spring! So I chose a lt. spring green linen that had been in the collection for awhile and some white piping to embellish the seams.


Pattern Alterations ~
I know making a muslin is very popular in the home sewing community but I hate making muslins.  Hey, just my point of view.  So I made pattern alterations by using my TNT dress pattern as a basis for checking the pattern pieces.

Back Pattern Pieces:
I started with the back pieces first.  I'm presently using a 4 piece back on my TNT dresses for a better fit. So I used my TNT back pieces to check the Vogue back pattern pieces. I ended up making a few small changes to the Vogue pieces.

1.  I decreased the shoulder seam pattern on each piece by 1/2".
2.  I added an inch from the waistline to the hemline of the back side seam.
3.  This was done to match my TNT pattern and to insure it would fit.


Those were the only changes I made.

Front Pattern Pieces:
This is where it got interesting. How to enlarge the pieces without losing the design silhouette?  Of course I started by laying the pattern pieces on top of my TNT dress pattern.
  • There are four pattern pieces that make up the front of the dress and after laying them on my TNT dress front I had to decide how to alter each piece to make them work.
  • My first thought was not to add any inches to the center insert. On the pattern envelope those center front seams curve, however, if you look at the line drawer above, those seams are straight. I decided to go with the straight version because it gave me some space and was a simple space addition to the pattern. 
  • The second piece I worked with was the top bodice piece because I only had to change the shoulder shape to match the change I made to the back piece.
  • The bottom skirt piece was next because it only needed width added at the center front seam.
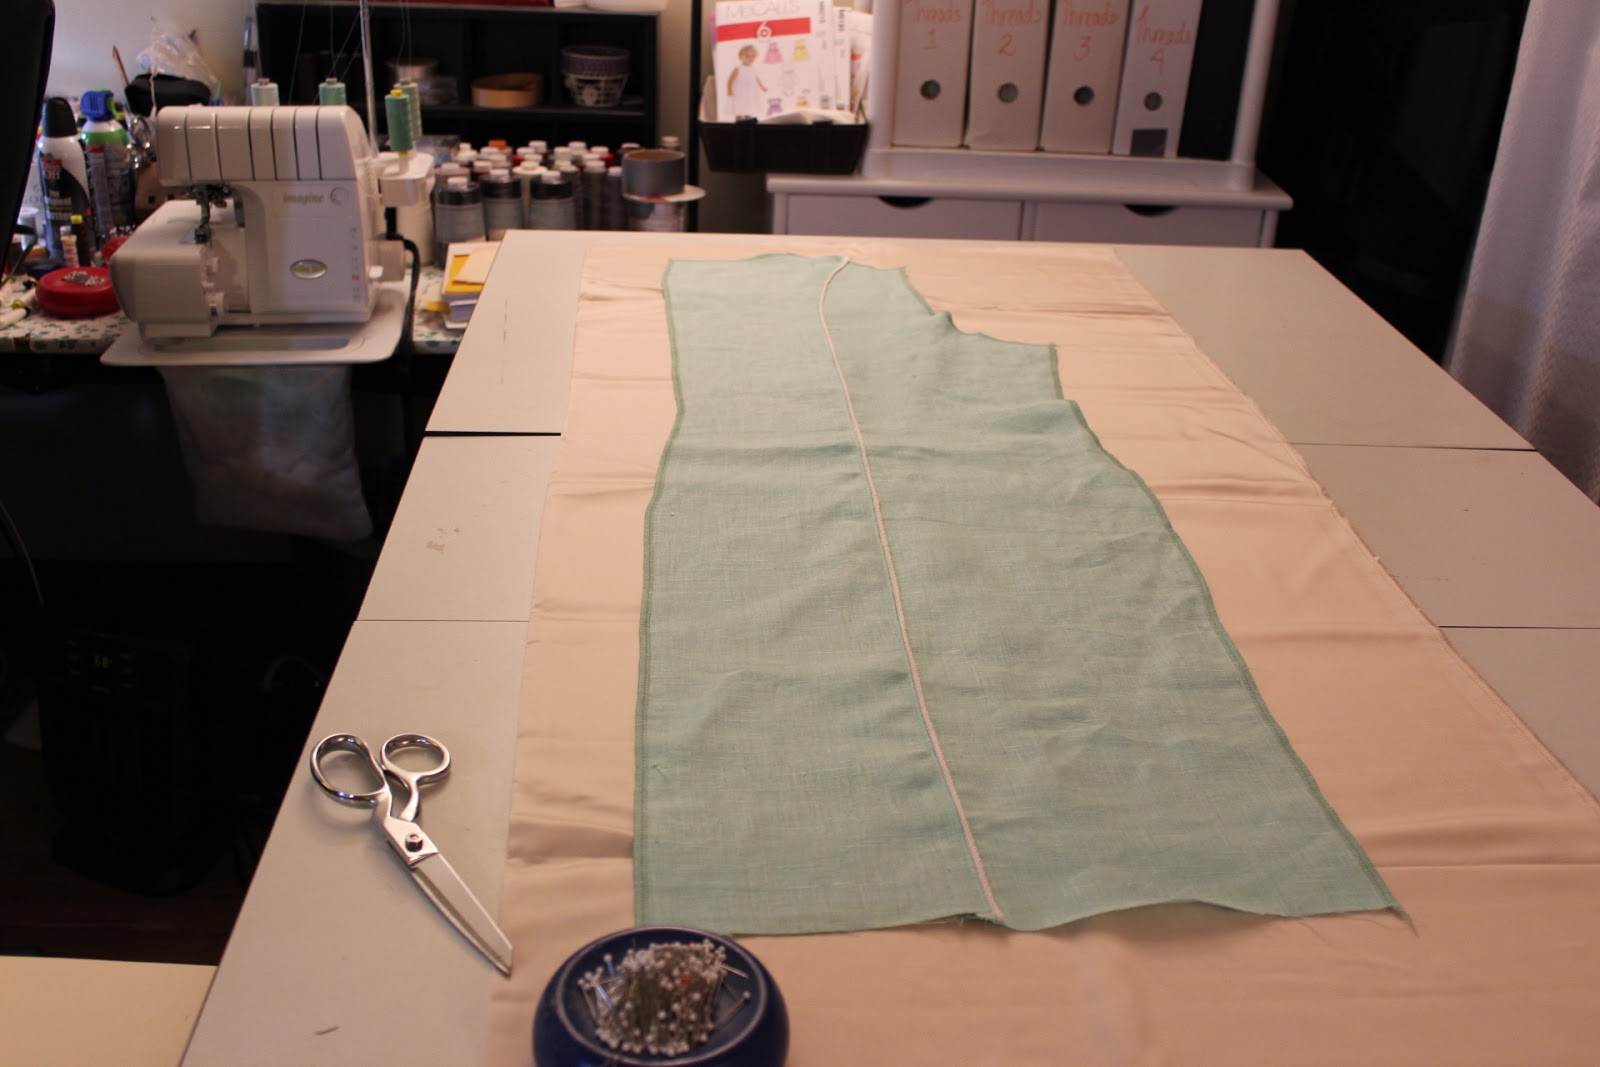
  • The piece that presented the most challenge was the waist insert. Of course it was because besides my bustline that's where I carry the most weight. I made several alterations to the pattern and just couldn't decide if the changes would work. So since I have five yards of fabric, I cut the pattern piece both ways...extra large and medium large.

Smaller version of the waist insert

Larger version of the waist insert

I decided I would baste the dress front pieces together and the piece that worked best would be the one that I'd use. Fine piece of pattern altering that was - NOT! But I was getting beyond my spacial abilities. I just couldn't see how the pieces would work together and I'd rather have cut out two versions of the piece and switch out whichever one worked best.

After working with the pattern I decided that I wanted to make the short sleeve version of the dress, so the sleeve pattern also had to be altered to work with my bodacious biceps.
  • That was accomplished by making a pattern sandwich ~ my TNT sleeve pattern, then the Vogue 8995 sleeve pattern piece which I sliced and spread then a piece of tracing paper to make the new sleeve.  
  • This way I didn't alter the sleeve cap on the original pattern piece and the sleeve would still fit into the armhole.  
  • I just gave the sleeve width and additional length so that it would work for my body.


Pattern Sandwich

Sleeve traced

Finished sleeve

After all of this ~ which btw took most of the day, I moved onto cutting the fabric.  Cutting and construction will be in the next post.

...as always more later!


LinkWithin

Related Posts with Thumbnails