Showing posts with label Sewing Techniques. Show all posts

Saturday, May 15, 2021

Bust Darts on a Mature Figure

I want to talk about bust darts today.  Specifically about sewing darts for a mature bustline. Why? Because I noticed something on my last dress after I took pictures.  Here's what I noticed:

I sewed this dress on autopilot. I was using a TNT pattern and didn't think about the darts, where they would land or how my bustline is moving further south. My dart legs are too long (photo 1) and aren't pointing at my bust apex (photo 2).  I guess I could be discouraged about this but I'm in my 62nd year of life and am realizing that once again my body is changing.

I've lived through the teen years, the childbearing years, the 30s & 40s, and the post menopausal years. So I've learned that a changing body is part of life. I'm not railing against the change, I'm adjusting to it.  And part of adjusting is to realize I need to check my dart placement going forward in all makes - even TNT patterns.

If breast tissue talk bothers you, time to bow out now! *LOL* Cause that's what's next. When I was younger I had high, firm breasts and like most young women I took it for granted that they wouldn't always stay that way! After childbirth, I was one of those women whose breasts increased with each birth.  Yes, I lost some firmness but they were still pretty amazing...helped by the fact that I did not breastfeed. I'm of that generation. I raised three daughters on formula.

I was also pretty religious about good bra support and wore one 95% of the time. Yes, I even slept with one on. So my breast tissue was supported well into my late 40s/early 50s when perio-menopause started and then of course menopause. Menopause that not only affected my hormones but affected my breast tissue too. I lost fullness, I went down a cup size and as I gained and lost weight purchasing bras that supported well became more of a challenge.

Now to bring this back to sewing. As I stated above I neglected to think about dart placement when making those last two dresses. This will be a consideration going forward. I'm also taking the time to purchase new bras - what a journey this is turning out to be...and no bra making is not on my list of sewing things.

Finally I'm remeasuring my bustline, determining my new bust apex points and checking all of this prior to cutting out bodices. I will be doing this with even my TNT patterns going forward.

My D cup breasts have become C cup breasts so I don't need a full bust adjustment. Also my fit is looser now that I'm older, comfort is more important than it was when I was younger. I like side darts and princess seams to make adjustments for fit. Maybe it's because of the way I learned, maybe because I'm lazy, or maybe these alterations work for me. 

Some of the changes I plan to make are:

o  Re-examine my bust point apex and mark it on my patterns going forward even my TNT patterns.

o  Lower the darts on my patterns. I've mentioned lowering darts before and my go to reference is from the Curvy Sewing Collective here.

o  Checking the length of the dart legs to make sure they're not too long or look weird.

o  Fit my paper pattern to insure that my darts are in the right place prior to cutting the fabric.

Anyway, I will be highlighting the changes I make to my patterns where bust darts are concerned going forward.  Just wanted to start the conversation and hear any suggestions, comments, alterations you have or used in the comments.  Thanks!

...as always more later!


Thursday, February 13, 2020

More Shirtmaking Info.

I've been sewing shirts consistently for three years now.  The one thing about making a garment over and over again is you refine your techniques. Your collar edges get sharper, the way you apply the overlap for the cuff goes on quicker & easier and you know how it fits.

Tools I use when making buttonholes and sewing buttons on

My shirt journey has become about the fabric choices, the buttons and any embellishments. Y'know the fun stuff! Lately I've changed up the way I sew buttons on my shirts. After doing it a certain way for awhile, listening to other sewists and just repeating the process, I knew I needed to change it up.

I've never been a precise marker. I have to work at that because so much of what I do is instinctive or learned response. However, I'm changing up the way I'm sewing buttons onto my shirts.

First I do machine sew buttons on when they're flat 2 or 4 hole buttons. As evidenced by this video I posted to Instagram.

o I always use a hat pin to create a shank so the machine sews the thread over it.

o I use to mark the opened buttonholes with a pin after slicing them open with my buttonhole cutter. Lately, I've been using my Frixon pen and marking the center of the buttonhole.


o It makes sewing the button on so much easier because I just place the button over the marking. I'm also more accurate with button placement now.


o My machine finishes sewing the buttons on with the needle in the up position. This allows me to cut a really long thread tail


o Then I use a regular needle, thread the tail through and pull it to the backside of the shirt


o The thread tails are tied off in the back 


o A drop of fray check is applied to the knot on the back to secure the button threads.

After talking with another sewist, I'm also going to buy some silimide to sew on shank buttons. I presently double thread a needle with coordinating thread which means that I'm using four threads. I then run it through some thread heaven and make 3-4 passes through the shank.  My sewing friend said that the silimide will allow me to make just three passes and it's just as strong. Anything that speeds up the button sewing process is something I want to pursue.

One additional thing to note - I use 11 buttons at least on my shirts. One for each cuff, one on the collar stand, nine down the front. I know I use more buttons than most pattern companies suggest but I like my shirts buttoned all the way down the front. Pattern companies leave a longer/larger amount of space on the front of the shirt. That front flaps open on me and I just don't like it which is why I change it.

Just wanted to update how I'm sewing buttons onto my shirts now.

...as always more later!


Wednesday, May 02, 2018

Shirt Sewing Tips

I added some tips to a couple of my shirt making posts and then I decided to just put all of the tips in one post ~ also adding some more information and links to blogs and equipment in case you need them. So while this post is a little long, I'm hoping that you can refer back to it whenever you need tips on making your own shirts.

Buttons/Buttonholes ~
- Buttons
To me button placement is so important on a shirt to prevent gaping.  As I said before I use a lot of buttons on my shirts. The first button I place on the shirt, is in the valley between my breasts. Then one is placed above and below that one. This is to guarantee that there's no gaping. I typically set my buttons 3.5" apart.

This is the beauty of making your own shirt. You can use as many buttons as you like. I also used a larger button than most RTW shirts have. I hate trying to button those tiny shirt buttons so I've sized up. As a plus size woman I find that good button placement and a great fit add up to a well-fitted shirt. I highly suggest that you use the size button and a placement that works for your body, not just what the pattern suggests!


- Making Buttonholes
I use a seam gauge to mark my buttonholes down the front of my shirt. However, another method of marking is to use a simflex guide. I've made a lot of buttonholes in my sewing career. There are many ways to mark your buttonholes and loads of tutorials on the internet. 

I honestly use pins to mark the top of my buttonholes because I can line them up on the red lines of my buttonhole foot. I snug my buttonhole foot between the stitching lines on the buttonhole band so my buttonholes fall exactly in line and stitch from there. You can see a quick video of my sewing machine in action here. Let me stress that this is NOT the right way to do things. 

You should use proper markings to line up your buttonholes. A great example of this is a picture from one of the people I follow on Instagram - here.  Look at how Sarah has marked not only the start of the buttonhole but the length of it too.

I mark the way I do from experience. Although I will tell you that I start making my buttonholes from the bottom of the shirt and work up. This way if my first or second buttonhole sucks (it happens even after making a test buttonhole) I can remove the thread in an area that's not quite so noticeable.

My final tip is to use a chisel and block to cut open your buttonholes. Afterwards, I apply Fray Check to the front and back of the buttonholes. Also, I let the Fray Check dry before cutting the buttonholes open. I've found this method prevents those little flyaway threads that can occur when cutting buttonholes open.


Interfacing ~
My interfacing of choice is from Fashion Sewing Supply.  Pam has the best interfacing for garments. I used both the Pro-Woven Light Crisp fusible interfacing or Pro-Sheer Elegance Medium Fusible for my shirts. I highly recommend that you purchase an interfacing sample set from Pam so you can feel the different weights.

Otherwise, I apply interfacing following the pattern instructions. 

Making shirt collars ~
I know that Pam Erny who runs the Fashion Sewing Supply online interfacing store has a collar technique on her blog, Off the Cuff. It's the post that's dated, October 8, 2012. Sewists have successfully used her method to get great collars since she's an excellent shirtmaker so they come highly recommended.

However, I don't use her technique. I use a set of steps that I've done for years. I wanted you to have the professional way of making a perfectly pointed collar before I explained how I sew mine.

1. I sew the long side of the collar first using a 5/8th seam allowance.


2. Then I stitch each side seam also using a 5/8th inch seam allowance. However, I double stitch over the intersecting seam portion.

3. The corners are clipped.


4. Next I take the collar to the ironing board and press it over the pointed end of my clapper.


5. Then I trim the sides of the collar and the longer edge


6. I use my bamboo pointer and push the collar edges out as far as they will go


7. Another press to set the collar flat

This is my method. I'm sure others use a different method or Pam's.  Drop a comment in the comment section letting me know which method you use.

Matching Prints/Plaids/Stripes ~
You know I advocate a single layer technique when you need to pattern match. I also believe you should run your pattern pieces in the same direction to insure that you get a pattern match all the way across your garment. I've talked about this in numerous posts.

However, Gaylen of GMarieSews does an amazing job of pattern matching pockets on her husband's shirts. When we were at Sew Camp, we got to see the shirts she makes for her husband in person. So here are a few of her tips:

First - I trace my pocket pattern onto medical table paper (you can use any tracing paper you have on hand for this). I use this for my pattern work because it's easy to see through. I cut out several pocket patterns so I always have a fresh one to work with for each shirt.


Second - Once the left front of the shirt is cut out, I position the pocket pattern on the front where it needs to be sewn.  When I have the pocket where I want it, I take a pencil with a rounded point so I don't rip the paper and trace the critical elements of the design onto the pattern piece.


Third - I lay the pattern piece directly onto the fabric matching the print to my drawing, carefully pinning it in place, then cutting the pocket out.

Fourth - prepare the pocket as you normally would.  When you're ready to sew the pocket to the shirt, line up the print, pin the pocket in place and sew it down leaving the top open.


Gaylen's husband wearing the shirt

Design Changes ~
I don't know if this qualifies as a tip but I'm adding this.  I talked design inspiration in this post. However, I really want to encourage you to think outside the box on the details you add to your shirts. It's what makes each of them different and reflective of your personal style.

Embellishments like piping and binding, embroidery and ribbons can be used. Different fabric for the undercollar, cuffs and button bands really add a creative touch to shirts. The fabrics don't need to match, just coordinate which gives your shirts an artistic flair. 


Also, please realize that you can use fabrics that aren't normally used for shirts. I've made 13 now and used a variety of fabrics...polyesters, shirtings, cotton sateens. I have several more in mind that I want to make using linen, silk blends, some voile and cotton. Since you're the designer, you're not limited to standard fabric choices.

Simple Common Sense Sewing Techniques ~
1. Change your sewing needle. 
I changed mine after every two shirts. You want your stitching to be precise especially in the topstitched areas and a dull needle won't give you the stitch quality you want.  So change your needle!

2. Add a button to the side seam.
I add a button into the side seam of all my shirt makes. That way if I lose one I don't have to search through the loose button stash to find one.

3. Make sure you're using the correct foot to sew your garment. I noticed a huge difference in my stitches when I changed to a straight stitch foot and throat plate. So if your sewing machine comes with different feet try them out and see if they provide better stitches than just using the basic foot on your machine.

Sewing Library Suggestions ~
I always think you should own a book or two on sewing...or maybe even start your own personal sewing library.  To that end, I recommend the following books to help sew the best shirts you can:

1. Shirtmaking: Developing Skills For Fine Sewing by David Coffin

2. The Shirtmaking Workbook: Pattern, Design, and Construction Resources - More than 100 Pattern Downloads for Collars, Cuffs & Plackets also by David Coffin

3.  Easy Guide to Sewing Blouses: Sewing Companion Library by Connie Long.

For web inspiration, definitely read Pam's Off the Cuff ~ Sewing Style blog. It's a treasure trove of shirt making techniques and tutorials, as well as being chock full of inspirational sewing. There are pages of tutorials on Grainline Studios blog. You can access them here.

Hopefully something in this compilation of information will help you when you're making a shirt or deciding to make one. As you know there are quite a few shirt patterns out there - both from the Big 4 and from the Indies. Hopefully you will be able to develop a TNT pattern so that you can take creative journeys with your shirt pattern.

Next up on the blog is the wrap of Shirt Month...I've really enjoyed sewing these shirts. I hope you've enjoyed following along!

...as always more later!


Wednesday, June 28, 2017

One more sleeve hack...

This time I decided to share the technique before the dress' reveal. Partly because it was a good sewing weekend and I didn't want to stop and take pictures and partly because my photographer wasn't around.

The sleeves are what makes the difference between the last two dresses. The rose and white dress has a split sleeve with a banded tie. How that banded tie is constructed is what's featured in this post.


Honestly, that tie took me three tries to get right and I almost gave up on it! I photographed all the steps so that I would have them memorialized in case I want to do this again...okay, not so sure about that last statement!

Here is how I made the split sleeve with tie ~

The sleeve alterations are the easy part. Take the sleeve and fold it in half, then press it flat:


Lay the pressed sleeve flat and cut the pressed edge leaving a full inch from the sleeve cap:


Serge finish the edge and press back 3/8" just pass the serging:


Stitch all the way around the cut edge:


Put the sleeve aside until it's time to insert it into the garment.

To make the band ~
- I decided that I wanted the band to be 2" wide, so I started with a 3" band. 
- That gave me 1/2" seam allowances. 
- I made a pattern piece for the tie that was 3" wide and 17" long. 
- This is what fit the hemline of the sleeve measured with enough fabric to form a knot with a tie that didn't hang over too far on my arm. 
- I rounded the end of the pattern because I didn't want a square ended tie. 
- Each band consists of two pieces sewn together. 

My finished band/tie was a trial and error situation. I made two attempts before the third one looked the way I wanted it to. I'd also cut my sleeve too long so I had to remove 4" from the hemline of the sleeve.

Attaching the band ~
The rounded ends of the band was clipped and graded before the band was turned and pressed flat.


The two pieces of the bands were sewn together until where it needed to be attached to the sleeve hem.


Then the band was stitched to the sleeve hem. Finally the entire band was topstitched.

Here is what the final sleeve looks like on the dress on Lulu. Yeah, my girl really needs some legs...*sigh*


I posted the construction pics to Instagram last week and promised that there would be words/directions to explain the process here. I hope that these are clear. If not, please feel free to leave a question and I will answer it.

Next up on the blog are the last two Concord Tee dresses. I know that I said I would make five but I got tired of working with the pattern, so I've ended up with four. I think I hacked myself out. LOL! 

Also all the other Concord Tee's will be shown with the bottoms I made or am making to go with them. I have nothing new to say about their construction, so they will make an appearance later. I have worn this pattern out. There are other patterns on my list and/or garments that I want to sew so I'm moving on.

...as always more later!


Monday, June 19, 2017

Adding the Ruffle Sleeve to a Concord Tee Pattern

As I said in my previous post, I saw this sleeve on a young lady in the streets of NYC. When I saw it I immediately thought of the sleeve from View D of McCalls 7542. Cause it's so obviously "The Year of the Sleeve!"


I know this is a popular pattern and I own it for ALL of those sleeve variations. I'm sure that other versions of the sleeves will show up here on future garments.

The sleeve for this tee was the easiest to make ~


- The most important thing is to make sure the diameter of the sleeve is the same as the diameter of the ruffle.  
- I measure the sewn sleeve's hem diameter.  
- Then I measure the circle that fits closest to my sleeve hem and mark that on the pattern piece.
- The circle is traced onto the cut out ruffle piece.
- I carefully cut the center out and then serged it to finish it.
- The ruffle hem was stitched down a 1/4" and pressed.

Finally the sleeve was pinned to the sleeve and sewn down.


Seriously that's it. Easy Peasy!

Now the Flamingo Ruffle took a little more work ~
For drama I used two circles. At first I thought that I would make two of the same size ruffle and sew one a little lower down from the first ruffle. However, after a good night's sleep, I realized that one ruffle should be larger than the other one.

To achieve the larger lower ruffle, I added 1.5" all the way around the circle. there was no set formula to it, I just went with what I thought would look best. 

  1. First the edges are serge finished and hemmed by turning the serged edge under and stitched flat. 
  2. The circular opening/stitching line has been drawn onto both pieces. 
  3. The circles are layered over each other so that the stitching lines match.  

Next the centers were stitched together on the stitching line.
The centers were then cut out and pressed flat.


Then the edges were serge finished.


The double ruffle was stitched to the sleeve.
I pressed the seam up and stitched it flat on the outside of the sleeve.


Here's a view of the double ruffle attached to the sleeve. Now a couple more things you should be aware of:

- I started with a sleeve that was one inch longer than the elbow length notches on the sleeve pattern. 
- My thought was that this would get me a sleeve that was almost to my wristbone. 
- I didn't want it too long because I didn't want it dragging into things.

It did provide the drama that I wanted and I'm thrilled with the final result!


I really am happy with this dress and hope that the tutorial will help you make a dress or tee with flamingo sleeves!

There are a few more tees and dresses on the way, so that's what's up next on the blog.

...as always more later!


Tuesday, February 28, 2017

Piped Cuffs

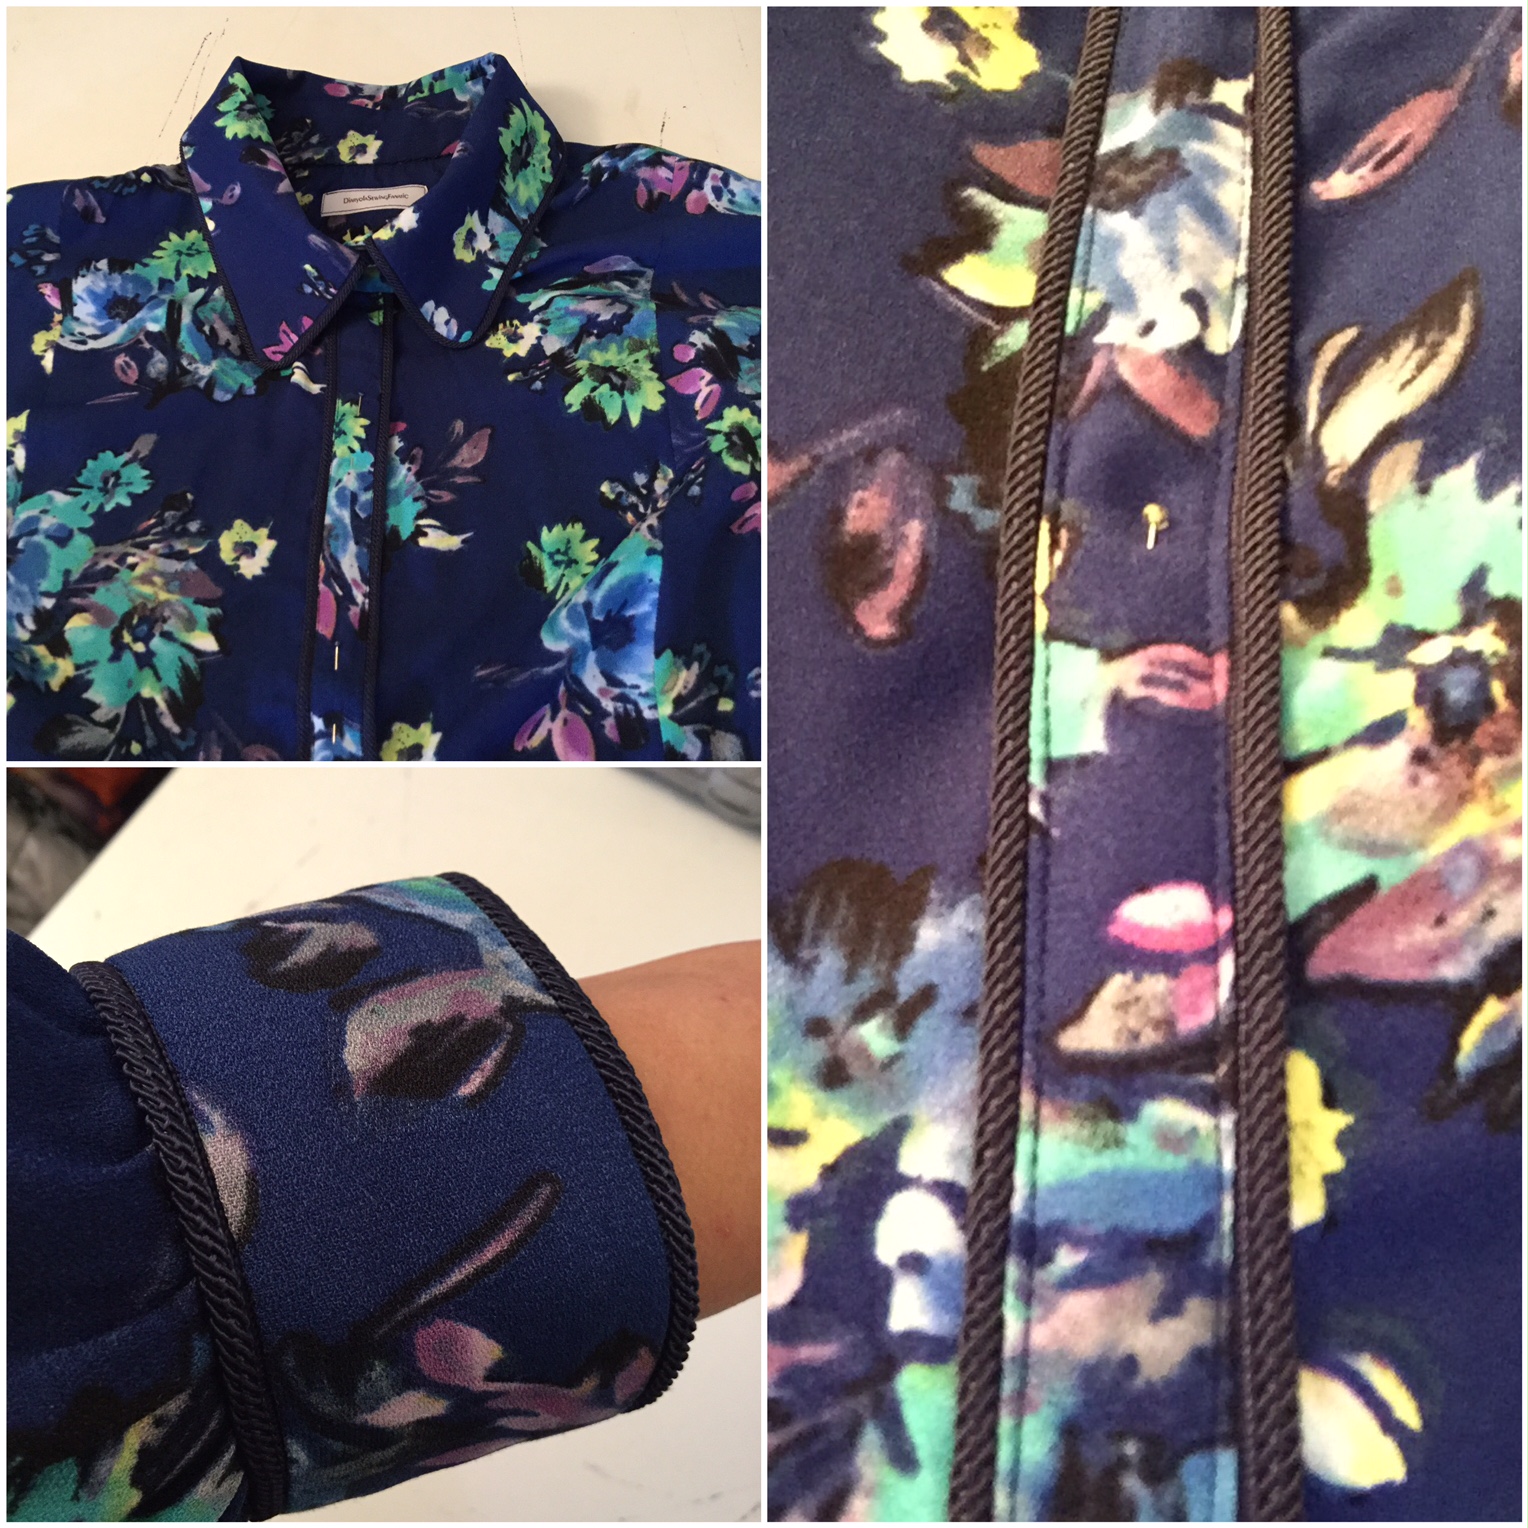
The piped cuffs on the button downs in the last post were not included in either pattern and came about because I didn't have enough buttons when I was making the first version. 

I really liked the green glass buttons that I used for the cotton version and didn't want to look for a substitute so I had to come up with a solution for the cuffs. Closing up the side seam and gathering the sleeves into the cuff seemed like a great solution and was easy to do.

However, I kinda upped the ante for the blue & white version because I decided to add piping to the cuffs. 


Here's how I made the piped cuffs ~

First I cut four of the cuff pattern and interfaced just one side of each pair.


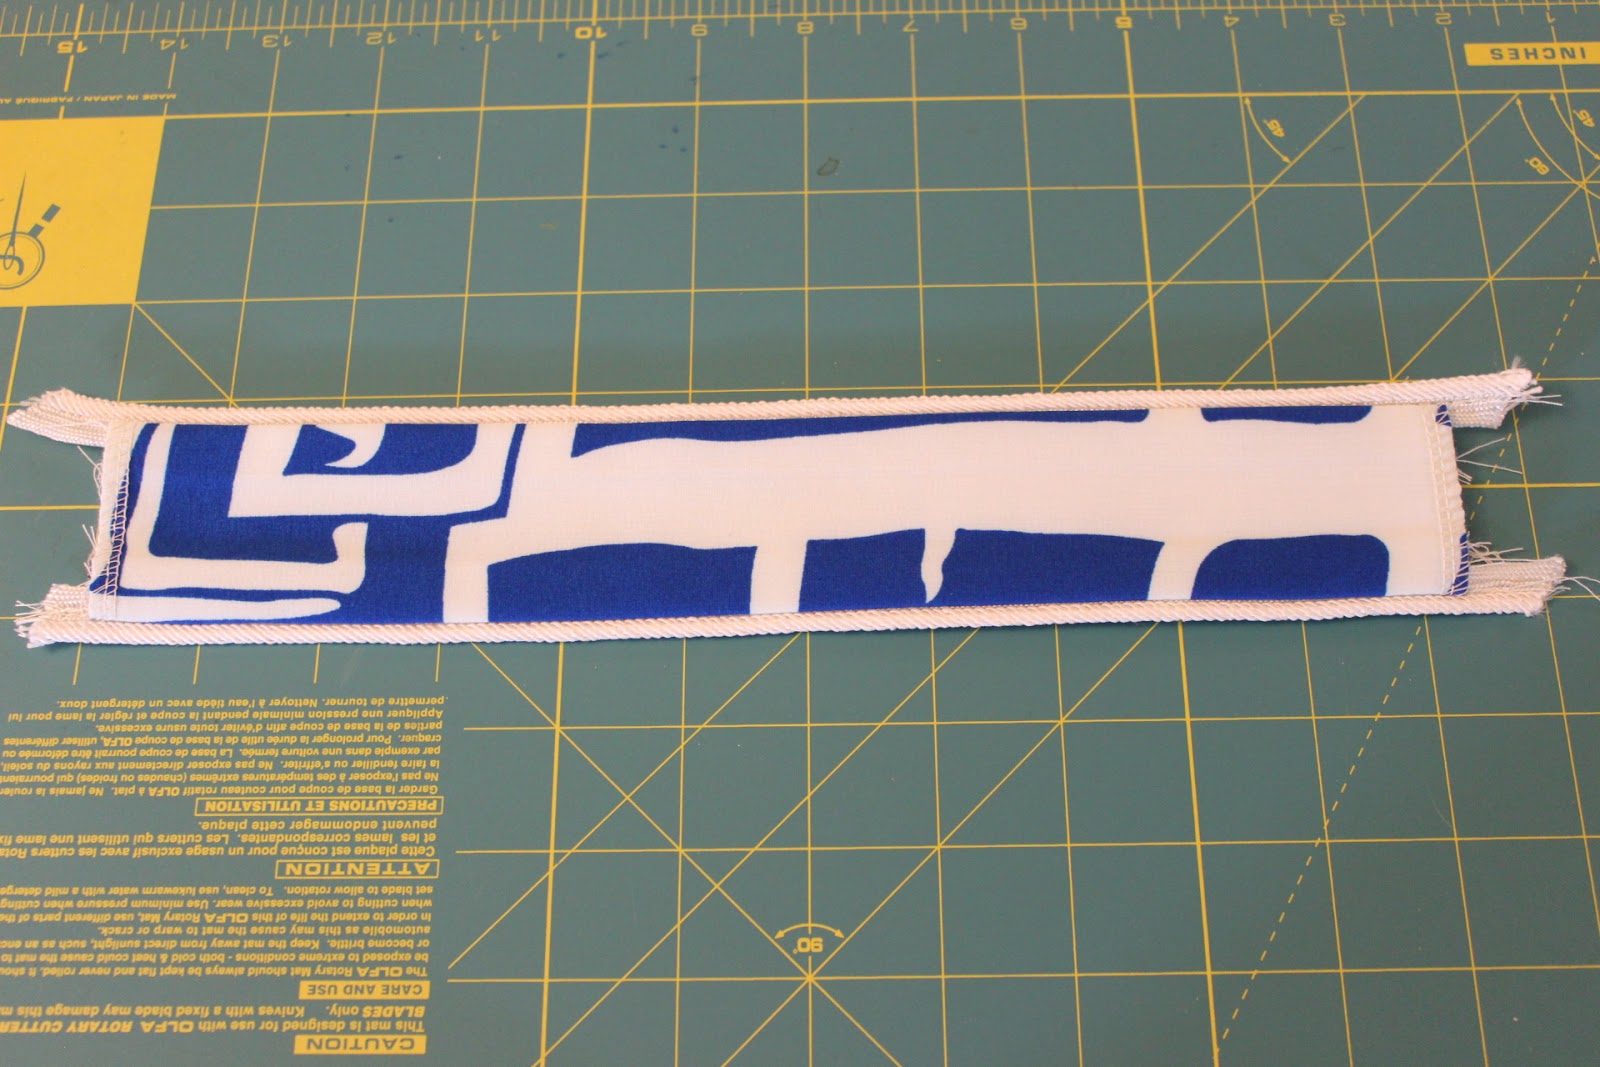
Then I basted piping 5/8" from the edge to both sides of one of the cuffs.


The second cuff was sewn to one edge of the piped cuffs.


The cuff is then pressed flat and open - I use an organza pressing cloth and my sleeve board for precision.


The cuff once it's pressed flat.


Then the cuff is opened up and the side seam is sewn closed and then pressed open.


I hand basted the cuff to the sleeve. Then machine stitched it onto the sleeve. I did this so that I wouldn't have pins sticking me as I sewed the two pieces. I used my zipper foot to get as close to the piping as possible when sewing the two pieces together.


The finished sleeve waiting to be inserted into the shirt.


Making the cuffs was the easy part, sewing them to the sleeve was the hard part. Halfway through I wanted to kick myself for picking such a complicated and unnecessary design detail. Between hammering the seams to make them less bulky (yes, I did clip the seams first) and putting the first cuff on wrong then having to take it off...to hand stitching the cuff to the sleeve...those cuffs were a challenge. Let me say that again, A CHALLENGE! 

After finishing the first one, I had to take a minute before starting the next one. However, I'm glad I took the time to add the piping to the cuff because the finished button down looks great because of this detail.


Then I completely lost my mind and decided that I needed to add piping to the button placket too on the next version.


So begins the adventure for the next button down...coming soon to the blog!

...as always more later!


Saturday, January 09, 2016

Adding Piping to a Sleeve Hem

There were several Carolyn touches added to my designer knock-off tunic, primarily piping.  As I was inserting the piping to the sleeve hem I posted a picture to Instagram. Then I had a thought that I should add a post on how I added the piping plus hem facing to the sleeve.  So here it is:

First thing I did was draw a hem facing by using the the pattern piece and some wax chalk ~


After cutting the hem facing out, serging the edges to finish them and stitching the side seam, I was left with this ~


The hem facing's other edge was then machine stitched flat to clean finish the edge for actual hand stitching the hem ~


The facing was pinned to the sleeve, matching the undersleeve seam ~


I set my sewing machine up with the extension table removed for freearm stitching with my zipper foot on the machine. I use my zipper foot even though there is a piping foot that can be purchased for my sewing machine. My zipper foot works well because I can get it close enough to the piping while it's encased in fabric. 


Stitch close to the piping on the facing edge. I grade the seam by the piping join to remove some of the excess bulk. Then I pin the facing in, prior to pressing it ~


Next I edgestitch close to the piping on the outside of the sleeve, using a 2.9 stitch length on my machine ~


Finally everything is pressed flat using a silk organza pressing cloth and the clapper ~


Here is the sleeve once it's inserted into the garment ~


I think this is a great technique to add to your garments. It will help take them to the next level. If you've followed along here, you will realize that I'm a piping fiend and use a lot of it in my garments. I just like the touch it adds to them or maybe I'm just channeling Cynthia Guffey!

If you're interested in how I add piping to garments, I wrote post about it back in 2008 and you can find the information here. BTW, my Sewing Techniques link has some good information in it, if you're looking for a technique I've used in previous garments or just want to learn a new sewing skill.

Next up is a denim skirt from Vogue 1247. I loved my original skirt and can't believe I was able to reproduce it in a fabric for my new lifestyle. BTW, some time in 2016 I'm gonna stop using that phrase ~ I promise! *LOL*

...as always more later!


LinkWithin

Related Posts with Thumbnails