Showing posts with label The Border Print Series. Show all posts

Sunday, February 03, 2019

Stripes can be border prints too!

Well at least in the Fabric Mart universe they can be!


I bought this fabric from FM after #carriagecornersewcamp last March. It wasn't on the site when we were there but it caught the eagle eye of Nakisha from Dressmaking Debacles at the time and she let us know when it appeared on the site. She made an amazing shirt from it.  I bought some too but it sat during the summer while I made other things.

For some reason I didn't take a picture of this fabric before I washed or cut it apart to make my shirt. Though Nakisha's version is a true representation of how the fabric is made and shows the stripes much better than my pics do.  As I said my fabric was cut apart to work with the border print. This is the most conservative version of my Border Print shirts.

Supply List ~
3 yards of cotton shirting from Fabric Mart
12 2-hole 1/2" pink buttons from Pacific Trimmings
Interfacing from Steinlauf & Stoeller


Notes on Construction ~
  • There are no real construction changes to this shirt. 
  • I used the straight hem version of my TNT pattern.
  • Cutting apart the border and using it to cut out the buttonbands, cuffs, collar and collarband is what makes this shirt work.
  • I added a strip of the pink stripes to carry the border print throughout the garment since I didn't have enough fabric to cut the cuffs out of it.

I included a few construction photos so you could see the stripes and how the border print was used. Especially since the stripes seem to be washed out in my final pictures. I know I probably should have retaken them but honestly this was garment number six that I'd photographed and at that point I was done. I'm sure y'all will get the gist of my shirt.


A Few Pictures ~


(This was the last garment of six I photographed 
and I was getting really silly by this time)


Conclusion ~
This was a unique piece of shirting and the striped border was very small compared to the rest of the fabric. However, there was enough to add contrast to the shirt, so that's how I used it. This is the last shirt in "The Border Print Series" and I'm glad I concluded it by using a more classic-type shirt fabric. 

It was shirt Number 16 for 2018 and my last garment for the year. This also catches me up on blogging about last years garments.  I have a few remaining pieces from January that will also show up in February.


...as always more later!


Monday, January 28, 2019

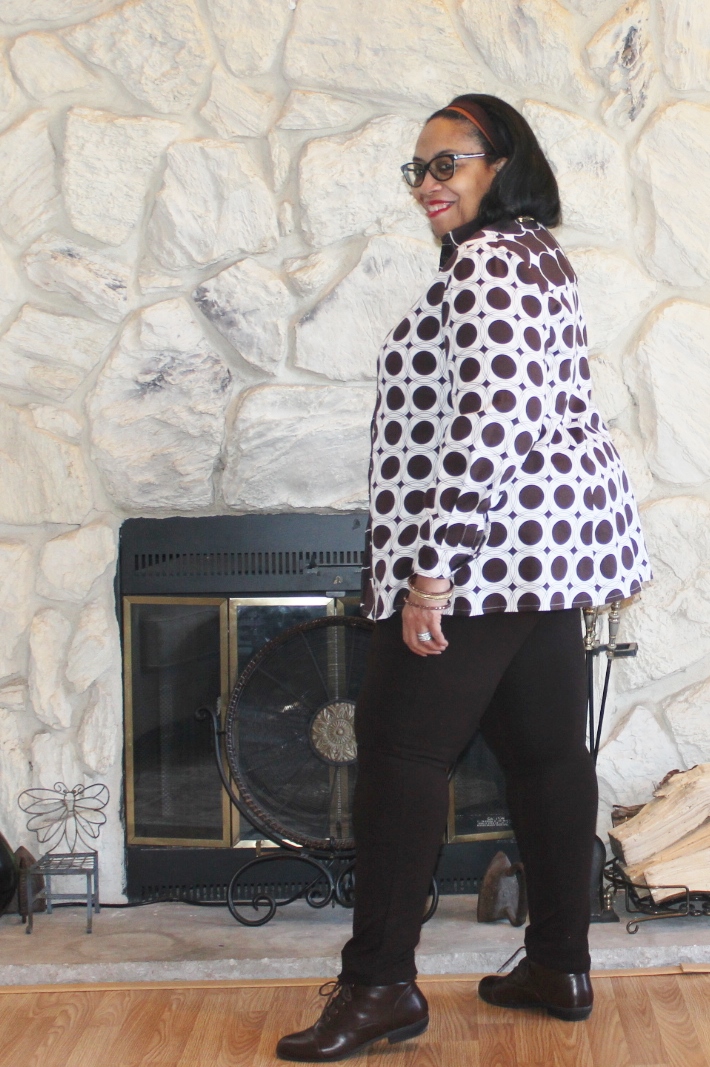
A Circle Border Print Shirt

Back in December, I wanted to use an older piece of fabric for my next shirt in The Border Print Series. I've been collecting border prints for years and knew there were some buried deep in the collection. I just needed to dig them out. After rummaging around in it I touched this piece...


...which was purchased in 2010. Yes, I'm taking it way back. At that time I blogged every fabric purchase, so here's the post regarding the border print. However, this fabric doesn't count towards my 2019 #deepstash garments. I made this in 2018, and I'm just sharing it to the blog.

Supply List ~
- 3 yards of cotton border print fabric from the collection
   (long time residence - 9 years)
- 5/8" coconut buttons from the notions stash 
   (from the days I worked at a button company)
- Interfacing from Steinlauf & Stoeller


Construction ~
Since I was starting with my TNT pattern for this shirt, the challenge was how to use the border print since it only runs down one side of the fabric. It's the side pictured in the photo above. It was wide enough to cut out shirt fronts, the collar & undercollar and the back yoke. Originally I wanted it for cuffs too but didn't have enough. In the end I'm glad I didn't cut the cuffs from the border. I like that the larger circles just runs down the front of the shirt.

This is a lightweight shirting fabric. I bought it to make a summer dress and now I know why it sat in the collection. It's way too lightweight for a dress ~ even a summer dress ~ but it's perfect for a shirt. Especially if I wear it under a cardigan for the winter.
  • The construction was similar to every other shirt I've made, the only difference being the way it was cut out. 
  • It has a straight hemline, I didn't want a curved one for this version. 
  • I used the fold over center front piece because I didn't want to sew on a button band. 
  • When I went to fold the button band - the front band was flimsy even when folded 3x. So I added a strip of interfacing to the front to stabilize it. 
  • I don't usually do this because the fold of fabric typically is stable enough.
Everything is topstitched in white. I made samples using brown and white thread for the topstitching and the white sample won. Also took pictures of buttons for the front...the brown coconut or a simple 4-hole white one. I went with the brown coconut since I wasn't trying to make a statement with the buttons.  Those are the only construction points worth mentioning for this make. 

So some pictures of the shirt in action ~


I made this cardigan in November 2012. When I was doing the great closet clean-out after changing jobs, I just couldn't let this go. There was so much work associated with it and I loved the pleather accents. I've worn it occasionally when hanging out with friends because it's a great throw on when headed out to dinner. I thought of it when I needed a cardigan to go over this shirt. This is how I will be wearing it to work now...


Conclusion ~
This is the next to last shirt in "The Border Print" series AND it's the 15th shirt I made in 2018. For the last shirt in the series, I had another border print fabric in mind. However, the pattern tetris wasn't working with the fabric. Sometimes what I see in my mind doesn't work well with the actual fabric so I put it back on the shelf. However, I really wanted one more shirt in the series so I pulled a rather conservative shirting purchased from Fabric Mart after the last Sew Camp.

The last shirt in the "Border Print Series" will show up in February. I know this seems to be stretching them out but blogging all of my makes goes with my 2019 goals. Plus, I like having them here on my blog. The next post is my end of the month round-up.

...as always more later!


Sunday, November 04, 2018

A Talbots Influenced Shirt

This is the third shirt in the "Border Print Series." I added it to the series because of the mix of gingham fabrics and the fussy cutting needed to make the shirt work...


Let's start with the Inspiration photo that jumped this shirt off for me...


I've held onto this photo since spring because I love the play of the larger versus smaller gingham. I'm grouping it with the other border print shirts because of the fabric manipulation required to make the shirt work. To get the look there were bias pieces cut out as well as the front and backs being singly cut in the same manner I cut a border print. That's how this shirt gained a place in this series.


Here is my supply list ~

Fabric:
Both gingham fabrics are from StyleMaker Fabrics. I chose to make mine from navy & white but other color combinations are available here.

Notions:
1/2" 2-hole white buttons from Pacific Trimmings
Interfacing from Steinlauf & Stoeller

Construction ~
As I mentioned above, cutting out was the most important part of making the shirt work, especially since this version of my TNT pattern has princess seams.  For this shirt, I went back to the straight hem of previous shirts. I know my inspiration pic shows the curved sides but I was ready for something else.


I also omitted the bands with buttonholes and buttons on the sleeves. My sleeves have a sewn on cuff.

Using the straight hem made it easier to match the plaid across the seams of the shirt.

For the back yoke, I cut the fabric on the bias and added a seam to get the chevroned pattern. I like the detail but honestly I did it so I wouldn't have to match the plaid of the back yoke to the shirt back bottom.

Buttons on the front are white 2-hole shirt buttons which are smaller than buttons I normally use. Because of that I added more of them down the front of the shirt. When stitching them to the button band, I had to use tape to hold them down so they wouldn't move around. So thank you to whomever left that tip in the comments.

A Few Pictures ~


Conclusion ~
I took a couple of months to acquire the fabric I needed to make this shirt. I'm glad I was able to get a combo I liked. It was the challenge of manipulating the fabric and making the plaid match all the way around the shirt that was the intriguing part for me. So while this is not "technically" a border print, the extra work to make it happen is why it's in the series.

...always more later!


Sunday, October 28, 2018

Lavender for Winter - Why Not?

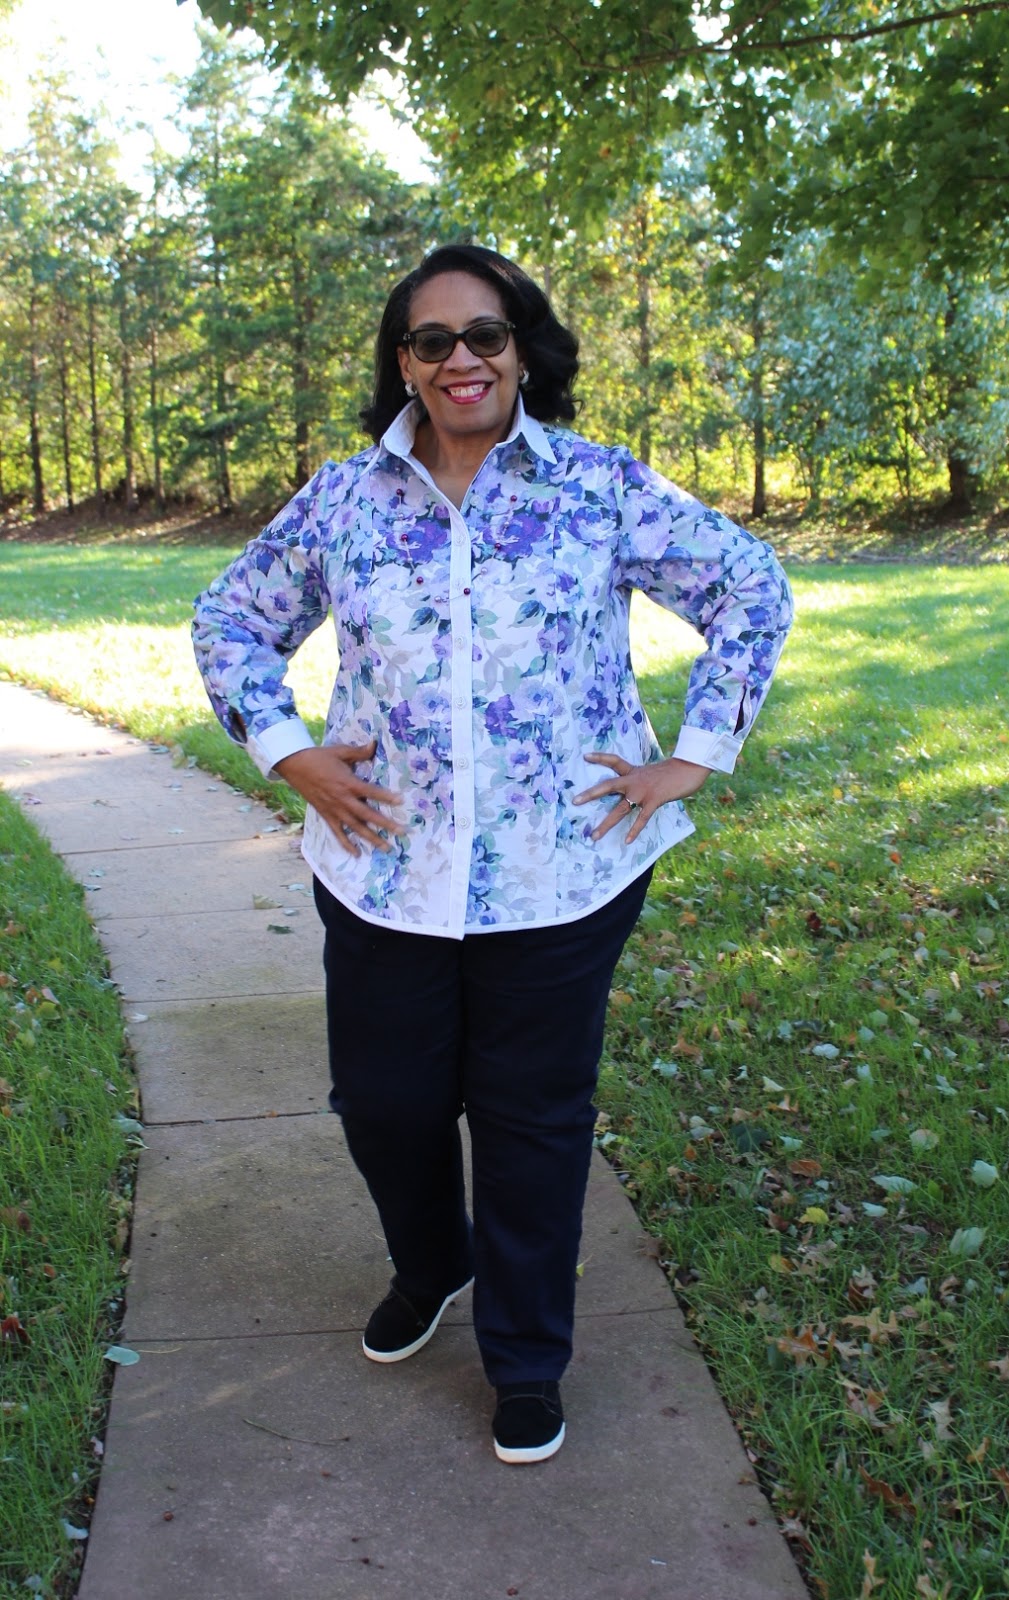
Fabric Mart put up a bunch of cotton border prints in September and I bought four of them. I knew as I was purchasing them that I wanted shirts from them. Because when was the last time you saw a cool border print shirt in RTW?  I can't remember if I ever saw one! Ah the joys of sewing for yourself!


Supply List ~
TNT princess seamed/back yoke shirt pattern 

Fabric:  
100% cotton sateen border print

Notions:
Interfacing from Steinlauf & Stoeller
1/2" plastic floral buttons purchased from Pacific Trimmings


1" white bias binding purchased from Pacific Trimmings

Some Construction Thoughts ~
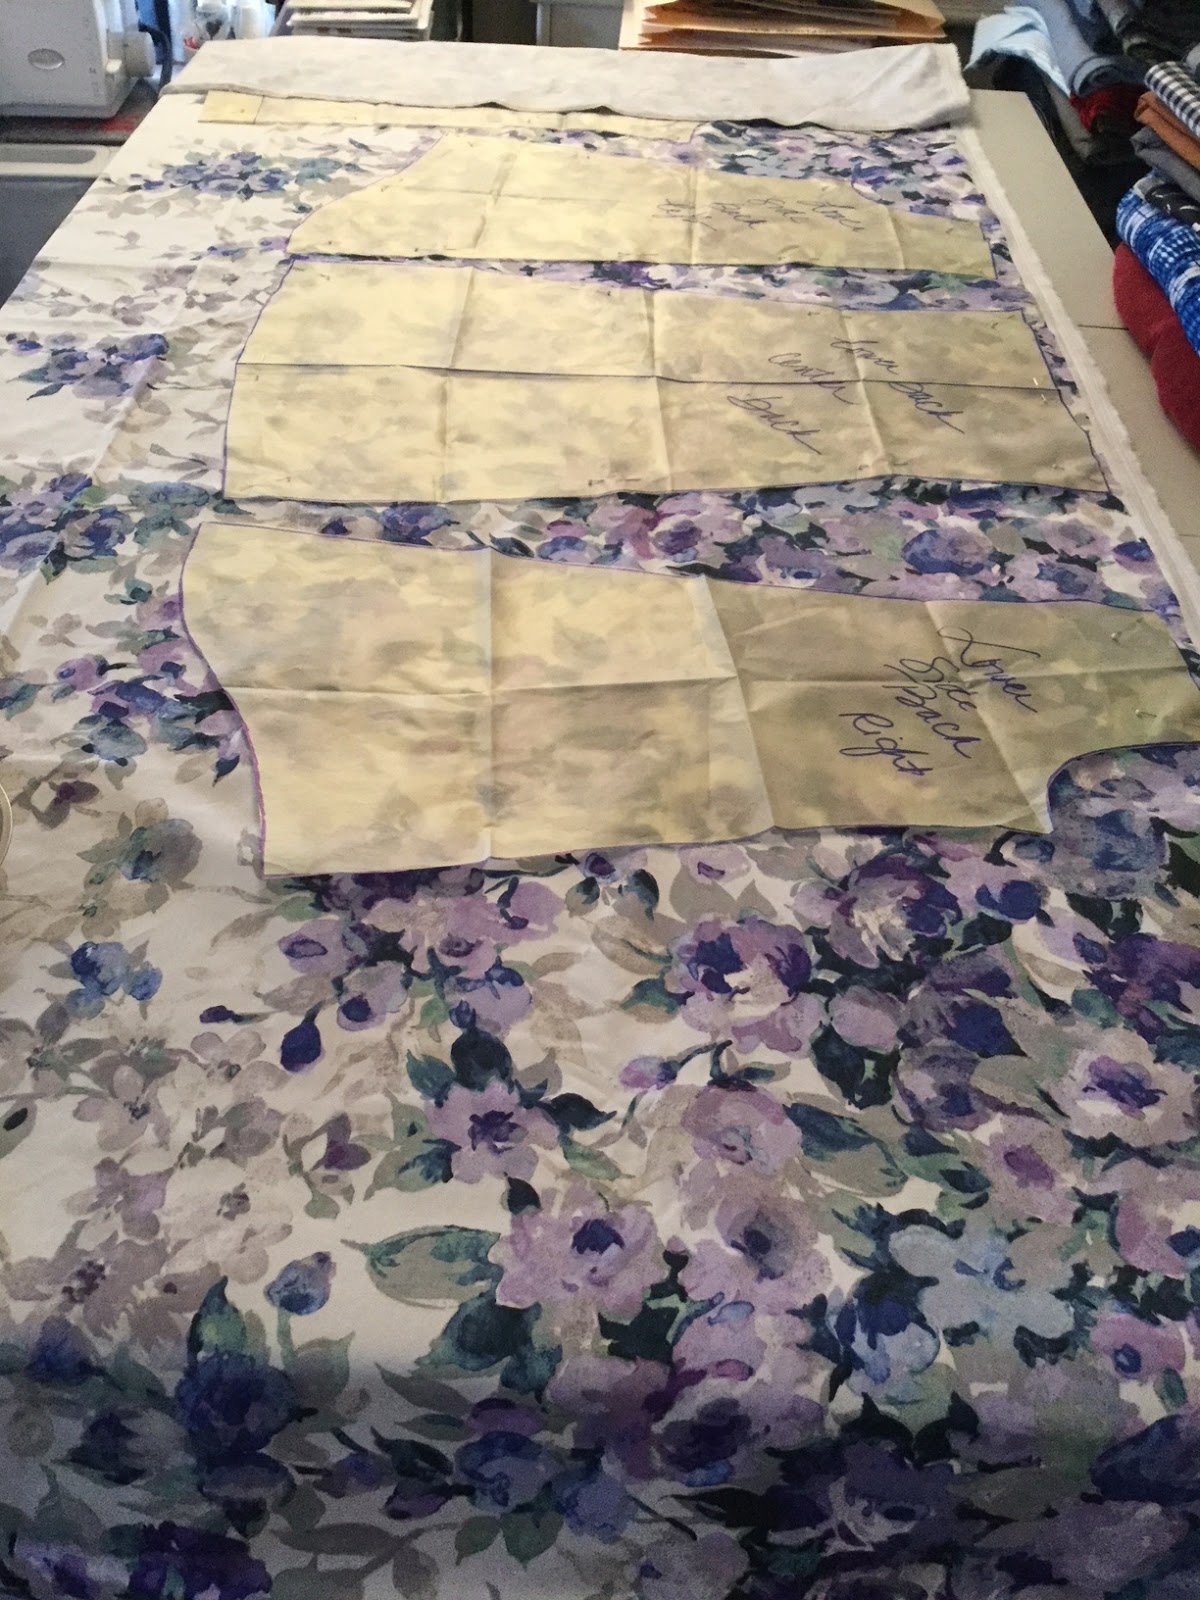
I think of this as a happy shirt because the fabric makes it so! Normally border prints are used with the print on the bottom, like my previous shirt. This time I used the border print for the main body of the shirt since it covered more of the fabric. The white from the top of the border print was used for the collar, collar stand, button bands and the cuffs.

To cut out the fabric, I used a single pattern layout which means the fabric was cut with the stretch going up and down the body. However, for the sleeves I wanted the stretch to go around my arms. So the sleeves were cut on grain with the stretch around the arms. This is important with my bodacious biceps and a mistake I made with a previous border print shirt make.


Another point to mention is that the fabric is a mid-to-heavyweight cotton sateen. This is not shirting fabric BUT it's perfect for our cold winters. I will add an additional layer of warmth with either a long sleeve tee or turtleneck underneath the shirt.  Making it will be perfect for winter wearing.

The hem is bound with the white bias binding to carry the white theme throughout the garment. 

I did get to a point in the construction where I was ectastic with how the garment was sewing up! One because the shirt was turning out the way I imagined it.  


Two even though some parts of the construction was tedious and slow going, the results were so worth it! Making this shirt was all about slow sewing. 

So a few pictures ~


This is the second shirt in "The Border Print Shirt" series. Two down and three more to go!  If you like the silhouette of my TNT shirt pattern, here are a few suggestions for current patterns you can use to make your own shirt ~ Grainline Studio Archer shirt, Cashmerette Harrison shirt, Butterick 5526, McCalls 7575, Vogue 9029, Vogue 8689, Hotpatterns Classic Nouveau Great White Shirt, to name a few. I'm sure there are more out there in Indie land that could be used too.

Personally, I have four shirt patterns that I will be using this fall/winter. Two are TNTs and two will be new pattern sews. My advice is to find a pattern that works for you and sew it a couple times. Make it a TNT pattern that you can use whenever you want a new shirt. As I've said before a TNT pattern allows me to play with fabric, techniques or manipulating both. I like to play. It's the main reason I sew!

One thing to note ~ this month is/was National Domestic Violence Month. Purple is the color associated with the month and as a survivor of Domestic Abuse I'm thrilled that I got this shirt made in time to celebrate the month. Even though it's more lavender than purple, I think it counts. Learn more about National Domestic Violence month here.

Next up on the blog after the month in review, will be a Rivermont Top. I've had this top in my mind since the beginning of the year.  I finally got it out of my creative brain and sewn up...

...as always more later!


Friday, October 26, 2018

The Rifle & Co "English Garden" Border Print Shirt

I know Rifle & Co prints are big - HUGE! Quite a few sewists have made some beautiful garments using fabric from this line. While I like the prints I've seen, I've never felt like I NEEDED to own one...well not until I saw this one on Stylemaker Fabrics site. I was honestly bowled over by the border print which is how this shirt came to be.


There is nothing new in the construction of this shirt.  I used my close-fitting TNT shirt pattern with the shirt tail hemline for this version. Initially I was going to use the TNT shirt with the gathered back. However, after thinking about it, the border print would be more impactful in the closer fitting shirt. So that's what I did.

I'd like to discuss one thing I do in making my shirts regarding the button bands. On some shirts I use the foldover button bands. On others, I've cut it off and replaced the band with a sewn on band. 


What I'm saying is that I don't interface this band whether it's folded over or sewn on. Recently there was a popular sewist on Instagram saying that you had to add interfacing to the band, that the three layers of fabric was insufficient. 

I've made over a dozen shirts now using this fold & turn method and never had a problem with buttonholes being wonky or the buttons not being stable on my shirts. So why did I bring this up? Because there are several ways to sew things and no one way is always the "right" way. Try out a couple of techniques and see which one works for you. Then use what works for you.

Materials Used ~
4 yards Rifle & Co Empire Garden cotton border print
Interfacing from Steinlauf & Stoeller
10 1/2" 2-hole navy blue buttons from my button collection

Design Details ~
First I've used border prints before. I really like working with them and collect them whenever I find them. Here's a blog post I've written about sewing with border prints.

This shirt has no exceptional use of the border print but I didn't believe it needed any. This is a bold print that uses a large portion of the fabric. My decision was how to make the print work best for me. So the body of the print is along the bottom and mid-body for this shirt.  

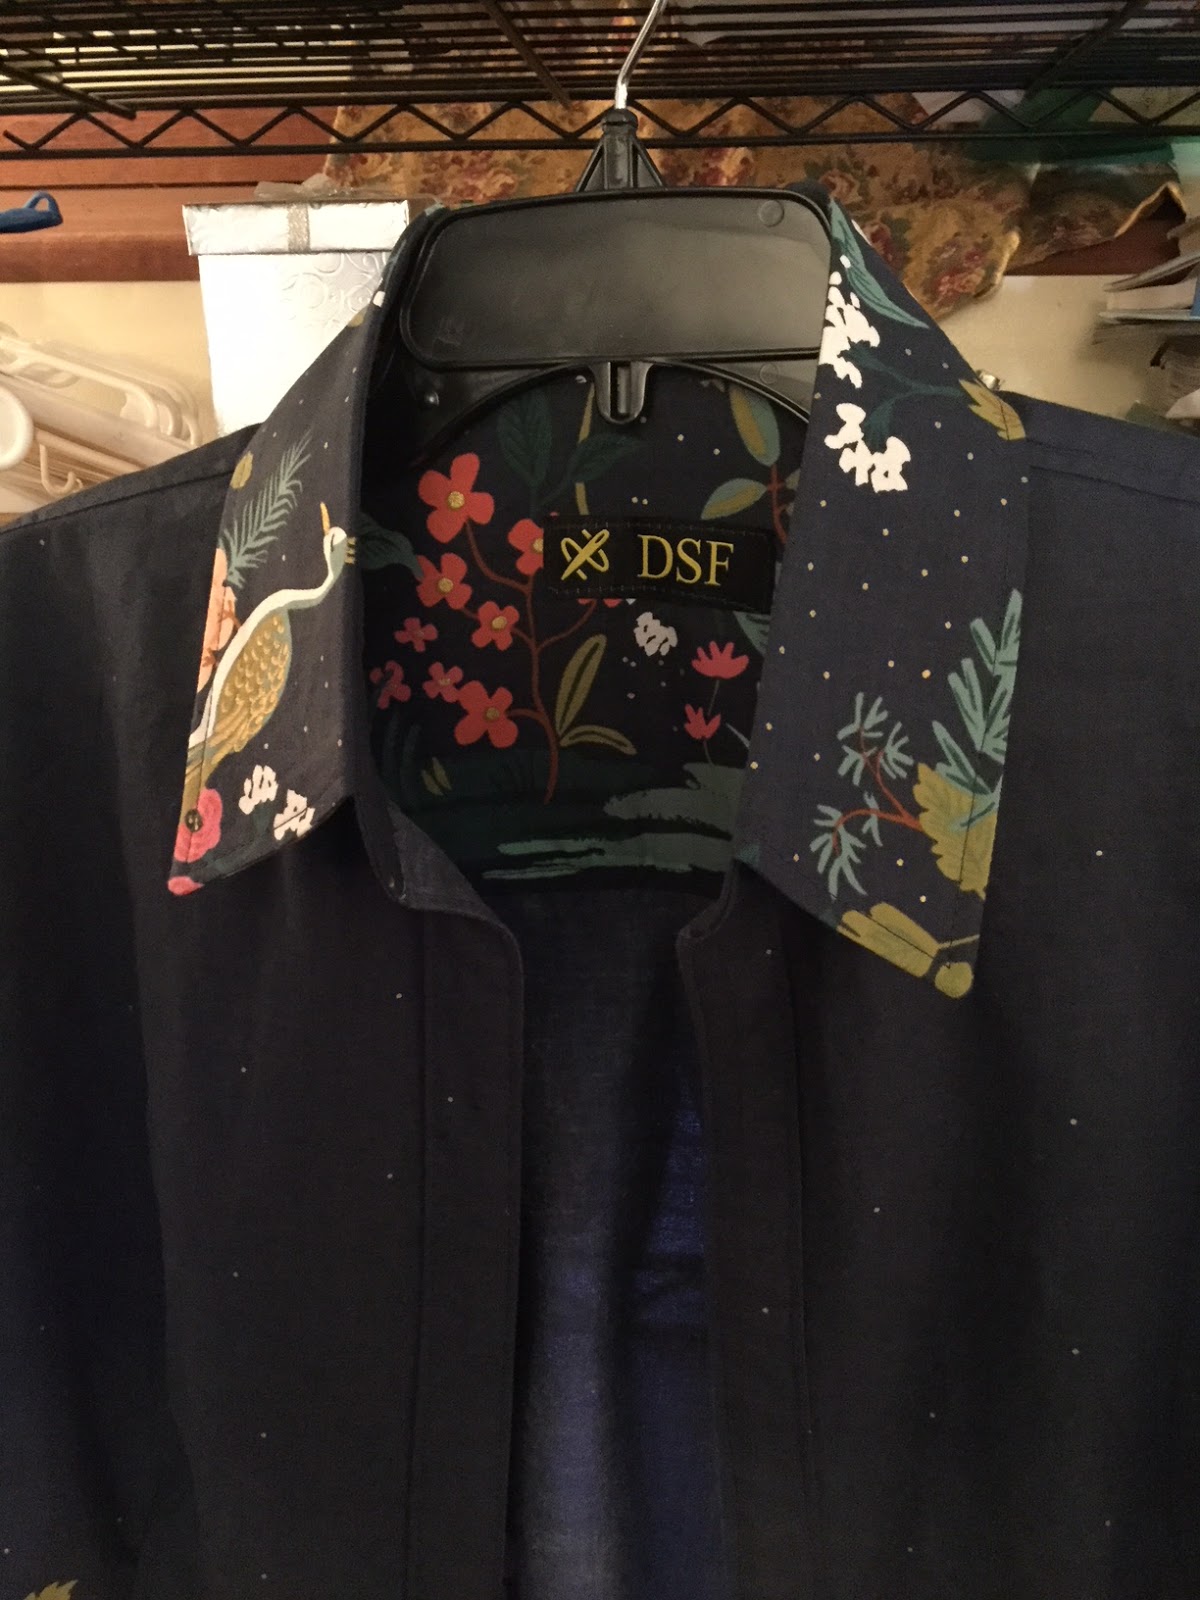
The sleeves and back yoke were cut from the starry portion of the fabric. 


Collar, cuffs and the inner back yoke were cut from the border print.


This allowed the shirt to showcase the border print with the maximum effect.   

A few pictures ~


Conclusion ~
This is the first shirt completed in the border print shirt series. I have a few more left to make before the series is done.  Next up is a cotton sateen border print shirt made from the Fabric Mart fabric haul recently purchased.

...as always more later!

Tuesday, August 15, 2017

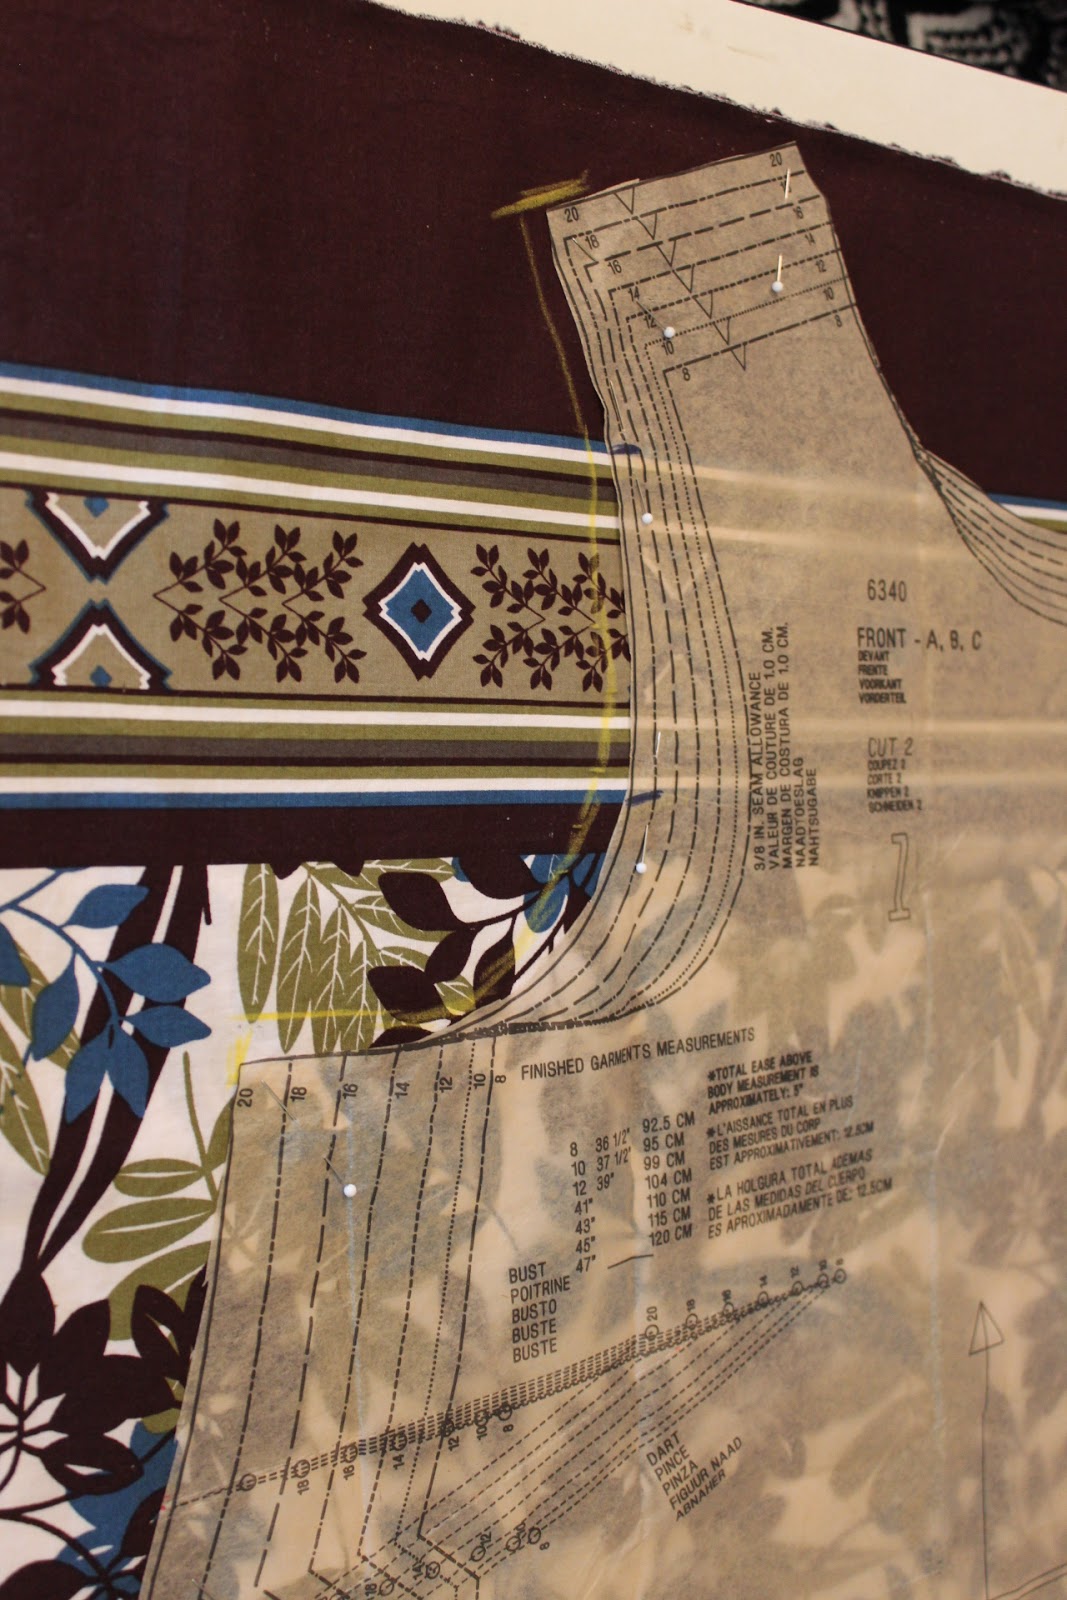
New Look 6340 in a Border Print

After I made my first version, I knew I was going to make another one right away.  This summer my policy has become "If I like it make it again as soon as possible!" Because when you change up the fabric and add an embellishment, non-sewists don't realize you're wearing the same dress/pattern!


I chose this border print for the dress because I wanted something different from the first two versions. Then I flipped the script by using the border print at the neckline instead of at the bottom of the dress.  It looks like I wanted it to in my head but it didn't occur without challenges.


Materials ~
For this one I used a cotton sateen border print from the collection.  The fabric wasn't tagged so who knows where it came from...though I think Fashion Fabrics Club...but I'm not sure. The notions are a little interfacing for the facings and the purchased white piping from Daytona Trimmings also by way of the collection. 

Pattern & Construction Information ~
As you may have noticed I added sleeves to this one which meant a few pattern changes. 


Let's start with the sleeves...
To make sure I added back the space that was removed from the sleeveless dress pattern pieces, I measured the two back & front pieces against each other. Using that as a measurement, I drew the extra space back, right onto the fabric. I probably should have made new pattern pieces but I don't believe I will make this version again...and if I do I have my notes here to remind me of what I did.


That settled ~ the next challenge became how to match the border print across the top of the dress. I wanted it to work from the sleeves all the way across the front and back of the dress. I ended up making and inserting three sleeves to determine which one would work best.

Option One ~
The sleeve cap had too much of the brown in the top which made the border print look really disjointed across the front and back.


Second Option ~
This one had less brown in the sleeve cap but was too long and looked matronly. That was something I could correct though by cutting off some of the extra at the sleeve hem.


Third option ~
Then I decided to try a total floral sleeve adding a piece of the border as a band at the sleeve hem. But the sleeve was too long and heavy looking so I rejected it.


As you can see from the pictures of the finished dress, I went with the second option.

Though honestly, the border print doesn't work as well as I would like across the front of the dress. I wanted it to match completedly around the dress and it doesn't. I'm acknowledging that upfront but I'm still wearing it!

I went back and forth over whether or not I liked the dress. My disappointment in how the border print works across the sleeves, how it looks like a house dress on the hanger...helped to let it hang for a few days before I finished it. When I did, I decided to add some white piping to the neckline and sleeve hems to give it some punch.


I'm so glad that I added the piping. It gives it a little more upscale look yet delivers the comfort I want.

A few pictures of the dress ~


Conclusion ~
Since I used a cotton sateen for this one, it hangs differently than my linen versions do. Also, this dress would have benefitted from a back opening because while it's not so hard to get on, it's a little challenging to get off because of the sleeves. Yet again, not enough to make me not wear it.

Parting Shot ~
My other parting shot pics have featured the girls but the boys were here too. Now while The Little Prince, Danny, never left the comfort of the airconditioning, the Littlest Prince, Joshie, did venture out with his sisters.


This is my last version of this pattern.  I'm putting it away. There are other projects that I want to work on. It's August so summer will be gone soon and I really want to make a few other garments from my summer sewing list.


...as always more later!


LinkWithin

Related Posts with Thumbnails