Showing posts with label Vacation Sewing. Show all posts

Friday, December 11, 2015

Really Another Top?

Yeah by the time I got to this one, I was thinking really another top?  So if you feel like that too, I understand.  Without further ado, here's another version of McCalls 7095.


Materials ~
Maroon printed velvet from Fabric Mart
White velvet
White burn out velvet

Background & Construction Info. ~
All of the materials are from deep within the collection. I actually had to hunt through several bins to find the velvet stash to coordinate the white velvet with the maroon velvet.

There are no new construction techniques in this top.  However, I did cut 2" off each side for a total of 8" deleted from the side seams. My first two versions are a little fuller and it was okay because they were made from rayon challis. For the velvet one, I just wanted to omit that extra fullness.

As I said before, this was the last top of the sewing vacay. I needed to finish the week with a tried and true top and not another involved fitting session. While it's interesting/challenging/necessary to sew new patterns, the fitting requirements for each one can be taxing if you do four of them in one week. I miss tried and true patterns...*sigh*

Anyway, the velvet did require special handling. The pieces had to be cut all in the same direction to insure the nap would run the same on all of the pieces. The seams were pressed open using my needle board which I ended up wrapping around my sleeve board to get a good press. 

For this version I went with the bell sleeves again. To me the bell sleeves really give the top a boho feel. I used the same lace used on the yoke pieces to lengthen the sleeves...and while the yokes are lined, the sleeve bands are not. It really was the perfect top to end my sewing vacay with...

A few photos ~


This is my third version of this top and not my last. I love the coverage of this top and how comfortable it is to wear. Also it works well with leggings and my ponte jean leggings so perfect for my new lifestyle. And who doesn't love a velvet top?!  So luxurious feeling, right?!

...as always more later!


Thursday, December 03, 2015

McCalls 7194 - An Asymmetrical Top

Shams made this top in August. I think I purchased the pattern shortly thereafter because her top was so inspiring. While hers is a study in how to make a wonderful summer top in a lightweight fabric, mine is made using a double faced wool knit.


Version One ~
This is an easy top with several variations. I used View C. I sewed this straight out of the envelope in a size XXL. The only pattern alterations were made to the sleeves to make the bicep area larger.  


Somehow I overlooked the fact that the pattern envelope calls it a close fitting top. I hate close fitting tops. I like the illusion of a close fit but not an actual close fit - if you know what I mean!


I don't know how my daughter and I missed it but all of my pics
wearing the top with this necklace have it sitting over one breast! Oy!

The fabric used in the top is a double faced wool knit with the burnt orange on one side and the heathered gray on the other. So I used the gray for the sew on edges. I purchased this from Fabric Mart many moons ago. 

I will wear this but it won't be a favorite. So much so that I didn't even bother to finish the sleeve hems...just turned them up.  And after seeing the pictures, I'm going to leave them just like this!

A few more photos ~


Version Two ~
Because I really like the idea of the top and Shams version, I decided to alter the front and back pattern pieces for a total asymmetrical look. Now the real pattern work came in.


This was one of the last tops we shot and I was starting to get 
a little punchy.  Don't know how models do this!

Pattern Alterations ~

  • First I added two inches at the shorten/lengthen line on the front and back pieces. 
  • Then I added another four inches to the bottom of the front and back pieces.
  • On the center front line I sliced it up and spread it 1/2 inch wide at the top out to two inches at the bottom.


  • At the center back line I sliced it up and spread it 1/2 inch wide at the top and an inch at the bottom.
  • This gave me 60" in width around the hip line.
  • Then I redrew the altered pattern pieces onto new pattern paper.


Construction Info. ~
For this version, I chose a sweatery turquoise knit that I bought in 2006. Yeah those little tags I place on the front of the fabric tells me everything! Anyway it's been in the collection long enough, it's time for it to be useful.

With this top I followed the instructions except for the fact that I inserted the sleeves flat. I just don't understand inserting sleeves into knit garments in the round. Why? Especially when I've found that I get a better finish when I insert sleeves flat.

Other than that the construction was straight forward. It went together easily and I was careful when handling the fabric not to stretch it too much. I didn't want to distort it.

A few more pictures of the top ~


The top is thin so I'm wearing it with a camisole underneath it.
This is the way I will always wear it.


I had an idea to make a color blocked version of this pattern but I'm moving on. Even with my alterations its still a close fitting top and personally I'm still trying to come to grips with a closer fit. Though both my Mom and Daughter loved this one and my daughter keeps reminding me that you can really see the weight loss in my closer fitting clothing...sure, right.

The turquoise one will probably be worn more than the orange/grey version. Although when shooting the orange/grey one outside I realized that it will probably be very warm this winter. Anyway two of them are enough...

A Parting Shot ~
As you know my daughter comes with four little assistants and trying to persuade little people that they shouldn't be in every shot can be interesting. So my parting shot is of Miss Sammy coming to join me in a picture.


...as always more later!


Tuesday, December 01, 2015

A Godet Top - Butterick 6248

I bought this pattern from Joann's when I was in Houston this summer. I knew that I wanted the version with the back godet because I love some of the pieces that Lori Goldstein does on QVC.


It's interesting that I can only find two finished garments from this pattern on the internet because I think this pattern is so cool!  My version is a combo of View A & B with long sleeves but no cowl and no front pockets - seriously who thought pockets on a woman's stomach is a good idea?  Ummmmm, no!


My Fabric Choices ~
I picked a fabric that is not recommended on the pattern envelope - ponte.  See I already own two RTW versions of this top.  One made from a sweater knit with a polyester georgette godet and the other is a thin knit lycra with a polyester print godet. These wear so well and have a sexycool vibe that I like when I'm going out.

My godet fabric is a light printed mesh that I got from Fabric Mart years ago. There must have been a sale on these at some point because I keep finding pieces hidden among the other fabrics in the collection.

Construction ~
This is an easy to sew pattern. I made a straight size 24. Wait, I know you're thinking but I thought you lost weight - well remember that IF I was sewing this last year I would have added inches to the princess seams to give myself more room.  It would have been the jumping off place ~ not sewn straight out of the envelope.

And it's loose...in a thinner knit I would go down a size or two depending on how tightly I wanted it to fit. However, since I was using the ponte as my base fabric, I wanted to make sure that it would go on easily and not be too tight.

I need to say that I added nothing to the sleeves because they are cut generously! Yes! However, I did make an alteration to the shoulder seam on the front and back pieces to make the shoulder seams an inch smaller. I also didn't play with the seam allowances, they are all 5/8" seams. Hey, there's loads of times those seam allowances have been altered to give me just a squeech more space!  

To add the godet, I sewed it to one back piece, then to the other back piece and finally sewed the back seam up to the marked spot. It makes sure the point is enclosed in the seam without any puckering.

I also inserted the sleeves flat not in the round as the pattern suggests. This has become my method of choice now for inserting sleeves on knit tops, because you have fewer challenges with getting them in the garment correctly. Okay it is a truly puckerless application - I just needed to say that! hahahahaha!

Pictures of the finished top ~


I'm wearing this with my black leggings from The Avenue although I was a little chilly taking the pics. I may end up wearing this with my ponte jean leggings instead. Also note the flat shoe boots - I have them in black and brown and wear them almost every day. I miss heels! *LOL*

Conclusion ~
I want to make this again in the version with the cowl neck using a merino wool or a lighter weight wool. I think to make this top successful it's important for the godet to have enough drape. So for that version I'm thinking about making the godet a little wider so it has even more swing.


Finally, I love how high/low hems work with my figure type. I don't know how much longer the trend is going to last but I'm going to rock it while it does!

...as always more later!


Sunday, November 29, 2015

Vogue 9084 Finished

This was the third top that I made during the sewing vacay but it was the most involved sew.  So let's start with a picture of the Vogue 9084 top finished ~


For all the trials and tribulations to get this top finished, I'm glad I made it. I know it looks nothing like the pattern envelope but I like the use of the suiting fabric with the faux leather to give it a funkysexycool vibe. See I told you, I'm a wanna be biker chick! *LOL*

Materials Used to make the Top~
Glen Plaid Wool Blend Suiting purchased from Fabric Mart years ago
Black faux leather from Sawyer Brook
Rayon Bemberg Lining from lowpricefabrics.com
20" invisible zipper

A little more sewing information ~
I detailed all of the pattern alterations and construction challenges in the previous post. Though this top took way longer to make than I thought it would. My choice of fabrics, alterations made to the pattern and the use of the faux leather all elevated the construction level of this pattern.

I was really concerned that I would have a problem getting the sleeves into the top.  Faux leather doesn't really gather well and the sleeve cap on this pattern needs a little gathering to make it fit. However, adding just a small amount of gathering at the top of the sleeve cap worked. I was really thrilled with how easily the sleeves went into the top, especially since it was the last element added before the top was finished. Even the pressing went without a hitch, probably because I used my shoulder stand and an organza pressing cloth folded into fourths to get a good press.

If I were to make any change to the top, it would be to line the peplum...and I even thought about it.  But removing all of the stitching in the hemline was overwhelming...so the peplum remains unlined. However, that is the only regret I have about making this top.  Everything else worked so well and it's casual enough for my workplace and yet dressy enough for me...so a win-win.

All of the pattern pieces are altered and stored away.  I don't know if I will make this again. It's such a distinctive pattern. Maybe a spring version out of a lightweight ponte...we will see.

A few more pictures ~ 

Adding the extra flare and lowering the back hem by 2" prevented
the flounce from landing in the middle of my backside.

A peak of the faux leather insert on the side

Worn with a pair of RTW ponte leggings and a wedge shoe bootie

Conclusion ~
I am a dress snob. I love sewing and wearing them. I thought that sewing tops would be easy, too easy after the complicated sews I've had making dresses. Boy did this top pattern prove me wrong! *LOL* Yet I'm so glad that it did! It means that I can take all of my advanced sewing techniques and apply them to some of the tops I make to satisfy my creative needs.


I've primarily sewn tops on this vacay.  Since my company closes Christmas Week and I will be on vacation for 11 days with probably 8 or 9 to just sew, I plan on concentrating on a pants pattern then. I'm so excited and so thrilled with this new top!

...as always more later!


Thursday, November 26, 2015

A Hi-Low Top - Vogue 9084 - Part One

This vacation seems to have been all about the Top!  This is the third one I've made but the first one I'm blogging about.  It's another pattern that I bought thinking it would look great over leggings or skinny knit pants. 

I originally wrote this as one post but it was so long that I'm cutting it into two! This post talks about the drama of the make and the second one will have pics of me wearing the finished top.

Introduction ~
As with any new pattern, I'm checking the internet to see what other sewists have to say about construction, how it looks on them, etc.  However there were only 2 reviews. I must be the Queen of picking unsewn top patterns! Or I have no experience at all at what looks good as a top. *sigh*


Let's start with why I like this pattern. I don't know about anyone else but I'm a true pear shaped plus size woman. As such, I'm always looking for a fashionable way to cover my ass-ets! Something that's not loose, ill-fitting, or tent-like really appeals to me. Since I've made peace with the size of my thighs, I've found that I really like high low tops.  So whether they're still on trend or not, I'm gonna sew and wear them.

I chose to use the suiting fabric with this pattern because I really did have an epiphany when I saw the Rachel Roy collection at Macy's. It's then that the thought circling in the back of my mind coalesced. I could use my fabric collection in different ways than it was intended for when purchased.  Of course when I started to work with the fabric, it talked to me and told me a different way to go.

Pattern Alterations ~
I lengthened the front and back bodice pieces two inches because the flounce would land on my bodacious booty and stick out the comb (crown) on the top of a rooster's head. Not a good look or the one I was going for!


Added a 4" wedge to the back flounce because I wanted extra flounce. In the two pattern reviews I read the flounce was just so-so and I wanted much more. Interesting from a woman who hates ruffles right?  But trust me the added extra fabric makes the back look more like the illustration on the pattern envelope.


Widened the dart legs on the shoulder back pattern piece to make the dart a full inch wide. This allowed me to remove the excess to make the shoulder seams fit my own.  Because I narrowed the back shoulder seam, I did the same to the front shoulder seam by slicing, overlapping and taping it down.


Added a 1/2 to each side seam in the bicep area because I wanted to insure that I had enough space.  Especially since I was using the faux leather and adding a lining to the sleeve because I find faux leather sleeves clammy.

Cutting and Construction of the Top ~
Matching the glen plaid was easy since it's not a predominant plaid.  Also, the fact that the fabric was 61" wide made it easy to lay the pieces side by side to get a better match.  That was the easy part.


In my infinite wisdom (not!) I decided that lining the top would be better than adding binding to the neckline. In truth it is, in application it was good until I realized my top was too small in the butt area. Why do you ask was it to small there?  Because when you lower a pattern two inches it would be good to remeasure and make sure it fits around your bodacious booty. Ummmm, I neglected to do that!  So let the sewing drama begin...

After I thought about it I had two choices:
  • One to remove the two inches I added because when I pinned it out, everything fit like it should.  
  • Or two find a way to add more inches to it. Of course I chose the more difficult option of adding more inches.
Hey every eff up is an opportunity for a new design decision right? So I went with a godet/wedge because they have worked for me in the past.  Think of my Olivia Pope top (which btw I didn't have the heart to donate so it's still in the back of the closet) I just had to decide if I wanted the wedge to match the fabric or to use a contrasting fabric. 

Up to this point I was wavering about what to do with the sleeves - match or contrast - drama or no drama. I even considered adding ponte as the contrast and sleeves but decided that the faux leather would add an edge to the suiting fabric. So I went with the faux leather.


I added contrast to the side seams (which I increased by 7" and took it from a too tight to a looser fit) by cutting a triangle from faux leather scraps. BTW, I keep a bag of the scraps because who knows when I will need them!


Unpicked the side seams on both the lining and the fashion fabric and inserted the faux leather triangle. Because the seam is a little bulky, I decided to press the seams down first...and then this happened!


Yeah I had the iron up way too high!  Unpicked it one more time and successfully got the triangles added to get the extra width. At the same time I re-evaluated the peplum. The front piece is a lot straighter than I saw it in my head. Now let's make it clear, the pattern envelope has a very straight front but of course I missed that!


So when I added the needed 7" to the front peplum piece, I also added a 6" wedge to give a little more drape to the front of the piece.  Then the peplum was sewn back onto the top. Oh and one more consequence of adding all of that extra fabric - that long-*ss peplum needed to be hemmed. 


After getting the top hemmed - all eighty million inches of it - I made one lined faux leather sleeve pinned it to the top and called it a night.


Post 2 will have finished pictures and more sewing drama! *LOL*

...as always more later! 


Sunday, November 22, 2015

Transition...

I've thought of loads of ways to write this post and none of them seem to work because I end up sounding like a big whiny baby! As I was walking home the other night, I realized that transitions aren't easy...and neither is this one.

One week I'm inspired and think I know what I want to sew and the next, I'm floundering again! So I'm on vacation this week (btw, I swear I've worked less this year than at any other time in the last 20 years!) and mixed in with the Thanksgiving celebration I want to sew. The challenge is figuring out what to sew.

It's been a long time since I've had loads of time to sew and no idea what to make. I'm thinking I should probably stick to sewing tops since I primarily wear leggings/jean leggings as bottoms. Every once in awhile, I throw a skirt and sweater combo in the mix but I ALWAYS get a comment about why am I so dressed up!  See CHALLENGING!

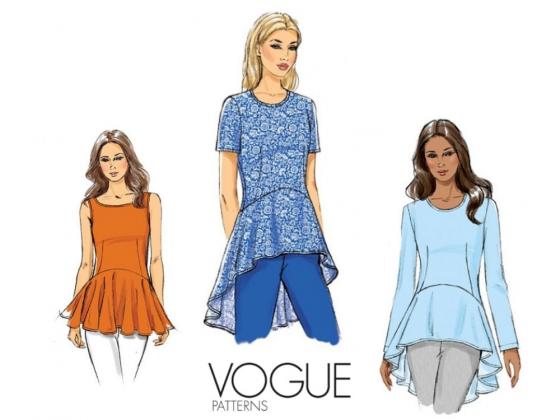
Anyway, I think I'm gonna start with some tops. Here are some of my contenders...


Then I spent some quality time with the fabric collection pulling possibilities...that was actually the best part of the experience...touching the fabric in the collection. I know the pile below is bigger than I can possibly sew in the next couple of days but it's a starting point with options to allow me to sew as I'm moved. Hopefully continuing to sew after the vacay is over!


I'm also on the hunt for some low heeled pumps because even though my legs look okay in leggings with shoe boots, I'm still happiest in a shoe with a heel. I think I need to make a trip to DSW to see what's available.  Finally, I really need to get on with reworking or working on a new pants pattern.

Now let's hope I actually sew and don't end up spending the entire time in front of my television or reading books!

...as always more later!


Tuesday, September 10, 2013

An Update from the Sewing Cave...

I thought I would answer some of the questions posed during the sewcation as well as document some of my thoughts in this post.  However, I thought I would start with a picture of the completed garments...


Pleather jacket, white/black herringbone skirt, CRR wool doubleknit suit
RTW cardigan w/brown pinstripe skirt, cranberry wool crepe lace dress
and finally the Chado Ralph Rucci doubleknit dress

I completed:

2 skirts
2 dresses and
2 jackets

6 items in all

So my thoughts and answers to a couple of questions follows...

I loved the Cynthia Guffey video and I immediately started using some of her techniques...

1.  Pinned the pattern perpedicular instead of horizontally.  Years and years ago I learned to pin patterns to fabric horizontally.  I've seen other sewists pin differently than I did but hey it was working for me - so what was broke didn't need fixing until Cynthia explained why I should.

2.  I'm a scissors/shears girl.  I own a rotary cutter and I do use it to cut bias strips, strips of fusible interfacing, etc. but I cut out garments with my shears. So when Cynthia explained a better way to cut out, I changed the way I was doing that too.  CG explained that you should cut with your scissors/shears between your body and the fabric/pattern because you get less ragged edges that way.  I've always wondered why one side of my pattern would be raggedly cut and the other side clean.  I always fixed it at the serger but its good to know that I can do it right on both sides with a little forethought!

3.  I know that Cynthia doesn't promote fast sewing - and by following her don't move anything after it's pressed until its cold and dry (from the steam) slowed me down considerably. I thought I was good about not moving freshly steamed pieces but when you're conscientious about it, you realize how much time goes by before a piece really is ready to be moved from the ironing board.

+ + + + +

You know the best thing about having a bunch of time to just sew?  You slow down and enjoy the process. What do I mean?  I take my time on the weekends when I sew.  I try hard not to rush any process but there is always a clock in the back of my head telling me I have only so many hours left before I need to shut down for the weekend.  With seven/eight days to sew, the clock doesn't tick as loudly.  I mean it did when I first started but midway into the week, I stopped hearing it.  All I felt was the joy of the process that thing that I was longing for.

+ + + + + 

My Janome 8900 QCP isn't a year old but it has changed my sewing life.  I loved my Memory Craft 6600P but I absolutely adore my 8900.  This week not only have I appreciated the fact that it has the ability to lift the foot in two positions to get lofter pieces of fabric under it but I am also loving my teflon foot.  This foot isn't part of the original feet included with the 8900.  My dealer gave it to me as a gift when I purchased the machine.  I was happy to get it when I got my sewing machine but I was thrilled with it when I needed it to sew the pleather/ponte sweater jacket. Thrilled.

+ + + + +

There were several comments on my preservance on the B6002 pleather jacket.  After thinking about it, I realized that I never felt overwhelmed or bothered until the end.  Maybe if it had been a weekend sew I might have been more challenged...but I had time to think things through and let it rest so I was fine with it.  What a difference having time makes vs. rushing.  And of course the fabric put up a fight...it is beautiful and not easy to sew but so worth the effort...so worth the effort.  

Rachel, I'm sorry but the pleather is only available at Mood's NYC store. Normally I say call the store and see if there is some left but I bought this at the end of July and I just don't know how much or if any is left. However, Mood does have an amazing assortment of pleather online here.  Don't be put off by the fact that Mood calls the pleather vinyl, just know that it's what I've bought and used for a couple of pieces.


+ + + + +


More questions about the sleeve board/shoulder stand that I used for the sleeves on the pleather jacket... I bought this board/stand after seeing it on Ann of Gorgeous Fabrics blog.  You can get one here.  Best $40 I ever spent and a wonderful addition to my pressing arsenal.  I blogged about it here.

+ + + + +

After a week of sewing fall garments, the one downfall is that I won't be able to wear them until it gets quite a bit colder.  It's kind of nice being able to wear the things I've labored over when I go back to work and that won't be happening this time!  Also, photographing these pieces in the heat was a little much!  Seriously, I took one set of pictures in tights and boots and thought it is time to make a transitional dress/outfit instead of all of these fall garments! *LOL*

+ + + + +

After a slow start due to the Labor Day celebrations, I've ended up with six great pieces, and I'm calm & collected ready to go back to work.  Stay tuned there are a few more posts about the garments I made, as well as the September Fabric Giveaway winner!

...as always more later!


Thursday, August 29, 2013

So it begins...


This is where I'm planning on spending some of the next 10 days.  The astute will notice that I said "some"...see it's like this.  Originally I'd planned a 12 day immersion in my sewing cave.  I'd planned to eat, sleep and live in the sewing cave just sewing, sewing, sewing.  Then I said I'd host our annual family Labor Day celebration - ummmmm, I don't even have a grill...*sigh*

But it's okay, I figured I'd lose two days to this AND it really is my turn...so 30 family members will be descending upon me this weekend.  But it was okay because I had 12 sewing days...by losing two I would still have 10 days of sewing pleasure.

Then some really important meetings landed on the calendar at work.  Did I tell you that I got a new boss and some new responsibilities?  Did I tell you that I'm now an integral part of these meetings?  Oh and did I tell you that a member of the team started to freak out when they found out I was on vacation part of that week?  Well you know what happened next...yeap lost two of those vacation days.

So, I'm now down to ten vacation days...two of which will be used working on the Labor Day celebration. I'm not disappointed...just a little deflated.  I know that I still have eight days but some of the expansiveness of time is now missing.  I will soldier on.

My "Fall Sewing List" has 16 garments on it.  The Chado Ralph Rucci pieces don't even appear on this list.  However, I learned a valuable lesson from this past Sunday's sew.  Plan less...sew more.  I've picked six pieces from my list to work on during the "reduced" sewcation.  One of those pieces is a straight skirt ~ yes, it will be made in a trendy fabric ~ but seriously an involved straight skirt takes me three hours to sew.  See, Plan less...sew more.

I don't want a repeat of last summer's sew.  It was truly unfulfilling...even now a year later I remember how hollow it made me feel.  I need these eight sewing days to be calming and productive because the week that follows will be hectic and full of long hard work days. Okay this sounds like I'm talking to the confessional camera on one of those reality shows. *LOL*

Anywhooo, tomorrow I wake up at a decent time...no more 5:35ams for me for the next 10 days!  Woooo hooooo!  I head to Home Depot to purchase a grill. Make out my shopping list for the supermarket to deliver ~ yeah I'm hosting but I'm not biting that "going to the supermarket to shop" bullet!  No way! *LOL*  My daughter will show up to help me clean and set up AND I will enjoy the time with my family.

Then it's onto sewing, sewing and more sewing.  If you're so inclined, stick around to see the five maybe six items that come out of my sewing machine.

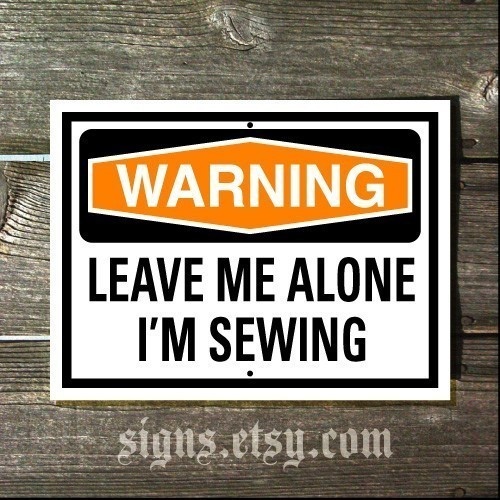
And I'm hanging this sign on the sewing cave's door...


Found on Pinterest


...as always more later!


Friday, February 08, 2013

Twenty Thirteen is going to be a sewing year!

Do you know how companies have mission statements?  They come up with two or three catchy sentences that supposedly define the essence of the company. They print it up on everything...the walls at their headquarters...their promotional materials and handouts...everything.  I've come up with my own mission statement for my sewing this year, 


"It's A Sewing Year and It's All About 
the Designer Interpretation!"

There will be a few patterns sewn this year, again because I keep buying them, so I should use some of them. However, I really want to interpret some of the designer pieces I'm seeing.  Speaking to my plus size sistahs, I know that we look at thin models wearing some awesome pieces and walk away or turn the page thinking, not for me/us.  But this year, I'm gonna prove you wrong!  I want to show you that we plus size & bodacious women can have designer inspired pieces too.

So if you've liked what I've sewn so far, fasten your seat belts, it's gonna be a year of fun and funky, cool and capricious, professional yet edgy...and predominantly designer gear.  I also have a real faux leather thing going on...so expect to see more garments with leather accents too!  

My latest fascination is with Roksana Ilincic because of garments like these:


I've taken a few days off next week.  Originally we were headed to Vegas, but someone has to work unexpectedly so instead of giving my days back, I'm just gonna stay home and sew - make lemonade from lemons.  You know I've got a list. Besides my Mood Project, I'll be working on a couple of other pieces (DL jacket and dress anyone?) too.  

I'm gonna sew like no tomorrow because it's a sewing year and it's all about the designer interpretation!  Yeah that's my mission statement and I'm gonna be repeating it alot this year!  

...as always more later!


LinkWithin

Related Posts with Thumbnails