Showing posts with label Designer Inspired Sewcation Dresses. Show all posts

Tuesday, September 27, 2011

Designer Interpretations - Fabric Inspired

I don't want to sew pieces of a wardrobe.  I don't want to figure out how to make 5 or 6 pieces work with each other.  I know that in times past, I've extolled the virtues of wardrobe sewing and I've even wallowed like a pig in mud, dreaming up and constructing wardrobes...but right now...I don't want to sew that way.  So I won't be finishing up a 6pack...cause I don't want to. 


Now...right now...I'm inspired by designer garments.  This fall season is offering up so many delicious pieces made with wonderful details in amazing fabrics.  I want to make those things.  My mind is overflowing with creativity caused by all of those glossy pictures in the fall magazines featuring the best of the designer collections.  The garments that cause me to go crawling around in my fabric collection pulling out pieces of fabric to then add to a TNT pattern and coming up with my own designer inspired creation.  


Today's designer inspired piece is based upon Salvatore Ferragamo's Fall Line. EricaB has highlighted it and there have been three to five page ad layouts in most of the September magazines.  I love the silhouettes the designer, Giornetti, used but mostly I absolutely ADORE his use of black and white houndstooth.  He has recycled a classic fabric into new silhouettes that have sent my creative spirit into overdrive.


So I found this fabric in the collection:


It's a take on the classic houndstooth pattern in black and white that I've used with my TNT dress pattern...and a black petersham ribbon.


I also added a little piping to the neckline:


An invisible zipper to the back...
and I got a great pattern match here...


And that's as far as I got Sunday evening before I packed it in for the night.  The dress still needs to be hemmed and the armholes finished.  Both are things that I can finish up this weekend so I will have a new dress to wear to work next week...when the weather finally starts to act like it's fall.  


BTW, I've taken the Leather-Look dress apart...I need to cut out the silk organza pieces and stitch them to the dress before I reassemble it.  I also found some brown leather-like piping from Daytona Trimmings to add to the neckline and armhole...so this dress has become a little more involved.  And Toy, the dress is to wear to an after work event...I wanted something a little funkier, trendy and fun...I thought this fabric would make a dress that would fit the bill.


...as always, more later!


Thursday, September 15, 2011

Wrapping it all up

My sewing vacay was shorter this year than in years past...and on top of that I ended up getting sick when I went back to work...so I was home bedridden for two days...cutting into the weekend sewing I'd planned on doing.

I have three items left on my list to sew...the accompanying jacket to The Lace Inspired Dress, the second inspirational Jason Wu dress and a designer inspired dress that I'm still going back and forth over whether I can pull off.  Hopefully the jacket and JWu dress will make it out of my sewing machine before the month is over because this is the first time since I've been doing sewing vacays that I've felt unsatisfied with what I accomplished.  Not in the quality or even the amount but that I fell far short of my personal goals.

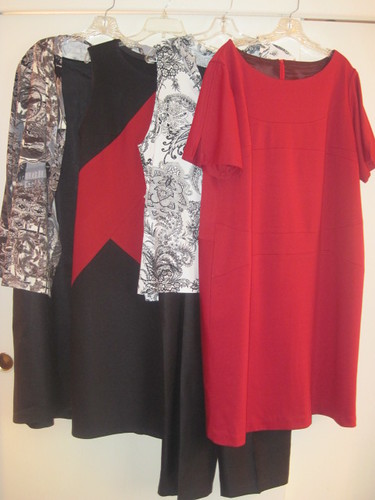
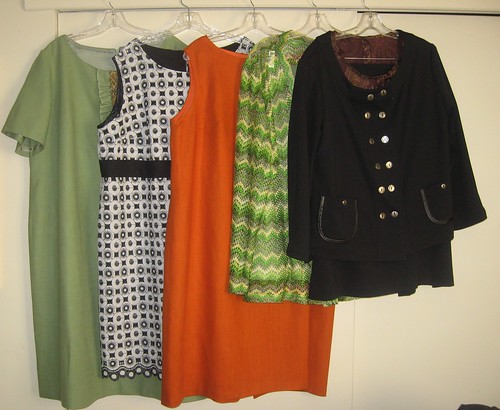
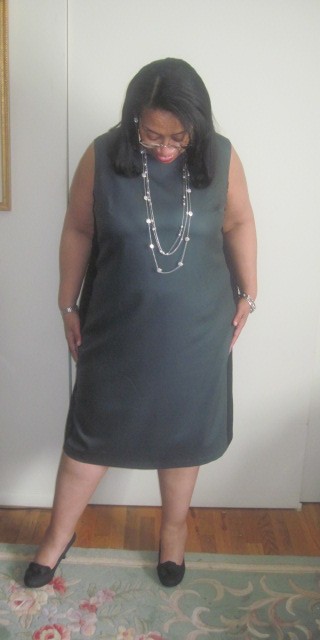
Here are the finished garments from this sewing vacay...

The Lace Inspired Dress, The Pinstriped Inspired Dress,
The Mixed Fabrications Dress and The Quickie Dress

...what I finished last year...

...and the year before...

I will be interspersing quite a few of these looks with the four pieces I just completed to wear to work this month...and even though these were very involved garments...I never reached the creative nirvana that I usually experience after a sewing vacay.  So the main lesson I've learned this year ~ I need the full week off to be creatively satisfied.  Believe me, this won't happen in 2012!!!

The full collection along with construction pics can be viewed in my flickr album.

Finally, I want to thank you all for following along while I sewed...for all of the wonderful comments you left regarding the dresses and for realizing that even fat girls can be fashionable!

...as always, more later!


Monday, September 12, 2011

Designer Interpretations - Mixed Fabrications Dress

The Dries van Noten dress resonated with me from the moment I first saw it in the September 2011 issue of Elle magazine. I'm sure to some it looks like a mixture of prints that don't play well together but I saw a dialogue between fabric and silhouette...and that's what I was drawn to...

So my interpretation of that dialogue becomes Dress No. 21 for this year, Dress #50 from my TNT pattern and the third in the series of Designer Inspired Dresses.  To say that I love a dress is becoming somewhat of an understatement...


Some stats:

Pattern:
TNT dress pattern - altered to interpret the designer dress

Fabric:
Vanilla 4-ply silk crepe from the collection
Black worsted wool crepe from the collection
Silk Houndstooth purchased from Fabric Mart April 2011
Printed silk charmeuse from the collection

Notions:
beige bemberg lining
18" ivory invisible zipper

The Construction Journey:
After making the pattern alterations, I ended up with quite a few pieces...all of those pieces cut from single pieces of fabric needed to be kept separately so that they could be matched up correctly during the assembly process.  Someone referred to the Macy's Dress in the comments section that I made during last September's sewcation, and that was a simplier sew.  Simplier because I only made the interlocking pieces for the front of the dress and left the dress back uncomplicated.  The back on this dress does have a design feature...a little less design than I originally imagined but some detailing nonetheless.

The Dress Front:
There are three very distinctive fabrics used in the front of the dress.  At first glance they don't exactly coordinate...but pieced together they do speak to each other and I like the conversation they are having.  The first thing I did after cutting out the pieces was to beef up the printed silk charmeuse triangle by adding a piece of the lightweight silk used in the HeidiM inspiration dress.  I didn't want to have any difficulties with the weights of the fabric working together once the dress front was assembled.


An additional concern was where all of the fabrics came together at a point.  To insure that it laid flat, I graded some of the seams, used alot of steam while pressing and my clapper very liberally.


The other change in construction - is that my side piece is a little larger than the inspiration dress.  From what I can see in the photos, it is a slim piece with the fabric overlapping it in places.  I made my side piece a little wider (wider body/wider piece) and it works for the look I was trying to achieve...


The Back:
I used the already altered pattern pieces from The Versace Dress back so the sewing wasn't complicated.  I deliberately cut the pieces so that there was a jag around the zipper to add a little interest to the back. 


Originally I was going to add a strip of the printed charmeuse to the back hem...but as I worked on the dress, I decided against it...even though a piece of the print is on the hem of the designer dress.  Also, instead of using a 22" invisible zipper, I substituted an 18" invisible zipper.  The 18" zipper works as well for opening the dress to slide it on so it was no big deal to change that out.

The Lining:


I used a beige bemberg rayon lining instead of a white one because I wanted to mute the opaqueness that the white silk/white rayon lining combo had.  No lace was added to the hemline of the lining.

A few more pics:


I have two more dresses that I want to sew in the Designer Inspired Series.  However, they will come to fruition later in the month.  After sewing three very labor intensive dresses (even if they look simple) it made me want to sew something quick and easy as my final vacay dress which I will share with you next.

Parting Shots:

I bought these shoes earlier in the summer.  They aren't what I normally purchase but I love the AK Anne Klein line of shoes and they are slingbacks another fave...but most especially they are purple!  I think they work perfectly with this dress that pushes my corporate world boundaries a little...just like my shoes.

Shoe portrait in the mirror


Single shoe alone


...as always, more later!


Thursday, September 08, 2011

Designer Interpretation - DVN Dress Pattern Alterations

The next dress up in the Designer Inspired Series, is this Dries van Noten dress:

Dries van Noten Fall 2011
(photo courtesy of style.com)

It's the mixed fabric combination that appeals to me and that look is being shown in several designer lines this fall.  I've pulled these fabrics to fashion a dress that has more of a corporate slant - yet takes advantage of the mixed fabrication of the designer dress.

left to right:  vanilla 4ply silk crepe, silk herringbone,
black wool crepe, print silk charmeuse

Of course to achieve the look of this dress, I had to make some alterations to my TNT dress pattern.  It basically meant chopping up the dress into pieces to use with the different fabrications.  Here are the pattern alterations for the front of the dress:


For the dress back, I will use the pattern pieces from the Versace Inspired Dress. 


I'm sure that this isn't what the DVN dress' back looks like...this is just my interpretation.  It's what I'd like the back of the dress to look like.  Also my dress back will only use 3 of the 4 fabrics shown above.

All of the pattern work has been completed and the fabrics cut out...next up is the sewing.  So hopefully there will be a completed dress to share soon. 

I have one more Designer Inspired dress left to make after this one is done alongwith the jacket for the Lace Inspired dress.  Hopefully, I will get all of this finished before Monday.  If not, I still have some Sundays in September to work on garments since I have to work a few Saturdays this month. 

...as always, more later!


Wednesday, September 07, 2011

Designer Interpretations - Pinstripe Inspired Photos

As I mentioned in my last post, this dress is an interpretation of a Heidi Merrick dress. This too is a sheath dress with interesting details...and it's those interesting details that made me want to make a version of my own.


Some stats:

Pattern:
TNT dress pattern

Fabric:
From the fabric closet, I pulled a lightweight pinstripe tropical wool that I purchased from Fabric Mart during one of their 'the entire store is $1.00 per yard' sales. The sleeves and tie are made from a very lightweight silk that I purchased from Fabric Mart during the April Fabric Shopping Spree.

Notions:
22" black invisible zipper
black bemberg rayon lining
1" black lace

I loved the sleeves and the tie on the designer original. I loved that the dress was made from a pinstripe fabric which is such a corporate fabric but had the fashion forward sleeves and tie. And I realized that this dress would be very easy to make using my TNT dress pattern.

I made a few changes to make the dress suit me. First, the sleeves have the puffy sleeve cap of the original BUT I left the sleeve hems flowy and loose. This looks better on me than the banded or elasticized sleeves. I know this because I did make the sleeves with an elasticized hem and it looked like I was wearing a little girl's dress...NOT the look I was going for! *LOL*


Second, I made my tie extra long but thinner than the one the designer used. Since I'm still experiencing my own personal summers, I decided that a longer but slimmer tie would give me "the look" without all the extra fabric
around my neck.


Otherwise, this was a normal dress construction once I'd worked out the sleeve issues. I added a lining to the dress with a lace hem...you know how much I like that finish in my dresses...


...and that was it.  I think I made the dress work for me and I really like it. Amazingly, so did both of my daughters!

Here are a few more pictures:


I've started work on the next dress in the Designer Inspired Series. This one involved some pattern alterations to my TNT pattern and I will share those next...

...as always, more later!

Tuesday, September 06, 2011

Designer Interpretations - Pinstripe Inspired - "The Sleeves"

My next dress is one that I'm copying twice over.  I saw this dress on The Selfish Seamstress' blog.  Elaine made her own interpretation of a Heidi Merrick dress and even though she is petite and thin, I thought that this dress would work for me.  Because we all know that a sheath dress...is a sheath dress...is a sheath dress!  Here's the original:

picture courtesy of The Selfish Seamstress blog

Again it's the details that drew me to the dress...this time it's the sleeves and the bow tie.  I have once again started with my TNT dress pattern and two pieces of fabric pulled from the fabric closet.


This post is about the sleeves because to me if the sleeves work, then the dress works.  So the first thing I needed to do was alter the sleeve pattern for my TNT dress pattern. 

I had a basic idea of how to go about doing this but I knew that there were instructions and diagrams in the book, "Make it Your Own Personalizing Patterns for Creative Design" by Lori Bottoms & Ronda Chaney.  This book is out of print.  However, it is one of my treasured resources because it was one of the first books that taught me that I could alter a pattern successfully and without fear.


Chapter Four - Savvy Sleeves is where I found the information I needed to alter my pattern piece.  I made a copy of the original sleeve pattern piece and then following the instructions for enlarging a sleeve, I placed three slits in the pattern.  One in the center front and one on either side of the center slit. Then I added 2" between each slice, so that my altered pattern piece looks like this:


Since I only had a small piece of the lightweight silk available, I didn't want to ruin it so I made a sample sleeve from a piece of silk charmeuse that was comparable in weight to the silk chosen for this project...


...then I inserted into the shell of my pea green linen dress...a dress that's hanging waiting to be completed btw...but made from the same TNT dress pattern...


I like the fullness that this added to the sleeve...the detail that I believe is necessary to make this design work.  Now that I'm sure the sleeve pattern will work, I've moved onto making the dress and the tie.

...more later!


Monday, September 05, 2011

Designer Inspirations - Lace Inspired Photos

The dress is finished. It took quite a bit of work to get it there ~ 2 full days to complete and at least 6 hours of hand sewing...but it is finished and I love it!


The Jason Wu Dress that inspired my garment is sold at Bergdorf Goodman for $1,695.00. My version cost $68.91!

Some other differences:
~ the original dress is sold in sizes 2-8, mine is in a size 24.
~ the original dress has lace down the sides and over the shoulder seams,
   mine has the side lace and black piping at the neckline.
~ the original dress has a "high" waistline, mine is a straight sheath
~ the original dress has a high u-neckline, mine is slightly wider
~ the original dress is made from a wool/spandex blend, mine is from a 100%
   Italian wool

Some similarities:
~ both are lined
~ both have an invisible center back zipper
~ both are sleeveless

Some additional stats:

Pattern:
TNT dress pattern

Fabric:
100% Italian wool purchased from Metro Textiles - 2 seasons ago

Notions:
22" gray invisible zipper
black bias binding
rayon seam binding
7" wide black lace from M&J Trimmings
black satin piping

The detail that drew me to this dress was the lace accents.  I only used it on the side seams and omitted the lace detailing on the shoulder, however, that was the detailing I liked least in the original designer dress. 


I replaced that detail with black satin piping at the neckline because the neckline did need something and this will work well with the jacket I plan on making to coordinate with this dress.


The lace accents on the side are very slimming and I love that about my dress.  While my dress is based upon a high fashion designer original, I believe it will still work in my corporate workplace.  I may be pushing the envelope just a bit but it will work nonetheless.

A few more pics:


Finally, this is the first piece of my newly revised Autumn Six Pack plan!

...as always, more later!

Saturday, September 03, 2011

Designer Interpretations - Lace Inspired

A couple of posts back I said that I was going to make five items in five days.  I've actually already shared the five garments I want to sew in an earlier post...but after going through the fabric collection it will probably be only four since I didn't have a piece of fabric for one.  Which is actually a good thing since I got off to a slow start yesterday and I haven't actually picked fast and easy pieces to make.

The four designer inspired dresses I want to sew during this brief sewcation are:

1.  The Jason Wu Sheath Dress with the Lace Embellishments

2.  The Jason Wu Appliqued Sheath Dress

3.  The Dries Van Noten Mixed Fabrication Dress

4.  The Heidi M. Dress w/tie

Since I was off to a slow start, I thought I would start with one of the faster pieces - The Jason Wu Sheath Dress with the Lace Embellishments.  Not only was I inspired by the dress I found on Bergdorf Goodman's site:


But also the Lace Accents articles found in both the September 2011 issue of InStyle:


and the September 2011 issue of Elle Magazine:


I started with my TNT Dress pattern because to me this was basically a sheath dress with a lace embellishment.  Of course the lace embellishment is the make or break detail on this dress...elevating it from a basic dress to a designer one...but easily duplicated using my TNT pattern.

And the construction of the shell was simple...I've done it quite a few times before *smile* so that was the autopilot sewing.  However, getting the lace on was another thing.  It was a little more involved than I had originally anticipated.

First I had to measure the lace so that it hit the curve of the armhole like on the inspiration piece all the way to the hem.  I determined this by matching armhole seam to armhole seam then placing a pin on the front and back of the dress at the halfway point between the seams.

I folded the lace in half and placed a row of pins down the center of both pieces of lace.  Then each piece of lace was pinned to the side seam using the row of pins as the centering point.


Next I hand basted the lace down the center of each side seam and at the underarm seam.


After that I took the dress to the sewing machine with the intent of machine stitching the lace down.  I ended up just placing one line of stitching down the side seams because when I machine stitched one side down it caused an unsightly puckering.
 

So three hours later and alot of hand stitching, the lace was stitched to the sides...


...this is where I stopped to have some dinner and write this blog post.  I thought I would do a progress report since this simple sheath dress was alot more involved than I originally thought.

I did try the dress on. It fits so well and looks great...but I still have to decide if I'm going to add the lace at the shoulder seams (right now I'm not leaning that way), add a lining and hem the dress. 

I will definitely finish this up tonight - so photos tomorrow!


...more later!


LinkWithin

Related Posts with Thumbnails