Showing posts with label Art Teacher Chic. Show all posts

Monday, July 21, 2025

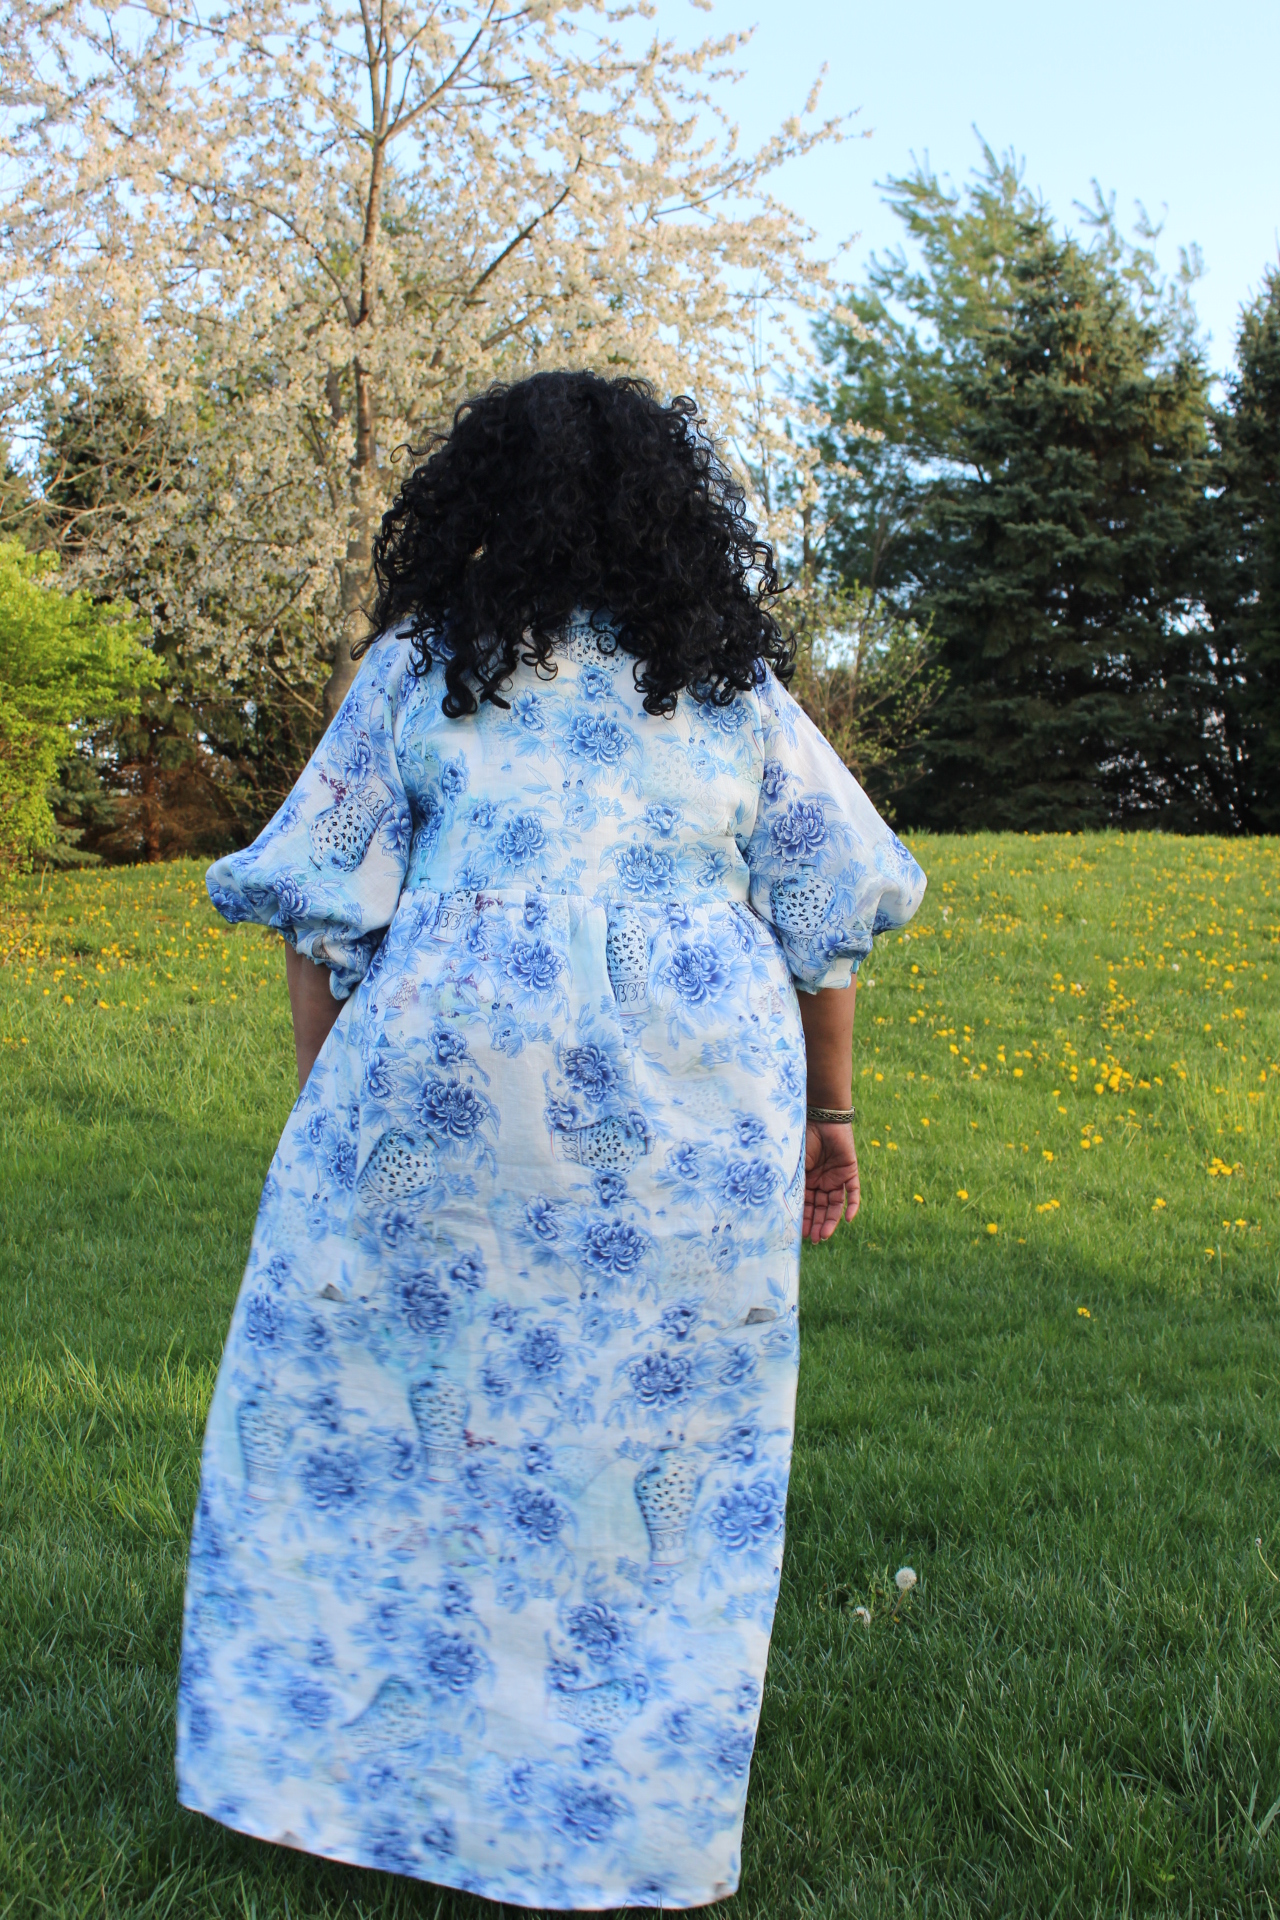
A Floral Vogue 9299

I love the painted fabrics that Julia Allison Costs sells. I've purchased a few pieces because they speak to my creative heart. This is my third garment using her fabrics. The Sunshine Katie and The Mountain Range jacket that is still under construction.

Supplies ~

3 panels of a large floral print from Julia Allison Cost

12 5/8" buttons purchased in Lancaster, PA

A scrap of interfacing

2" twill tape

This was the "Inspiration" for my shirt. I've been seeing this big, bold print on shirts everywhere lately.

Layout ~

This is always the challenging and exhilarating part of a make. How to use the fabric to it's best advantage. How to make the design and silhouette sing. This is also the part that's anxiety inducing because one wrong cut and everything goes south.  As an aside why I generally buy one more panel than I need to make a garment...making sure I have more if disaster does actually occur.

A few photos of the tunic during the construction phase...

Putting the label in the back yoke

Cutting table layout making sure the fronts match

Back without sleeves

Front without sleeves

Construction ~

There are no new construction techniques. However, since I hadn't made the garment in over a year, I did reread the instructions and didn't wing it. Was definitely interesting to see the steps I'd skipped when I remade the tunic as a TNT pattern.

This pattern has several sleeve variations. I've never used them. For this one, I added the sleeve I previously used but I added a cuff to it instead of the elastic in the hemline. I wanted a more classic sleeve and look for this bold printed tunic.

A Few Photos ~


This fits in with my new aesthetic..."Art Teacher Chic" It checks all the boxes for me.  Functional, comfortable, and a bold floral. Everything I like in a tunic and was the perfect garment for a long train ride to Boston this summer.


...as always more later!


Thursday, July 03, 2025

Water Lilies Myosotis - UPDATED!

I've thought about why I return to this dress pattern over and over again. Like why don't I use another pattern? Honestly it's because this pattern checks all of my boxes. It's comfortable to wear. It works in a variety of fabrics, patterns and colors. Mostly I feel pretty in it.  Let's not forget that!

At the end of May 2023, I spent my birthday with my bestie in Lancaster, PA.  The home of cheap sewing supplies and a short ride to Fabric Mart.  The true Disney World of my life! We visited a few quilting stores and shocked several employees with me stating that I wanted to use some of the quilting cottons for clothing.

At one quilt store (Burkholders), I purchased the Water Lilies border print by Michael Design Works and the coordinating striped water lilies & print pattern because as I held the fabrics in my hand, I could see another Myosotis.  So why would I deny this fabric what it wanted to become!


One thing though, this is a complicated sew. Therefore, there are a lot of progress photos making this a very long post.  Right here I'd like to thank my pass self for being diligent in taking them because when I finally finished this a year later I would NEVER have remembered these details without them.


Supplies ~

5 yards of 100% quilting cotton Water Lilies


2 yards of 100% quilting cotton coordinating Water Lilies print

9 - 5/8" green sheer and patterned buttons (purchased from the Quilt Store) Normally I use 12 buttons but they only had 9 so I made due.

Construction ~

Working with a border print is always a challenge. It makes me think outside the box to make the fabric sing yet end up with a wearable yet amazing garment. This was a complicated sew because I was basically remaking the pattern pieces to fit the vision in my head.  There was some pattern work done to accommodate the fabric.  

Bodice:

The bodice piece was enlarged and then the button front piece was removed.  I made a separate piece for the button front. 

I knew I wanted the bodice to be from the lighter part of the fabric. So I needed to sit on it a minute to figure out how to make the fabric work for me. I ended up cutting it on the crosswise grain to make the most of the lighter fabric.

After the bodice piece was cut out, I did a trial of how the fabric from the other pieces of fabric would work with the bodice.

I also did a test with the buttons I choose to see how they would work once the bodice was completed.

Skirt:

The skirt is cut on the crosswise to use all of the border print in the design. 

I removed the original border and added the border from the coordinating piece of fabric after adding the button band to the front.

Sleeve:

Was cut from the main border piece so it coordinated with the dress' skirt. I added elastic to the sleeve to make them short and puffy.  I like this style because it adds some grown up whimsy to the dress and it covers my bodacious arms.

Collar/Front Band:

This was made entirely from the border piece of the coordinating piece. It's the ultimate border/stripe to the entire piece. And the reason it took so long to finish the dress.  Fussy cutting that border held me up for WEEKS! 


Then I had to recut the collar and collar band because of the way I added the border to the front of the dress.  I was hoping that I had enough of the border print left to just cut larger pieces. Ummm no.  The collar had to be pieced to get the length I desired.

I will admit that this went through a few iterations before I settled on this one. But this one highlights the water lilies but yet brings the drama a good border print garment should.

It took me over two months from the time I started this to finish it.  When I say my sewjo had been vacationing, I wasn't kidding.  However, I had a few days off at the end of July/beginning of August 2023, so I finished this up.  When I say this was an involved sew, please believe me that it was.  I had to rethink everything to make the border print work the way I saw it.  All of this took time and since my sewjo was weak, those things took longer than normal.

Then it sat while I waited to get the urge to sew the buttons and buttonholes on the dress.  It sat almost a year before I decided I needed to wear it to church one really hot July Sunday. Then and only then was I motivated to do the last 2 steps!

Tie Band:

As you know, I've lost quite a bit of weight, and I didn't want this dress to sit in the closet or get packed away. I decided to add a ribbon tie to the bodice side seams to remove some of the fullness of the top. 

  • I thought I had a solid green wider ribbon in my trims stash.
  • However, the green I had was a 1/2" wide and would get lost on the dress. 
  • There was a 2" pink ribbon on hand. 
  • I cut a 15" length of both ribbons.
  • Then I laid the green ribbon on top of the pink ribbon and used 1/2" steam-a-seam 2 to iron the two pieces together.
  • I didn't want to stitch the two ribbons together because they both have a distinctive stitch on their edges. 

A few pictures of the dress in 2025. I wore it to work the other day and my co-worker graciously took the photos below:


I'm calling the sewing I'm doing now, "Art Teacher Chic" cause I'm all about the fabric.  How can I manipulate it.  How I can make something unusual and different. I know I will make another Myosotis because it's my go to pattern.  

I know it's a lot of photos but we took them near my job at Broadway & 39th Street at the Art Installment, I'm calling the bones. I only wore this beauty only once last summer and I received so many compliments. I'm glad I finally got to wear it to work this summer and document that fact.  This was such a complicated sew, I'm glad I posted it in case I want to refer to it in the future.


...as always more later!


Sunday, November 05, 2023

A Woodland Border Print Simplicity 8687 - Part 1

First, I'd like to say thank you for all of you who still follow my sewing adventures and leave a comment.  I so appreciate you! Just one quick thing ~ I know blogger has made logging in more challenging so if you use "Anonymous" would you mind leaving your name at the end of your comment.  Thanks again!

Now to the actual blog post...

I use to write progress posts all the time for my makes.  Somewhere in the last couple of years I stopped. I'm changing it up again and going back to writing progress posts.  I appreciate being able to scroll through those old posts and see what I did and why.  Since I'm not sewing as much these days, I feel like I need to share why I make decisions as I'm making them in the moment.  My sewing decisions are primarily based upon my experience. The experiences that affect how I'm sewing going forward.

I purchased a bunch of Julia Cost's fabrics a couple of weeks ago after not buying fabric for almost six months.  That's a LONG time in my world!  However, purchasing it really jumpstarted my mojo which has been vacationing.  I want to use all three of the fabric pieces I purchased taking my time to make them sing.  I also know I want to use TNT patterns for these garments.  I want to manipulate the fabric not fiddle around with fit.

Also, I feel like I haven't been walking in my essence for the last year.  I create that's who I am. Ideas come to me, fabric is purchased or chosen from the collection, a pattern picked and I make garments come to life. Various factors have squelched my creativity but I'm reclaiming it with both hands and leaning into it. Because this IS who I really am.

Pattern:


I'm using Simplicity 8687 again. This will be my fourth version although it wasn't a very popular pattern in the sewing community.  PatternReview only has 7 reviews of it.  The hashtag on Instagram has 13 photos under the hashtag...and several of them are of my toppers. I think I saw something in the line drawings that no one else did.  I've also used very distinctive fabrics to make the jacket pattern sing which definitely changes the finished garment's appearance.

Fabric:

I purchased 4 yards of 55" wide lightweight cotton corduroy border print for this project. While I only needed 3 yards to make this topper, I like an extra yard of fabric to match the border print across the seams. I believe this is necessary for a good border print match.  Trying to be stingy with layout on fabric hurts the look you're trying to achieve.

Notions:

In my sunflower version I bound the hem facing and the hem with bias binding. I'd really like to do the same for this version. I also want to add green buttons for the jacket front.

Construction:

When I tried on the sunflower version, I can close it but my extra weight gain the last few years makes it a snug fit.  Not an obnoxiously too tight fit but I wanted the slightly looser fit of the originally sewn jacket. To achieve this I decided to cut the lower back pattern piece out with a 2.5" pleat.  This gives me the added space I need by adding a cool design feature.

The back and collar pieces are the only pattern pieces I cut on the fold.  Here are a few photos of the cutting out process. 

Cutting out the jacket fronts using a single layer of fabric


Jacket front pieces laying side by side

A few other things to note:

- Corduroy has a nap.  While I cut the pieces on the wide width I made sure the tops of the pattern pieces all faced one direction.  This was so the nap ran the same way on all of the pieces.

- Always, always, always purchase at least an extra yard or extra panel when working with border prints and panels.  It allows you room to experiment, match borders across all the sides and even recut if there is an error.

I'm well into constructing and making some design and trim options for the jacket.  That will be in the next post.


...as always more later!


Saturday, May 06, 2023

A Blue & White Hope

Last year I was on a real tear to purchase blue & white toile type prints. I ended up buying a blue & white print that was similar to a toile and an actual blue & white toile. I was really proud that I only bought two pieces! I'm even prouder that I'm using one for my next Hope.

Of course this is the Hope Dress using the extension pack and it's exactly the same as the funeral dress.  As with all remakes, I improve something with the next version.  For this one, I shortened the length of the elastic I used in the sleeve hems.  I also left the pockets off this one too.

Materials ~

The fabric is a 100% digital linen shirting from StyleMaker Fabrics purchased last year and it's still available to purchase.  

The four 3/4" white buttons are from my button collection purchased so long ago I have no idea where I bought them. 

I used 26" of 5/8" elastic for the sleeve hem casings.  The pattern recommends 1/4" but that would get lost on my body so I changed it.

That's it.  A nice, easy, relaxing sew where I just took the journey.

A Few Pictures ~


(feeling like a matron on an English cliffside with the wind blowing!)

I have fabric set aside for one more version of the Hope Dress using the bias bound, tie front bodice and the original sleeves.  That will be enough for awhile since I will have three different Hopes in my spring/summer wardrobe (not including the funeral dress).  If you don't have this pattern yet, I highly recommend it!


...as always more later!


Monday, April 17, 2023

A Sunflower Katie

For this make, the panel fabric totally drove the idea. I saw this fabric on Julia Allisson Cost's IG account and I knew I had to have some because...

Sunflowers are one of my favorite flowers.  They remind me of my grandmother's garden and the summers I spent on my grandparents farm. BTW, it was my grandmother who taught me how to sew.

The fabrics come from Julia's hand painted art.  Which means the fabrics are different and unusual and that always excites me. 

The Pattern:

When I saw these panels on Julia's site, I knew they would make "the perfect" MimiG Katie shirt.  BTW, this is one of those TNT patterns I revisit over and over again.  I've made several and they're still on rotation in my closet. I love this silhouette because of the ease of wear, comfort factor and how different fabrics can make interesting variations of the pattern.

Pattern Layout:

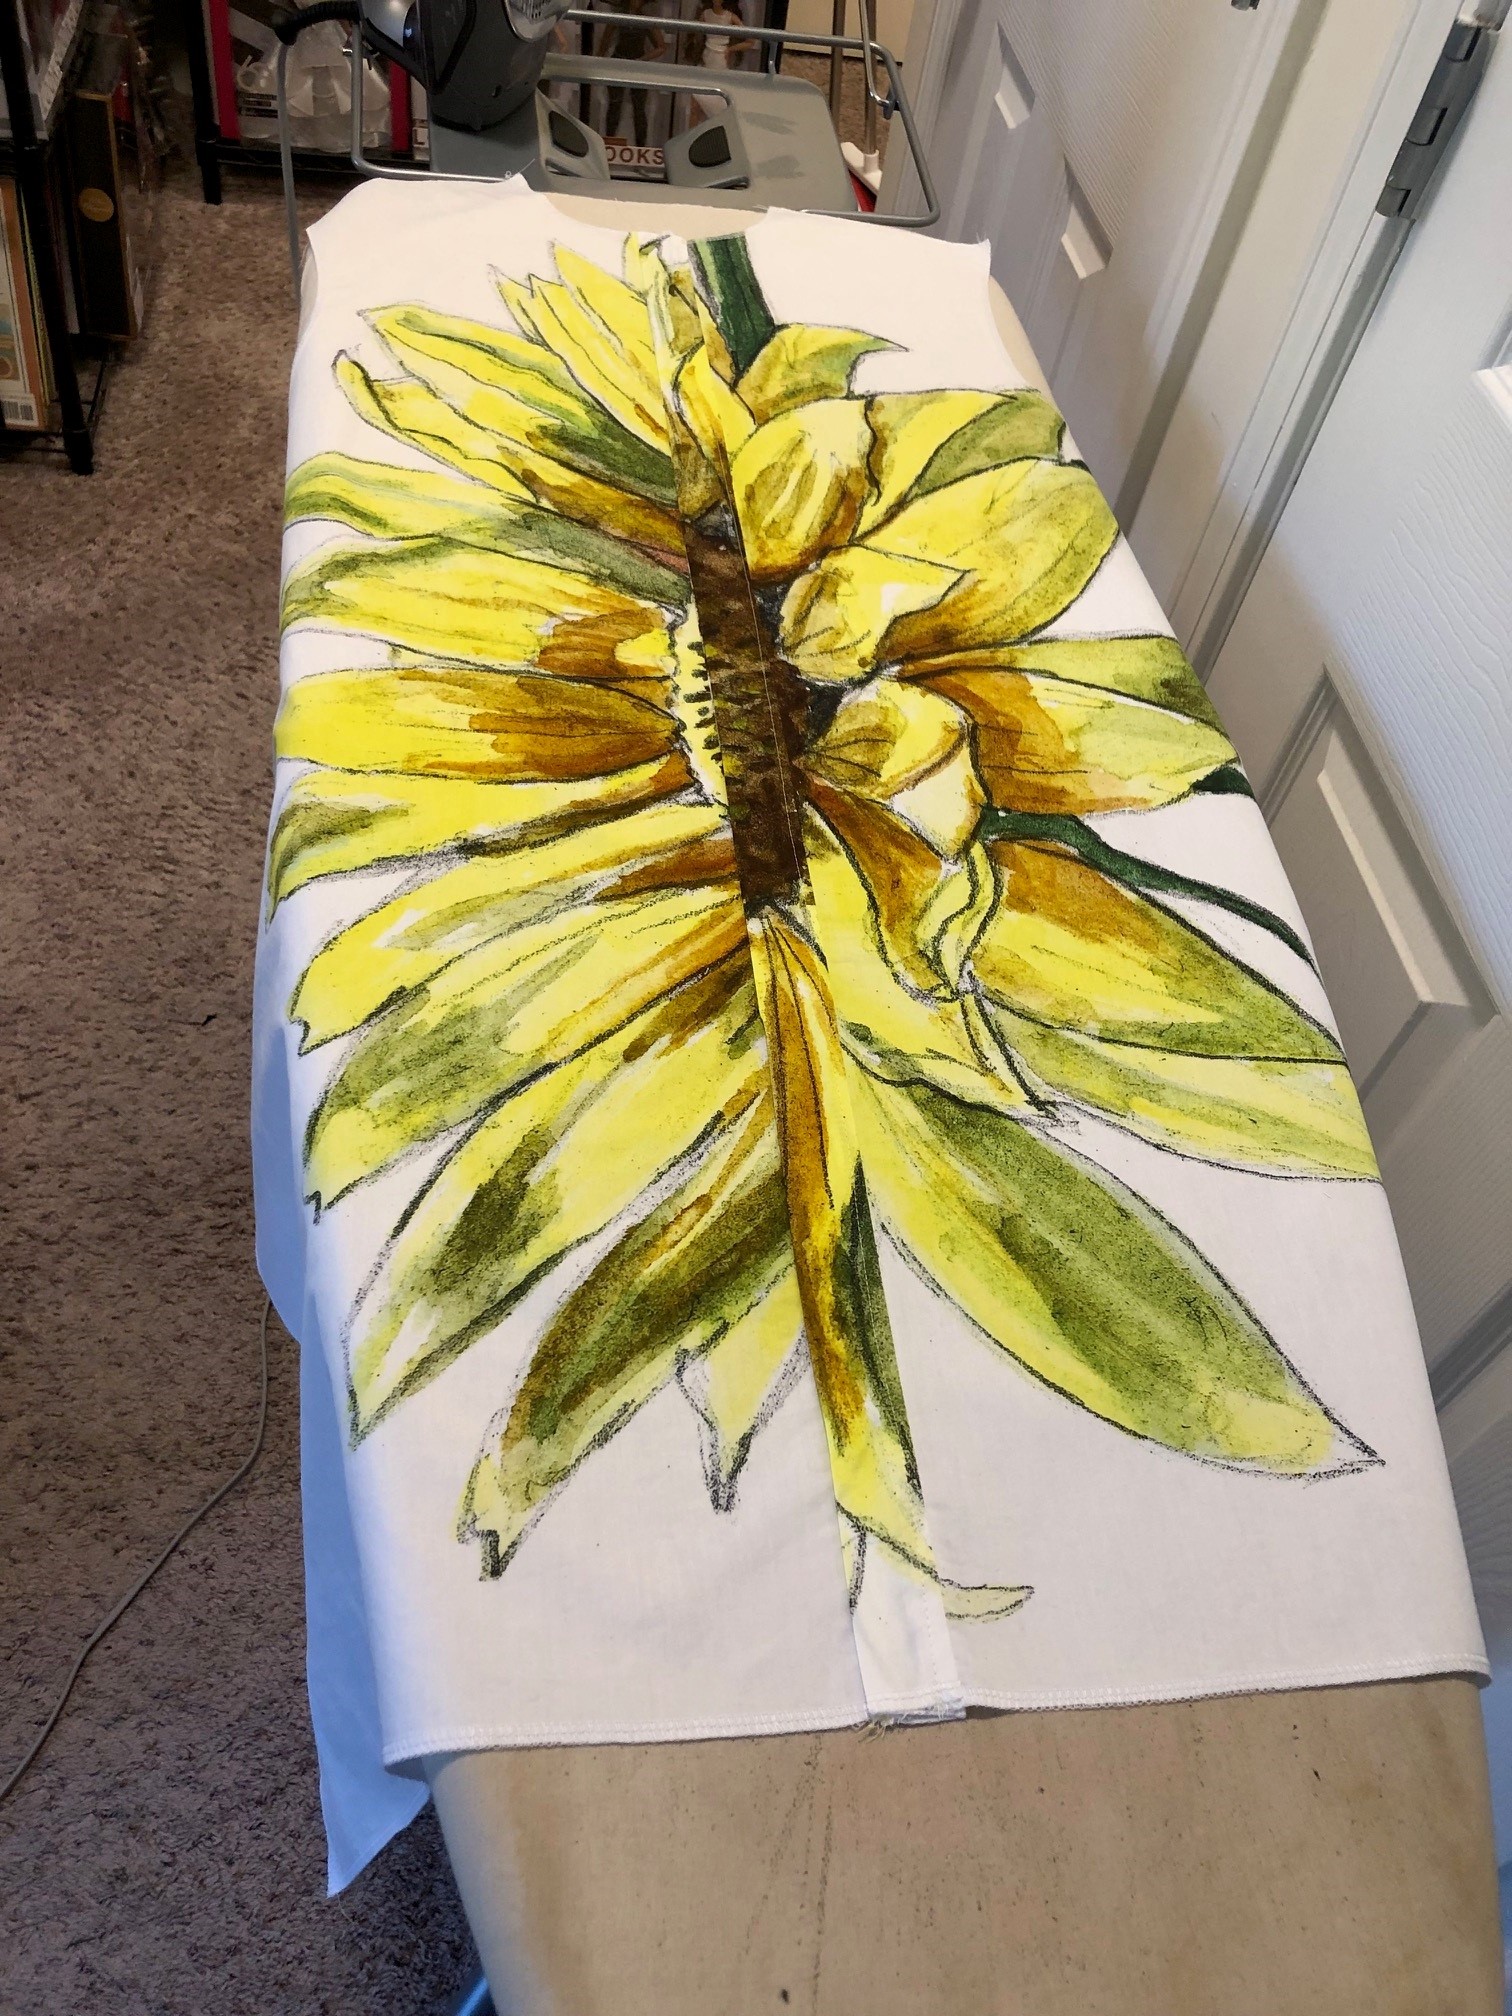
The front & back pieces were placed directly on the sunflower print so all the other pieces could be pinned around them. I wanted the sunflowers to be the focal point.

The sleeves were cut into two pieces and stitched together because there wasn't a white piece wide enough for the full sleeve.

When I realized the button front bands were sewn on, I made sure the shirt front and the button front pattern pieces were laid side by side on the fabric.  This allowed the print to carry across the front of the shirt which is what I wanted.

The collar was cut from leftover stem pieces because I wanted the print to play well together.  A white collar would look disjointed with the sunflower print button fronts. I ended up having to piece the fabric together to get a full collar.  It works because you don't notice the seaming on the collar piece.

The collar band was cut from a yellow gingham that's been in the fabric collection for years but originally purchased from Fabric Mart. I was going to use this gingham for the collar band, the hem facings and the pockets. BUT the gingham was too bright underneath the white fabric.  

I pivoted by using it only on the collar band. I used a lighter yellow gingham bias binding that I bought during my last Carriage Corner Sew Camp weekend for the hem facing. I love how its barely noticeable on the hemline.

Other Supplies:

I chose a button with a transparent greenish cast because it worked with the variety of colors on the front band.

Construction:

This is a simple sew. Probably why I make it again and again.  The only changes I made was to omit the pockets. I know but I'm just not a pocket girl. Also I used the bias binding mentioned above instead of the hem facings.

One thing to note - I did change the thread to sew the buttonholes on so they would merge into the background instead of stand out.  I wanted nothing to diminish this fabrics beauty.

A Few Pictures:


I referenced this garment in my Threads Interview.  

Where they asked what I was currently working on.  A link to the article is here.  

I have a few more Katie's planned using some very distinctive prints. Sooner or later they will make an appearance here. This make falls into my taking my time, using an amazing fabric to make a distinctive, totally me garment.


...as always more later!

LinkWithin

Related Posts with Thumbnails