Friday, November 30, 2018

November was Good to Me!

Well the end of the year is approaching with only 31 days left.  So I'm reviewing these last 30 days, my buying habits and what I made...cause November was a good sewing month for me.

The Fabric Struggle Continues...
First, let's deal with my fabric piggyness ~ or my "In and Out" totals. I'd already purchased 14 yards before I added an additional 22.5 yards with my Black Friday purchases. *sigh* There are a whole lot of things I could say about that but why? We know fabric is my weakness and some months I'm better at containing the piggyness than others.  The total amount of fabric in this month is 36.5 yards.  DEFINITELY a month of overabundance.

The only good thing is that my out total is pretty high. Not high enough to cover the abundance but adequate.  Part of the reason the output is so high is I precut five garments a couple of weeks back. I discussed that in this post. While I've only sewn three of the garments I precut, once fabric is cut it comes out of inventory...plain and simple. So my out total is 22.5 yards. Just one less purchase and I would have broken even...*sigh* There will be a post on what actually came after the last of the fabric arrives. Yes that's right...there is still more coming...

New out total for the year so far is:  208.25 yds. I know this is the amount of some peoples stashes but honestly this is just a drop in the bucket in my world. There is still an overabundance of fabric in the sewing cave. I'm not feeling like I met my goal to sew primarily from the collection but I will discuss that more in my year end post. 

New Additions to the Closet...


I made six garments:
     - Blue Gingham Shirt
     - McCalls 7817 - Jacquard Jacket
     - Cashmerette Pembroke Turtleneck Tunic
     - Velvet Deer 'n Doe Dress - coming to the blog soon
     - Black Ponte & Lace Jacket - coming to the blog soon
     - Cashmerette Rivermont Top - coming to the blog soon

Next...
I have two more shirts in border print fabrics cut out that are waiting to be sewn. They will definitely be on the blog next month. I will also have a lot of time to sew during December due to my Winter Break. Some of the garments I make may show up at the end of December.  But I'm sure more of them will fall into January 2019 cause when I'm on a sewing tear, I just like to sew.

Anyway, it was a good sewing month and Imma take pride in that!  Next up on the blog is the Velvet Deer & Doe dress.


...as always more later!

Wednesday, November 28, 2018

Cashmerette Pembroke Tunic in a Wool Knit

I've been looking for a turtleneck pattern that I wouldn't have to do a lot of work on.  The Pembroke pattern while not a true turtleneck, is close enough for me to use to make a couple of layering pieces this fall/winter.


This is a simple sew. I used the shoulder seams for size 22, bust and waist size 24 and hip size 26. The bust cup is a C/D.

The fabric is from Gaylen's fabric collection. She was going to add it to her pile of giveaway fabric for the Baltimore Destash. I rescued it instead! It's a panel border print wool knit that I used 2.5 panels for the tunic.

I added seam tape to the shoulder seams and used a double needle to sew the sleeve and bottom hems. That's the only construction information, so a few pictures.


This was my trial make. I'm going to make a couple of adjustments to the pattern (shoulder, widthwise and length) then make a few more. This top will make a great layering piece for winter and its just what I need to add to my wardrobe.

Here it is with one of my first Simplicity 8059 cardigans and how I will wear it.


This version is a great jump off for future makes. I'm sure a few more will show up here in the upcoming months!


...as always more later!


Sunday, November 25, 2018

McCalls 7817 - A Jacquard Jacket

I'm always looking for toppers that will work with my casual lifestyle.  Now while I'm drawn to very tailored jackets, realistically they don't fit into my work life. So when I saw this McCalls pattern in the fall offerings, I thought it would fit well in my wardrobe...


Even though this pattern has several sleeve variations, I'm sticking with the kimono type sleeves because I like simplier silhouettes. Refer to my sentence above about tailored jackets. I really am a classic silhouette loving sewist who likes bright colors and prints. This pattern gives me a great layering piece, which I need for the winter. It's simple, classic and stylish.


Supply List ~
Blue/Black Jacquard from Elliott Berman Fabrics
12 yds black bias binding from Pacific Trimmings
1 small snap

Pattern Alterations ~
- The shoulder seams were shortened by an inch 
- Did a pivot and slide to add 3" at the hemline and 2" at the hip area
- Added inseam pockets from McCalls 7481 

Construction Info ~
This is a simple sew and it goes together quickly. There are four pattern pieces - back, front, sleeve and sash. The time consuming element is the bias binding...and that's what drew me to the pattern.

I did add some time to the construction by adding pockets after I sewn the side seams. So everything had to be ripped open and sewn again. Because I used big and deep pockets, I had to hand stitch them to the jacket front so they wouldn't flop around inside the jacket.


The bias binding was applied using the Hong Kong method. The pattern tells you to fold it in half and sew it down. I wanted a cleaner look. Applying it using the Hong Kong application means that the bias is longer on the inside. Stitching in the ditch causes it to have a more finished look on the jacket front. 

I also added some ribbon ties from the bias binding to the side of and the front of the jacket to tie it together. I wanted to insure that the belt wasn't the only thing holding the jacket together.

A snap was sewn to the v-neck junction at the front of the jacket. This helps the v-neckline to lay flat. To me all of these additions enhance the wearability of the jacket.


After I added the snaps I noticed that the left side hangs a little lower than the right. I was going to fix it but I like the quirkiness of it, so left it. When you're looking at the pictures below realize that the fronts not meeting is deliberate.

A Few Pictures ~


The fabric is what makes this jacket work. I suggest if you make one for yourself that you use a bold fabric (like the pattern envelope) or a denim so that the jacket is distinctive. Your bias binding can be coordinating (like mine) or contrasting to add even more pop! Also, buy more bias binding than the pattern recommends. I bought 13 yards and used 12.

This is where I tell you that Elliott Berman supplied the fabric as part of my Brand Ambassadorship with them. If you're interested in purchasing fabric similar to the one I used, check out their new french jacquards here. One more thing about the fabric, it's warm. I'm looking forward to pairing this with other turtlenecks during the cold months of January through March.

I would make this again...probably in denim. Though I will have to adjust the pattern fronts.  To achieve the look on the pattern envelope, I need a little more fabric across the front. Even though I'm fine with the way this one hangs. But if I do make it again, I will definitely make the adjustments.

Even with that I highly recommend purchasing this pattern. It's a simple sew especially if you don't add all the elements I did. The finished jacket has a lot of bang for the buck and I'm sure it will get a lot of wear this winter.

...as always more later!


Saturday, November 17, 2018

Do you?

Do you cut out a pile of garments to be sewn and then sew from the pile?


It was something I tried back in my early 20s.  I cut out a large pile of garments. Before I got to the bottom of the pile, I was totally turned off and didn't want to sew the garments. It probably didn't help that I did it during the summer when I was working. By fall I had to change living arrangements and my job so the things I cut had lost their appeal.  

Fabric & patterns were more precious to me then (having less disposable income) so I was majorly disappointed when the fabric sat unused and eventually got thrown away because I was no longer that size.

I developed a policy never to cut out piles of garments again. Basically I've lived the cut one, sew one policy for decades. However, earlier this summer, I cut out four projects and managed to sew my way through all of them. I was bitchin' by the end of the pile but I did get them all sewn.

It made me look at and think about my sewing differently. See I always have sooooooo many projects on my to-sew list. Then there are the ideas that float in and out that never make it to my list but tickle me creatively. A couple of weeks ago I was drowning in sewing ideas. There were so many projects demanding my attention. I needed to do something more about it then just write them on a list. 


So one evening I headed to the sewing cave and pulled fabric and placed them with patterns. The next evening I pulled notions and trims to go with each project. Even making a list of a few items that I needed to purchase from Pacific Trimmings. Though in actuality, after searching the notions stash, I found everything but two things which made me happy...so very happy that I'd shopped the stash first. 

Now that I'm working in the garment district again, I find it's so easy to head to M&J or Joyce Trimmings or Pacific Trimmings that I'm neglecting the very LARGE notions stash I own. I'm glad I looked before I bought this time!

Then I started cutting. Most of what I'd paired with fabric was TNT patterns...items I'd sewn before with success. Each cut garment was paired with it's notion and pattern, then piled on the cutting table. I'm presently sewing my way through the pile. Instead of the angst I thought I would feel so far I'm not bored with the pile. Then again I'm still in the beginning stages of sewing the pile so we will see how I feel as I near the bottom of it. Though I am encouraged since I'm only working Monday of Thanksgiving Week and then it's four weeks until Christmas Break, so I have plenty of sewing time coming up.

This brings me to my "Question of the Day."  Do you pre-cut piles of fabric/garments to sew?  If you do, how many do you cut at a time?  Do you do it seasonally?  Have you been successful with this type of sewing? Also, do you worry about ending up with UFO's? If you don't, why not?  Do you have the same concerns I use to have?  Or do you just prefer the one off sewing? 

This is the Question of the Day, so talk back to me. I'm really interested in hearing your answers to the questions. Oh and here is a good place to say, that I understand why you read my blog on a reader (i.e. bloglovin') but I don't check my account there often, so if you leave a comment or ask a question I probably won't see it.

There are finished garments up next on the blog because pics are being taken tomorrow.

...as always more later!


Wednesday, November 07, 2018

Registration has opened for March 2019 Sew Camp

I must have a thing about Sew Camp at Carriage Corner in March because I've been the last two years and will be going again next year!


Registration just opened for the March 22-24, 2019 weekend of Sew Camp. If you're interested in spending a weekend with like-minded sewists doing the thing we love most - then contact Gaylen at hello@carriagecornerbandb.com for information on room rates and details.

Just to remind you why you should come ~

Friday is shopping at the bricks and morter store of Fabric Mart:

From March 2018

From March 2017 - I think I'm taking the picture in this one

After lunch at a local cafe we head back to the B&B for dinner and sewing as long as you want...


Sewing is all day Saturday and Sunday until around 5pm...


I can tell you that it is one of the best sewing weekends I have! It's probably why I and several others return year after year. I mean fabric shopping at one of my fave fabric spots, all sewing conversation for three days and sewing, sewing and more sewing!  Yeah count me in!  I hope you'll join me there!

...as always more later!

Sunday, November 04, 2018

A Talbots Influenced Shirt

This is the third shirt in the "Border Print Series." I added it to the series because of the mix of gingham fabrics and the fussy cutting needed to make the shirt work...


Let's start with the Inspiration photo that jumped this shirt off for me...


I've held onto this photo since spring because I love the play of the larger versus smaller gingham. I'm grouping it with the other border print shirts because of the fabric manipulation required to make the shirt work. To get the look there were bias pieces cut out as well as the front and backs being singly cut in the same manner I cut a border print. That's how this shirt gained a place in this series.


Here is my supply list ~

Fabric:
Both gingham fabrics are from StyleMaker Fabrics. I chose to make mine from navy & white but other color combinations are available here.

Notions:
1/2" 2-hole white buttons from Pacific Trimmings
Interfacing from Steinlauf & Stoeller

Construction ~
As I mentioned above, cutting out was the most important part of making the shirt work, especially since this version of my TNT pattern has princess seams.  For this shirt, I went back to the straight hem of previous shirts. I know my inspiration pic shows the curved sides but I was ready for something else.


I also omitted the bands with buttonholes and buttons on the sleeves. My sleeves have a sewn on cuff.

Using the straight hem made it easier to match the plaid across the seams of the shirt.

For the back yoke, I cut the fabric on the bias and added a seam to get the chevroned pattern. I like the detail but honestly I did it so I wouldn't have to match the plaid of the back yoke to the shirt back bottom.

Buttons on the front are white 2-hole shirt buttons which are smaller than buttons I normally use. Because of that I added more of them down the front of the shirt. When stitching them to the button band, I had to use tape to hold them down so they wouldn't move around. So thank you to whomever left that tip in the comments.

A Few Pictures ~


Conclusion ~
I took a couple of months to acquire the fabric I needed to make this shirt. I'm glad I was able to get a combo I liked. It was the challenge of manipulating the fabric and making the plaid match all the way around the shirt that was the intriguing part for me. So while this is not "technically" a border print, the extra work to make it happen is why it's in the series.

...always more later!


Wednesday, October 31, 2018

Just like that it's the end of the month!

I don't know about you but October just flew by!  Flew! However, it was a good sewing month for me.


I posted six garments. Two were made in September and four in October.  I still have another one to share with you...rolling it over into November. October was a good sewing month!

My fabric in and out totals for October are ~
Fabric in:
26.5 yards (15 yds from Fabric Mart, 6 yds from Blackbird Fabrics, 5.5 yds from Mood)

Fabric out:
17.5 yards out for 3 shirts, 1 top and 1 jkt.

Year to Date totals:  
I ended up with 9 more yards in than out this month.  Which makes my YTD out total:  194.25 yds

Again, while it seems impressive it wouldn't be if I hadn't given away so much fabric. I still need to sew more from what I have than of dreaming of garments with new fabric.  That will be a challenge for 2019.

Love to Sew Podcast ~
Another wonderful thing that happened this month was my interview on the Love to Sew podcast.  If you haven't had a chance to listen to it yet, it's available here or you can download it on iTunes.

Some Random Sewing Thoughts ~
I'm always wondering lately how much to post to both my blog and Instagram about the state of the affairs in the world. I don't want to be have one of those pretty Instagram accounts that just reflect my sewing. I'm much more interested in having an IG account that reflects me - that's authentically me!

I've been thinking about my style some more...definitely brought about by the questions asked of me on the Love to Sew podcast. I think I have a better description. I'm Stylishly Comfortable.  I use to be "Corporate Chic with a Designer Flare" but these days I've traded heels for sneakers. Dresses for shirts and jeans and I rarely wear my collection of pearl jewelry sets anymore. Though my co-worker did say I'm rather well accessorized.

I'm never going to stop buying fabric. I have a problem and it's not gonna change. If I'm honest, I really like buying and having a lot of fabric around just need to set some boundaries...okay I might have said that twice in this post. 

I was looking for how to insert an invisible zipper on my blog cause I've been sewing buttonholes and buttons so much lately, I got lost! Seriously!  Anyway, one of the posts I checked out was from June 2010 and it featured this dress:


The post was called Museum Inspired. Its made from two knit panels that I purchased from Fabric Mart. I'm thinking I'm going to share pieces from older posts once a month. Things that everyone can remember I've sewn. Especially since I have a treasure trove of garments on the blog that many newer readers have never seen and no longer live in my wardrobe.

Well only two more months and its twenty nineteen. I have a few things I want to sew for November.  Trying to decide if I'm going to do any Christmas sewing this year.  However, I will be off work from Saturday, December 22nd through Sunday, January 6th, 2019 for some serious sewing time. I have a few personal things to do but I will be sewing.

...as always more later!


Sunday, October 28, 2018

Lavender for Winter - Why Not?

Fabric Mart put up a bunch of cotton border prints in September and I bought four of them. I knew as I was purchasing them that I wanted shirts from them. Because when was the last time you saw a cool border print shirt in RTW?  I can't remember if I ever saw one! Ah the joys of sewing for yourself!


Supply List ~
TNT princess seamed/back yoke shirt pattern 

Fabric:  
100% cotton sateen border print

Notions:
Interfacing from Steinlauf & Stoeller
1/2" plastic floral buttons purchased from Pacific Trimmings


1" white bias binding purchased from Pacific Trimmings

Some Construction Thoughts ~
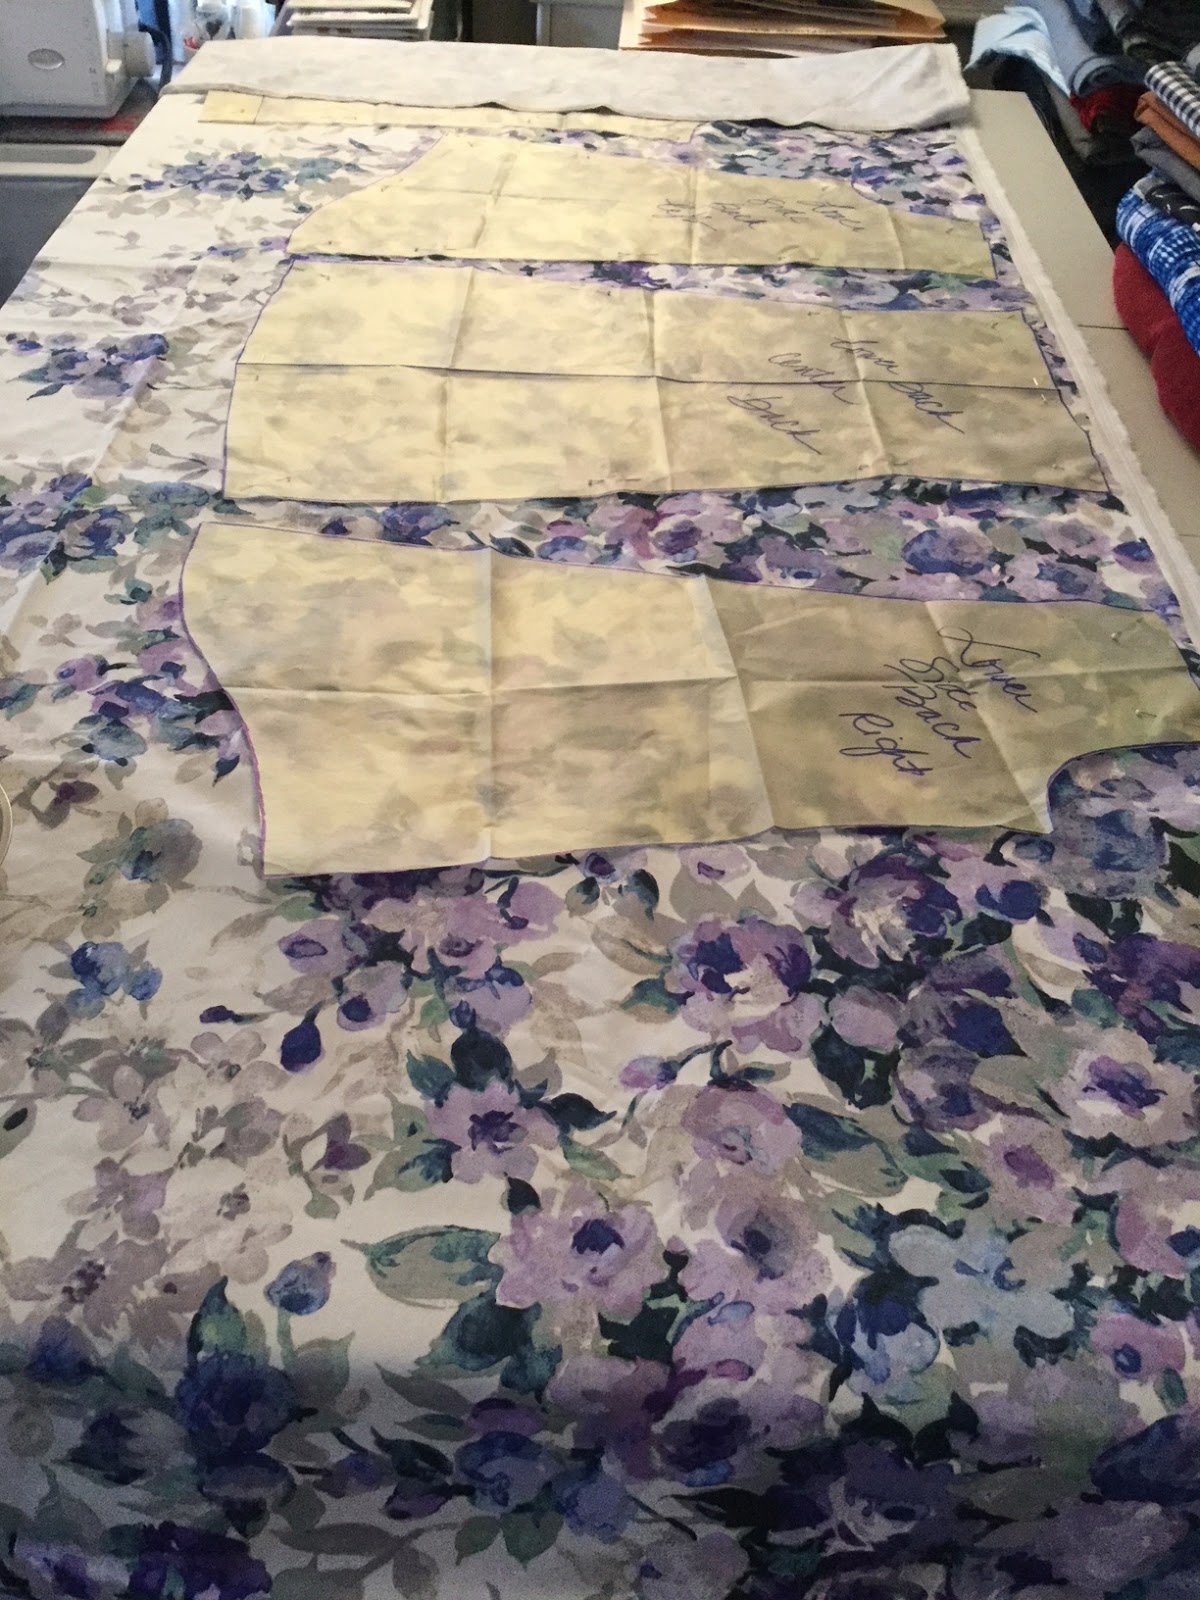
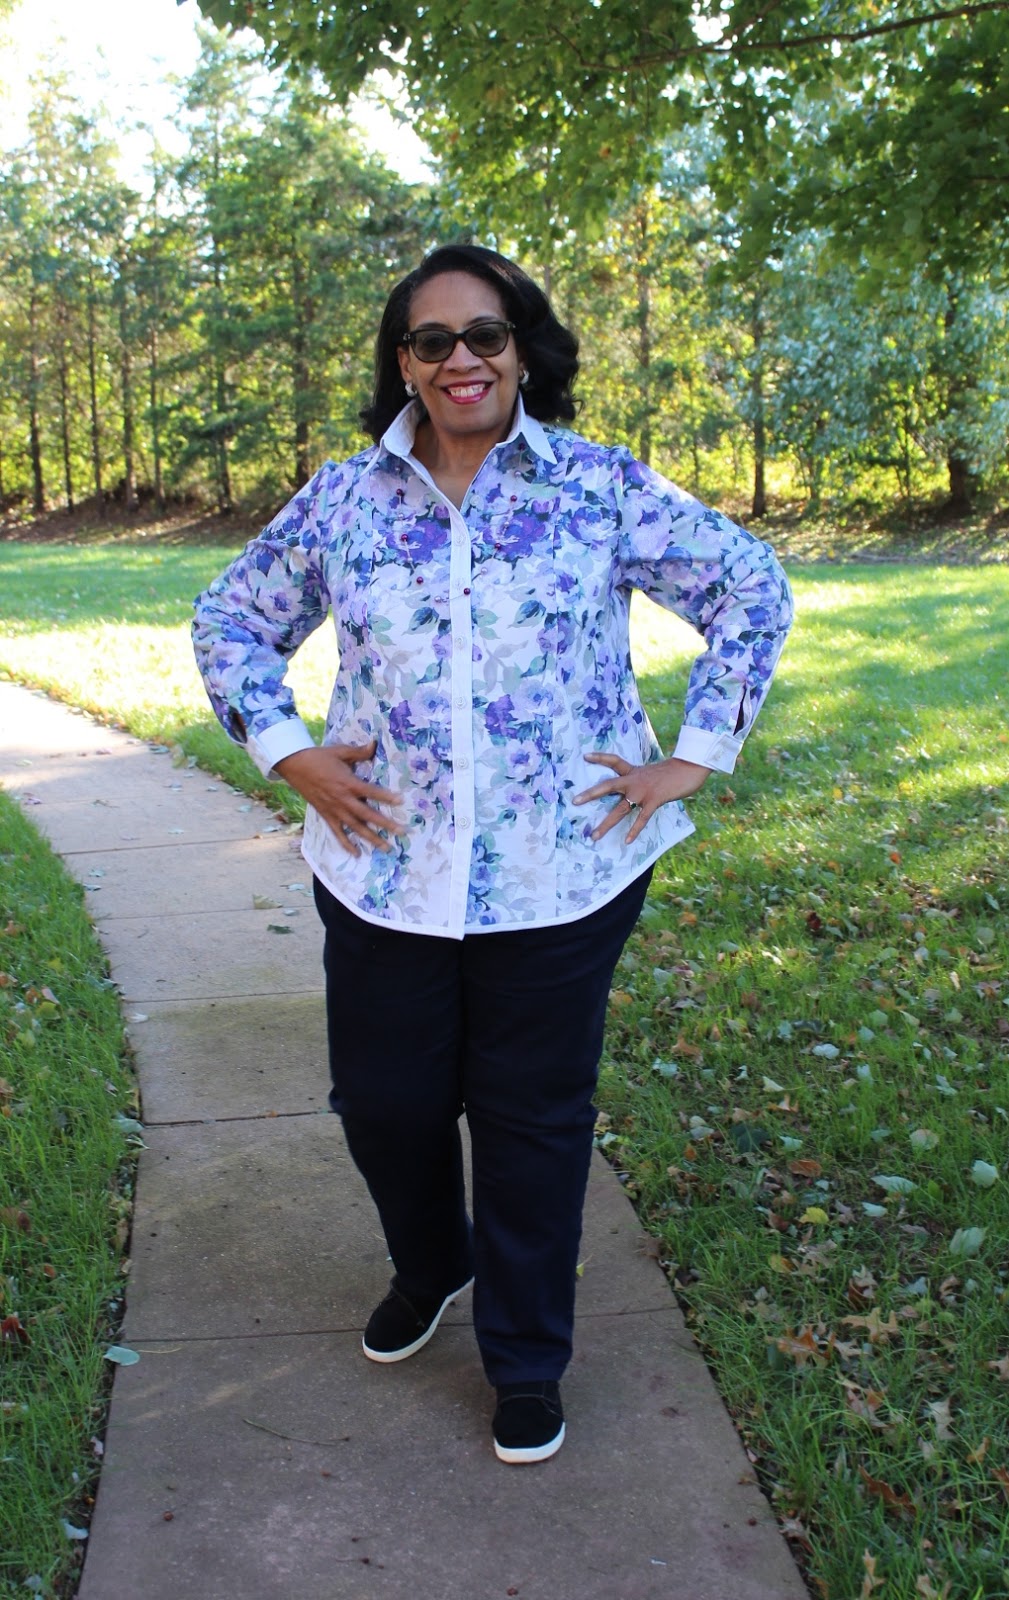
I think of this as a happy shirt because the fabric makes it so! Normally border prints are used with the print on the bottom, like my previous shirt. This time I used the border print for the main body of the shirt since it covered more of the fabric. The white from the top of the border print was used for the collar, collar stand, button bands and the cuffs.

To cut out the fabric, I used a single pattern layout which means the fabric was cut with the stretch going up and down the body. However, for the sleeves I wanted the stretch to go around my arms. So the sleeves were cut on grain with the stretch around the arms. This is important with my bodacious biceps and a mistake I made with a previous border print shirt make.


Another point to mention is that the fabric is a mid-to-heavyweight cotton sateen. This is not shirting fabric BUT it's perfect for our cold winters. I will add an additional layer of warmth with either a long sleeve tee or turtleneck underneath the shirt.  Making it will be perfect for winter wearing.

The hem is bound with the white bias binding to carry the white theme throughout the garment. 

I did get to a point in the construction where I was ectastic with how the garment was sewing up! One because the shirt was turning out the way I imagined it.  


Two even though some parts of the construction was tedious and slow going, the results were so worth it! Making this shirt was all about slow sewing. 

So a few pictures ~


This is the second shirt in "The Border Print Shirt" series. Two down and three more to go!  If you like the silhouette of my TNT shirt pattern, here are a few suggestions for current patterns you can use to make your own shirt ~ Grainline Studio Archer shirt, Cashmerette Harrison shirt, Butterick 5526, McCalls 7575, Vogue 9029, Vogue 8689, Hotpatterns Classic Nouveau Great White Shirt, to name a few. I'm sure there are more out there in Indie land that could be used too.

Personally, I have four shirt patterns that I will be using this fall/winter. Two are TNTs and two will be new pattern sews. My advice is to find a pattern that works for you and sew it a couple times. Make it a TNT pattern that you can use whenever you want a new shirt. As I've said before a TNT pattern allows me to play with fabric, techniques or manipulating both. I like to play. It's the main reason I sew!

One thing to note ~ this month is/was National Domestic Violence Month. Purple is the color associated with the month and as a survivor of Domestic Abuse I'm thrilled that I got this shirt made in time to celebrate the month. Even though it's more lavender than purple, I think it counts. Learn more about National Domestic Violence month here.

Next up on the blog after the month in review, will be a Rivermont Top. I've had this top in my mind since the beginning of the year.  I finally got it out of my creative brain and sewn up...

...as always more later!


Friday, October 26, 2018

The Rifle & Co "English Garden" Border Print Shirt

I know Rifle & Co prints are big - HUGE! Quite a few sewists have made some beautiful garments using fabric from this line. While I like the prints I've seen, I've never felt like I NEEDED to own one...well not until I saw this one on Stylemaker Fabrics site. I was honestly bowled over by the border print which is how this shirt came to be.


There is nothing new in the construction of this shirt.  I used my close-fitting TNT shirt pattern with the shirt tail hemline for this version. Initially I was going to use the TNT shirt with the gathered back. However, after thinking about it, the border print would be more impactful in the closer fitting shirt. So that's what I did.

I'd like to discuss one thing I do in making my shirts regarding the button bands. On some shirts I use the foldover button bands. On others, I've cut it off and replaced the band with a sewn on band. 


What I'm saying is that I don't interface this band whether it's folded over or sewn on. Recently there was a popular sewist on Instagram saying that you had to add interfacing to the band, that the three layers of fabric was insufficient. 

I've made over a dozen shirts now using this fold & turn method and never had a problem with buttonholes being wonky or the buttons not being stable on my shirts. So why did I bring this up? Because there are several ways to sew things and no one way is always the "right" way. Try out a couple of techniques and see which one works for you. Then use what works for you.

Materials Used ~
4 yards Rifle & Co Empire Garden cotton border print
Interfacing from Steinlauf & Stoeller
10 1/2" 2-hole navy blue buttons from my button collection

Design Details ~
First I've used border prints before. I really like working with them and collect them whenever I find them. Here's a blog post I've written about sewing with border prints.

This shirt has no exceptional use of the border print but I didn't believe it needed any. This is a bold print that uses a large portion of the fabric. My decision was how to make the print work best for me. So the body of the print is along the bottom and mid-body for this shirt.  

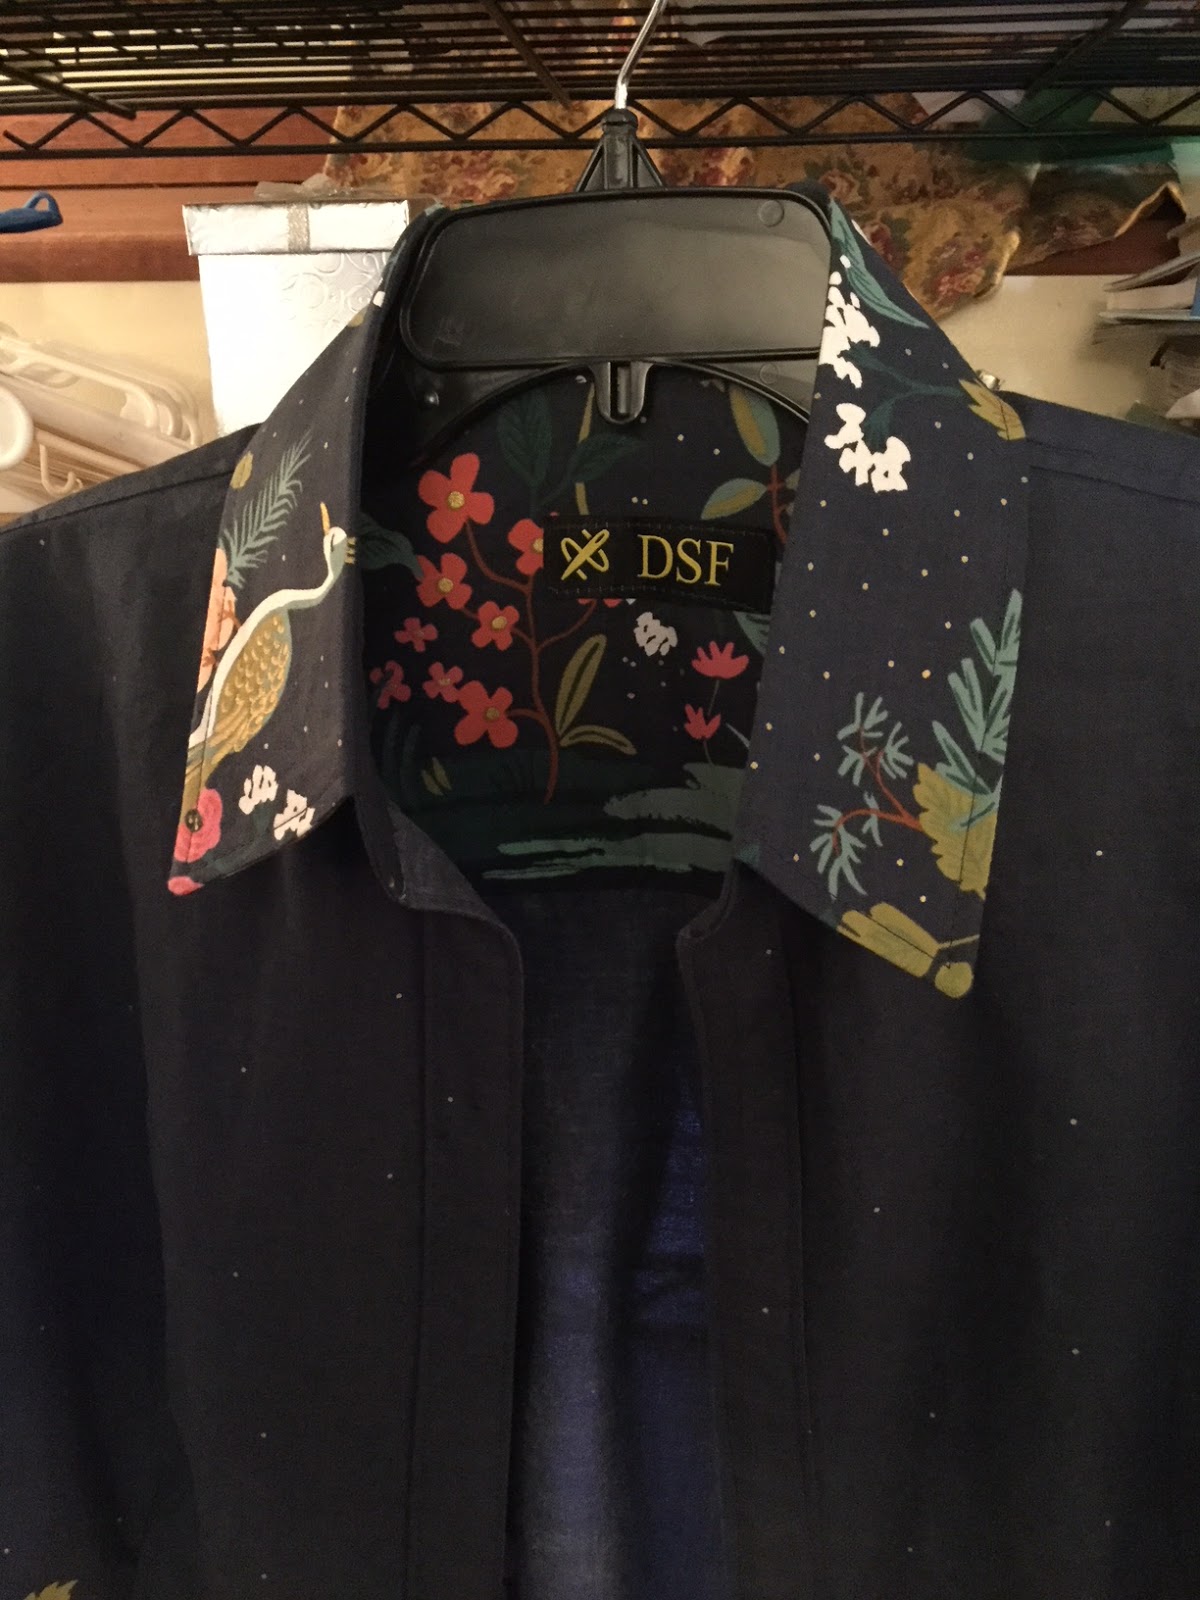
The sleeves and back yoke were cut from the starry portion of the fabric. 


Collar, cuffs and the inner back yoke were cut from the border print.


This allowed the shirt to showcase the border print with the maximum effect.   

A few pictures ~


Conclusion ~
This is the first shirt completed in the border print shirt series. I have a few more left to make before the series is done.  Next up is a cotton sateen border print shirt made from the Fabric Mart fabric haul recently purchased.

...as always more later!

LinkWithin

Related Posts with Thumbnails