Saturday, May 15, 2021

Bust Darts on a Mature Figure

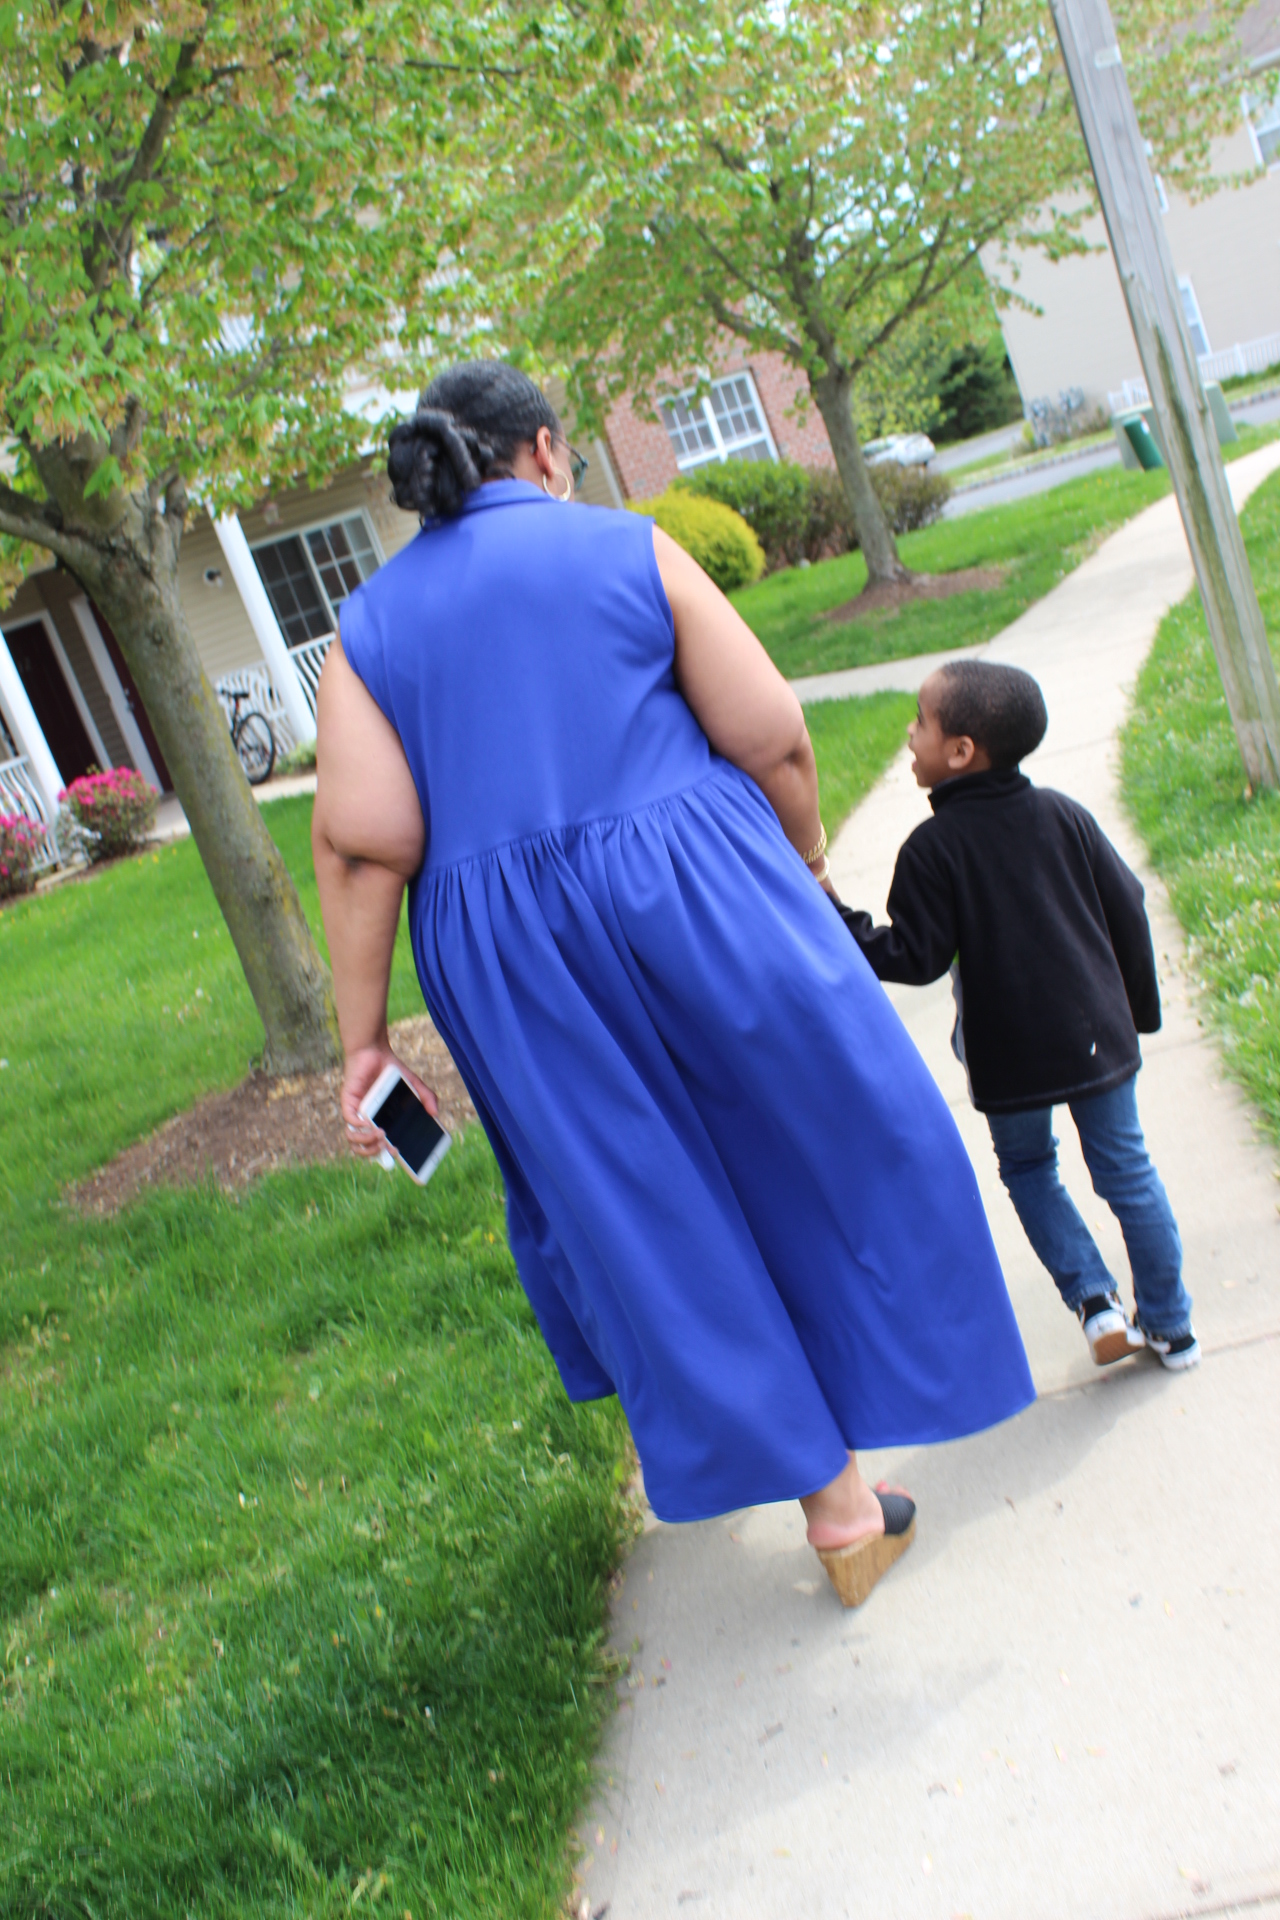
I want to talk about bust darts today.  Specifically about sewing darts for a mature bustline. Why? Because I noticed something on my last dress after I took pictures.  Here's what I noticed:

I sewed this dress on autopilot. I was using a TNT pattern and didn't think about the darts, where they would land or how my bustline is moving further south. My dart legs are too long (photo 1) and aren't pointing at my bust apex (photo 2).  I guess I could be discouraged about this but I'm in my 62nd year of life and am realizing that once again my body is changing.

I've lived through the teen years, the childbearing years, the 30s & 40s, and the post menopausal years. So I've learned that a changing body is part of life. I'm not railing against the change, I'm adjusting to it.  And part of adjusting is to realize I need to check my dart placement going forward in all makes - even TNT patterns.

If breast tissue talk bothers you, time to bow out now! *LOL* Cause that's what's next. When I was younger I had high, firm breasts and like most young women I took it for granted that they wouldn't always stay that way! After childbirth, I was one of those women whose breasts increased with each birth.  Yes, I lost some firmness but they were still pretty amazing...helped by the fact that I did not breastfeed. I'm of that generation. I raised three daughters on formula.

I was also pretty religious about good bra support and wore one 95% of the time. Yes, I even slept with one on. So my breast tissue was supported well into my late 40s/early 50s when perio-menopause started and then of course menopause. Menopause that not only affected my hormones but affected my breast tissue too. I lost fullness, I went down a cup size and as I gained and lost weight purchasing bras that supported well became more of a challenge.

Now to bring this back to sewing. As I stated above I neglected to think about dart placement when making those last two dresses. This will be a consideration going forward. I'm also taking the time to purchase new bras - what a journey this is turning out to be...and no bra making is not on my list of sewing things.

Finally I'm remeasuring my bustline, determining my new bust apex points and checking all of this prior to cutting out bodices. I will be doing this with even my TNT patterns going forward.

My D cup breasts have become C cup breasts so I don't need a full bust adjustment. Also my fit is looser now that I'm older, comfort is more important than it was when I was younger. I like side darts and princess seams to make adjustments for fit. Maybe it's because of the way I learned, maybe because I'm lazy, or maybe these alterations work for me. 

Some of the changes I plan to make are:

o  Re-examine my bust point apex and mark it on my patterns going forward even my TNT patterns.

o  Lower the darts on my patterns. I've mentioned lowering darts before and my go to reference is from the Curvy Sewing Collective here.

o  Checking the length of the dart legs to make sure they're not too long or look weird.

o  Fit my paper pattern to insure that my darts are in the right place prior to cutting the fabric.

Anyway, I will be highlighting the changes I make to my patterns where bust darts are concerned going forward.  Just wanted to start the conversation and hear any suggestions, comments, alterations you have or used in the comments.  Thanks!

...as always more later!


Tuesday, May 11, 2021

Follow-up

The post on "What is an Influencer" produced a lot of conversations, not only on the blog (thank you for your comments), but also in my email and on social media. Obviously it was a topic that many sewists had thoughts about ~ which is probably why there was such a big discussion.

However, I wanted to add a few other thoughts.  Honestly, I do not think of myself as an Influencer.  Which someone pointed out to me was wrong because I'm a Janome Ambassador and it gave me pause. A few of you called me different names in the comments ~ Influential, Mentor, Inspirational.  I like those titles so much better. They more accurately reflect how I see myself.

I want to inspire each one of us, myself included, to learn our craft, sew better and to enjoy the process. I want to inspire you to seek out the thing in you that makes you want to create and explore that - taking it wherever it leads you - but hopefully on many creative journeys. 

Inspiring you to try new techniques, new fabrics, new notions ~ things that will bring depth and joy to our craft.  I want to inspire you to think of yourself as an artisan or a craftsperson...not just someone who sews.  Because we're all talented with special gifts that we're using every day.

I want to share my fabric, notions, stores, etc. with you without you and myself feeling like I'm "selling" to you. This last year has taught me I'm NOT that woman. I'm not saying that others who are stepping into those roles should not be doing so because each sewist has the right to choose their own path.  It's just not mine.

My path is to share my sewing journey with you. Especially now that my health issues have been resolved and it seems as if life is moving on. I refuse to say returning to normal because the pandemic has changed our lives in so many ways and we will never return to pre-pandemic life.  At least to me... So I've made a few decisions about how I'm moving forward.

I will be blogging more. Words are my comfort zone. More so than images, moving or static. I will be posting to Instagram but more like I did prior to reels, IGTV, etc. I will continue to add process, alterations and construction tips to blog posts here. I know this sounds like I'm standing still and not changing with the times and maybe that's true. I just need to be true to me and share in the manner that works for me.  For me authenticity means a lot.

Thank you all so much who've hung in here with me.  Found me and followed me on Instagram.  Continue to comment and hold discussions...it's one of the things I really like about blogging...hearing your thoughts, suggestions and comments.  It may be old fashioned, out of step but sometimes the old things work! *LOL*


...as always more later!


Thursday, May 06, 2021

Black/White Border Print Shirtdress

As you know, I started making some late winter/early spring shirtdresses using my TNT shirtdress pattern earlier this year. This one was also finished in late January/early February but got buttonholes & buttons the first weekend in May. Dragging my feet much! LOL!

This fabric was purchased in April 2020. Before I bought it I was talking about it with Gaylen and she was so-so on it. But I saw something in it and went ahead and purchased it.  Then I found this dress online at Lane Bryant that was made from my fabric and I was so thrilled!

While I like how Lane Bryant used the print to emphasize the waist and hemline. I chose to use it a little differently.  I love h
ow a border print gives you so many opportunities to manipulate the fabric. It's what I love about working with them.

Supplies ~

4 yards of a crepey ponte knit purchased from Fabric Mart

1/2 yard of 1/4" elastic from the notions collection

11 1/2" black & white buttons from the button collection

Every supply used was already in the Resource Center.  Nothing was recently purchased to make the dress. I love when my collections work together like that!

Working with Border Prints ~

If you've been following me for awhile you know I love border and panel prints. I've sewn with quite a few and own a lot more of them. I thought I would drop a few tips I use to decide what to buy and how to use them.

Buying first ~

I look for border prints that can be used in more than one direction.  There are a lot of border prints out there that are only on the bottom of the fabric. If they're too directional, I don't purchase them.  Mainly because the print works best at the bottom of a garment. I'm looking for more versatility.

o A larger border print draws my attention faster than a smaller one.

o A mixed print & stripe or varied prints really makes my heart sing.

o Fabric content usually doesn't matter...I will figure out a way to use it!

Using them ~

My most important tip is to think outside the box and use it in a place that will really make it stand out.  A collar, a cuff, button band, insert into a side or back seam...somewhere it makes an impact...brings a little drama.

I have a rule of three.  Meaning that wherever I use the border print it has to be duplicated 3x in a garment. I also like odd number of uses over even uses.  So this meant creatively cutting the collar and collar stand with the stripe.  That way the stripes would appear at the top of the dress, the hem of the sleeve and the hem of the dress. Thus tying the fabric pieces together.

I've written a blog post highlighting my love of border prints and how to use them here if you want more information.

Construction ~

There are no new construction techniques in this make. This is a TNT sew using the fabric's border print to make it different from all the other versions. The changes I made were to...

o  Lengthened and widen the sleeves to get full sleeves with elastic in the sleeve hem

o  Cut the fabric so that the border appeared on the collar, sleeve and skirt hems

o  To emphasize the border print I cut the back skirt in half so I could match the border all the way across the bottom.

o  Used my standard button front opening on the skirt bottom. A 1.5" fold over of the fabric to match the front facing on the bodice. 

A Few Pictures ~


Parting Shot ~

My new complex has amazing green spaces. From my sewing room window, I can watch people walk their dogs, kids play and ride their bikes, and my neighbors do yoga as well as take their daily walks. There is an amazing hill that the kids sled down during the winter and my daughter took these pictures at the top of the hill.  Of course I had to take my high heeled wedges off to walk down the hill!

All of these spaces are steps from my front door and I appreciate it now that spring has arrived. No more figuring out the best naturally lit spaces in my apartment for photos...giving me time to set up a space in my "Resource Center" to take pictures when the cold dark times return in 8 months.

Finally, I'm headed back to work in my office 2 days a week - whichever 2 days I want.  I haven't decided whether to do Monday & Wednesday or Wednesday & Thursday but it's inspired me to sew again.  Now that these are finished, I'm going to be hitting up the cut pile to make some of the spring/summer pieces I've cut out.  I'm happy for spring.  I'm happy I will be leaving home and I'm really happy that people are getting vaccinated so I can leave home! Thankyouverymuch! *LOL*  


...as always more later!


Sunday, May 02, 2021

Blue Ponte Shirtdress

I cut this dress out back in February.  It was supposed to be part of my winter/early spring work from home wardrobe. I finished it in February except for the buttonholes and buttons and it sat until this weekend. When I finally broke down and added them to the dress.


Truly it's sad this beautiful dress sat so long...but it be's like that sometimes.

I'm going to stop calling this the Myosotis Dress going forward. I've changed the pattern up so much that only the silhouette resembles the pattern. Now that there are several maxi dress patterns with this silhouette on the market, you can choose one that contains the changes I've made and use instead.

Here are the changes I've made to the pattern:

o Added a collar

o Added a button front opening in the skirt - so the entire dress has a button front

o Changed the length and removed the bottom ruffle

o Removed the ruffle on the sleeve

o Lengthened, shortened and removed the sleeve

o Added a cuff to the sleeve 

o Lengthened to a fuller sleeve

For this version, the fabric is the primary player. It's the first time I've used a midweight ponte to make this pattern. It affected the way I handled some of the construction. 

- Notably, I clipped more to remove bulk from seams. 

- I used interfacing on both sides of the collar pieces to give it a firmer hand and hold.

- My topstitching is done with the three step stretch stitch - Stitch No. 5 on the Janome 9450 using a 5 stitch length.  I love that stitch because it allows the topstitching to pop on the thicker fabric.

- The gathering was done using a wide and long zig zag over coated dental floss, so I can maximize the gathers to emphasize the drape of the fabric.

Supplies ~

3 yards blue rayon ponte from Mood Fabrics - purchased over five years ago but there's plenty of ponte on their site.

11 - 3/4" blue enamel and gold buttons purchased recently from Pacific Trimmings

Interfacing from Steinlauf & Stoeller

There were no other changes made to the construction of this shirtdress that hasn't been documented in other posts.

A Few Pictures ~


The reason this dress is midi length is because I ran out of fabric. At first I was annoyed because long maxi dresses in spring & summer is truly my thing.  However, I remembered how much I liked this cotton one so I went with it. Also blue is my favorite color and this purplish blue is one of my fave shades of blue!

I have this maxi shirtdress and one more coming to the blog. After this, I'm retiring the pattern for awhile. I'm not saying that I won't ever use it again...just that I own enough versions of it now. There are so many different maxi dresses patterns calling my name that I really want to sew.  So other than the fact it took me about two months to add the buttons to this dress, there isn't much else to say.  This is one more dress to add to my spring wardrobe.

A Parting Shot ~

Me and Joshua who is 6 years old now!


...as always more later!


LinkWithin

Related Posts with Thumbnails