Wednesday, July 31, 2019

Some Thoughts and Some Totals

July was full of challenges.  I got really sick the 4th of July weekend and lost 5 days of sewing.  I got myself together along with gaining my sewjo back and started working through my summer sewing list. I made 3 garments this month and 2 are left over from Sew Camp in June.


Monthly Totals ~
I decided to participate in projectfabricfast to help curb my growing fabric collection. Not because my collection makes me feel guilty but because there are so many goodies in there that I really want to sew more of them rather than holding onto/collecting them. All of my makes this month came from the fabric collection with no new fabric purchases! 

Of course this helped reduce my in/out numbers for the month and the year. Especially if I only have fabric out and no fabric in. 31 days without a fabric purchase makes me happy. I only have 6 more weeks to meet my goal and I have faith that I'm going to hold out and get there!

Here are in my in/out totals for July:
In - zero yardage!!!
Out - 28 yards

YTD totals are:
In - 246 yards in
Out - 208.5 yards out

Dayum those are some large numbers of fabric moving in and out of my sewing cave!

I have 6-7 more weeks to sew for summer. I have a cut pile that reflects me spending quality time at my sewing machine...never mind that I also have a few social commitments for August.

A Few Thoughts ~
This spring/summer I made a to-sew list full of new sewing patterns I wanted to try.  I've realized that I like a woven dress more than I like a knit one.  So most of my Concord tee dresses have been donated. Well in truth, most of them don't fit anymore since I've gained back all the weight I lost.

I also really love sewing a pattern quite a few times.  No matter how much I try to sew it once and move on, the pattern kinda lodges in my brain and I do creative somersaults with it. It's also interesting to note that I think I'm becoming out of date/trend/season with this way of thinking/creating/sewing.

Now that the pattern companies are actively involved in social media it seems that the pressure is on to always sew the latest and greatest pattern. Even though we purchase so many of them from each pattern company, and have to fit making into our daily lives, which of course means that sometimes a pattern can sit in our stashes for several seasons or years. 

I understand that pattern companies are businesses that need to sell their new products, I just wish they celebrated the making of ALL their patterns (no matter the season or year) as much as they celebrate the shiny new ones. Especially since patterns can almost always be found on Etsy, eBay, Amazon or several internet sites that sell vintage and OOP patterns.

I've cut and sewn four new patterns this season ~ 

1. Vogue 9371
I've made 2 versions and I'm probably done with this pattern for the year.

2. Cashmerette's Holyoke Skirt
Three versions have been made of this skirt. Two have been blogged. I still have to blog the last one.
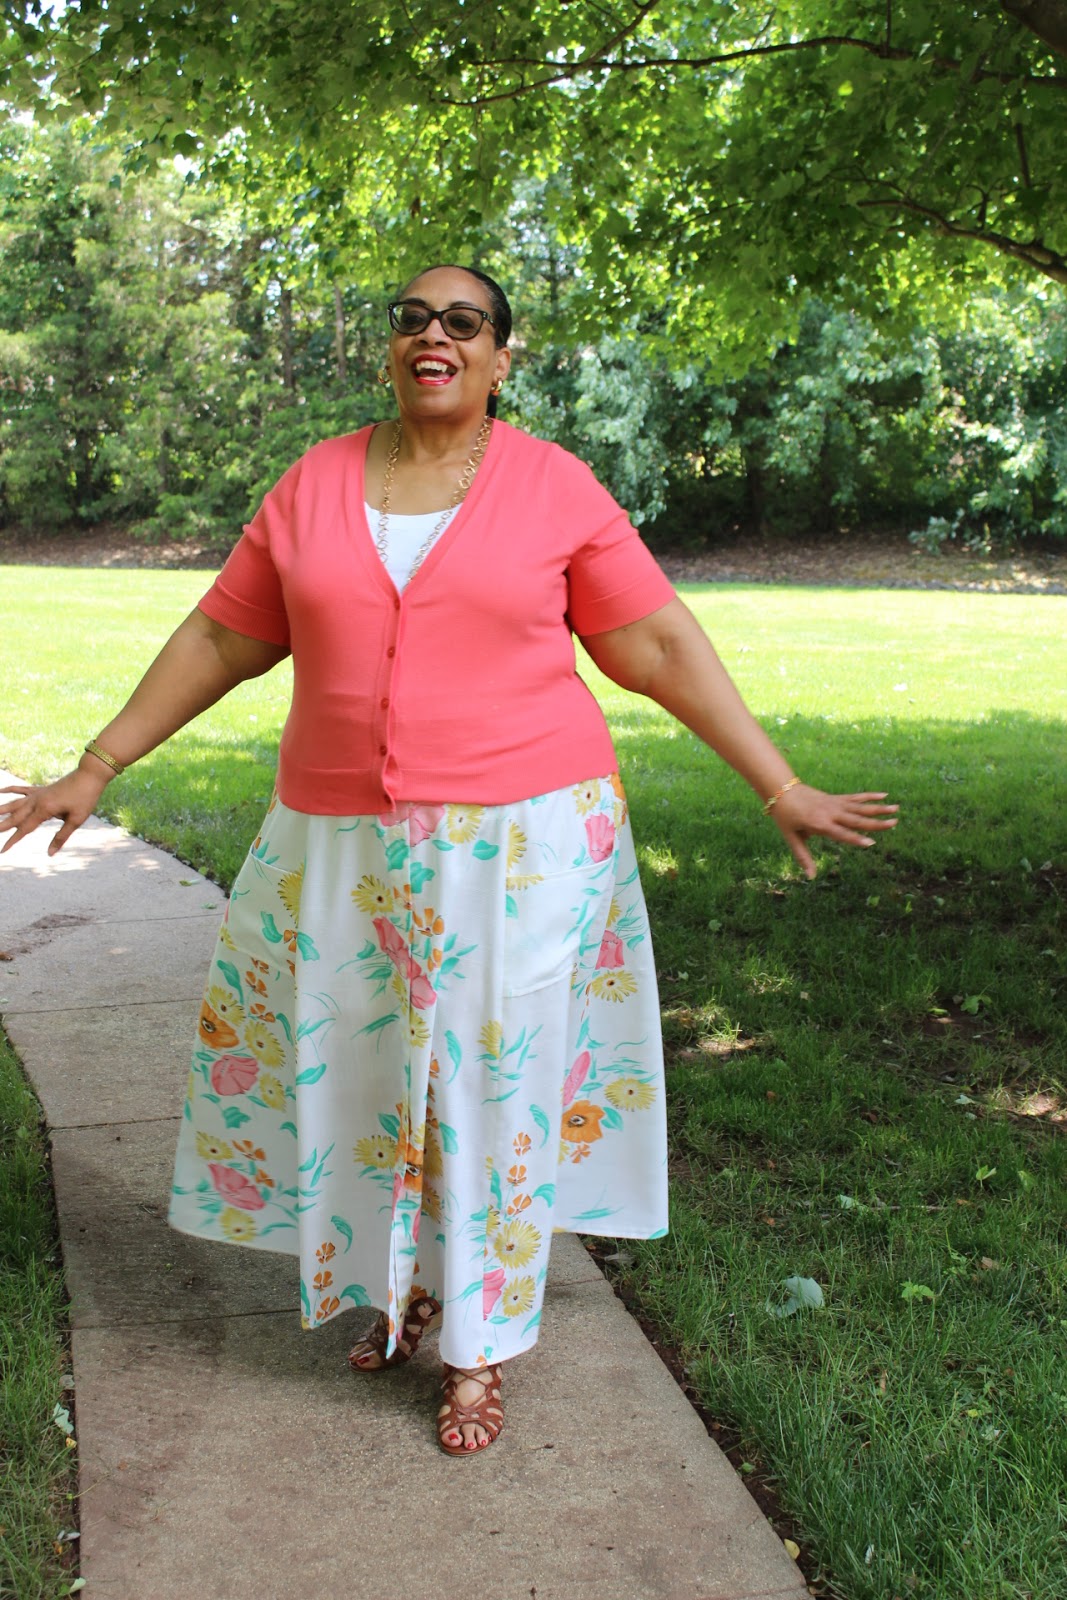

3. Simplicity 8871
Two have been made, both will be coming to the blog in August. But this pattern has me in a creative whirlwind. I have fabric set aside to make two more so the finished dresses will show up in August or September. I've worn one to work and it's everything I want in a summer dress. I'd truly love five of these, just don't have time to get them made! It's my pattern crush of this season just like Myosotis was last year.


4. McCalls 7774
Two versions of this dress are cut out and waiting to be sewn. One in a border print (another idea I've worked out this season) and one in a stripe.

Also I'm continuing my Myosotis Dress love. There are presently three versions cut out and laying on my cutting table.  All maxi length versions.  All hacked or using some type of embellishment.  All coming to the blog in August and September.  Because the Myosotis love continues!

That pretty much sums up the rest of my summer sewing. While I've made a good faith effort to use more of the new sewing patterns I've acquired, in actuality I LOVE the journey of a pattern. I love using different fabrics, embellishments and hacking it to see all the things a pattern can become. I'm really not into the shiny and new.

Last thing ~
I've also decided that I need to "Make Do" more. Participating in #projectfabricfast has allowed me to see how often I run to one of the trim stores in the garment district to purchase things. This is something that has gradually developed because I'm now working near the garment district.  When I worked uptown and couldn't make it to pick things up, I stashed ALOT of notions. I need to turn to that notions stash now and "Make it Work" instead of dreaming up new things to buy. 

With that in mind, I'm setting myself a two month goal of "Make Do." I will try my hardest to use a notion/trim/button that's already in my notions stash rather than run to Pacific or Joyce Trimmings to buy new. By not buying new, I've already challenged myself to make my own piping. The next Simplicity 8871 dress features this embellishment and will be coming to the blog soon.


That's all! (said in my best Miranda Priestly voice)  It's an all sewing weekend. My last for the month of August so I want to see how much I can get accomplished.  There is a new dress coming to the blog next!

...as always more later!


Sunday, July 28, 2019

Challenge - A Border Print Katie

One of the things that was different about Carriage Corner Sew Camp this time, was that we all received three yards of fabric from Fabric Mart for a sewing challenge. Prior to Camp, Gaylen presented the attendees with three choices and we voted on which fabric we liked.


The majority of us chose this Milly border print.  It was waiting for us with our other swag items from camp. We had 30 days (end of July) to come up with a garment using the challenge fabric. Honestly, the fabric was different than what I thought it would be and initially had a creative block on how I'd use it.


However, I did know I wanted to use as much of the daisy print as possible. So after thinking about it and seeing other sewing camper's garments, I went with the Katie top. Why? Because it allowed me to use most of the daisy print.

After all of the fussy cutting I ended up with just scraps of the fabric...


Supplies ~
3 yards of Milly border print from Fabric Mart
8 clear & black 5/8" buttons from Joyce Trimmings
black 'n white plaid bias binding from Home Sew
Interfacing from Steinlauf & Stoeller

Some Sewing Info ~
There are no new sewing techniques in this shirt. However, I want to emphasize the binding on the pockets. It came about because I was too lazy to change the serger thread. Seriously!  So I looked for something to bind the pockets and remembered that I'd bought hanks of bias binding back in April. It was perfect to add to the pockets and gave the innards some shuzz!


The fussy cutting of the border print added to some of the elements I like in this garment. Both the front and back facings were cut beneath the hemlines of the front and back pattern pieces.  That way the facings match the outside of the fabric perfectly ~ another aspect that thrills me. Okay I actually did the joy-joy dance when this worked out.

One more sewing thing...if you know me, you know I'm anal about changing my thread colors on my serger and during construction. I was just as deliberate about alternating the white and black threads on the sleeve as well as the facing hemlines. No one will probably even notice. That's because there's no white threads glaring against the black fade or black threads running through the white background.

I also love how the black fade plays on the sides of the top highlighting the border print. Honestly, that black fade was what stymied me when I first got the fabric, so I'm thrilled to have made it work.


This fabric plus this pattern made the perfect top! This is my fifth Katie and I'm thrilled that I've revisited this top with this fabric! 

So a few pictures ~


This was a fun challenge!  It made me think and stretched me creatively to make the best use of the fabric.  I hope you will follow my sewing sistahs to see what they did with their fabric, Gaylen, LaQuana, Cennetta, Bonnie, Andrea, Marji and Barbara. Hopefully, Gaylen will share all of the photos including the sewing sisters who don't have social media accounts. There is an amazingly creativite use of the fabric amongst my sewing sisters!

...as always more later!


Thursday, July 25, 2019

A Marimekko Vogue 9371

I've made the decision to only sew from my fabric collection this summer ~ no fabric purchases until September 15th. I'm participating in #projectfabricfast on Instagram.  So I've been challenging myself to make garments from the collection ONLY


I really like my first Vogue 9371 but due to some health challenges, my ankles are swelling during the day. It's one of the reasons I'm making maxidresses this season. BTW, I'm fine and I don't need any suggestions about how to deal with the swelling but appreciate your concern.

When I picked the pattern, I was drawn to the drape depicted in the cover art. However, after making the pattern alterations to give me the drape and length I wanted, I ended up with very large and wide pattern pieces. On a regular piece of fabric, the pieces would have to be cut singly which ate up alot of yardage. I thought a 4 yard cut of 56" wide fabric would work but no...I needed at least 5-6 yards of fabric.


My first thought was that I owned nothing in that amount of yardage that wasn't a wool. I b*tched and moaned to Gaylen about how could this be. I started to run options through my mind. I even went to Fabric Mart and loaded the cart with a rayon challis because it was 60% off making it about $4 a yard. A reasonable price to me for 6 yards of fabric.  The only thing that stopped me from purchasing it was knowing it wouldn't get to me for a week. I was worried I would've moved on by then. So that large amount of fabric would just sit in the collection ~ nah ~ been there, done that!

Finally I got up and started going through the collection. I was looking for anything that could be color blocked or if hopefully there was 5 yards of something I hadn't remembered. Instead I found a Marimekko extra long twin, set of sheets...and OMG! The heavens opened up and the fabric angels sang!!!  That is how I ended up with a Marimekko Vogue 9371.

Supply List ~
1 flat Crate & Barrel Marimekko sheet
1 fitted Crate & Barrel Marimekko sheet
12 - 7/8" 2-hole white mother of pearl buttons from the button collection
White bias binding


Pattern Alterations ~
  1. The first alteration was to slice both the front and back pattern pieces and spread them 1/2" at the top with a 3" width increase at the bottom.
  2. At the lengthen line I cut and added 3"
  3. Then I added another 3" at the hemline.
Construction ~
I did have to cut the elastic off the fitted sheet and press it out before I could cut the pattern.


After pressing the sheet out, it handled just like regular fabric and I was able to cut out the extra large pattern pieces easily.

The only design change I made to this version is that I added inseam pockets to the dress using the pocket pattern from my Myosotis Dress.

When I was thinking about how I wanted this dress to look in pictures, I kept thinking of the flowy dresses my Mother use to wear to parties in the 70s. Lotsa hair that was enhanced by a wig piece and a huge scarf tied around it all. I wanted to emulate that look with these pictures and I believe I was successful.

A few pictures ~


And with a little twirl...

To keep this from looking muu-muu like, I kept a closer fit at the bustline and shoulders. I added to the body of the dress so it would have greater flow at the lengthened hemline.

Also, I did not prewash the sheet. I'm hoping and praying that since it's a sheet it won't shrink.

Other than that, this is my "Throwback to the 70s - Marimekko Vogue 9371." I know it's bold and loose but that's how I'm feeling this summer.  A little Maude-ish, a little free and definitely so-so comfortable.

...as always more later!


Wednesday, July 17, 2019

Do You Sharpen Your Scissors

My "Question of the Day" is 'Do you sharpen your scissors?'


The reason I ask is because I was on Amazon looking at Kai Scissors.  Scissors that I'd looked at on Wawak before scoping out the cheapest price point on Amazon. I realized then that when my scissors are dull...I just buy more. SERIOUSLY.  And the really whack part of this is that I bought one of those scissor sharpeners and used it about three times.

Now I don't throw my duller scissors out. They migrate. I use them to cut out wrapping paper, or put them in that kitchen catch all drawer, or in the craft box the grandkids use when they come over. I even keep a pair for just paper cutting in the sewing cave.  I know I should be having them sharpened but honestly since I don't go to the craft store, I have no idea where else I can get them sharpened...y'know besides that scissor sharpener I own. Which has been discontinued...mmmmmm.

Anyway, I love the Kai Scissors depicted above and I really WANT another pair...especially since they're just $14.39 for a pair from Amazon...when they're $22 at Wawak. As I sit here debating whether I need a new pair or should just try sharpening the old pair, I thought I would ask y'all.

So, do you have your scissors sharpened?  And if so, where?  Finally does it cost more than the $14.39 it's gonna cost me to buy a new pair of Kai Scissors.  Talk back to me because inquiring minds and all that...

...as always more later!

Sunday, July 14, 2019

Border Prints - Why I Love Them

I've written about my love of border prints and how to sew them before.  You can read those posts here and here. This post is about how they've made an impactful appearance in my wardrobe lately.

My latest garments made using border prints

As you can see, I've been on a border print roll lately. Why do I love border prints so much?  Because of the challenge they present when using them...because of the possibility of making something different and unusual...and because they dare me to look at a piece of fabric in a new and interesting way.

I know the most common use of border prints is at the bottom of garments just like the border lays on the fabric. But I love it when you move that border around and place it in areas where you don't normally see a border. I love using garments with several pattern pieces to get the best use out of the border print. And I especially love the puzzle of fussy cutting a border print and how it causes you to think outside of the box!

Border prints aren't easy to find. You have to search for them. Recently they've become more popular but aren't still readily available. You can find them in quite a few different fabrications. I've purchased them in everything from ITY knit, silk and even wool. I've made skirts, dresses, shirts, maxidresses and jackets all using border prints.

Simple skirts ~


In maxidresses ~

At the top and bottom of the dress


Running a border print down the side of a maxidress ~


I even did a series of shirts using border prints.


My collection of border prints run deep in my fabric shelves... 


When I see one I like, I ALWAYS purchase it even if I have no idea what it will become. To me border prints are like 4 leaf clovers ~ magical, mystical and worth searching for. That's why right now I'm working on two more garments using border prints. They will be coming to the blog before the month's over.

So how about you? Do you like to sew with a border print? Do you look for them when fabric shopping? Or are they elusive like a fabric unicorn? Let me know. I'm interested to see if I'm the only sewist in love with the magic of a border print.

...as always more later!


Wednesday, July 10, 2019

Vogue 9371 in a Border Print

This fabric purchased in October 2018 plus a newly issued Vogue Pattern made this dress ~


The Vogue 9371 pattern is in the Summer 2019 release from Vogue Patterns. I loved the idea of the shirtdress unbelted and floating free. Just the kind of look I'm desiring this summer.

My fabric is a border print that I purchased from Fabric Mart. Originally bought to make a shirt. However, it didn't work with my pattern pieces so I put it back on the shelf.

I pulled it out again when I saw this pattern. I knew it would make a wonderful maxi. I cut this out in a size 22 and made no alterations to the pattern though honestly I should have added a few inches to the bottom of the pattern pieces. I was a little disappointed when I sewed it together and realized that it wasn't grazing the floor.

Normally I have a few in-progress photos but since I made this at Sew Camp, there are none. It was an easy sew. Nothing complicated about the instructions or assembling the dress. The fabric was the only challenging part ~ cutting it to most effectively highlight the fabric. Thankfully that was done at home before heading to Sew Camp.

I wanted some larger white buttons and had none that fit the bill in the button stash. Unbelievably, I found some at WalMarts in PA where we stopped to purchase some things. The buttons are a plastic white floral that coordinate with the fabric and at 88 cents for a card of 4, a real bargain!

Some Pictures ~


Finally I will sew this again.  However, I'm going to make some alterations to the pattern to give the dress a little more swing. I'm using some of the pattern's design ease to fit my body. Also I think a softer/less crisp fabric will give me the drapy look I want. I will lengthen the pattern pieces to make it a true maxi too. Hopefully the maxidress from this pattern, will make an appearance before the summer is over. Another one will be perfect for those hot, hazy August days.

...as always more later!


Sunday, July 07, 2019

A Thirty Year Old Holyoke

After seeing some of the other versions of this skirt, I really wanted one of those soft swingy ones. So I pulled out a challis and cut out another Holyoke skirt...however, this post isn't about that skirt because it's only halfway done.


While I was looking for a nice soft rayon challis to make version two, my hand touched the fabric I used for what's technically my third Holyoke. This fabric has a back story...

I purchased this fabric in 1989 from Cloth World, the precursor to JoAnns. I remember the exact day...not because something spectacular happened but more because I was a really pregnant woman roaming around Cloth World buying fabric with my lunch money because I was miserable. I was pregnant with my third daughter, huge and ready to be done, but with several more months to go. 

At that time, I did buy fabric for future projects but not projects that would be years in the making. I didn't have that kind of money...not with two little girls and one on the way. But I loved this fabric and two other pieces like it. They made me feel good in a way that not much did at the time. So I bought them. 

I don't even think they manufacture this type of fabric anymore. It's a linen-like fabric that's probably more poly than linen and it was made to look like linen but not wrinkle like it. I made quite a few garments from this type of fabric back in the day. This is truly deep stash sewing!


I made one change to this Holyoke.  Instead of inseam pockets I decided to try and make some pockets that were placed on the outside of the skirt ~ sewn between the seams of the skirt.

This pocket was inspired by a skirt I saw on JJill's site. I liked it and realized it was an easy change to make to my pattern.  


Here's my pattern piece ~


The finished pocket is kind of deep and wide. After I made it I wasn't sure it actually worked. It wasn't until the skirt was photographed and my daughter raved about the pockets that I thought okay, I can live with them.
  1. As you can see I made the pattern piece by putting the side front and center front skirt pieces together.  
  2. Then I traced a piece that filled the space from side to side. 
  3. My pattern piece is 8" long with a 1/2" turn at the top and at the bottom - so 7" finished. 
  4. Wide enough to jam my hands or stuff into.
  5. I also placed the pockets further down than the inseam pocket because I wanted to slide my hands down into them.
It was simple to do and added no extra time to the construction of the skirt. Otherwise the skirt construction was exactly the same as the first one.

My buttons are from deep stash too. Buttons I've had since that same daughter was 9. So except for the new pattern, all of the pieces of the skirt have been marinating in my collection waiting for their time to be used.

A Few Pictures ~


I love that I'm fulfilling one of my 2019 goals - to sew several garments using deep stash fabrics/notions from the collection. This skirt is made from fabric that is as deep stash as it gets!

My third and final Holyoke will be finished and probably make it to the blog before the month is over. That will most likely be my last one for the season. I have so many things on my to-sew list that I really want to get made!

...as always more later!


Wednesday, July 03, 2019

A Dover Maxidress

I've been stating since my fourth make of the Dover Jacket that I really wanted a maxi dress from this pattern. 


I bought this embroidered gingham border print from Chic Fabrics last November.


One day at work I was doodling during a meeting, combining this fabric and the Dover Jacket and dreamed up what I thought would be an amazing maxi dress. I have to admit that the final dress is somewhat different than what I imagined. 

The dress I'd imagined had scallops at the hemlines of the dress and sleeves. Since I did not take my 8900 to Sew Camp and was working on my 6600P I just couldn't get the scallops long and thick enough to work. After fiddling with it for a few hours, I called it quits. I couldn't make my design idea come to life on the equipment I was using. Maybe if I'd been home I would have come up with another idea but I really wanted to bring home finished garments so I added a triple stitch to the hemlines of the dress and sleeves.

Supplies ~
3 yards of fabric from Chic Fabrics
Red Piping from Joyce Trimmings
10 - 7/8" flat red buttons also from Joyce Trimmings
1 black covered snap from Pacific Trimmings

Pattern Alterations/Construction/Sewing ~
When I cut this out I flipped the border print which was only on one side of the fabric and used it for the top of the dress. All pieces were cut side by side to insure that the border print went all the way around the top of the dress.

I made two alterations to the pattern to get this maxidress.

1. I shortened the sleeves to elbow length
2. I lengthened the skirt body to make it maxi length

Except for the scallop samples I made and having to handstitch the piping down (none of my sewing machine feet worked and I had to borrow another camper's sewing machine to get the piping and facing on my dress), the construction was pretty simple. Nothing any different from the construction on a normal Dover jacket.

I made buttonholes all the way down the front except at the top because it would have been in the middle of the embroidery. I really didn't want to disturb the embroidery, so I added a snap to the inside and sewed a button on the front. I'm glad I was able to leave the embroidery alone and not cut into it. 

BTW, I have no construction pictures because it was made during Sew Camp.

A Few Pictures of the Maxidress ~


This pattern is just as comfortable as a maxidress as it is a jacket! I took it for a test run to the grocery store and it was an easy wearing, comfortable dress. Just what I'm looking for this summer. If I can, I will make another one before the summer ends and the only change I would make is to add some inseam pockets.

...as always more later!


LinkWithin

Related Posts with Thumbnails