Saturday, September 28, 2019

Print Mixing Simplicity 8984

I'm trying to be more specific in my pattern buying.  Not just buying patterns because they're on sale, or I might want to make one because of how it looked on another sewist, or I want to read the instructions. So from the latest Simplicity Fall offerings I only bought three patterns.


All of them are on my fall to sew list. As I was choosing garments to add to my cut pile, I thought it would be great to add one of the new patterns. This one really jumped out at me.


I chose a lightweight pinstriped denim shirting purchased from BlackBird Fabrics last year for the tunic's base. Originally I was looking for a pleather scrap to add as an accent but touched the leftover scraps from this shirt and an idea was born. I love a floral/pinstripe match and there's just enough white in the background of the floral to "tie" both fabrics together. 


That was the genesis for this project. However, this is a new pattern so I'm sure you're wondering about pattern alterations. I started out by measuring my pattern pieces and cut a size 22. Got the top put together and realized that my head would never fit easily through the opening. Tried the top on and struggled to get it on and off. I needed an opening in the back so it's not such a struggle to get the top on.

I had to figure out how to make it work cause I wasn't giving up that print mix! I ended up adding strips that were the length of the bodice and 1.5" wide. Then I added a 11" invisible zipper which opens up the back and allows me to put the top on easily.


The raglan sleeves were wide enough for my bodacious biceps so no alterations were needed there. I didn't need to worry about a waistline since it's gathered. It is a relaxed fit pattern and one of the reasons I chose it.

(Just excuse the junky sewing cave background photos)

I was sure the tunic would fit now...ummm no!  This is how it looked on Daphne, the dressform, because I'm not putting a picture of how it looked on me on the interwebs. It was tight...a little too tight for my comfort. I was pissed! Pissed I tell you. I used good fabric and the last of my floral scraps to make this and now it wasn't wearable. 

So I folded it up and put it on the edge of my cutting table. As I was turning out the lights to go upstairs for the night, the pattern starting whispering to me to not give up on it. Long story short, I pulled another piece of fabric and decided I would make pattern alterations and remake the tunic. However that was the last night of my short vacay and the tunic/fabric/pattern sat.

Last weekend, I picked the tunic up to move it from the cutting table. I needed the space and realized maybe I didn't have to ditch it. Maybe it could be saved. I removed as much as I could from the side seams and the piece I inserted into the back. It gave me an additional 2" and took the bodice from tight to looser fitting.


It meant that I had to take the tunic apart...
- open and resew the side seams with a 3/8" seam allowance instead of 5/8"
- rip open the back side inserts
- reinsert the invisible zipper
- resew the seams with 3/8" seam allowances instead of 5/8"
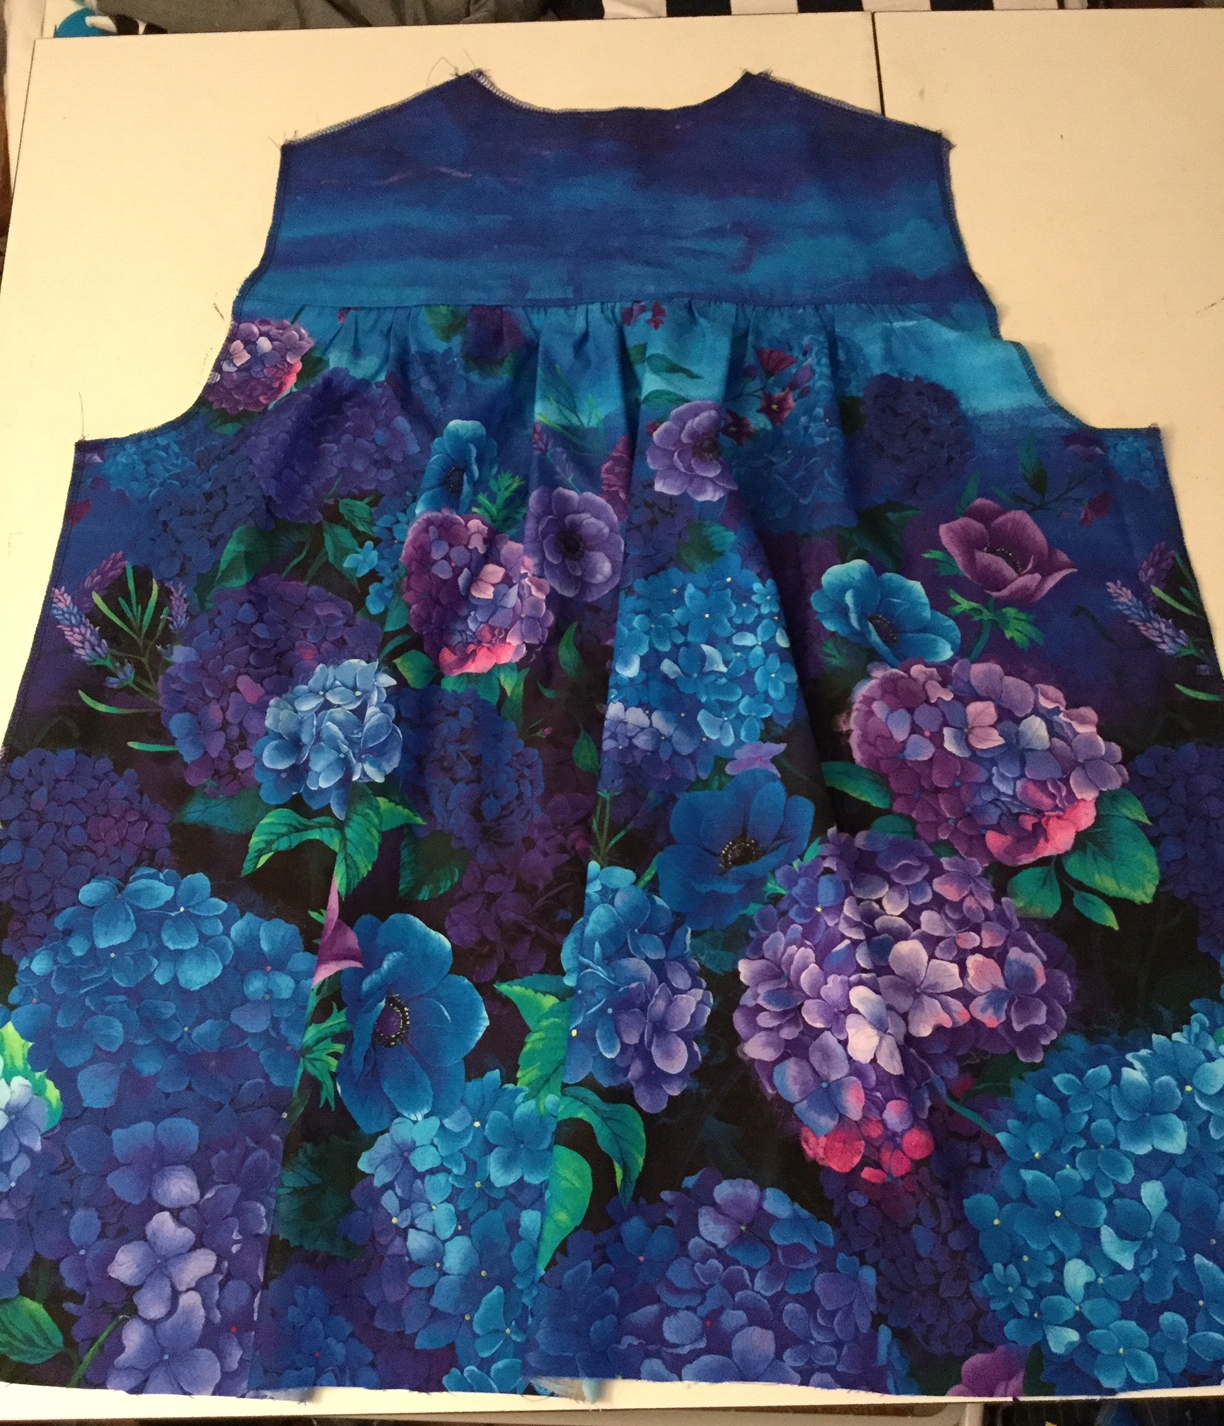
- added the skirt back but put in small pleats instead of the gathering and like it so much better!


Tried it on and yes it works. It's not as loose as I've been making things (well in my head cause when I look at my back pics my dresses are fitted) but it works.


A couple more things...
* I omitted the pockets. I cut them out but it just seemed like too much on the tunic front.
* The back facings had to be recut since I changed the back opening. I made them longer to cover the zipper.
* After the facing was added, I topstitched it down.
* Two inches were cut off the bottom of the tunic and it was machine stitched with a one inch hem allowance. 

A Few Pictures ~


I'm glad I took the time to alter it and make it work. Honestly, when I finished I wasn't loving it. Though after my daughter photographed it, I was a lot happier with the top. I probably won't make this pattern again. There are just too many patterns and shirts to be made to work on a pattern that I'm only so-so about.

Along with finishing this up, I washed, dried and ironed a pile of fabric that will become more shirts and tunics. They will be coming to the blog soon.


...as always more later!


Tuesday, September 24, 2019

Do You Appreciate the Garments You've Made?

I wore this little topper a lot this summer.  While we did get a heatwave in late July/early August, the warm weather took it's time arriving.  It also seemed to disappear all too quickly...making light layers needed earlier and longer.  However, as many times as I've grabbed this topper this summer, I've yet to make another one.


I was wearing it the other day and looked down at my sleeve hems. There was three rows of stitching to hold the hem down. Honestly, I was impressed that I took the time to make sure the hem was stable and it laid correctly.

I have to say this little topper is full of amazing construction details. I'm proud that it's worn often and has held up to the wearings. Has this ever happened to you? Have you ever worn an older garment you've made and noticed a technique or pattern match that you did and had forgotten about?  Did the attention to detail inspire you or make you proud?

This is the Question of the Day so talk back to me!

...as always more later!


Saturday, September 21, 2019

Mod 60's Purple Shirt

Once again fabric is the driving force behind this shirt. I wanted something original, funky and fun. I believe this print checks all of those boxes.


However, unlike the Hydrangea Panel Print shirt, this one has a closer fit. Same TNT shirt pattern just different back pieces...or the same dayum button up shirt I've been sewing for the last two years. See it's like this...these two shirts fit my lifestyle...so why am I changing it up?  I guess I could try another shirt pattern but my thought again is why when this works?

I love finding interesting fabrics to use to make these button up shirts. They work so well with my fall/winter wardrobe of jeans or leggings with a cardigan or a topper. To throw a monkey wrench into this thinking, I do have another shirt/blouse pattern that I used a couple of years ago. It will be making an appearance on the blog soon - Vogue 8772.

Supply List ~
100% cotton fabric from Zooks Fabrics in Lancaster, PA
White shirting from Metro Textiles
Buttons from Nancy's Notions in Lancaster, PA
Interfacing from Steinlauf & Stoeller

Again no new construction techniques. I chose to use white shirting for the collar, undercollar, front band and cuffs. When I chose this print fabric, I knew I was going to add the white to it...to emphasize the print...yet close in the print and give your eyes a place to rest.

A Few Pictures ~


(I loved this shirt when we took the pictures and amazingly 
this was the only one of the back we took! Why?)

I love the bold print of this fabric especially with my white denim jeans that I'm still wearing...cause it's summer until September 23rd! BTW, can I talk about these jeans for a minute. 

They're RTW denim jeans from QVC from the Women with Control Line. They have tummy control (cause my tummy has none! LOL!) and I buy them in tall so I have extra length. Most importantly though they fit over my bodacious bottom which is a challenge I have with a lot of RTW jeans. I own these in white, black, a muddy brown called chocolate and a midwash denim. Yes, I'm one of those people that when I like something I buy it in all the colors!

So out of the three pieces of fabric purchased from my last trip to Zooks, I've sewn two. The third is going on the fabric shelves because frankly it's a little too summery to sew now. I've been sewing so more is coming to the blog.

Parting Shot ~
My granddaughter, Samantha, always throws up these two v's when she takes pictures...so much so that we have to tell her to stop.


I was starting to get goofy.  We take photos of 3 or more garments when my daughter comes, to maximize her time and my sewing time, I start to get pretty silly after "posing" for awhile. Here I am imitating Samantha.


...as always more later!


Wednesday, September 18, 2019

Hydrangea Panel Print Shirt

When I purchased this fabric I knew I wanted to make a shirt from it using my TNT shirt pattern. I wanted the full back so I could layer camis or turtlenecks under it in the winter. As well as, show as much of the panel's print as possible. This is a mash-up of two OOP shirt patterns (Vogue 7700 & Butterick 5678) but these patterns work for me. One of the two TNT versions I use to continue making a wardrobe of button up shirts.


This shirt is all about the fabric choice and my chance to fussy cut it to make what I envisioned.

Spreading out the panels at Zooks to see all of it

Supply List ~
3 100% cotton panels purchased from Zooks Fabrics in Lancaster, PA
Blue buttons from Nancy's Notions in Lancaster, PA
Interfacing from Steinlauf & Stoellers

I laid out the shirt pattern pieces on the crossgrain to insure the print would go in order around my body. Making sure that the tops of the pattern pieces showed the sky as well as the hydrangea print.


Then I used the the sky portion of the border print to cut out the collar, undercollar, front button bands and the sleeve cuffs. Using all the pieces of the panel to tell this shirt's story.


There are no new construction techniques in this make. However, I did add a little more to the body of the sleeve, about a 1/2" on either side. I wanted a big full sleeve for this shirt which I gathered into the cuffs. The cuffs are slightly smaller than my normal cuff which I think I will use in more makes going forward.

So a few pictures ~


Sorry, okay not sorry for the number of photos. My daughter outdid herself shooting this one.  I'm also so thrilled with how this shirt turned out. I've always loved "Art to Wear" garments and this shirt feels like a walking picture. I will definitely be on the lookout for more panels like this to make more shirts!  

Next on the blog is another shirt in the other piece of cotton I bought from Zooks when I purchased this one.  


...as always more later!

Sunday, September 15, 2019

Button Up or Button Down Shirt

I've always called a woman's or a man's shirt with a collar, button band and cuffed sleeves a button down shirt. Shortly after I fell in love with making shirts, I called it a button down shirt in a blog post. I was scolded in the comments for doing so.


Then I was at a loss for how to describe my shirts because the commenter was quite adamant about how I was using the wrong term...breathe...sigh. I tried not to use the term again because if it's wrong, it's wrong and I'm big enough to admit my mistakes or lack of knowledge. But quandry much?


Then I read this great article online at Marie Claire clearly stating how to determine what is the right terminology. The article also had some styling and fit tips for shirt wearers.

Okay so Imma stop right here and link to the article again - HERE.  You go and read it now. Don't worry I will be right here waiting when you get back!

Are you back?  Did you read the entire article? Cause honestly you need that information to read the rest of this post.

...waiting for the stragglers...

Are we good now?  Everyone on the same page? So let's discuss, mmkay. I love how Audrey McLoghlin, founder of Grayson and Frank & Eileen, calls shirts "button ups" but most importantly she says this...
"I call my pieces a button up because the placket buttons up,
but it doesn't infer that there is a button-down collar.
WOMEN TEND TO USE THE TERM INTERCHANGABLY,
but in the men's world, they're distinct."
(Caps are my emphasis)

It gave me a better understanding of why the words "button down" are interchangeable in both the sewing and fashion worlds for women's shirts.


The article has some great tips on fabric, fit and styling as well as an array of retailers who sell women's button ups. Since we sew, the retailers info isn't pertinent but the other sections are really helpful ~ well at least to me! Also, there are quite a few women's sewing patterns for shirts from the Big4 as well as from indie designers currently available.


Now back to my point...or better still my question.  Were you calling shirts button downs or button ups?  Did you know there was a difference?  Does it even matter to you?  Sound off in the comments, cause I'm interested in what you have to say!

A NOTE:
I know quite a few of you read my blog posts on bloglovin'. You need to know I only check bloglovin' every once in awhile. I also don't interact with any comments, questions, or observations left there. All of my attention is here on my blog...and yes there is a difference between bloglovin' and blogger.

Did you make it this far?  If so, next up on the blog are two new shirts. The weather is changing (though it was hot as hades for a couple of days last week) and I'm back in jeans, a shirt and a cardigan.

Parting Shot:


Since Meghan Markle is my favorite Princess, I wanted to include a photo of her wearing a button up white shirt from her newly released collection of workwear essentials called The Smart Set. The charity's mission is to offer dressing and coaching services to women with job interviews...see every woman needs a good white shirt!


...as always more later!


Thursday, September 12, 2019

McCalls 7774

I cut this maxi dress out a couple of weeks ago. Its the last garment from my summer cut pile to be sewn. As I was working on it, I was thinking of how much I was enjoying the process. I wasn't rushing through to finish it. I wasn't short cutting any of the sewing, I was just happy to be in the minute...and I thought Cynthia Guffey would be proud.


Seeing her at a Sewing Expo changed my sewing life and helped me get pass the fast, faster, fastest sewing that had been ingrained in me by the pattern companies. 

I know quite a few of my summer makes have had piping, pattern matching and several sewing techniques in them. But the pieces I'm creating now are the embodiment of my slow sewing/enjoying the process journey.

Shew what an intro! *LOL* I've had this pattern in my collection since it came out last summer.  But even as much as I sew, I don't get to all of the things on my list. Sometimes it's lack of time...sometimes I haven't matched a fabric to it...sometimes I'm on another sewing journey and it doesn't work with where I'm going.


Since I was sewing maxi dresses with full bodies this summer, this pattern now fits into my sewing journey. And even though it worked, you see I didn't get to it until September. I definitely have more sewing ideas than I have time...okay reeling it back in!

Supplies ~
3 yards of a linen border print from Fabric Mart (part of my Summer Sew Camp fabric haul - there is still some left in other colors - the green is sold out!)
22" brown invisible zipper
Brown bemberg lining from the collection
Braided brown piping also from the collection

Pattern Alterations ~
1. I added a graduated 1" to the front and back bodice pieces


Front piece

Back Bodice altered

2. Due to my fabric choice I didn't use the the skirt piece because it has an a-line design. I cut the rectangle from the length and width of the fabric.

Those were the only pattern alterations made.

Design Choices ~
I added piping to the neckline and armhole. I didn't plan to do that but was rambling around in the piping/binding drawer for another project and touched the brown piping and went down the rabbit hole. 

While I like the brown piping, I overworked it when I added it to the armholes. They are a bit wide and it's definitely due to the piping and self made bias binding I added to the armholes.


The other design choice was the border print fabric. I wanted the dramatic of a border print to add to the dress design. I think the fabric does bring the drama.

Construction ~
This is an easy dress to construct. However, I understand why there have been more shorter versions of this dress made than the maxi one. There is alot of gathering at the high empire line in the maxi dress if you use the actual pattern pieces. This amount of gathering is not very flattering.

I also had to take the skirt off and reapply it to line up the main lines of the fabric in the front of the dress. It gave the dress a more appealing line.

Inserting the invisible zipper was slightly challenging due to all of the fabric in the dress.  Otherwise an easy sew.

A Few Pictures ~


I had another piece of fabric pulled to cut a striped version of this dress, like it's pictured on the pattern envelope. After making this one, I wasn't that enthralled with the finished dress. Not to say I won't wear this maxi dress, because I will, but not enough to make another one.

I have one more maxi dress in the cut pile. One I can wear with a denim jacket into October before it turns cold. I also have several garments that I want to remake/refashion into more usuable pieces, as well as a couple of shirts that I've started. So in short, I've been sewing...

...as always more later!


Monday, September 09, 2019

A Hacked Myosotis

I know the Myosotis dresses I'm making now look nothing like the pattern envelope or even the ones you will find when you search for images of the pattern online. I know I've gone off the deep end making changes to the basic silhouette to make these dresses my own...but I love this pattern and it's possibilities. 


I've made more changes to this one. These changes incorporate the maxi length, button front hack along with one I saw from Beth of SunnyGal Sewing Studio.  Here's her version.  I love the changes she made to hers and I copied those for the bodice exactly as she described.  I also love that she listed all of the different changes/hacks you can make to this pattern to personalize it.


I can honestly tell you that this is not the last one for the season. I have one more laying on the cutting table because I've been kicking myself that I didn't start sewing these earlier in the season.

Supply List ~
4 yards of rayon challis purchased from M&J Fabrics in Jackson Heights, Queens (during Jackson Heights Fabric Crawl) so not deep stash but stash fabric used. Yeah!


1/4 yd white broadcloth from the lining collection
12 - 1/2" mother of pearl buttons from the collection
Interfacing from Steinlauf & Stoeller
Purchased white bias binding left over from another project

Pattern Alterations & Design Changes ~

  • Per Beth's instructions I lowered the front & back neckline one inch.  Beth also instructs you to narrow the shoulder seam too but I like the coverage on my shoulders so didn't make that change.
  • Then I omitted the collarband that's included with the pattern. I also left off the collar pattern that I've used in almost all of my versions.
  • Finally instead of using the facings, I cut another front and back piece from the broadcloth and lined the entire bodice with it. I really wanted the clean finish that the lining provided. The armholes were finished with white bias binding tape.
  • I omitted the pockets. I'm probably going to regret that but it was the third Myosotis I'd sewn in a row and I was tired of sewing them...especially since I'm not really a pocket girl.
  • My last challenge was adding the skirt to the bodice. The first time I sewed the bodice and skirt together, the broadcloth lining puckered and pulled strangely. Unpicked everything and just sewed the bodice minus the lining and the skirt together and left it to hang. Then I tacked the bodice lining to the skirt in key places, mainly allowing it to hang loosely. I believe this will work well.

A Few Pictures ~


This will be my 4th maxi Myosotis this summer. With just one more to finish, I will have added five to my wardrobe.  One for every day of my work week and enough for now so I'm putting the pattern away for the season. However, since it's reached TNT status I can't guarantee that it won't show up again. As I said above, I'm in love with this silhouette and how I feel wearing these dresses.

There are two more maxis on my cutting table.  After they're sewn, I'm sewing tops and tunics. I'm feeling the lure of early fall sewing. Most of the tops & tunics I made a couple of years ago are looking worn and are ready to be retired.  It's time to add some new looks to my top wardrobe.

...as always more later!


Friday, September 06, 2019

Do you have a Back Up Sewing Machine?

I strongly believe in having a back up sewing machine. I've had one for years. When I had a mid-range sewing machine, I'd keep the older machine I upgraded. So if/when something happened to my new sewing machine, I would have something to sew on while my machine went to the shop. 

Luckily, I've never had one die on me. I'm just not revisiting that time my apartment burned and I lost both my sewing machine and serger...probably when having a back up became really important to me...because I didn't sew for months!

Recently my back up machine has been living in PA because I'm lazy and don't want to carry it back and forth to Sew Camp on public transportation. So when my 8900 QCP started having challenges, I panicked. The back up was hours away if something was seriously wrong with my baby.


At the time I started looking at the Janome Skyline series. Then I took my sewing machine to be serviced at this amazing repair shop, Paramus Sewing Center. I breathed a sigh of relief when they fixed it right away. However, the machine I was looking at went on sale over the Labor Day weekend for a good price and I bought it.


It's the Skyline 3 - the lowest number and most basic of the series. However, it has all of the features I want in a back up machine...and it's a Janome. I'm just not into changing brands especially since I really like the Janome brand. My last three machines have been Janomes.

I've already taken it for a test drive and the stitch quality is exactly what I've come to expect on a Janome. There are some differences between this one and my 8900 - the workspace is smaller, there's no light underneath and there are way fewer stitches. But it does make an automatic buttonhole. I really like how they've improved loading the bobbin and winding it. It comes with a number of feet that I use constantly and if I want a few more I can always purchase them off Amazon.

BTW, I'm not hyping these sewing machines and I'm NOT encouraging you to purchase one. I just like sewing on these TOL machines which is my preference.  If you bond with another machine by all means, purchase what you love...whether it be vintage, mid-range, industrial or another brand.  

Now while I really want to upgrade to the Janome 9450, I've planned a trip to London in 2020 and want that way more than a new expensive sewing machine. Well right now that is! LOL! I'm thrilled that I have a new back up machine to pair with my main one. I don't handle not having a sewing machine well and this means I don't have to go without.

So this is the Question of the Day.  Do you have a back up machine? Is it of the same quality as your main sewing machine? Or is it lower in the series? Is it even in the same sewing machine family? If you don't have a back up machine why? Is it because you haven't considered owning on? Or what?

Talk back to me because this is the Question of the Day and I'm really interested in your answers.

...as always more later!


LinkWithin

Related Posts with Thumbnails