Showing posts with label Shirts. Show all posts

Sunday, October 12, 2025

Border Print TNT Shirt

I only own one me-made white shirt. It works for everything so there's no problem with it.  But I started to dream of white shirts that had some kind of design or print on them.  Over last year's Thanksgiving break, I pulled three fabrics from the collection to make this work.

The first one I worked on was inspired by a Coldwater Creek shirt. 

I had five yards of a double border print purchased from Fabric Mart in 2022. 

I started with the TNT version of my shirt pattern used to created my Mood Border print Shirt.  This fabric didn't need as elaborate a cut out but I didn't want a seamline on my front piece. The continuity of the print was important to me.  

I've made about 40 shirts during the last decade. I have plans to make many more.  Shirts work for my lifestyle and I can use the most amazing prints/panels/designs to create unique garments.  Since I have a TNT pattern with many different moving pieces, I can pretty much achieve any look I want.  However, that doesn't mean that I don't have at least a dozen other shirt patterns in my pattern stash.

So some photos from the cutting out process...

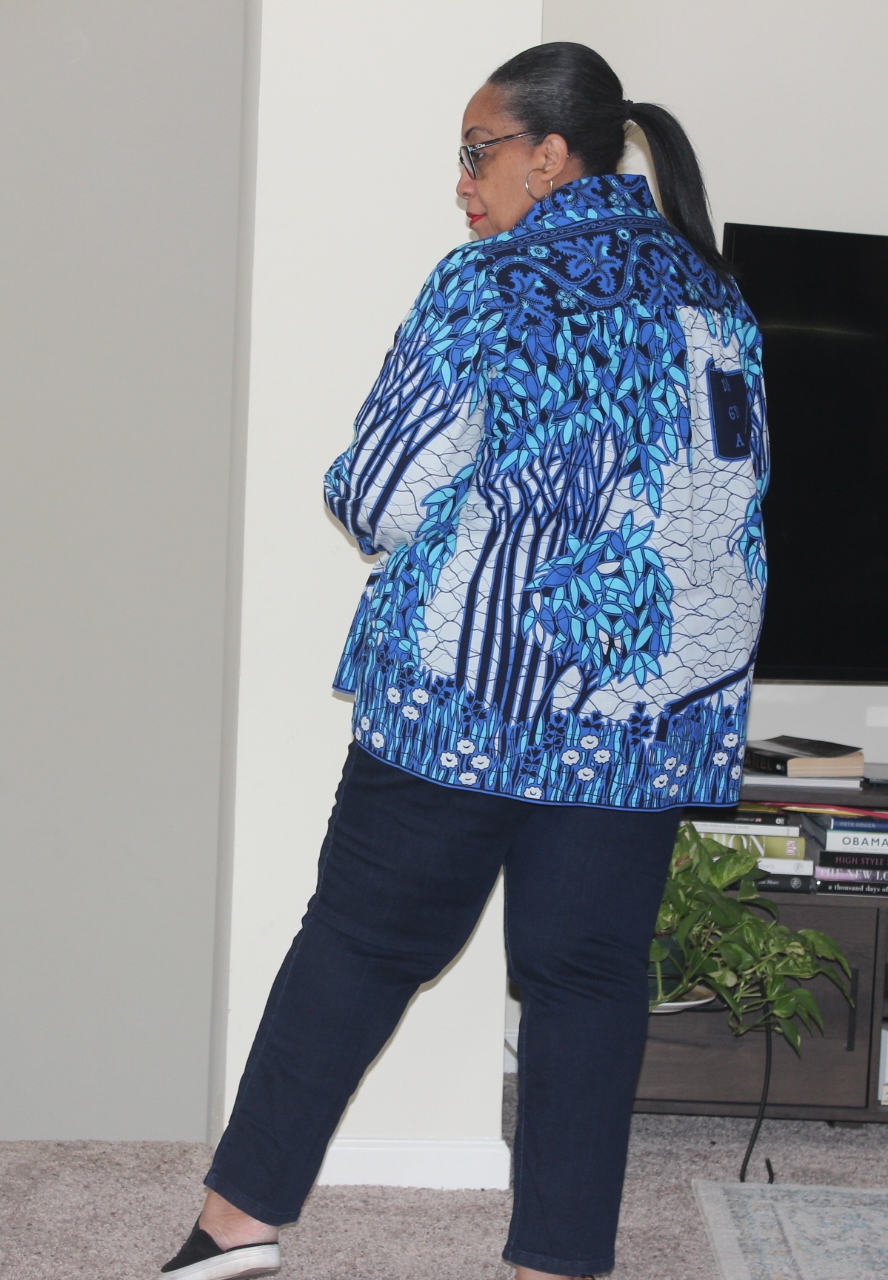
Here is the pleating process used on the shirt back.

I started with 1" pleats.  But using 1" pleats didn't take up enough fabric to meet the back yoke.  

Next I moved to 1.5" pleats.  Again, no go. So, I moved to 2" pleats and wallah that worked.

To secure the pleats, I basted across the top of the shirt back.  Then pressed the pleats flat.  Finally I pressed with spray starch to insure the pleats will hold. I also added a line of stitching at the edge of every pleat to help it hold it's shape.


That was the most complicated part of the shirt and took several days to complete because the frustration was real!

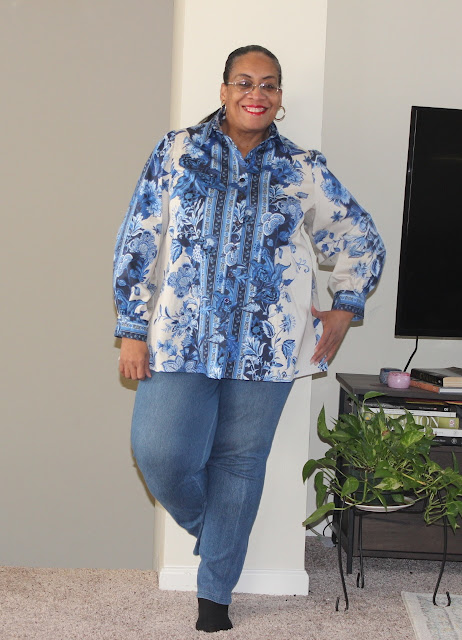
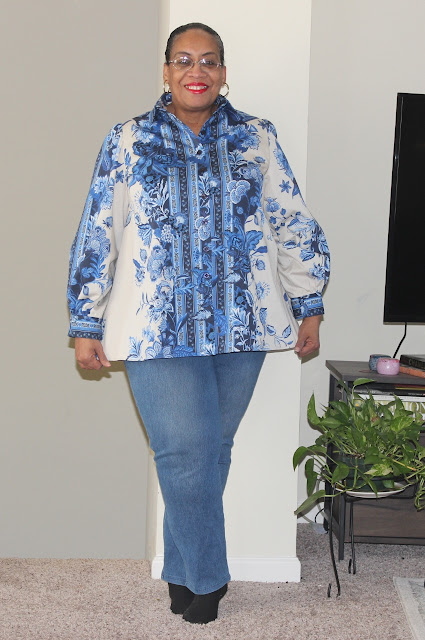
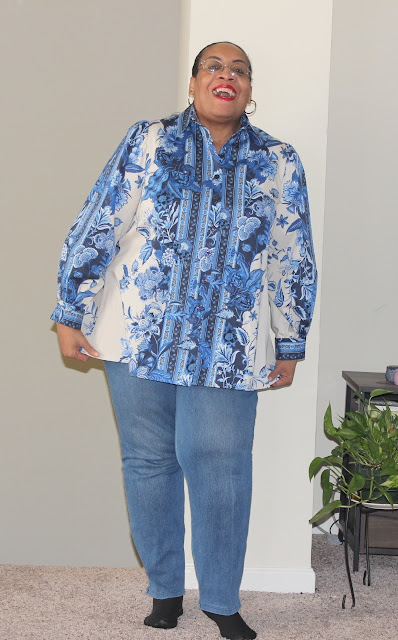
The rest of the construction was my normal process. Now with the weight loss it's an oversized shirt. Also, I promise to stop talking about my weight loss but right now it's like a living breathing thing that affects everything daily.

Here are a few photos of the finished garment...


(and yes this is a hair piece added to my ponytail)


Conclusion ~ 

I should have used the pattern that I based this shirt upon.  Not everything has to be remade by me! Sometimes I should stick with the experts.*LOL* Especially since I rifled through my pattern collection to donate some patterns at the Black Sewing Network Event and found the original! 


Wearability Report:
After my daughter took photos of this shirt, I wore it to work the next day. A few things, it didn't take long for the pleats to be come looser, wrinkled and lose their crispness with the wearing. It made a loose wearing shirt, even looser. To wear this shirt again, it will need some serious pressing to bring back the original crispness of the shirt.

Also I received several compliments regarding the shirt from women passing me on the street and when I went to Macy's to pick up a few things.

I won't be making this shirt again without using the pattern.  It's a one and done!


*I know Blogger has made it more challenging to sign in but would you kindly sign your name if you use anonymous.  It makes it easier to talk back to you.  Thanks so much!


...as always more later!

Sunday, April 10, 2022

Altered an Oldie but Goodie

I made this shirt back in April 2017 and if you look closely at the pictures, it's quite large on me.  This was back when I lost 35+ pounds and was still learning how to sew for a slimmer me.

Then

Now

Fast forward 5 years and I've gained back the 35 pounds plus some. But this is not a woe is me post. I love the me that I am right now especially since I'm living through a pandemic, the possibility of WW3, had some health challenges and I'm still standing. 

As you know I'm back to work in my office several days a week.  So I've been going through my shirt collection to see which ones still work for my body now. What I found is that all of the shirts with the back yoke and gathered lower back still fit fine.  It's the sleeves that don't fit. I've been going through choosing which ones to alter and which to donate.

To me this designer inspired shirt just needed new sleeves. I didn't want to lose the lacy effect of the original sleeves so I replaced them with full lace sleeves.  The lace of course came from the vast collection of fabric in the Resource Center. I actually had three pieces to choose from and went with the floral lace because you know stripes and floral lace. I love it when I can update a garment and definitely need to do more of that this year!

After prepping the sleeves, I tried the shirt on and while it fits, I wanted an even more relaxed fit. So I took the time to alter all of the seams on the shirt to give me another 1.5" of room.  I'm glad I reworked the shirt because I'm much happier with it now. It's going into the work garments rotation soon.

A few updated photos...


I have another two shirts that I want to make revisions to also.  They will be done as the spirit moves.  I want to save anything I've already created because so much time and effort went into making them.  Not everything should go into the donation pile, right?!

So do you save, recycle or donate?  Just wondering...


...as always more later!


Saturday, April 02, 2022

In Unity There Is Strength - A Shirt

I purchased a cotton wax print bundle from Sew Creative Lounge in the spring/summer of 2020.  There were three prints included in the bundle and since there was yardage of one of the prints in the online shop, I bought 2 more yards.

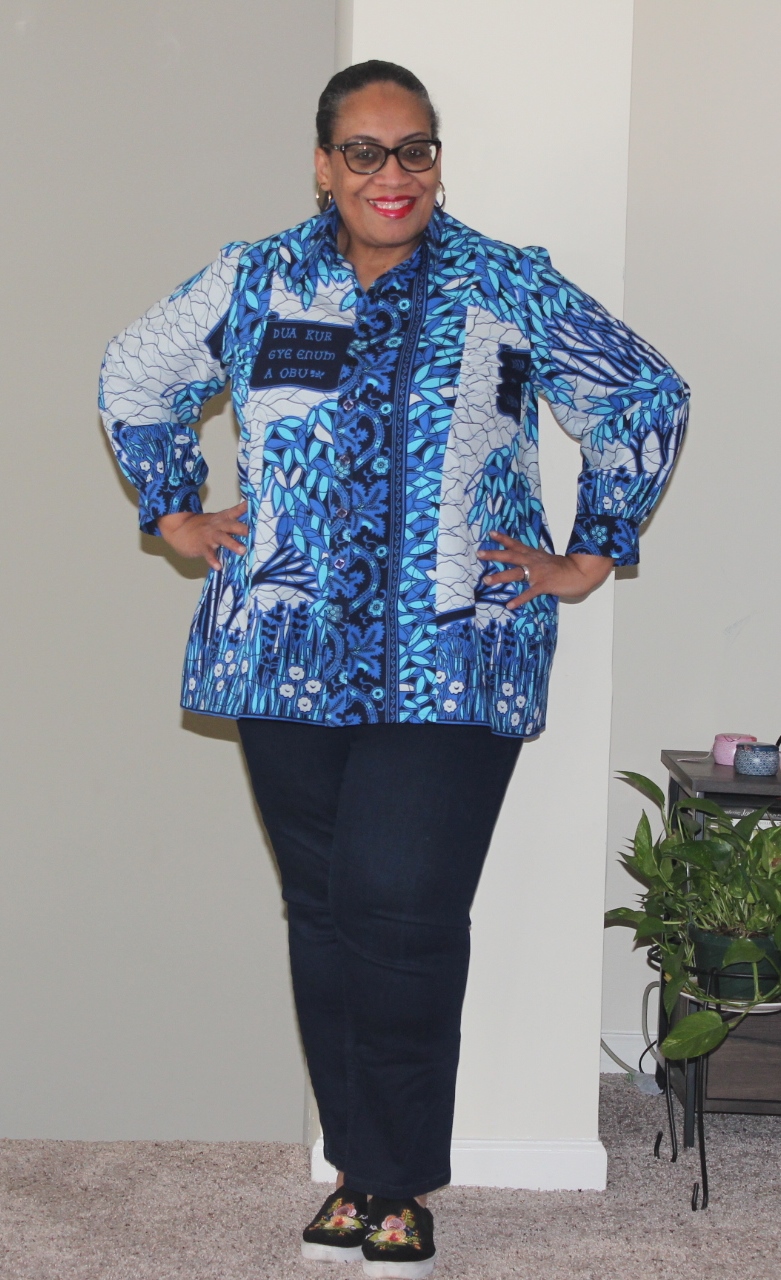
When the fabric arrived, I noticed there was some writing on the blue/white floral print at the bottom of the picture above. I'm not a fan of sayings on my clothing and was concerned about what this meant.  However, this saying, "Dua kur gye enum a obu" is Twi proverb which means "In Unity There is Strength." 

BTW, Twi is also known as Akan kasa, or Akan-speak, is a dialect of the Akan language spoken in southern and central Ghana by several million people, mainly of the Akan people, the largest of the seventeen major ethnic groups in Ghana.  Yes, Google is my friend. That's how I learned what the proverb meant and about the language.

This was one of the last pieces from my winter cut pile. Constructed in December during my winter break and finally the buttons were sewn on in March - the end of March. I really need to hang my head in shame on this one! *LOL* However, it's a lighter weight cotton so it will be perfect with jeans and a cardi or sweatshirt jacket headed into spring.

The most important part of this shirt is using the border print to it's advantage.  To me that's all done in the planning and cutting stage.  Here's a photo showing the shirt layed out on my cutting table to check the print across the front.

The most important construction tip is related to the border print. I really wanted the flowers to run all the way around the bottom of the shirt. To achieve this with my pattern pieces, I cut them a little longer and ruched/gathered the side seams at the bustline. 

It gave the bustline some interest and allowed the borderprint to work the way I wanted.  Now I don't know if this is the "proper" way to handle this but it worked for me so I went with it. Also it gave the shirt a design element that I like making it a little different from all of the other shirts I've made.

During the construction, I also used a dark blue & white small gingham as my inner yoke. I just wanted something a little different to go with this very distinctive shirt.

Boy do I need a new ironing board cover!

I added some dark blue shirt buttons purchased from Lancaster, PA to close the shirt. I chose them because I wanted them to melt into the background of the print. The shirt also closes left over right instead of the traditional right over left for women. This is because I liked how the print looked left over right better. It makes the shirt front pop!

A few photos ~


I was very pleased with how this shirt turned out and how it showcased my love of working with border prints. This was the last of my Christmas sewing. It took awhile but it's finished and ready to be worn. 


...as always more later!


Thursday, February 03, 2022

A Mood Borderprint Shirt

If you're on IG you know ads and reels rule our feeds. Whatever you show the most interest in, IG aka Meta aka Facebook picks it up and sends it back to you in a multitude of ads. I've learned not to click the ads because then one ad begets another ad and it's like rabbits multiplying.

I will admit that I don't mind the online fabric company ads, though. While 90% of the time I don't click through or make a purchase, this fabric is the direct purchase of an ad and a fellow sewist, Karon. Her IG handle is Cookeka. Yeah, y'all inspire me with your makes too! 


The Fabric ~

This borderprint showed up in my IG feed as a sponsored post. I was really intrigued by it but when I clicked in the blue that enticed me wasn't available. So I clicked out but every time the ad showed up, I checked to see if the blue was back in stock.

When it finally was in stock, I purchased four yards to make a shirt. I always buy more of a border print than I need for a standard garment. You never know how much you'll need to get the design idea you imagined.

Pattern ~

I started with my TNT shirt pattern back yoke and gathered lower back (Vogue 7700). The fronts are from Vogue 8722 (which I've used before) because I wanted solid front pieces that wouldn't interrupt the print. Collar, under collar and cuffs are from my TNT pattern which started life as Butterick 5678

I'm definitely pulling from patterns I've used before to get new looks. While I know there are new shirt patterns out there, I'm not trying to refit new patterns, especially when I know these pieces all work for me.

Cutting out the Fabric ~

As you know, cutting out a borderprint is the most important part. So I took my time to get the look I wanted. Using Karon's shirt as an inspiration, I cut the main border piece down the front so it would match at the center fronts.


Then since I was using the yoked back and gathered bottom for this shirt version, I cut the on the fold piece by centering the fold on the fabric.
 
o Pinned it on the fold line. 
o Drew around that piece.
o Then flipped it and drew around the other side before cutting it out. 
o This way I made sure the border print was perfectly centered in the center back of the piece.


The sleeve was cut with the border print down the center of the sleeve.  While the yoke, collar, under collar and cuffs were cut on the yardage featuring the the border print.


Construction ~
There are no new construction techniques used in this shirt. If you need to know about how I sew these shirts, all of the links above will take you to posts that detail my shirt construction.  The only thing I did do was change the thread during construction.  Dark navy blue in the border print areas and ivory in the other areas.

My buttons are dark navy blue purchased from Cedar Goods Dry Lane in PA during the last Sew Camp.  I deliberately chose such dark buttons so they would melt into the print. I wanted to highlight the border print.

A few photos ~


Conclusion ~

This is the first of three border print shirts I worked on during my holiday break. I know at $17 a yard that this is bordering on the high end of what I normally pay for shirting fabrics.  However, this shirt was worth every penny for the drama and affect it's giving.

I am culling, as in giving away, and altering some of my older shirts.  The more traditional closer fitting ones are going.  A few of the gathered back ones, need arms enlarged because everything about me is bigger since Covid. This go round I want more interesting shirts, different fabrics, larger more vibrant prints, nothing totally traditional since that's not my lifestyle any more.

I'm also going to make several different types of shirts, tops and blouses.  Things that will work over leggings, jeans and capris for summer.

One more cause I love this one ~


Another border print shirt is up next...


...as always more later!


Sunday, June 20, 2021

What a Hot Mess...

I got this wild flight of fancy in the dark days of winter - you know when the days were short and darkness reigned. The time of year I hate the most and want to fill with the most color and light as possible.

Supplies ~ 

I was surfing fabric sites because I needed some comfort and found this amazing panel on fabric dot com with a coordinating print.


Doesn't this fabric just scream warm summer evenings!  So yes, it's a quilting cotton but I've had success with other quilting cotton panels and after some hesitation because of price, I bought three panels. First off, I should have bought four...but we will get to that later! Oh and because I'm so timely (joke, joke) with this post, the fabric is long gone!

During February I took a week off to sew. I needed some days to sleep and create and this was the first project I worked on.  

A few more photos of the process...


This back was a whole hot ass mess, so I put the shirt pieces away and worked on some other garments during my sewcation. While I working on the other pieces, I was pondering how to save this. Obviously the back was the main problem. It wasn't working and wouldn't work with the 24" panel width.

Construction Techniques ~

After I made that hot mess of a back, I had to come up with another look. I will admit the shirts I've been most comfortable wearing during the pandemic have the gathered lower back eased into the back yoke. Plenty of room for those extra pounds I gained. But I only had one panel for the back and I just couldn't see how to make it work. That's when that disastrous back was created and immediately ditched.

After thinking on it I decided a solid back would be the answer.  I went and touched quilting cottons at the store. Then decided upon this printed blue fabric that I used to construct the back of the shirt.  


Making the collar...

Inserted the sleeves, okay auditioning sleeves...


...and the back quilting cotton is making the shoulders and sleeves buckle because they aren't similar weights. *sigh* I should have known better.


I let this shirt sit for 2 weeks before admitting I was done.  I don't want to save it.  I don't want to add my good buttons to the front and finish it. I basically threw a hissy fit because I'm tired of it.  So now it sits on the clothing rack.  After a couple of weeks, I decided the fabric is too heavy to think about finishing now...so it sits.  My first UFO for 2021.

Thus the title of the blog post - cause it's a hot mess!  BTW, I've completed two pieces just have to photograph them. But it's summertime, my grandkids are getting older and my photographer (my daughter) has things planned for their family for the summer.  I've scheduled a day so hopefully the completed items will be coming to the blog soon.

To all who celebrate, Happy Father's Day!


...as always more later!

Saturday, July 25, 2020

An Embroidered Sleeve Shirt

I don't normally sew shirts in the summer because it's too dayum hot to be wearing a lot of layers.  But work from home Carolyn, sits in air conditioning every day...plus the sewing cave is extra cold what with air conditioning and being underground.


Some days I grab a shirt and a pair of leggings to work in. The other day I had to run an errand during the middle of the day, so I grabbed the QVC Denim Shirt and my white denim leggings to wear. When I got home I wore them for the rest of the day and they were perfect for the Zoom meeting I had later that afternoon.

So when I saw this tunic on JJill, I knew I owned a piece of embroidered shirting to reproduce it.


Actually I only used the sleeve idea from the tunic, matching it with the pattern pieces I used on the QVC denim shirt. I wanted more of a shirt than a loose tunic. There are no construction changes for this one. 

The challenge was to use my fabric to it's best advantage to make the shirt I saw in my head. I've had this piece from Chic Fabrics for a minute (longer than a year but not more than two). I've pulled it out multiple times to use but the fabric and idea never worked well together. So back in the fabric collection it would go. Pattern placement was the key to making this shirt work.


Supply List ~
3 yards of embroidered striped shirting from Chic Fabrics
10 white buttons from Nancy's Notions in PA
Interfacing from Steinlauf & Stoeller
20" of 1/4" elastic from the notions collection

The best thing about this supply list is that everything was already in the sewing cave. Yeah, I'm throwing in that justification for my overstuffed sewing cave every chance I can get! *LOL* Believe me I'm not complaining because all of this stuff was comforting and allowed me to sew when we were quarantined.

A Few Pictures ~


While this is a comfortable and easy shirt to wear, the polyester in it makes it more a three season shirt than four. I was definitely warm taking pictures outside today. However, it does fit perfectly in my shirt wardrobe and will be worn at home or when the weather cools a little.

I love how by just changing the pattern pieces from my TNT shirt pattern that I've got a really cute shirt to wear. This is how I like to sew. It's the perfect example of what I meant in my previous post.  Expect to see more of this type of sewing!


...as always more later!


LinkWithin

Related Posts with Thumbnails