

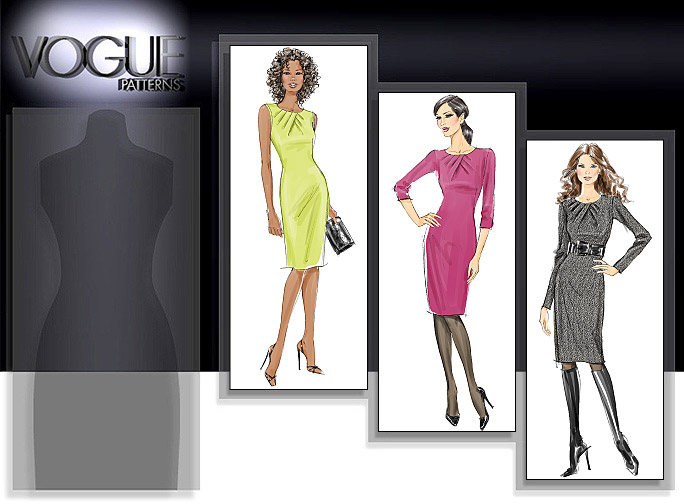
Up until that time, I never thought that I would be able to have a version of the dress. One ~ the original is a very tight-fitting, body-hugging dress and not something that I could actually imagine on my plus size body. Second, the design is so distinctive that I didn't think the pattern companies would get a copy out as quickly as they did. Now I know there is a Butterick version but I liked the style lines on this pattern better.
However, I was wrong on both accounts! So let's start with my favorite photo of me in the dress and move on from there...

Okay - let's discuss how dress number 21 came into being....
Fabric:
A poly doubleknit from the Vera Wang collection from fabric.com
Notions:
22" navy invisible zipper
First let me say that this is a relatively easy dress to make. Just make sure that you mark everything and choose the right fabric to work with and you will be fine. However, I did read every word of the three reviews on Patternreview and Amanda's version of the dress also.
Next I guess I should address my audacity in thinking that I could make this dress fit my plus size body. Well, it really is only a straight dress with some amazing details ~ the pleated neckline, the back shoulder darts, the dart that runs from the hem to the center back. To me all of those details could be manipulated to fit me.
Pattern Alterations:
I didn't know that the front piece with the pleat detail was one big pattern piece when I purchased the pattern. So my first challenge was to figure out how to get that one pattern piece (that only went up to a size 20) to fit my size 24 body. I kept thinking that if the dress had princess seams with side front pieces that it would be perfect. And that is when I remembered the vintage dress that I made last year using princess seams...if that side front piece could work with the dress front I would be in business.

After laying the pattern piece on top of the dress piece, matching notches at the armhole seams, I realized it would work. I have to admit that I started to do the joy-joy dance here because that was a major part in making this dress work on my body!

The pleated neckline on the dress is the most distinctive feature to me and one of the main reasons I wanted my own version. After reading the reviews, I noticed that one of the reviewers had topstitched her pleats down. I really liked that feature so I included it in my dress. Now those pleats aren't difficult at all to make. Take your time, mark the pleats carefully and they go together without a problem. Oh and don't forget to press them well. I used a silk organza pressing cloth, a lot of steam and my clapper to get those crisp pleats.


and instead of a dart from the hem to center back, I added a 1/2 inch seam/pleat on both sides. It gives a nod to the original dress design but honestly I was afraid that dart would make the dress too tight on me. So my solution works for me:

The original dress design is slim fitting through the waist and abdomen, not exactly a plus size girl's friend so my dress has more of an a-line skirt, but I'm thinking it works for me...judge for yourself:

and one more view because I just can't believe how well this dress turned out:

I will admit that I do have my bodyshaper on under this dress but even my daughter was thrilled with how this dress fit!
How about a close up of the accessories:

I'm very pleased with how this turned out...and I'm glad that I was fearless in trying this pattern out. With a little bit of adjustment, I made it my own. I know that some of you think I possess these amazing patternmaking skills but really sometimes I'm just fumbling around and doing the best I can with the vision I see in my head. I was fully prepared for this dress not to work...even had a back-up dress to work on...but I am so glad that I did take this journey.
I got an email this week and one of the things the young lady, who is plus size, said was that she hated to see the big old pieces of fabric because she was wary of making a sack when cutting out fabric for a dress. Let me tell you this is a constant concern of mine, but my solution is to add a seam wherever possible. It adds such a slimming effect, it makes designs that aren't originally targeted for plus size women accessible and isn't that the reason we sew for ourselves anyway!
This dress finished without accessories is kinda nunnish looking *LOL* but add some accessories, hair and make-up and I think I could go to the White House in this dress too! *LOL*
BTW, this is the first piece of my SWAP for the contest on Stitchers Guild. I've named the wardrobe "Midnight at the Oasis" because it will be comprised of mostly navy garments. The SWAP ends April 30th, so you will see more pieces in the coming months. I think that's it...I'm off to sew...I have one more dress laid out on the cutting table...*LOL*
...as always, more later!

