Showing posts with label sewsewdef patterns. Show all posts

Saturday, August 17, 2019

A Zooks Katie

This is my second Katie make of the summer. It is seriously one of my most comfortable summer garments. I wear this one all.the.time and everywhere! I wear it so much that I have to remind myself NOT to reach for it. So it became apparent that I needed another one like it because I love the combination of the tunic with a pair of knit capris.


The thing is that I wanted a lighter color version to wear with white capris or white jeans. Luckily I had 4 yards of this shirting cotton recently purchased from Zooks during Sew Camp.


Supply List ~
Blue & white quilting cotton from Zooks
White linen from the collection via Fabric Mart - this is stash fabric
10 5/8" white mother of pearl buttons
Interfacing from Steinlauf & Stoeller

Sewing Info ~
Since the fabric was only 45" wide I didn't cut the back piece on the fold because the pattern piece did not fit. This version now has a back seam as does the back facing. Although you can't tell its seamed because the print is so busy.

I imitated the black version by using white linen for the front bands, collar and under collar. My change to this top is the sleeves. It was a simple change to make.


1. The sleeve was folded in half, pressed and cut in half.
2. Both side seams were serged finished.
3. Then I sewed 4" from the cap down. 
4. The rest of the seam was pressed open and topstitched.
5. A band was cut 4" wide and 16" long from the white linen
6. The band was then sewn to the sleeve at the openings and pressed flat.
7. Next a 3/8" seam was pressed to the unsewn band side.
8. The band was pressed in half and topstitched down to the top of the seam - enclosing the band seam.
9. The entire band was topstitched, closing in the pressed 3/8" seam allowances.

There are no other changes made to this version of The Katie Dress.

A Few Pictures ~


This will be my last Katie for the summer. I still have a few other patterns I want to squeeze in and sew before the weather turns...and more garments in my cut pile that need to be completed.  So look for more garments coming to the blog soon!

...as always more later!


Sunday, July 28, 2019

Challenge - A Border Print Katie

One of the things that was different about Carriage Corner Sew Camp this time, was that we all received three yards of fabric from Fabric Mart for a sewing challenge. Prior to Camp, Gaylen presented the attendees with three choices and we voted on which fabric we liked.


The majority of us chose this Milly border print.  It was waiting for us with our other swag items from camp. We had 30 days (end of July) to come up with a garment using the challenge fabric. Honestly, the fabric was different than what I thought it would be and initially had a creative block on how I'd use it.


However, I did know I wanted to use as much of the daisy print as possible. So after thinking about it and seeing other sewing camper's garments, I went with the Katie top. Why? Because it allowed me to use most of the daisy print.

After all of the fussy cutting I ended up with just scraps of the fabric...


Supplies ~
3 yards of Milly border print from Fabric Mart
8 clear & black 5/8" buttons from Joyce Trimmings
black 'n white plaid bias binding from Home Sew
Interfacing from Steinlauf & Stoeller

Some Sewing Info ~
There are no new sewing techniques in this shirt. However, I want to emphasize the binding on the pockets. It came about because I was too lazy to change the serger thread. Seriously!  So I looked for something to bind the pockets and remembered that I'd bought hanks of bias binding back in April. It was perfect to add to the pockets and gave the innards some shuzz!


The fussy cutting of the border print added to some of the elements I like in this garment. Both the front and back facings were cut beneath the hemlines of the front and back pattern pieces.  That way the facings match the outside of the fabric perfectly ~ another aspect that thrills me. Okay I actually did the joy-joy dance when this worked out.

One more sewing thing...if you know me, you know I'm anal about changing my thread colors on my serger and during construction. I was just as deliberate about alternating the white and black threads on the sleeve as well as the facing hemlines. No one will probably even notice. That's because there's no white threads glaring against the black fade or black threads running through the white background.

I also love how the black fade plays on the sides of the top highlighting the border print. Honestly, that black fade was what stymied me when I first got the fabric, so I'm thrilled to have made it work.


This fabric plus this pattern made the perfect top! This is my fifth Katie and I'm thrilled that I've revisited this top with this fabric! 

So a few pictures ~


This was a fun challenge!  It made me think and stretched me creatively to make the best use of the fabric.  I hope you will follow my sewing sistahs to see what they did with their fabric, Gaylen, LaQuana, Cennetta, Bonnie, Andrea, Marji and Barbara. Hopefully, Gaylen will share all of the photos including the sewing sisters who don't have social media accounts. There is an amazingly creativite use of the fabric amongst my sewing sisters!

...as always more later!


Monday, August 13, 2018

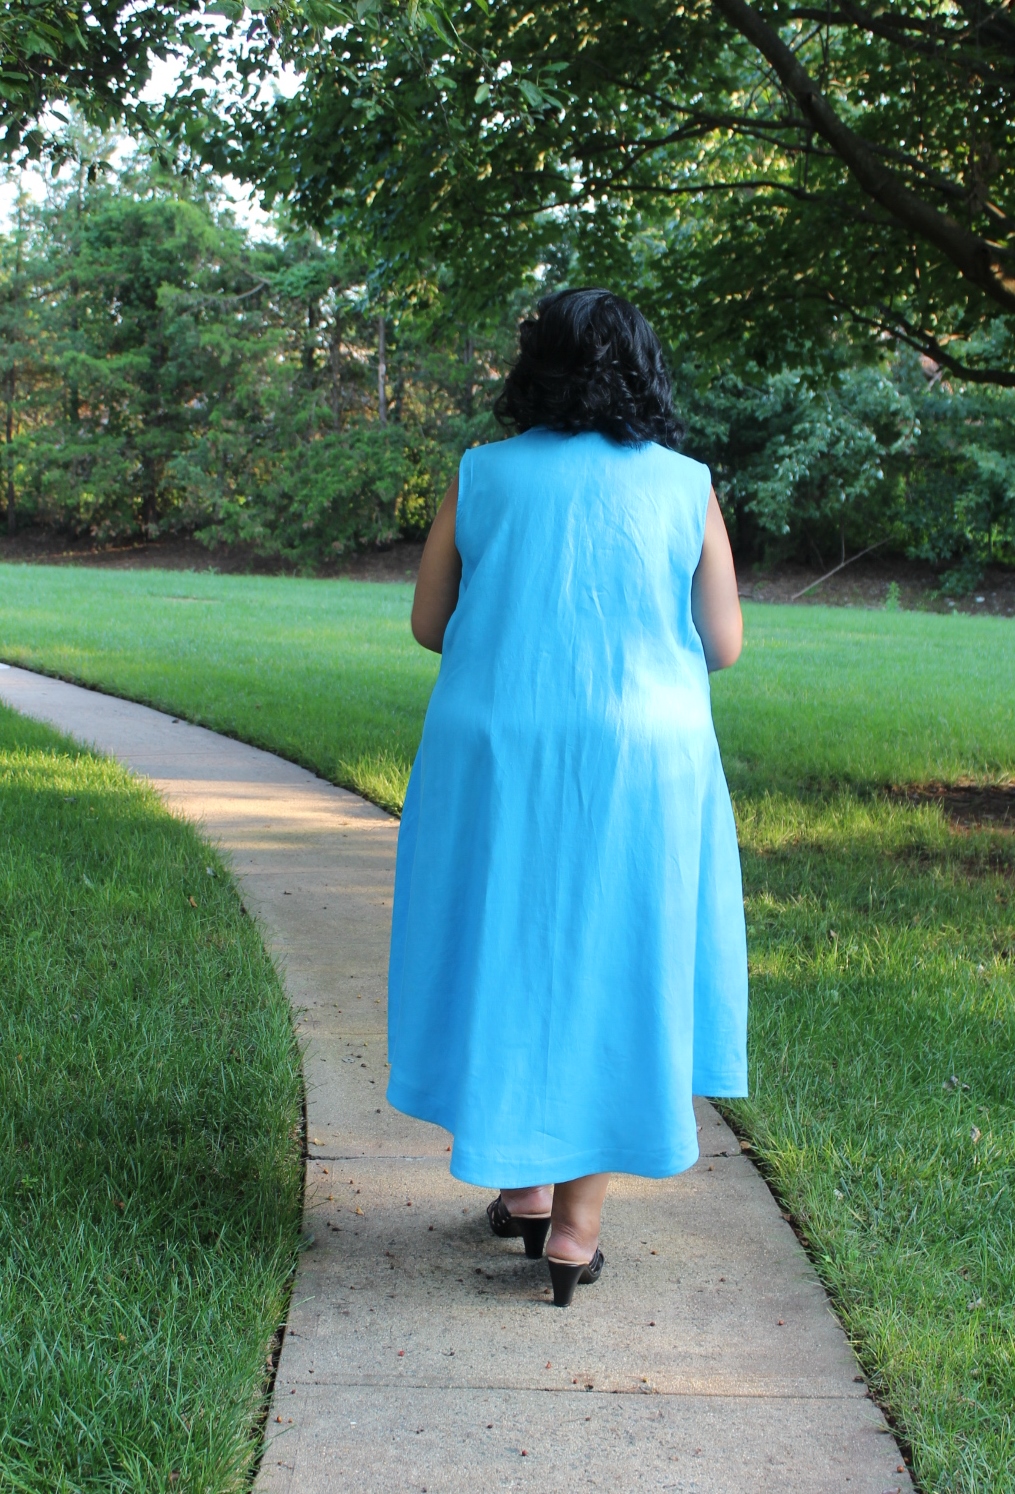
Solid Colored & Sleeveless Katie

I think of projects in threes...so this is my third Katie Dress.  


The difference this time is that I sewed them one right after the other! I am done with this pattern for awhile because I have three amazing dresses/tunics in a sleeveless, short sleeve and sleeved version.  That's not to say another shirt probably won't make it into my wardrobe come fall. I still haven't made the shirting version of this pattern which started this journey...but for right now I am done.

Each version has presented a sewing challenge but in a good way.  Each one has allowed me to use a technique or to change a detail. They've given me design, pattern alterations, and construction challenges which I love. All of which makes a great sew for me.

I chose a solid color with colorful accents for this version because after working with the other very bright & colorful prints, I needed something a little toned down...so why did I choose a bright sky blue linen...*LOL*

Supply List ~
- Linen from Fabric Mart's couture line 
This has been in the collection for a couple of years. They put it on sale one year and I bought all the colors...don't judge! *LOL* However, there is still couture linen on sale at FM so I've linked to one that's similar in color to mine.
- printed cotton fabric from Zooks Fabric in Intercourse, PA
- shell buttons from the button stash
- Fusible Interfacing from Steinlauf & Stoller

Pattern Alterations ~
- I added three inches to lengthen both the front and back pieces. My original dress was just a tad too short showing my knees and I wanted a dress that fell in a spot that I liked.

- I also raised the underarm seam a 1/2" on both the front and back pieces. More on this further down in the blog post.

- The front facing also had 3" added to it to lengthen it.

That was all of the pattern alterations for this version.

Construction ~
There were no changes to the construction process...just omitting the sleeves and adding a bias binding to finish the armholes. However, I stretched the armholes out when I was applying the binding and they were too long, exposing my bra under my arm.

*Sigh* I also didn't take into account the linen's qualities when I was changing the underarm. I added a crescent piece of the cotton print to the underarm seams to cover the extra space.


When I first put the crescent in (made by taking the dress, putting a piece of tracing paper in the armhole and tracing the opening, then adding seam allowances all the way around) it didn't fit. It was wobbly and stuck out away from my body. My solution was to take a tuck in the center of the crescent and stitch it down. Now it works and I love that it's made from the accent fabric.

If I were to make another one (maybe next summer) I would make the armhole snugger so that it fit closer to my chest. I like the full shoulder coverage though others might make it a little more cut-in. 

Design Changes ~
I had fun adding details to this dress to make it mine. Of course the inner collar stand is cut from the printed fabric...


as is one of the front button bands...as well as the crescent underarm inserts.


The front and back hem facings were also cut from the printed fabric and where I started this journey. I had it in my head to add coordinating facings to a solid color fabric.


I used shell buttons for the front of the dress. I also left a small sliver of the printed fabric band by sewing the buttons over a 1/4" which exposed the print and added a slimming effect down the front of the dress.

The final addition to the dress front is a small breast pocket with a square of the printed fabric. I wanted to cut down on the wide expanses of blue fabric and all of these details assist with that.

A few pictures ~


Conclusion ~
This is my favorite of the three Katies. I love the flow of the dress. I love the pockets - who is dis woman?! *LOL* Cause I'm so not a pocket person. I love the length and the drama of it...and it was perfect when I wore it on a 90+ degree, hot and humid summer day. I was cool, comfortable and it was so humid that quite a few of the wrinkles fell out as I walked to the bus station to go home.

As I said earlier I'm retiring the pattern for a minute. Though I will admit that I almost went back and added short sleeves because of the underarm issues. I just love that I improvised all of those details. They weren't in my original plan for the dress but they made it perfect...adding drama and interest and elevating the look of it.

Next up on the blog is my denim chambray version of the Myosotis dress. Indie month continues.

...as always more later!


Saturday, August 11, 2018

The Dark Floral Katie Dress

This was my first version of the Katie Dress made straight from the download.

As originally sewn

Worn with black capri leggings

Supplies ~
The fabric is a cotton/linen print purchased from Fabric Mart last month. It was from a special offering to Premium Members and I bought several of these prints then. They are now online here but the print used in my dress has sold out. 

The black linen is from the collection probably from Ebad Fabrics in the garment district purchased years ago...back when I kept black yardage on hand for basics.

Finally the buttons are from M&J Trimmings.  I bought them after I placed some stash buttons on the dress and posted it to Instagram. Some of the comments made me think, so I went shopping and found some different buttons to use.

A little backstory ~
Before I headed to banking land and an entirely corporate wardrobe, I use to sew ALOT of prints. So much so that my sister, who was a recruiter for a major corporation at the time, told me when I went to her for advice on getting a new job, to lose the bold prints. This was about 20-25 years ago. I was coming out of garment district jobs where I could basically wear what I wanted...trying to move into a corporate job with some serious benefits. 

So I toned down some of my wilder prints. Then I moved into a banking job where I had to tone them wayyyyyy down! Now that I've finally dislodged all of that corporate noise from my creative brain, I'm wading back into the deep with deliciously loud prints. See I'm actually a bold color and print sewist who likes simple shapes. I hate ruffles and ditsy little prints. I love a bold primary color and I also love a great menswear influenced garment. A little contradiction for sure.

Construction Info ~
So this dress...like I said earlier its made straight from the pattern and it worked. One of the things I love the most is the faced hemline. By adding the facing, you give the hem weight so that the fabric hangs the way it's supposed to and doesn't rise up or float around.

The changes I made were creative and not structural.  The front buttonband, collar and sleeve hems were all cut from the black linen. It was to give your eyes a place to rest. It also makes the floral print POP! 


The banded sleeve is a technique I've used over and over again but if you want a step by step tutorial, check out this blog post. Disregard the piping info or hold onto it for a future make! And I omitted the sleeve ruffle because seriously I'm tired of this trend. Can it go away already in sewingland? Cause I hardly ever see it on the streets of NYC anymore and I work in the heart of the garment district!

For the next dress, I'm lengthening the front and back by two inches so the dress front will cover my knees and the back dip will have more drama. You know I LOVE a dramatic high/low hemline!

A few pictures ~

The first photos are of the dress as is...it's a little short and shows my knees...and I'm just not comfortable showing my knees at my age.  Now this is me and says nothing about other women my age...just MY preference.


The next set of photos are of the dress worn with black capri leggings under it...like a tunic...and how I will wear the outfit! 


Y'all Imma be honest, I hate my arm fat pads in this picture...but a friend of mine said I was making my sleeves too long. So I'm including it so she can see why I make them longer. I was doing it to cover these fat pads & Imma go back to making my short sleeves longer to cover that area because I have to be happy with wearing the garment. Sorry...not sorry! *LOL*


This was the first of the Katie dresses but I'm posting it out of order because of the EB post...one more version to come to the blog!

Parting Shot ~
This was my daughter's favorite shot...so I'm including it because she's so patient and giving of her time to take these pics for me. We did these late one evening because with four kids, a full time job, and a partner, I take her when she has time!


...as always more later!


Wednesday, August 08, 2018

A Katie Shirt from Elliott Berman Fabric

This is the second version of the Katie that I'm sharing first because I used this amazing fabric from Elliot Berman.


Now I wouldn't call myself a funky or unique dresser but every once in awhile, I'm inspired to move a little away from my clean-line, unfussy styling and add a little funk.  This is definitely bringing the funk!

After figuring out the pattern I headed over to Elliott Berman's looking for a piece of fabric to use to make it. I specifically wanted this piece...


...but once Eugenia and I rolled it out...it really wasn't me. We walked around looking at other cotton pieces...and I touched some beautiful pieces...but nothing really made me catch my breath until she pulled this piece.


Now I know this looks nothing like what I've posted before, but believe it or not, I own two other pieces like this in different fabrications, because I love this type of design.

Supply List ~
- Red Linen by way of the fabric collection
- Gold Buttons purchased from Lauren Trimmings for this shirt
- Interfacing from Steinlauf & Stoeller
(I ran out of interfacing from Fashion Sewing Supply and picked up a couple of yards of this fusible midweight interfacing in the garment district while I wait for my next order to arrive from FSS.)

Pattern Alterations ~
My first change was to the front piece.  I had to figure out the best spot to end it on the front to effect the dramatic high/low hem. I did this by holding the pattern piece up to me and marking where I'd like it to end. Then I folded the pattern piece back upon itself to reflect the change. I also changed the front button band to reflect this change too.


Then I got the brilliant idea to add 2" to the back piece...well truthfully I was always going to make that addition...after making the first version. However, I added it much lower than I originally thought I would...and I was scared silly that I'd added it too low. Turns out it worked out alright!


Construction ~
The body of the shirt came together with no problem. Then I questioned using the red linen for the accents but eventually became okay with that. My challenge was the sleeves. In Mimi's shirt, she has long sleeves with cuffs and that was my original intent.  As you can see it's not what I ended up with and I don't know why my original sleeves didn't work.  However, this is my punt and I'm okay with it.


Like I said, it was my intent to make long sleeves with cuffs but somewhere along the way I lost my way and couldn't make my sleeve work. There was a problem with the cuff and then I cut the sleeve too short after I started messing with it. I ended up with the red linen ties to salvage the situation...and now I'm wondering why I was going in another direction because these are perfect for the shirt and for me.

Sleeve Construction:

  • I made a pattern sandwich using the sleeve from the original Katie dress and the sleeve from my TNT shirt pattern to make a new sleeve for this shirt.
  • The new sleeve pattern was cut a little fuller so that I could gather the hem into the cuff. 
  • Since I made my cuff too small and then realized that I'd drawn the sleeve too short, I had to come up with a new plan - thus the tied band.
  • To make the tied sleeve band, I cut a strip 3" wide and 12" long. 
  • Folded the band in half and topstitched it on...leaving about an inch of the sleeve without the band attached. 
  • Oh and I started the band on the underside of the sleeve so that the tie would be on the outside.

It was a simple process and anyone could do this!

A Few Pictures ~


Conclusion ~
This is a statement piece.  You will see me coming and going and it's all because of the fabric. This was an interesting piece of fabric to work with because it's a medium weight fabric with some body and stiffness. When I first showed Eugenia the pattern I wanted to use, she wasn't sure that the fabric had enough drape. However, the fabric got softer with pretreatment.

Now when I picked this fabric I did not realize the price per yard. I actually learned it when I linked to it for this blog post. While it's pricey ~ I have 3 yards of fabric in this shirt.  It means the final cost is over $150 with buttons and interfacing. This is on the high end of costs for me but if you want to own some of this fabric, go for it. It's a quality fabric that will make a very distinctive garment. However, if this is a little rich for your blood, there are more cottons on the site in the new arrivals section that will work just as well.

One more quick thing - this is really not a middle of the hot steamy summer wear. I was DYING taking these pics outside in 90+ degree weather. It will become a staple in my fall wardrobe and yes I'm going to wear those white pants in September after Labor Day! 

I won't have another Elliott Berman sew until late fall...already have the wool for that one! But there are two more versions of the MimiG Katie Dress up next on the blog.

...as always more later!


Monday, August 06, 2018

A Trio of Katies

The first of the Indie patterns I made is The Katie Dress, and I admit it I went a little crazy making Katie dresses...


However, in my defense, I love a great high/low hemline. And if I was gonna tape a pattern together, I'm getting the most uses out of it so I made three versions of this pattern. 


A little backstory ~
I was on Instagram watching MimiG's stories and she posted this shirt.


I've been wanting a shirt like this for quite some time. Just had no pattern on hand to use to start the journey. After a brief conversation with Mimi, she told me she'd modified the Katie Dress and that it was easy to do. I'd purchased the pdf pattern last November during the Black Friday sales and forgot about it...cause honestly pdf pattern.

But that shirt...it would add so much to my late summer/early fall wardrobe and it started to play in my mind...so I printed the pattern out and taped it together.


Yes, I know. *shaking my head* even my peeps on Instagram couldn't believe that I went in! LOL! As I started taping the pattern together, it started talking to me. Whispering softly of the things it could be...

So it became a dress as the trial run of the pattern ~


Then it became the Elliott Berman show stopper with a few pattern alterations ~


Finally with a few more alterations it became a sleeveless dress with a longer hemline ~


This is the preview before each post which will detail what I did and why. I'm starting with the Elliott Berman fabric post because there is a link to the fabric in it if you'd like some of that amazing cotton fabric too.  Then the other posts will follow.

Conclusion ~
  • Let me just say that I love this pattern. The pdf was easy to assemble which is a MUST for someone who loathes pdf patterns as much as I do and it didn't have a lot of pages to tape together! 
  • Then it was an easy sew because the instructions are fantastic and I love that at every step it reminded me that I was sewing with 3/8" seam allowances instead of the 5/8" ones I'm use to!
  • Pattern alterations were easy to make to my traced pattern pieces. Mimi you were right!
  • It IS the perfect shirtdress and shirt that I've been looking for to wear this summer! The.PERFECT.shirtdress pattern!
This pattern is still available to purchase.  If you want an easy wearing, perfect fitting shirt or dress with a great fit through the shoulders and bodice but with a abundant flow in the skirt for those sultry summer days, buy this pattern! Especially since it's sized up to a 2X and y'all know that's my pet peeve about some of the indie designs.

Lastly, I was only given the fabric for the Elliott Berman post. Everything else is paid for by me so ALL opinions are mine...plus y'all know me. I'm only effusive about things I really believe in whether it was given to me or not. So go and buy this pattern...it was worth taping it together...SERIOUSLY! LOL!

...as always more later!


LinkWithin

Related Posts with Thumbnails