Monday, December 26, 2022

A Floral Rayon Romey

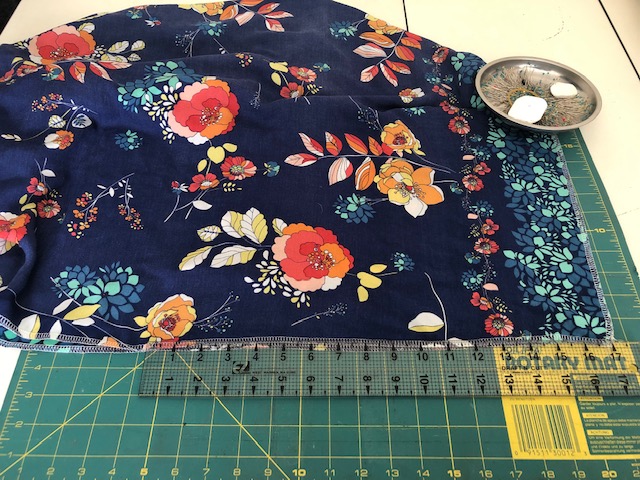
I have a thing for comfort. Gathered full skirt dresses with raglan sleeves work for me and are what drew me to the Sew House Seven Romey Gathered Dress pattern. Not only does this have a full skirt but it also has outside pockets that look to be sewn into the seams of the dress. I love this feature much more than in-seam pockets. I also love that this pattern goes up to a size 34 so accessible to a wide range of sizes. I made mine in a size 26.


I used a bubble crepe purchased from Fabric Mart at least five years ago.  I've been sewing with so much new fabric lately that it felt good to pull this from the shelves.

Construction Notes ~

1. The button loop pattern piece cut out was too fiddly for me. I purchased some small Goody Elastics several years ago to use for loops. I saw this tip on Katherine's blog years ago and have used it ever since. It has a good return and I don't have to fiddle with small pattern pieces. BTW, I'd picked out a button to go on the dress but never got around to adding it...and never missed it!

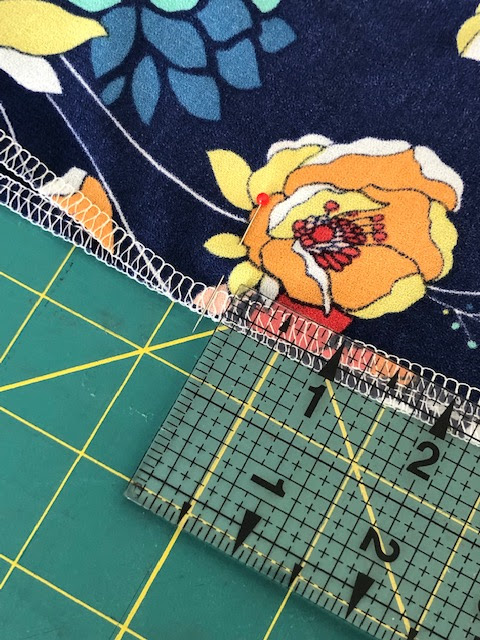
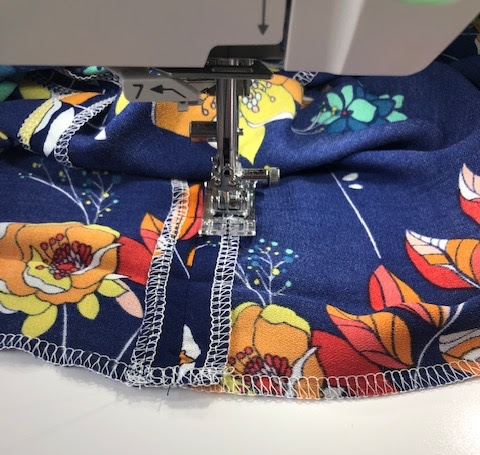
2. The pattern tells you to flat fell the seams. If I was working with a sheer fabric, I would definitely follow these instructions. However, I didn't see the need to do this with my rayon bubble crepe fabric. Let me state here that I'm not a fan of unnecessary finishing techniques when a simple serger finish will work.

3. Putting the neckband on was fiddly. I followed all of the instructions except the one where you fold it under and stitch down. Instead I clean finished the edge by serging the bias neckline piece. I didn't fold the entire neckline piece under.  I understitched and topstitched it down. I mean everything inside is serge finished so I had no problem with this.

4. The pockets ~ I put those pockets on twice and removed them twice, finally leaving them off. I had two issues.  One I couldn't understand how the directions tell you to put them on. Two I believe the pocket pattern is too small for the larger extended sizes. But mostly, I believe this is a ME problem and not a pattern problem. So whenever I make the next one, I will try adding the pockets again.

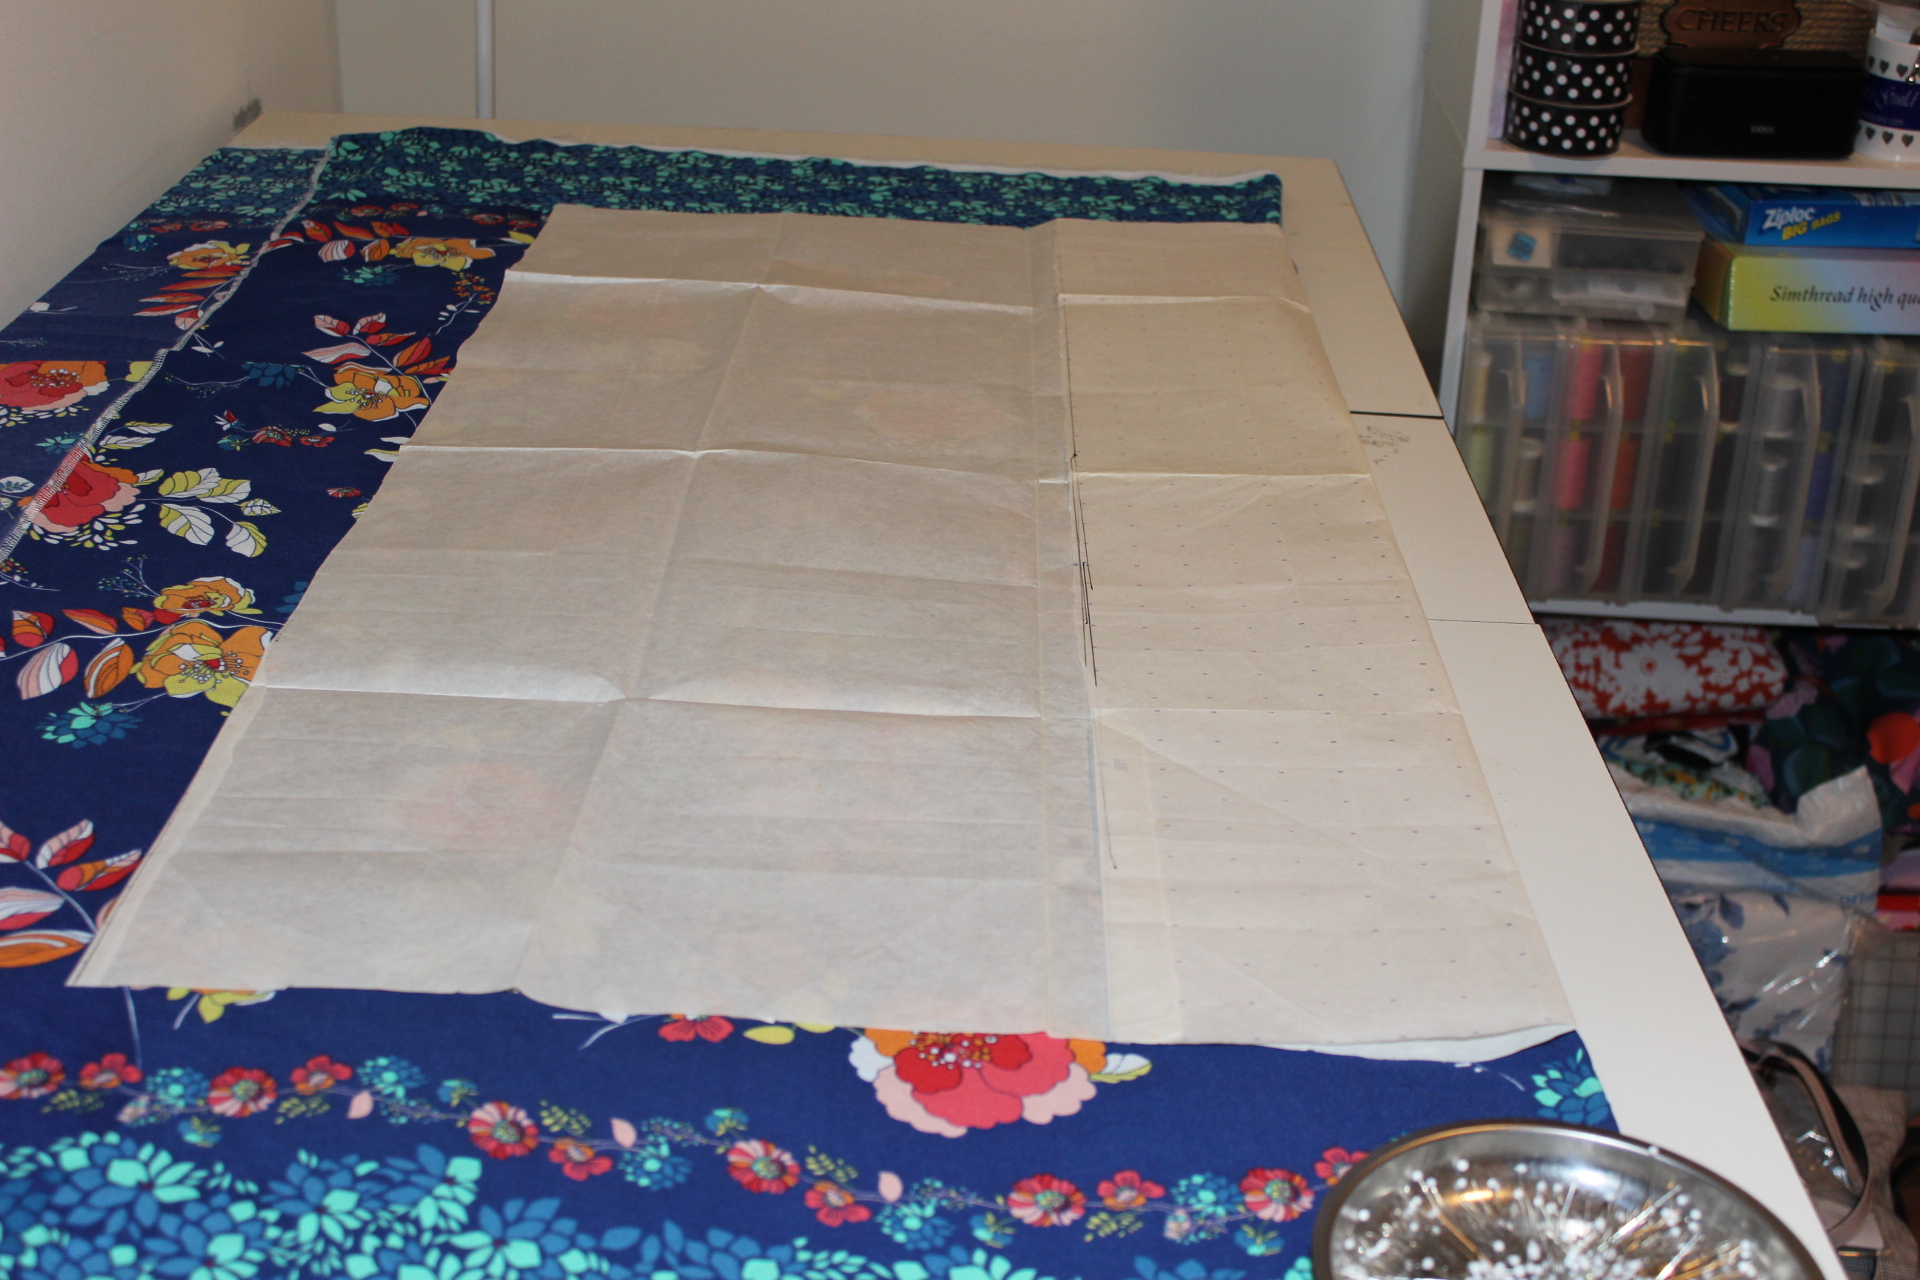
5. Maximized ~ the last thing I did when cutting out was add 4" to the hemline to make it a maxidress. Cause you know a midi dress wasn't working for me. I added 4" to the hemline because there wasn't a lengthen shorten line in the body of the pattern. Next time I will add one more inch because I like my maxis a little long.

A Few Pictures ~


I will make this again...probably several times!  I love raglan sleeves and this sleeve has some ooomph. It was the perfect dress for those hot & sultry last days of summer. It also received compliments every time I wore it. I highly recommend this dress pattern. 


...as always more later!


Thursday, December 22, 2022

Think Twice, Cut Once...

Originally I titled this post, "Remaking" but as I got into it I realized that Think Twice, Cut Once is way more appropriate. As you know fabric drives my creative spirit...and I've been looking for a fabric like this for awhile. It reminds me of some Dolce & Gabbana dresses from a few seasons ago.

Anywhoo, I found this RTW duster on HSN for sale. The fabric was everything I'd been looking for but hadn't found for an exorbitant price. So I purchased two of the largest sizes which were a 2x.

They arrived in a few days and I spent a couple of evenings ripping them apart. There was enough fabric to make a short sleeve maxi dress...the summer maxi dress of my dreams.

That was the easy part.  Deciding exactly what pattern to use, making sure that there was indeed enough fabric for my hopes and dreams, and then pinning and laying everything out, going over it several times, before finally taking a deep breathe and making those first few cuts...

Here is what I ended up with...


Now how did I get here...

First the pattern:

I used my Christine Haynes Verano bodice for this dress. The skirt is made from the two back pieces of both dusters.  They had the length and width I needed plus a bonus they were already hemmed. 

This is the third time using the Verano pattern so I would say it's reached TNT status.  The title of the post, Think Twice Cut Once, is because I had to cut the backs twice. I thought I had two different backs but ending up cutting two of the same side.  Not good.

Supplies:

Fabric ~

Using this fabric is like working with a border print, so I had to slow down the construction a little to think about how I wanted the finished dress to look. Also what I was willing to put up with since I had no extra fabric to pattern match!

To cut out the fronts, I used the already cut, interfaced and topstitched fronts...

The backs came out of two of the duster front pieces. I used the remaining front to cut facings.  Yes, facings.  

Piping & Buttons ~

In my mind's eye, I'd seen the bodice with piping and matching/coordinating orange buttons.  I just KNEW I had both in my abundantly equipped notions stash. Well yes and no...

I did have an orange ribbon that had polka dots on one side and was solid on the other.  I could make the coordinating piping using the ribbon and some purchased piping as the insert.


I did have a cache of orange buttons...but none worked. That meant I was going to resort to my favorite button matching method - covered buttons.  Which I do have a stash of for moments like this. However, when I went through the plastic bin that holds my covered button making stash, I found a bunch of other buttons in the bottom.

While the buttons don't match, they do coordinate with the fabric and the piping that I'd inserted. So I used them because I'd been dragging my feet on making the covered buttons.

Next I used facings to cover the piping. Since my fronts were already sewn down I needed to move away from the instructions and figure out how to make it work. The facings solved my issues.

Once the bodice was complete adding it to the skirt was no problem...

Here are my remade RTW dusters...

I have no idea why I only have one earring on in these photos?


I thought this was going to be a quick one day project even with the piping.  However, when I cut the backs out wrong, I set the dress aside and decided it could wait for my sewcation. BTW, RTW garments whether purchased new or thrifted are a great source of interesting fabric. And in this case solved a fabric desire and ended a chase.

I'm thrilled with the finished garment.  While I wanted short sleeves, once I chose the Verona bodice, I decided I didn't want the "challenge" of making and fitting a short sleeve to the bodice. It was supposed to be a fun, easy sew and I'd already complicated it with the piping & possible covered button situation.

I finished this garment during my Summer Sewcation.  As mentioned before, I didn't feel like taking pictures earlier this fall. So here I am - sharing them now before 2022 becomes a distant memory!


...as always more later!


Monday, December 19, 2022

Metamorphosis

Once upon a time in the year 2020, back when the plague times first descended upon the world, I came into existence. I was created to hold back some of the horror of the death and disease that was in our midst. In the home times, when we weren't allowed to venture forth, I came into being...

Now two years have passed and the world has moved on so I've evolved too. I've become a fifth of a quartet of makes. But I'm the only one that is birthed from an original Myosotis make. It is my claim to fame.

Here are my components ~

4 yards of pink chambray from Fabric Mart

1 yard of Rifle Paper & Co. from the original dress

12 pink buttons from the original dress

Please note the difference in me versus the other versions are my sleeves which were borrowed from Vogue 9266 and enlarged. Here are a few photos of the process...

Enlarging the sleeves using the Vogue 9299 sleeve pattern

The "Slice & Spread" method

Followed the instructions in this book!

Some other construction photos...

The bodice constructed using the accent fabric for the collar and the sleeve cuffs

I was almost finished when I realized I wanted the contrast print 
to not only be the bodice facing but the skirt facing too.  
This is that facing being applied.

When I FINALLY start adding buttonholes and buttons, I'm almost done!

Otherwise, I'm like my summer companions. Myosotis' who've been created to replace the ones made during the plague or in the before times when hope lived.

A few more shots of me shining...

Originally I put covered buttons on the dress front but 
after criticism by my daughters I removed them...

...and went with my original plan of reusing the original buttons!

One thing my Maker has realized is that not all creations should be donated. Some of them have more life to live and should be lovingly dissembled to bring forth a new garment. 

I am that new garment...

I've worn this dress several times.  Out to dinner with my daughters and to work but I've never gotten a picture of me wearing it. I shared it on the dressform because I really need to clear these 2022 posts out of my queue and make space for 2023.

...as always more later!


Wednesday, December 14, 2022

Breathe

Y'all I feel like I'm just coming up for air and able to breathe freely for the first time in a minute.  It's been a challenging fall but I can feel the page turning. The urge to create is strong.

I'm on Holiday break from December 20, 2022 - January 2, 2023.  Fourteen days off to celebrate with my family, relax, and jumpstart my sewing passion.  I'm going to try hard to get those last garments up on the blog before the end of the year.  I really don't want to carry those posts into the new year.

I've cleaned off my sewing/cutting table.  This was it's original state:  

Here it is now:


It's looked like the top picture for so long that to have moved things around and prepped the top to actually use is so encouraging!

I reorganized my patterns. They've been moved from piles all over my sewing room to the blue & white tote next to the sewing table.  The patterns I really want to work on next are on top of the table waiting for fabrics to be paired with them.

Moved some fabric around and reviewed my Fall Sewing List. I really feel like making some tops for this winter.  I have plenty of shirts and need some variety to wear over my jeans and knit pants when going into the office.

The last photo is of my sewing machine eagerly waiting for me...

So that's my plan...it's not an ambitious one...but hopefully it will restart my sewing journeys.


...as always more later!


Wednesday, November 30, 2022

The End of November 2022 Already?

I think this is the longest I've ever gone without a blog post.  There are a number of reasons for this.

1. While I have posts for my last five garments written, I have no pictures of the garments on me.  Somewhere during the summer & fall, I just didn't feel like taking them.  While I've thought several times about posting with the garments on my dress form, I just haven't gotten there.

2. I've been having real dental issues.  Why does everything in our bodies have an expiration date on it? So I've been dealing with them and will continue to deal with them into 2023.

3. I've been having some physical challenges.  From having to use a cane to walk long distances, to catching the crud, I just haven't felt like myself.  In all honesty, I still don't.

4. Because of the above, I haven't sewn since the beginning of October, which is a lifetime in my world. However, I've had no desire to sew or acquire.  That alone is a little frightening...me not buying anything.  I totally skipped the Black Friday sales because I just don't feel like adding more to what I already own.

Speaking on that...

I've decided to downsize my fabric collection a bit.  Realistically, I'm not going to sew ALL of the fabric beauties I own.  Now when I say downsize I don't mean get rid of it all, I just mean sharing some of it with others.  About 25% of it with others, meaning I will still own quite a bit.


When I was in my 40s and 50s, I always wondered why my older sewing friends, would start to share their fabric with others.  I understand now. It's just preparing for the next stage of life and that's not a bad thing, it's just different...so I'm preparing.

Moving forward...

The urge to sew is slowly coming back.  I have two weeks off for Christmas. My last Janome project will be due and will need to be worked on.  I also have a few things on my Sewing List that I'd like to make.  Hopefully, I will sew.  Hopefully, I will feel like taking a few photos.  Hopefully I will share these and my previous posts here to the blog.  I'm feeling hopeful! *smile*

I didn't want November to flash by without at least one post from me.  So here we are at the end of the month with me hoping I have something to share with you in December.  Thanks for hanging in and checking on me.  I appreciate it.


...as always more later!


Tuesday, October 11, 2022

Notes from my Sewing Machine - Early Fall Update

While I was on my sewcation, I needed buttons for one of my garments. So I went searching amongst my extensive button collection. As I was describing it to one of my sewing friends, she didn't realize that the last job I had in the Garment District was for a button company. Rochester Button Company to be exact.

During my three years there I learned a lot about button making, the different types of materials used to make buttons, how buttons are dyed, etc. I also accumulated A LOT of buttons. Sample buttons were ordered in gross amounts (144 pieces) and we typically ordered 5 gross. Which meant that my boss allowed me to take 2-3 dozen buttons, no problem. Three years of collecting free buttons, means that 23 years later, I still own a lot of buttons.

The other day I happened upon a history of Rochester Button Company and if you're interested it's here. Another article on the updated history once RBC left Rochester, NY. The second internet piece is for the reincarnated version of RBC with some of the team members I worked with in the 90s.

I've since purchased buttons especially during Frocktails weekend. I go through a lot of them for shirts and my TNT maxi shirtdress BUT I still use a lot from the collection too.


* * * * *

Sometimes when I look at my fabric collection, I KNOW deep down in my soul that I'm never sewing all of this before I pass on.  Yet, I continue to add to it. I'm definitely YOLOing in this circumstance!

I've also made the decision that I'm going to downsize some of my collection. Still thinking about how and when but I'm definitely thinking about sharing some of my goodies with my friends.

* * * * * 

I didn't sew half as much as I wanted to because work kept contacting me...and since I'm now the only one doing my job...I ended up working several hours every day for the first 10 days. I didn't sew or barely sewed until the Thursday before my vacation ended the following Tuesday.  To say I was upset in the way things turned out would be an understatement.

So I never got around to the Farm Rio dress. I knew that I needed time and space to work out the particulars and I didn't get it. I've shelved the project until next year. It was the only way I could move forward and sew the few pieces I did complete.

I did make a few dresses...which I've worn but still not photographed for the blog. With school starting and after school activities my daughter's availability has been slim to none. When she has been available either the weather wasn't cooperating or I just didn't feel like going through the process.

The Rivera Dress

Sewhouse 7 Romney Dress

Style Arc Montana Dress

Then work intervened again. I've been really busy and my sewjo fled. It turned back up this weekend. So I got this McCalls 7969 finished which I started during my sewcation.


 *****

BTW, I did attend NYFrocktails on October 1st. I wore this dress and had a wonderful time reconnecting with sewing friends I hadn't seen in over 3 years. You can see my recap here.

If I can get my act together and schedule a little time with my daughter, I have a bunch of blog posts about garments I've sewn in the last 2 months to share. That's my update. To all who reached out and asked where I was, thank you!


...as always more later!


Thursday, September 01, 2022

I'm a Camouflage Sewist

That's an intriguing title isn't it! Well what I mean is that when I learned to sew we "camouflaged" our "flaws" to give our garments a more perfect look. Now I know you're going what?  Aren't you out loud and proud about your body. The answer to that question is, "yes I am."

However, I also absolutely believe in a garment's silhouette.  Maybe it's my background in sewing or my college courses in design and silhouette. But to me silhouette is KING.  And a silhouette that covers a body part but enhances the garment is even KINGLIER to me.

I'm fat. I've gotten fatter due to health issues and the pandemic. I know I should do something about it but while I can still clothe myself and get amazing garments that are complimented in these streets, I'm gonna sew first!  

I have old lady fat arms and lately I've been sewing more sleeved rather than sleeveless garments. As an aside, I can also tell you that the Style Arc Nova will probably be worn with a short sleeve cropped sweater.

Anyways, I'm finding I like an interesting sleeve especially when it works with the dress design. It gives the garment a cleaner, more sophisticated look. 

Dress Length ~

My dresses are all maxi length these days to hide my swelling ankles. Some days they're fine and some days they look like extra tires around my ankles.  This swelling is due to the medication I'm on so they're here to stay and an inconvenience I can manage.  A maxi dress hides that and doesn't allow anyone to question why my circulation is doing weird things!

Waistline - what's that?  

Yeah mine has been gone for some time! So I sew garments that emphasize my bustline and make me feel fierce. I sew a lot of shirtdresses and the key to making them work for me is the "waistline" seam is raised on all of them. Even if I like a pattern and the waistline seam is lower, I shorten the bodice piece then add the amount back to the skirt.

Accessibility ~ 

Making pieces easy to get in and out of is very important to me. I've discussed this before because aging has made some things harder to do. So easily accessible clothing is necessary for my peace.

I've been sewing for 50+ years now. I've sewn through all the stages of my life.  Teenager, college student, young working woman, motherhood, wife, middle ages and now as I head into retirement. My body has changed with each stage of my life and I've adjusted my sewing to match it. This is why I think of myself as a Camouflage Sewist. I make my garments fit and enhance my body as I move through the stages of life.

So what about you?  Has your body changed during your sewing journey?  Have you changed techniques, pattern types, views, etc. to make clothing work for you now?

This is the Question of the Day.  So talk back to me!


...as always more later!


Friday, August 19, 2022

So it begins...

I posted this to Instagram last night.

...while it says 15 days, I'm actually off 20 days...dayum near three weeks.  However, I knew I would barely do anything today. I needed a decompress day or two from work.  It's where I sleep late, lay in bed, crawl out, veg on the couch, watch TV and read a few pages of my book.  Then and only then am I ready to actually dive into the all immersive sewing I've been craving.

Usually when I have 7-10 days off, I do have a decompress day or two but I make up for it by having a cut pile. When I'm ready to sew, I can just start.  This time I have a pile of fabric, 2 half finished garments, 1 item left in my cut pile and a grand idea to reproduce an inspiration dress.

So a plan but not a plan. I really want to sew what I feel with no pressures. I want to go on creative journeys not worrying about a timeline. I want to sew unhindered. I need this time. I need to reignite my creativity. This whole pandemic, post pandemic, learning to live a new way has upset my creativity. Also, the way I work has changed. I went into my office twice in the last month. 

Am I making clothes for home that I wear to work? Do I need to sew as many things as I have in years pass? Do I sew more for the granddaughters? Do I sew to sew? Or do I choose more engaging projects that stimulate me? I knew sooner or later I would be making these decisions since retirement is rapidly approaching. As an aside, I've set a retirement date in my head - still a few years off but I'm actively working towards setting my life up to be retired.

All of those thoughts are swirling in my mind as I move forward creatively. However, for the next 15-16 days, Imma create. I have everything I need on hand to make things...so I'm gonna make stuff.

Also, these fabrics just arrived and have made me anxious to get up off the couch and sew...

Some black & white strips from Cultured Expressions

African wax print from Mocherie Boutique

Expect more posts soon cause my sewcation has begun...

Reminder - If you're leaving a comment as anonymous, please leave your name at the end of your comment!

...as always more later!


Monday, August 01, 2022

The Beginning of August

I probably won't have any posts to share for a couple of weeks.  I'm starting the prep phase for my Summer Sewcation which begins August 19th and ends after Labor Day. To say I'm thrilled is an understatement. It's what I've been desiring -  a block of time to wallow in and create.

One dress that I know I want to work on is this one and will be blogging the process for posterity.  Cause this one is a project!

photo credit:  Farm Rio

I've been collecting fabrics, all from the collection btw, trim, and thread so I will have everything on hand and ready to go. This dress has so many parts to it that I want to do it justice and take my time!

I have a few other pieces that I'm working on pattern alterations and cutting out prior to the start of vacation. My cut pile has just one piece in it now so I need to add more to it. I want it to be a plethora of garments from which I can pick and choose.

I will admit that there are two more Myosotis dresses in the new cut pile but they have a twist. This dress is just so easy to wear, whether to work, out to appointments or just working from home, that I don't mind having dozens of them.  There's also two new patterns in the mix, as well as a pants outfit. I haven't sewn one of them in awhile and am pretty excited about it.

BTW, these are probably the last of my summer sewing. I've already started putting together a list of items I want to sew for fall. These new garments plus the ones I've already completed for summer will be enough to hold me.

As I said previously, I will be blogging the process for several of these garments but otherwise, I will probably be quiet here until then.


...as always more later!


Wednesday, July 27, 2022

A Simple Summer Maxi Skirt

Are you looking for that simple to sew garment with a lot of style?  One that's easy to make at the last minute for a holiday?  Or one that dresses up and down for any occasion?  Well, I've been making a version of this simple to sew summer maxi skirt for years. 

Skill Level:  A beginner to advanced sewist

Machine used for this project:  Janome 9450QCP   

Materials ~

  • 1 to 2 yards of fabric of 45" wide or 60" wide fabric based upon your measurements.
  • A tape measure, tracing paper, pencil
  • A yard or two of 1" wide elastic based upon your waist measurement


Prep ~

Fabric:

Please wash and dry your fabric before starting this project. This skirt is perfect for any fabric type you want or have on hand. A knit, a stable ponte, a woven, silk or cotton. Whatever you want to use is fine. 

Measurements:

1. Take your waist and hip measurements and record them. 

I'm going to emphasize making this for a plus size sewist. When taking your measurements, take them sitting down. You will notice a difference of 1" to 5" because the larger we are the more we spread. I'm strongly suggesting that you use the sitting measurements to make the skirt.

2. The next measurement you should take is a waist to floor measurement or waist to ankle measurement if you want an ankle length skirt.

Again, this skirt can be any length you want. Mini, knee-length, calf-length, tea length or maxi. I've made a maxi skirt because that's my jam now.

3. Make a pattern using your measurements or trace them right onto the fabric.  

I usually make a large square (pictured above) using my hip measurement and the length I want for the pattern.

- I add 5" of ease and 2.5" for seam allowances for 5/8" wide seams.

- To finish the square I add the length measurement plus 2.5 inches for the elastic casing at the waist. 

- You can change the amount of ease you want on the sides if you want it a tighter fit by adding less ease. You can also do this after you've cut the skirt out and tried it on.  Make larger seams if you want a tighter fight or smaller seams if you want your skirt a little looser.

- If you're in a hurry and need this quickly by all means trace your measurements onto the fabric and then cut. However, I suggest making a pattern because once you see how easy this to make you will want to make more.

Construction ~

o  After the fabric squares are cut out mark the front/back and top/bottom of the squares.

o  I like to finish all of the seams using my serger prior to constructing the skirt. 

o  Pin the side seams together.

o  Hold up the skirt to you to determine where you want the side seam slits to begin.  Mark and pin that.


o  I use a pin with a different colored head, so I know to stop stitching right there when sewing the seam.


o
  Sew the skirt using a 2.8 straight stitch on your sewing machine and an 80 universal needle.

o  When you sew the side seams, stitch in a piece of stabilizer. It can be seam tape, twill tape, or selvage edge piece to prevent the seam from tearing when you walk.

o  Press seams open making sure to press the side seams flat below the slits too.

o  Turn down 1.5" for waistline casing.  Press.  A tip, stitch the side seams flat prior to stitching the waistline casing. The thread will melt into the casing and it will make it easier to pull the elastic through the casing.


o  Stitch waistline casing flat leaving a 2" opening in the side seam.

o  Measure the elastic to fit your waist.  Subtract 2-3" depending on how tight you want the elastic to be then cut it.

o  When inserting the elastic into the casing, I use an extra large safety pin at the end of the elastic.  However, you can also use a bodkin to do this. 

o  I also pin the end of elastic to the casing so I don't accidentally pull it into the skirt.

o  Once the elastic is inserted, layer the elastic 1" over each other and stitch down. I use a lot of stitching on this piece because I don't want it separating during wearing.

o  After you've stitched the elastic together, distribute the gathers around the skirt. Another tip, if you're plus size and carry your weight in the front like I do, put less gathers there.

o  Next stitch the elastic down in the ditch of the side seams. This will prevent the elastic from moving around in the waistline casing.

o  Add a piece of ribbon or a tag to the back of the skirt so you know the front from the back.


Finally press up a 1" hem and machine stitch the hem and side slits flat...and you're DONE!

In 2-3 hours, depending on how quickly you sew, you will have a fun and flirty skirt.

Wanna see my version ~


I used a crepey rayon border print to give the skirt so oomph and paired it with a tank top and cardigan. Perfect for work, dinner with friends or a casual date. I hope you will give this a try because it's a lot of bang for the buck and a quick and easy sew!

This was my July Janome project which you can see here.  Sharing it here to the blog too.  I've started a new cut pile so will have new outfits to share soon.


...as always more later!


Friday, July 22, 2022

Learning not to be frustrated with the process...

While I was making my cut pile for summer sewing I've been frustrated at times at how slow some of the processes are. I don't remember feeling this way before. Instead of being thrilled that I'm pulling a new piece of a fabric out of the dryer, I'm dreading the ironing part. Because of that I had a pile of pretreated fabric that's unironed waiting it's turn.  That was never part of my process.

Some days, I'm impatient about threading my serger and sewing machines. Prior to purchasing my Babylock serger I use to dread it but that was related to dealing with the stitch tension.  These days it automatically corrects every time, so why do I dread threading it?  Same with my sewing machine. When I got to making bobbins and threading the sewing machine I use to be gleeful because that's when the fun start would start!  Not so much some days.

We all know I hate to cut.  Ain't nothing changed there EXCEPT when it comes to cutting out border prints.  Probably why I've been cutting so many of them lately. I love the puzzle of making this extraordinary print work as a distinctive garment. Twisting the options around in my mind, choosing and then rejecting layouts. So give me ALL the border prints.

Even the sewing process is challenging now and that use to be my favorite part. Like I have to take 3 or 4 breathes before I sit down to sew. I guess you could chalk it up to loss of sewjo but it's more particular than that.  I have the desire but lately I hate that I have to cram my sewing into weekends or a couple of days off. I'm truly envious of sewists and quilters who have all the time to just sew. Who plan their days around making a new quilt, trying out a new pattern, or making up a toile.  I want that!

I know some of it is because my retirement date is getting closer.  Not so close it will happen in the next year or two but close enough that I know I need to be preparing for it. Some of it is because truly how much clothing do I need at this stage of life, and contrary to the lap quilt I made a couple of months ago, I don't really want to quilt.  I will be adding in some sewing for the granddaughters but again, how much of that can I do. They're already getting to the point where they want to look like their friends!

When I really ponder this...it's because I want more time.  Now I can hear you saying oh I retired and I don't sew that much! I believe you. But when you do choose to sew, YOU choose the time.  You don't stuff it into a weekend or between meetings, or even take a few vacation days off to do it. I want that. I want that freedom to just create...and it's affecting me now.

Anyway, this is just a post.  Not even a question of the day and not quite a filler post.  Though there are completed garments coming after this one. Just wanted to talk about how I feel about my crafting and wondering if anyone else has experienced this too,


...as always more later!


LinkWithin

Related Posts with Thumbnails