Showing posts with label Skirts. Show all posts

Sunday, July 07, 2019

A Thirty Year Old Holyoke

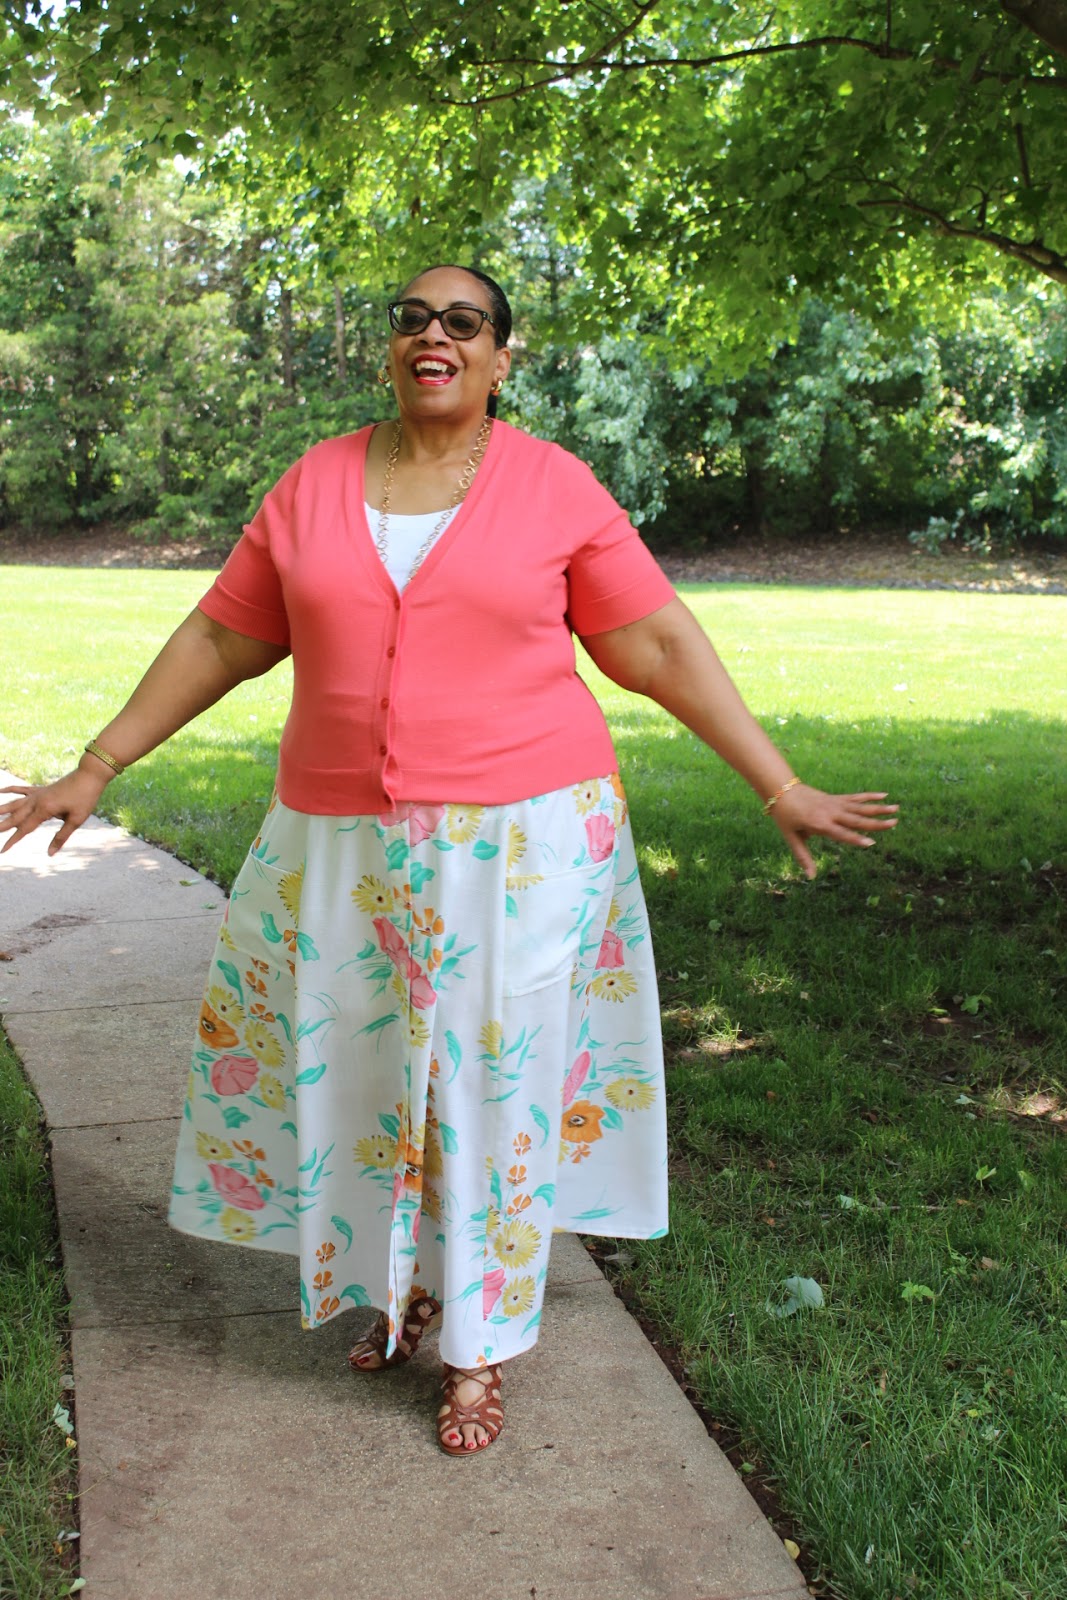
After seeing some of the other versions of this skirt, I really wanted one of those soft swingy ones. So I pulled out a challis and cut out another Holyoke skirt...however, this post isn't about that skirt because it's only halfway done.


While I was looking for a nice soft rayon challis to make version two, my hand touched the fabric I used for what's technically my third Holyoke. This fabric has a back story...

I purchased this fabric in 1989 from Cloth World, the precursor to JoAnns. I remember the exact day...not because something spectacular happened but more because I was a really pregnant woman roaming around Cloth World buying fabric with my lunch money because I was miserable. I was pregnant with my third daughter, huge and ready to be done, but with several more months to go. 

At that time, I did buy fabric for future projects but not projects that would be years in the making. I didn't have that kind of money...not with two little girls and one on the way. But I loved this fabric and two other pieces like it. They made me feel good in a way that not much did at the time. So I bought them. 

I don't even think they manufacture this type of fabric anymore. It's a linen-like fabric that's probably more poly than linen and it was made to look like linen but not wrinkle like it. I made quite a few garments from this type of fabric back in the day. This is truly deep stash sewing!


I made one change to this Holyoke.  Instead of inseam pockets I decided to try and make some pockets that were placed on the outside of the skirt ~ sewn between the seams of the skirt.

This pocket was inspired by a skirt I saw on JJill's site. I liked it and realized it was an easy change to make to my pattern.  


Here's my pattern piece ~


The finished pocket is kind of deep and wide. After I made it I wasn't sure it actually worked. It wasn't until the skirt was photographed and my daughter raved about the pockets that I thought okay, I can live with them.
  1. As you can see I made the pattern piece by putting the side front and center front skirt pieces together.  
  2. Then I traced a piece that filled the space from side to side. 
  3. My pattern piece is 8" long with a 1/2" turn at the top and at the bottom - so 7" finished. 
  4. Wide enough to jam my hands or stuff into.
  5. I also placed the pockets further down than the inseam pocket because I wanted to slide my hands down into them.
It was simple to do and added no extra time to the construction of the skirt. Otherwise the skirt construction was exactly the same as the first one.

My buttons are from deep stash too. Buttons I've had since that same daughter was 9. So except for the new pattern, all of the pieces of the skirt have been marinating in my collection waiting for their time to be used.

A Few Pictures ~


I love that I'm fulfilling one of my 2019 goals - to sew several garments using deep stash fabrics/notions from the collection. This skirt is made from fabric that is as deep stash as it gets!

My third and final Holyoke will be finished and probably make it to the blog before the month is over. That will most likely be my last one for the season. I have so many things on my to-sew list that I really want to get made!

...as always more later!


Monday, June 17, 2019

Cashmerette's Holyoke Skirt

Y'all when Jenny sent the email out to test this garment I jumped on it!  For two reasons - one I want a great new sundress and two I've been longing for a longer length button front skirt.


Pattern Description:
View A - Maxi length dress, princess seamed bodice and skirt, elastic back waist, bra-friendly straps
View B - Maxi length, princess seam seamed skirt, elastic back waist

This is my test version but there are two more skirts laid out on the cutting table waiting to be made.


However, let me back up and talk about making this skirt...this skirt that will become a staple in my wardrobe...


Supplies ~
Midweight stripe denim from Chic Fabrics
10 1/2" gold buttons from button notion collection - deep stash
Interfacing from Steinlauf & Stoeller

Construction ~
I briefly read the instructions and then went for it. BUT and let me stress this, I chose a midweight denim where every other picture I've seen of this skirt has been from a flowy rayon type of fabric. Can we say going my own way yet again! *LOL*

Oh wait, I just read the back of the pattern again and it does say that you can use firmer fabrics for a more structured result.  Okay I'm not cray-cray! *LOL* Also, I know how well loved pockets are in the sewing community but I'm still on the fence about inseam pockets so I left them out of this version.

The other thing to note is that I had some challenges with inserting the elastic in the back casing but I'm chalking that up to operator error. Cause it's one of the features of this skirt I love the most. I machine stitched my hem adding two rows of stitching to give it some firmness...and it was done!

This skirt is an easy sew and a wonderful spring/summer/fall addition to your wardrobe.

So some pictures ~


Conclusion ~
A good pattern to me is one where I see a bunch of possibilities for future sews. This one had my creative sewing brain working in overdrive. Expect to see more of these skirts and maybe a maxi dress or two. 

If you're a Cashmerette fan and haven't picked up this pattern yet (either paper or PDF version - I LOVE saying that!) please run don't walk and order a copy.  You won't be sorry!

...as always more later!


Friday, June 14, 2019

A Palate Cleanser

I made this dress in 2016 when I'd just changed jobs and lost 35lbs. I was really into maxi dresses because I couldn't wear them at my previous job. I was also still trying to get used to the fact that I could wear jeans to work. It was a culture shock to go from totally professional dressing to wearing whatever I felt like...so I gently slid into the whatever I want...meaning that I was a little overdressed my first year at the job.


When making this dress even though I'd washed both fabrics separately before I used them, I'd never washed the two together.  This is what happened when I washed them as the maxi dress...


At first I thought I would be able to shout or bleach out the stains so it sat waiting for me to do that. It sat for over a year. Sometime earlier this spring I started to think I should just take it apart and make a maxi skirt. I finally did that.

It was easy to rip apart as I watched TV. In the meantime, I've added another one of these maxi dresses in these fabrications to my "To Sew" list. Hopefully that match will fare better.

To make this a maxi skirt ~ 
- I added the skirt portion to a 2" wide black elastic cut a couple inches shorter than my waistline
- I purposely did not iron the skirt before pinning it to the elastic. 
- Since the top was already gathered, it made it easier to pin the gathered fabric to the elastic.
- I added one line of stitching at 5/8" and then again at 1/4" to secure it.
- Because it was already hemmed, once the elastic was attached, the skirt was done.

A few pictures ~


It only took a couple of hours to add a new skirt to my closet. This summer I'm concentrating on adding more maxi skirts, maxi dresses and wide legged pants to my wardrobe. I've accumulated so many maxi dress patterns over the years that I'd like to challenge myself by actually sewing a few of them!

...as always more later!


Tuesday, June 19, 2018

Simplicity 8612 Wrap Skirt - Shorter Length

I knew when I made the first S8612 wrap skirt in the longer length that I would be making the shorter version too. So this version is made exactly as the first one except for one change I made to the pattern. I made separate pattern pieces for the right and left fronts.   

(wearing my birthday present necklace - thanks Marce!)

The right front is a size 34 and the left is a size 26. I wanted the underlap to cover my entire body when I sat down. It spreads a little too much on the longer version. But since the longer version has extra fabric it covers me when I sit down.

For this one, the length is just under my knees. I added one inch to the hemline of the pattern to lengthen it. I also made the ties differently than the pattern instructions. 


As I stated in the last post, the ties were a b*tch to turn. So for these ties, I pressed the seam allowance flat. For the end of the tie, I pressed it down in both directions, then cut diagonally across to remove the excess fabric, so the tie end would lay flat. Besides the length it's the only change I made. Then I stitched the tie flat all the way around before following the pattern instructions to attach it to the skirt.

The fabric for this make is a denim looking fabric I purchased from Fabric Mart's brick and mortar store during Sew Camp in March 2017. As an aside this is the third piece I've used from that purchase.

A Few Pics ~


Conclusion ~
Originally I was going to wear this with the Montrose Top but the two pieces just didn't work well together. So I went with plan B.  I wore it my white TNT sleeveless shirt.  I know it's basically the same look as the longer skirt but hey if it ain't broke why fix it. 

This is my favorite of the two skirts probably because I used a lighter weight fabric and the shorter length. I also like the way it wraps better.

I won't be using this pattern again this season.  Too many other things to sew and fabric to use.

...as always more later!


Saturday, June 16, 2018

Simplicity 8612 Wrap Skirt & A TNT Shirt

When I was at Sew Camp LaQuana was making this Simplicity wrap skirt and I was intrigued. After she posted it to her blog, I was even more intrigued. See I'm trying to be open to new styles I wouldn't typically wear now that my lifestyle has changed.


So when I told Gaylen I was thinking about the pattern she picked it up for me from the craft store when they were having a sale on Simplicity patterns. 


But Imma be honest - I'm not the sewist that gets excited about a new pattern. Y'all know I love me a TNT...however, I own so many patterns and every now and then desire a new pattern so I need to get over it. Cause this was supposed to be a simple sew...

Supply List ~
* A midweight patterned denim from Fabric Mart purchased during my December 2016 trip there - as an aside I've used four pieces from that trip!
* Fusible interfacing from Fashion Sewing Supply

Pattern Alterations ~
I didn't make any alterations.  I made a straight 26 out of the envelope.

Construction ~  
I made the longer version of this skirt first and I've probably used a heavier weight denim than recommended on the pattern envelope. I really liked the pattern on the denim and I think it turned out okay. 

So a few things:
1. I hated the way the ties are assembled.  They are really long and hard to turn. No matter what trick I tried I had to suck it up and pull them through. Thank goodness I was binge watching Scandal...

2. I don't know if it's me or my body but the overlap didn't work completely. It separates underneath when I sit down.  Not enough to make my bare legs show but enough that it annoyed me. It doesn't separate or open when I walk probably because I made the longer version first.

3. So for the shorter version, I made a right and left overlap with the right one being bigger so it would cover all of me when I sit.

4. The buttonhole is definitely tricky if you don't think it through. Since my machine makes automatic buttonholes, I chose a button that was the size of the end of the tie. I used it in the buttonhole foot to make a buttonhole and it worked perfectly.

5. Also I didn't use the markings on the pattern piece to determine where to put the buttonhole opening. I put the skirt on my body and chose a point. I also topstitched the waistband and the ties.

6. For the waistline, I used the longest pattern piece for waistband available. I knew it was too long but it was easier to cut off the unused portion than have to worry about fitting the skirt. This is cheating I know but hey it works so I went with it.

7. When wearing this I've tied the ties really tightly and added a safety pin to the back to hold the ties together.  I wanted to insure that the two pieces don't separate and provides some piece of mind to me.

A few pictures ~


My TNT Shirt ~
A. The shirt is from my TNT pattern and a navy handkerchief linen from the collection by way of Fabric Mart. 


B. It uses most of the same construction techniques as in this shirt, however, I didn't burrito method the yoke. 

C. I stitched the yoke to the back seam and pressed the shoulder seam allowance flat.  Then topstitched it down on the shoulder seams. 

D. The other thing to note is that for the collar stand I doubled the navy blue handkerchief linen on one side because the inside piece of fabric I chose was a cotton sateen floral print. The print was showing through on just one piece of the linen.

E. Because I doubled the fabric, I did not add interfacing. The cotton sateen plus the doubled fabric give the undercollar enough stability.

The buttons and bias binding are from Pacific Trimmings. I made a special trip to pick up some shirt buttons because they have them in every color imaginable. It was important that the buttons matched the fabric so that it will be wearable with other things in my wardrobe including this skirt.


Conclusion ~
I really like this skirt and the construction.  There is a simplier version of this pattern on the Butterick website. However, I believe the addition of the side panels on this pattern makes it a superior choice. 

I haven't made alot of skirts for spring/summer in the last couple of years. I've concentrated on casual dresses for work but now that I have a good basic wardrobe, I want to add in some other pieces.

This outfit is the first one in my spring/summer sewing series - say that three times fast! I've made a list and it includes a few indie patterns, some Big4 and a couple of repeats from last year. I'm pretty excited about the list of things I want to create this spring/summer.  I completed this skirt and shirt prior to my sewcation. However, since I just wanted to sew during my sewcation, this is the first chance I've had to take pictures of all my recent makes. 

The short version of this skirt is up next on the blog.

...as always more later!


Monday, May 29, 2017

Fabric Mart's #sewcoolskirts


Julie from Fabric Mart contacted me late last month and asked if I wanted to participate in Fabric Mart's #sewcoolskirts for May.  Of course I said yes.

Now my skirt isn't made from a current pattern. I have way too many TNT skirt patterns in my pattern collection to reinvent the wheel. However, my skirt is influenced by an ad that was in my email.

Inspiration Photo from Dressbarn.com

My fabric is a lightweight ponte from Fabric Mart. I purchased it a couple of months ago and while not exactly the same, it is very similar to the fabric in my inspiration picture.

A little more about my skirt ~
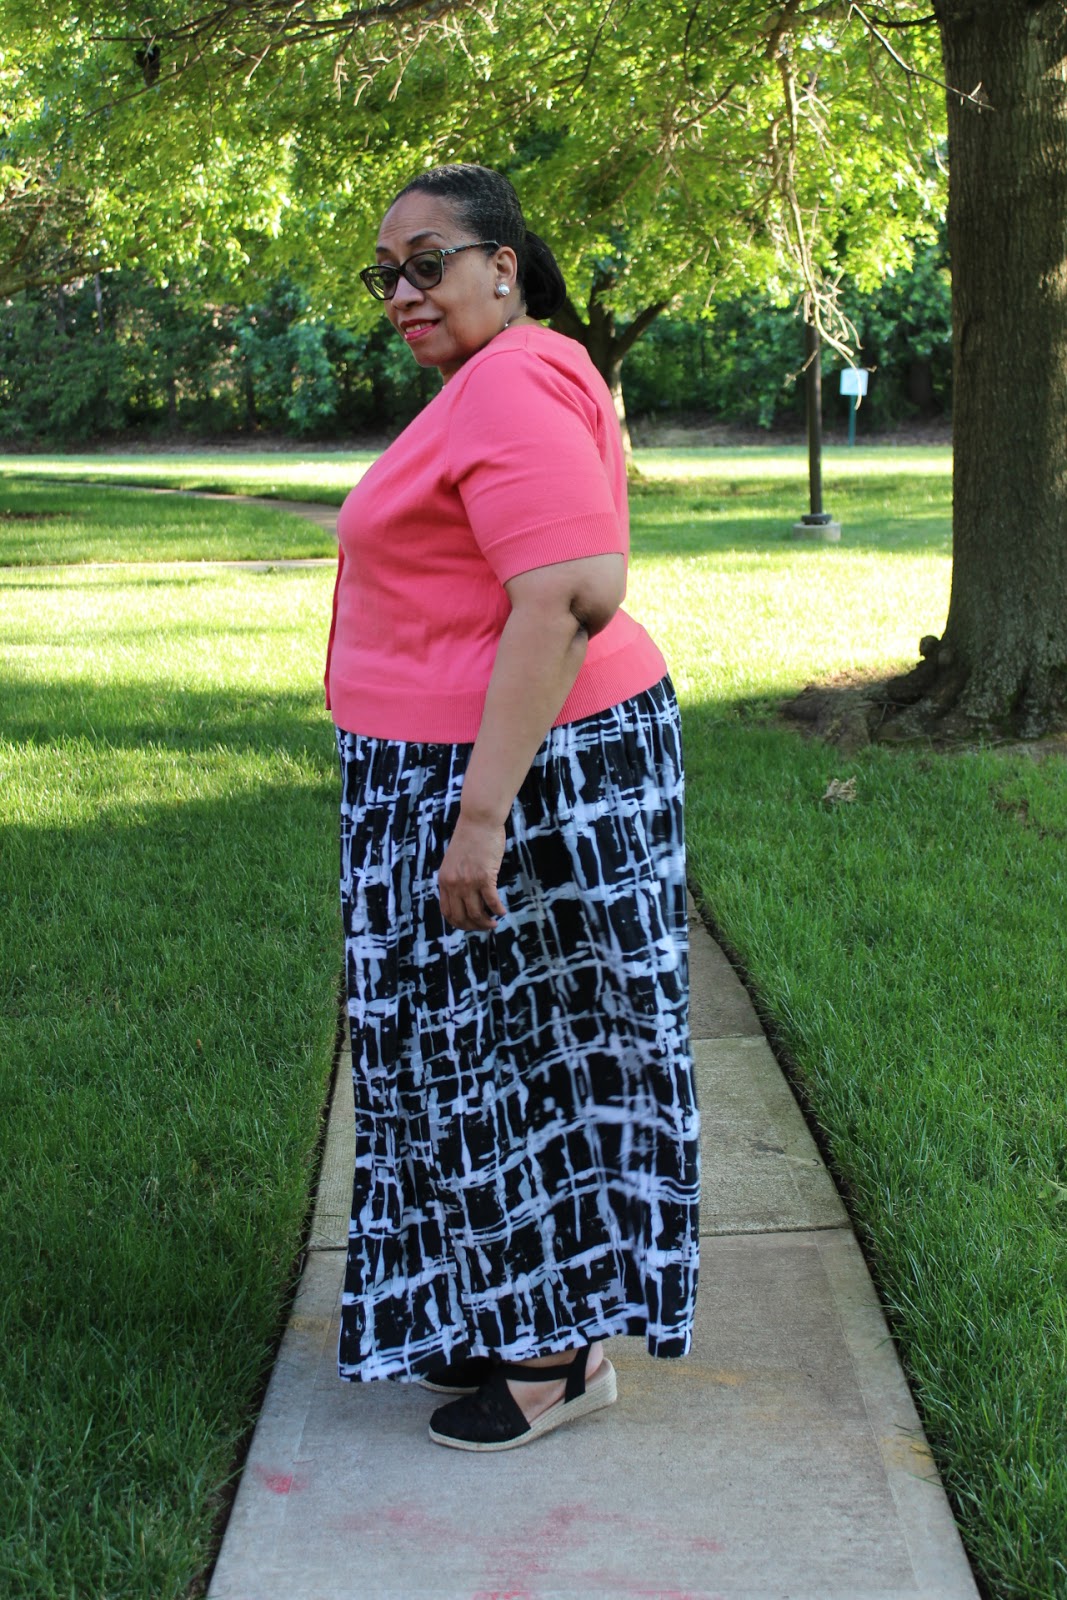
I've really fallen in love with the slim fit through the hips yet flared at the hemline maxi skirts. When I saw the ad featuring the black and white maxi skirt, I knew that my TNT 4 gore skirt with an elastic waistline would work to make one of my own. I had to make a few alterations to my pattern piece but that and the ponte fabric got me a new maxi skirt just in time for the hot weather.

Pattern Alterations ~
  • I started by making a pattern sandwich to get a maxi length skirt pattern piece. The original skirt pattern piece was placed on my cutting table. 
  • Then I added the shortened version on top of it. 
  • Finally some tracing paper.  
  • I traced the top and sides of the skirt and added 6" to the hemline adding just enough flare to the sides so the skirt hangs properly.
  1. Four pieces of the pattern were cut out and sewn together. 
  2. I inserted 1" non-roll elastic to the waistline casing. 
  3. After trying the skirt on, it was a tad too long.
  4. So I serged an inch off the hemline. 
  5. A 1/2" hem was turned up, pressed down and then stitched
  6. Walah! An easy peasy new maxi skirt!
A few photos of the skirt in action ~


Skirt worn with my white Concord T


And Another One ~
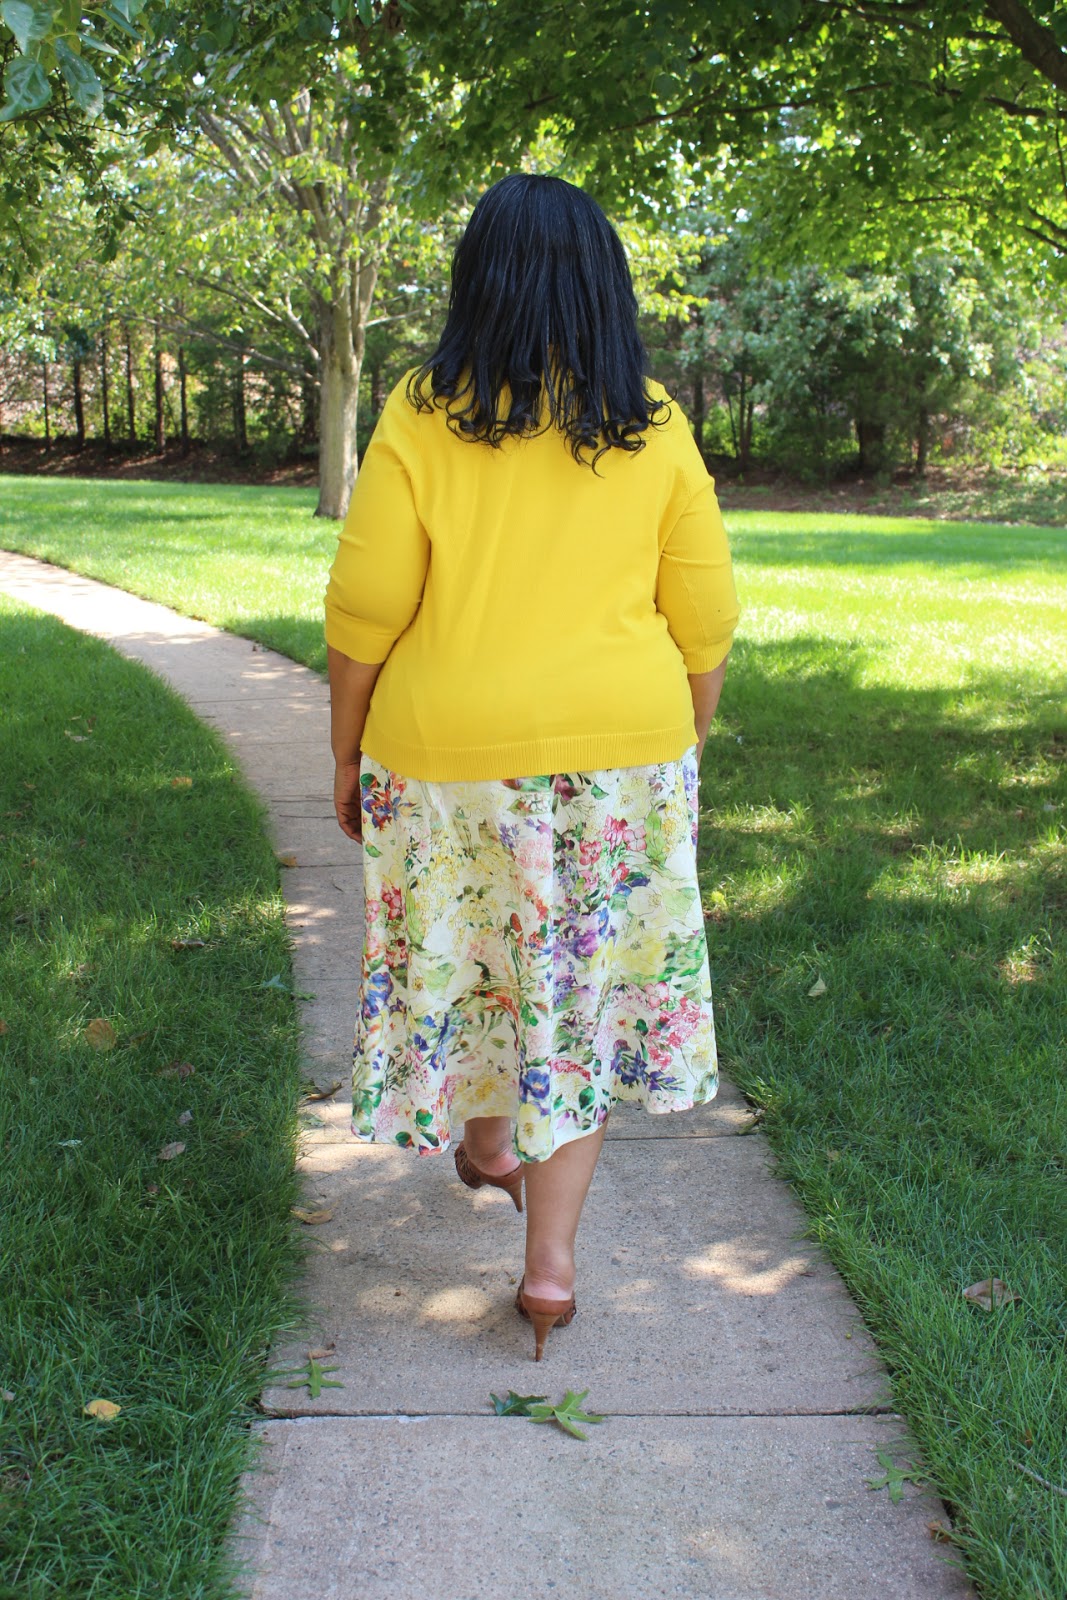
After I made the first one and submitted it to Fabric Mart, I woke up the next morning and realized that I had a light floral poly crepe in the collection that would make another wonderful version of this skirt. 

So this one came to be ~


I'm wearing this one with a RTW short sleeve sweater
that I've owned forever!

My sewing list is varied for the spring/summer.  There is a little bit of everything on it. A couple of tops, several maxidresses (cause y'all know how much I love a maxidress), some more Concord T's, and a few more maxi skirts. My first Style Arc pattern is also included in this bunch. 

I'm loving the silhouette of a basic tee over a maxi skirt. I can wear it with heels or sneakers and it's the look I'm most interested in this spring/summer. It's interesting because for the last couple of spring/summers I've started out knowing which garment type I wanted to concentrate on sewing and this year, it's that t-shirt/skirt combo.


BTW, this is an easy sew. If you're looking for a great new piece to add to your summer wardrobe you can't go wrong with this style. There are plenty of patterns in the pattern catalogues similar to my skirt. I highly recommend that you pull out a couple of pieces of fabric and make several for yourself!

* * * * *

It's Memorial Day weekend here in the US. Besides going to my daughter's for a barbeque, I have no other plans. Well you know besides spending quality time in the sewing cave with my favorite things! If you're in the US, I hope you have a wonderful and safe Memorial Day weekend!

...as always more later!


Thursday, August 11, 2016

A High Low Skirt

I'm greatly influenced by what I see on the streets where I work.  There's probably so much inspiration because I work near the garment district and walk through the district every evening on the way to the Port Authority. 

This week's inspiration was an amazing high-low skirt on a pretty young thing that was walking towards me. Her high-low was so obviously high as in thigh length which made the low so dramatic because it was ankle length. Now I knew I couldn't pull that look off but I could a regular high low skirt.


I came home that Thursday evening aching for one, especially since I've worn the pink version of Simplicity 1621 to death because it's so comfortable...the most comfortable thing I've made this summer! I knew I should have looked for a pattern for this skirt but Simplicity 1621 was still on my mind. It was really easy to adjust the dress pattern to make a skirt from it.

Here's what I did ~

1. Folded both the dress front and back at the waistline markings on the skirt.
2. Laid the pattern pieces down on the fabric and added 1" to the top of the
    pieces by marking with chalk.
3. Sewed the front and pieces together and pressed the seams open.
4. Added 2" elastic to the waistline.

Sewing order ~
  • measured the elastic around my waist, pulled and cut it 3" shorter than my waistline
  • Sewed a 1/2" seam in the back to work with the elastic in the round
  • Placed pins at the 4 edges of the elastic
  • Elastic was pinned to the skirt at the four points
  • Then stitched to the skirt by slowly sewing and stretching the elastic and fabric to match.
  • After the first row of stitching, I stitched it again all the way around to insure that the stitching would hold.
  • Pressed the gathers flat
  • Stitched it down
I turned up 1/2" hem and stitched it down. The skirt was done. I used a lightweight linen that I bought from Marcy Tilton's booth at Expo in March. I'm determined to use as much of that fabric purchase as possible this year. The 2" elastic for the waistband was in the collection. I have it in white and black. It was bought a couple of years ago to make skirts like this.

A few pictures ~


...and worn with a RTW yellow sweater...


Conclusion ~
I couldn't believe that the skirt made up so quick and easy! It's nice to have a trendy, yet age and work appropriate piece. If you want to make one of your own and don't have Simplicity 1621, try one of these...


This will go into rotation this week cause it's still hot here!

...as always more later!


LinkWithin

Related Posts with Thumbnails