Showing posts with label McCalls 6559. Show all posts

Saturday, September 19, 2015

A New Dress and an Event!

A couple of weeks ago Kashi asked me to invite a few friends over for an evening shopping event at Metro Textiles. We decided to add a little wine and cheese and since I didn't want anyone to be slighted, my friends (@oonaballoona @gingermakes @sownbrooklyn) and I shared the event on Instagram...opening it up to anyone who wanted to stop by and shop. 

However, the day before I stopped by Metro Textiles to finalize a few details with Kashi, and he came up with an idea. He asked me if he gave me a piece of fabric could I make something to wear to the event the next evening. Can anyone say "Challenge!" I left work a half hour early and made it home by 6:10pm which left me about 6 hours to make a dress.

Now of course I wasn't going to start from scratch using a new pattern because I would definitely be rushing the process and might end up with a wadder. Instead I went with my summer fave ~ McCalls 6559!  The day of the event was supposed to be hot and humid in NYC (summer is hanging in rough in NYC this year) so McCalls 6559 was up to the challenge!

The Dress Materials...


2 yards of a cotton knit houndstooth
5 yards of a polka dot foldover elastic purchased from Pacific Trimmings
A little seam tape
Fusible stay tape

This is what I ended up with...


A little construction information ~
The good thing about choosing this pattern is that it's already been fitted to my body and made numerous times this summer. The second thing was that I could figure out my cutting and construction process on the train ride home which made it easier to sew. Lastly since it was a knit there are no seam finishes inside the dress.

The construction details are in photos below...

I used my knee length version then added 6" to the bottom
by using pins to designate the extra inches

Design Plus Straight Fusible Stay Tape 
was added to the neckline & armholes

Then the polka dot foldover elastic 
was added to the neckline and armholes
using a zigzag stitch

The question I was asked most about the dress was how did I get the fringe so even... 
I used a June Tailor Shape Cut purchased a hundred years ago and stored with the other quilting supplies in the cave. Yes, I own quilting supplies because about 20 years ago, I was really into art-to-wear sewing. It's easier to cut shapes with squares, triangles, etc.

So I pulled out the Shape Cut placed it on the fabric and cut 1/2" strips using my rotary cutter. Here's a link on how to use the Shape Cut. Mine were cut 7" from the hemline so the entire bottom of the dress would be fringed.


The June Tailor Shape Cut, seam tape, fusible stay tape and cutting mat

Shape Cut placed on top of the dress to cut the fringe

To be perfectly honest all of the strips aren't the same size but it works. I'm not sure if making the fringe prior to constructing the dress would have made the strips equal sized. However, I was working in a short time frame so I went with what was fastest!


#wineandcheesewithkashi ~
About 25 women showed up to shop and I think a great time was had by all.  A few pictures are below... 


...if you're on Instagram, use the hashtag wineandcheesewithkashi to see other pics from the evening!

Kashi has asked us to sponsor a few more of these so we will.  When dates are decided, look to social media where it will be announced first. Thanks to everyone who came out and shopped. It was a great event!

Also my McCalls 6559 did not let me down!


...as always more later!

Sunday, August 30, 2015

Summer's Not Done Yet

Even though I've made some plans, bought some patterns and trims for my fall sewing plans, there's still a lot of summer left here on the East Coast. It's going to be in the '90s all next week and I'm thinking that quite a bit of September is going to be warm too.

So with that thought in mind and the fact that I've just about had it wearing my limited summer wardrobe, I made a couple more versions of McCalls 6559. Hey I already had the fabric, so why not use it?

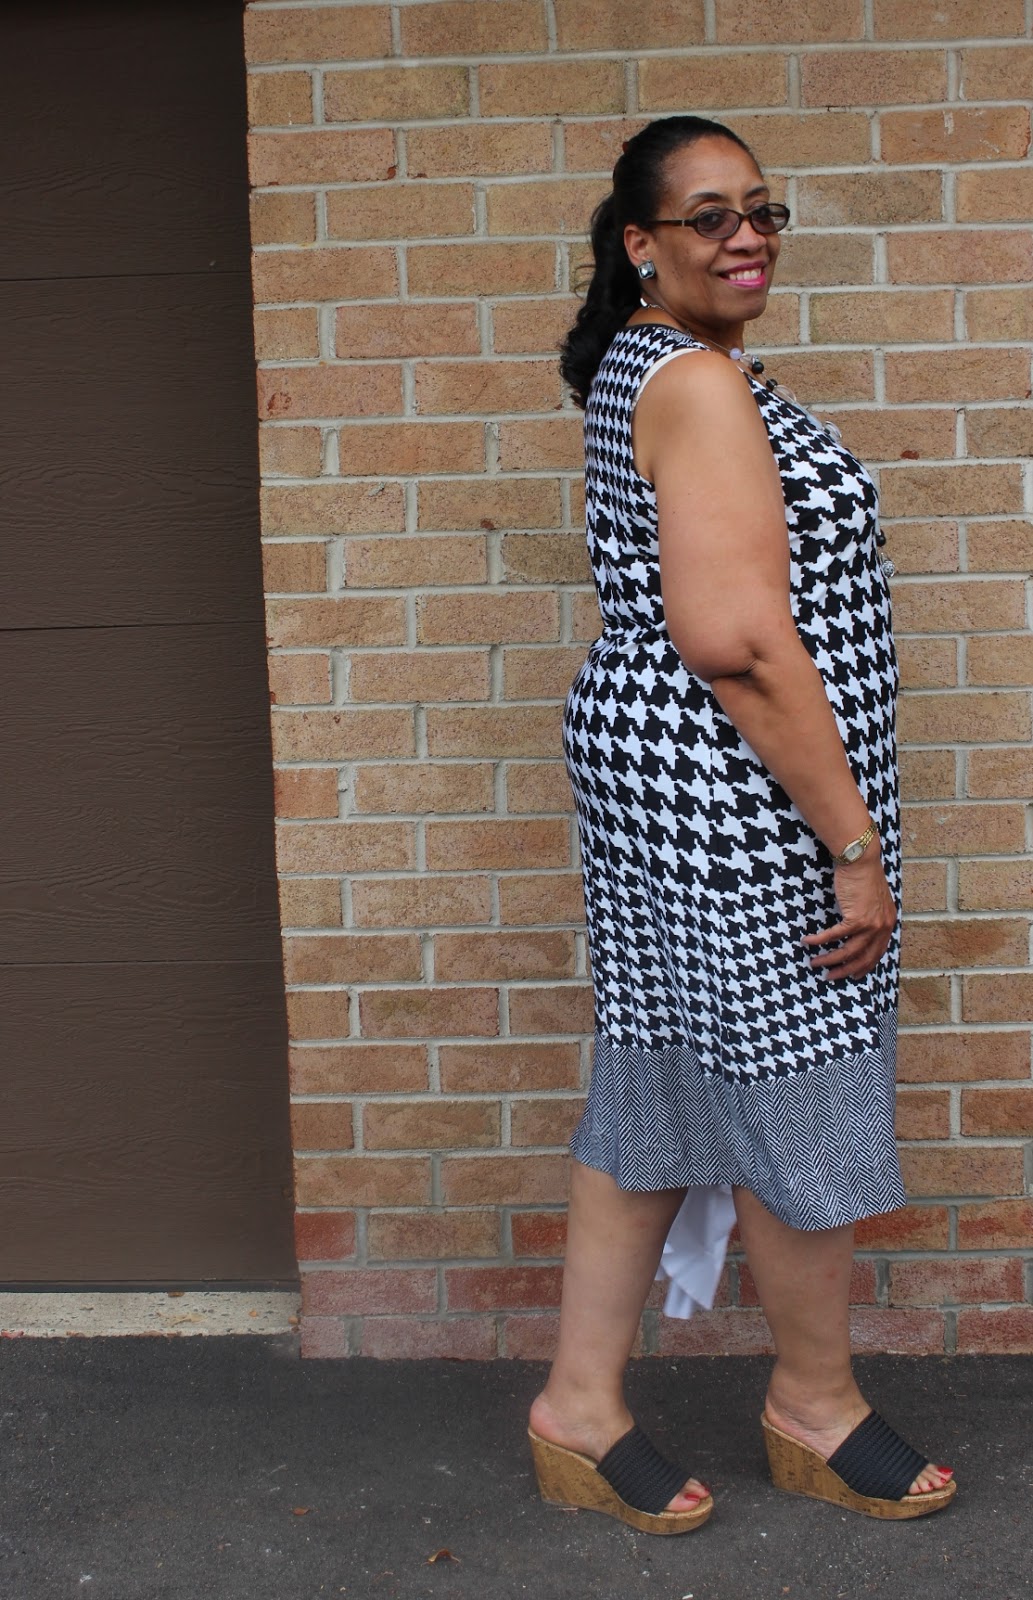
Black 'n White Version ~ McCalls 6559:
The first version is from a herringbone/houndstooth ITY knit that I purchased in late October/November of last year from Fabric Mart.


I've always been intrigued by how the herringbone/houndstooth print worked and thought it would make a great short version of McCalls 6559. 

What do you think?


  • I added a black foldover elastic at the neckline. 
  • Turned down the armholes and stitched. 
  • Turned up the hem and ironed in a little stitch witchery then stitched it down. 
Easy peasy...a new dress for work this week...


Wearing it with a little cardi will make it perfect for public transportation and the office..


This one is golden because my oldest daughter gave it her seal of approval and said she'd even wear it! I know it's a good make when one of the daughters endorse it!

Large Floral Print ~ McCalls 6559:
The next one has a little backstory. I was cleaning a couple of shopping bags out of the storage area. I thought they only contained books because I'd cleaned off some more shelf space to store them. When I opened the second shopping bag, there were four pieces of fabric at the bottom of it...one still in the envelope from EOS with a date of June 2013 on the invoice.  

The first short border print dress turned out so well that I decided to make another. The fabric is from Fabric Mart and was $4.49 per yard - probably purchased during another one of their sales. I just loved the bold floral print and how it ended with a border!

So a few pretty pictures...


Next up is finishing off the blue and white print dress from the last post.  After I cut out the shell, I realized that I like a cotton sateen garment better with a lining. Then I decided to add piping to the neckline and finally maybe some pockets on the front?  I've turned this into a project...so that's how I spent this Sunday afternoon.

Oh and the little people were here...


A few behind the scenes shots ~ 
This is what happens when little people are running around when you're trying to take pics...


I know this post is picture heavy so thanks for understanding about all of them. You know I can't help but share grandchildren pictures! 

This is what I did with my weekend.  What did you do with yours?

...as always more later!


Saturday, August 15, 2015

Mo' Maxis, Mo' Maxis!

I think I'm getting ready to bore the h*ll out of y'all cause I've got maxi dress fever!  I wore 3 out of the 4 maxi dresses to work a couple of weeks ago and decided that I need more of these McCall 6559 dresses in my life.  More, give me more...lotsa more! *LOL*

So I took a trip through "The Fabric Collection" dug deep and pulled out three more knits for dresses. Now this is the point where I would normally head off to Le Fabric Mart and purchase more knits. But I'm showing restraint and not doing that...because besides the three pieces of fabric shown above, I found two more amazing border prints (not to mention the couple of pieces that I picked up at Metro Textiles). 

I need to stop here and say how thankful I am for that wonderful wall of fabric! I probably could make another 10 maxi dresses with pieces of fabric from the wall...never mind the other awesome pieces of fabric I found! 

Now y'all know me. The fact that I made the original four dresses using just the pattern and fabric to bring them to life did not mean that my next versions would be the same. Originally I was just going to make three more straight from the pattern dresses, then "me" kicked in and this is what I ended up with... 

The first one was shortened and made the print the focus point...


This fabric although pulled from the collection is from Metro Textiles. I had it on when I went into the store the last time and Kashi recognized it right away. There was only 2 yards of this and I decided that I needed to feature the print because it's so cute!  This dress cost $8 - $4 per yard at 2 yards.


* * * * *

The next one is so cool because I cut the stripe on the cross grain instead of the straight grain. Of course we all know that the stripes going vertically down my body is just more flattering than if they run around me. I also added a black lightweight bias binding to the neckline to add some definition to the dress. This was one of the features on some of the Avenue inspiration dresses and I incorporated into my 6th version.


I bought this fabric from Sawyer Brook Fabrics a couple of years ago. The tag told me how much and from where but not what I paid for it. I'm sure it was a little more costly than the ITY knits I bought from Fabric Mart because it was Sawyer Brook. 


* * * * *

My third and final dress was inspired by this Avenue dress ~


I blatantly copied the back making my back piece from a black crochet lace from the collection. I took pictures of the process and will post them in a separate post if you want to copy this look.


The brown/black lace print ITY knit has been in the collection for at least 15 years. I bought this from Ebad Fabrics years ago. I'm sure that I paid no more than $4 a yard for this piece. 

The black cotton lace was purchased from Metro Textiles several years ago. I used maybe a 1/4 yard for the back so the entire piece has gone back on the shelf. Yes, I own a lot of fabric and the collection is very deep...very deep...considering I auditioned two separate brown stretch laces for the back before deciding on this black piece. 

Let's say this one cost $12 to make while the one I copied was originally $60 and is now marked down to $25, though I think their fabric choice is dicey, very dicey.

Soooooo these are the latest versions of the McCalls pattern. There will be more because hey I just bought more fabric for that specific purpose. After the last few weeks I've had I really want to spend some serious time in my sewing cave just haven't been able to get there!  I have about 6 weeks of summer sewing left and there are a few more garments that I want to make and they aren't all maxi dresses.

Lastly ~ my daughter is finally home from Houston...doing better than she was but not 100%.  We still have several more rounds of doctors visits and associated things but at least she's with me! Also, I tried to thank everyone who left a message on my last post (unsuccessfully) because I wanted everyone to know that I truly appreciated every kind comment left, every prayer and thought and each private email sent to me. For the kindness, love and thoughtfulness, I am truly grateful.

...as always more later!

Tuesday, June 30, 2015

One, Two, Three, Four Maxi Dresses in a Row...

I want to start the conversation about these dresses talking about my body, my perceptions of my body and how I choose to dress it.

See the thing about sewing for yourself and then posting your pictures on the internet is that you've opened yourself up to criticism as well as praise from others. But here's the thing...the criticism, whether about your weight, your shape, or how you choose to dress your body, is just someone else's opinion.  

They haven't walked in your shoes. They don't know your experiences and how it affects how you see yourself. They can't even participate in your day to day life experiences, to see whether the dress or garment will work for you. So in actuality it's just an opinion or as dictionary.com defines it - "a belief or judgment that rests on grounds insufficient to produce complete certainty."

I say this because I truly believe that I look better in long, straight garments. Yes, I'm learning that a closer fit works well for me but I will never IN MY OPINION look good in a dress with a bodice and a gathered waistline. To me, it emphasizes my bottom half and not in a flattering way.  My bottom half is the part I want to de-emphasize. But that's me...and my opinion and the opinion that counts the most since I'm sewing for myself.

A little about the construction of these dresses~
So with that said, these last three dresses are made using McCalls 6559. The ITY knit maxi dresses fit completely different than the ponte version did.  For one they are lighter and the fabric was a little more challenging to cut. Two, it's gonna take me a little to wear them alone...they will probably be worn with a sweater or topper over them for waist definition and to cover some of that arse I'm rocking! Because that sure didn't seem to have gone anywhere when I dropped a few pounds!

Otherwise the construction is exactly the same as the black ponte one except I did not serge the seams.  Why? They are knits and won't ravel. The distinguishing thing about these maxi dresses is solely the fabric.  I made three of them out of distinctive prints so that the prints speak loudly enough that most people will probably ignore the similarity of each dress.

Red/brown/black polka dot version ~
Somehow the neckline stretched out a little with this one.  I could have tamed it but I liked how it forms a slight v so I let it be. The neckline and armholes are finished with a line of stitching as is the hemline. This one does not have the bias fusible stay tape added to it.

One more thing...this is an ITY knit from my fabric collection purchased from Fabric Mart. I bought 3 yards at $5.99 per yard so total cost to make was $18. It is the lightest of the three maxi dresses.


Bold printed version ~
The challenge of this dress was cutting out the border print so that it wrapped around my body. I wanted the print on the same side on the front and back...and remarkably it worked. I've had it go epically wrong in the past, so I'm really thrilled this one is fine! To me that's the interesting factor of this maxi dress. 

More fabric from the collection from Fabric Mart (it's hard to beat their sales!) was used to make the dress. This one cost $5.99 per yard and again I bought 3 yards so total cost to make was $18.


The border print version ~
I cut this one using the border print at the bottom of the dress.  A simple use of a great border print...but again making the print the central feature of the maxi dress. This dress is a little shorter than the other two because of the distinct border print.  It had large 2" white bands at the top and the bottom of the print so I lost inches at the bottom of the dress but gained some interesting details at the top in the front and back.

This ITY knit is a little heavier than the red/brown/black dotted one, which is really light, and the bold printed fabric which was a medium weight ITY. The fabric is also from Fabric Mart and cost $4.49 a yard, and I purchased 3 yards so total cost for this one is $13.50.


Conclusion ~
All of these will work well for my upcoming vacation and were cheaper to make than purchasing them from retail.  They were also fast to sew, seriously fast! I made all three of these and the ponte one that was in the last post in two days! They will even wear well to my day job with a topper.  

I want to make a couple of linen or cotton voile high/low maxi dresses next. I even have a pattern picked out. I just have to rumble through the fabric collection to find some interesting prints. I may be a little late to climb on board this fashion trend but I'm here now and I'm going for it! 

...as always more later!


Sunday, June 28, 2015

Finally a maxidress...

For the last couple of years my solution to a cool summer knit dress was Vogue 1250.  Well lose a few pounds and all of those amazing dresses have been added to the donation pile...and what is a woman to do now?

With much prodding and poking from my girl, Gaylen, I pulled out McCalls 6559. You know the maxi dress that everyone has made (110 reviews on Patternreview at last count) and I horribly failed at three years ago.  But body changes and an acceptance that maybe just maybe this should fit closer rather looser and I have this...


Okay let's back up a minute.  I really wasn't sold on McCalls 6559 until I went on the Avenue's site and saw maxi dress after maxi dress in this style. The only thing distinguishing each dress was the print used on the fabric or a binding added to the neckline and the armholes. I guess I could have just bought a few but all the elements to make them exist in the cave, so I thought I would try again.

As you can see from above, it worked. 
  • I started with the same pattern pieces adding 5/8" to the front and back side seams.
  • I added a 1/2" at the center front seam by placing the pattern piece 1/2" away from the fold. 
  • I also added a center back seam instead of placing the back piece on the fold.
  • The neckline was raised an inch and then an inch was removed from the shoulder straps to raise up the armholes. 
  • For the next version I added another 5/8" at the neckline on the pattern to raise it up. I think the black one is a little low.
  • I topstitched the neckline and armholes in white thread to give the top a little sumthin' sumthin'. 
  • The shoulder seams were stabilized with "Design Plus" bias fusible stay tape.
  • Finally the side seams were sewn with a 1/2" seam allowance and then serged finished.
  • The hem was pressed up 1.5" and I added some stitch witchery. Then I topstitched the hemline with black thread.
  • After finishing the dress, I had some gap in the front armhole, so I improvised side armhole darts.
  • Altered the front pattern piece by slicing and folding over at the armhole and did a similar alteration at the back armhole.
My first try is from some of the black cotton/lycra ponte from my 10 yard stock. I figured if it didn't work, I would still get a maxi skirt from the leftover. I realize that this is a firmer fit than an ITY knit will provide, which are my next choices. 

Here are my fabric choices ~


An ITY navy & black border print, a red/brown/black polka dot ITY knit
a cotton/spandex vanilla dot print & a bold border print ITY knit

...a few more pictures of this maxi dress in action.


I will show pics of the other dresses in another post because I ended up making four of them, enough for vacation and as Gaylen reminded me on Instagram, enough for a week's worth of work outfits. 

Finally, I really like the tie top that accompanies this pattern and I think it will give me some much needed waist definition.  Now to find that linen knit fabric I bought from Fabric Mart years ago to make a couple!

...as always more later!


LinkWithin

Related Posts with Thumbnails