Showing posts with label Dresses. Show all posts

Wednesday, August 27, 2025

Rewind it Back - New Look 6340

I've seriously been walking down memory lane of my previous makes.  Part of it is because I don't wanna fit a new pattern.  Part of it is because these garments worked for me and I need that in this updated body. So, today I'm revisiting New Look 6340 which is still in Simplicity's catalog. This is my newest version.

Between 2017 and 2020 - I made seven garments from this pattern - 2 sleeveless maxi dresses, 1 tunic, and 4 different dress versions.  My favorite was this denim version:

I wore this one and the linen versions the most.  And only one still lives in my closet - this maxi version.

Supplies ~

3 yards of a midweight linen print from Mood Fabrics online purchased several years ago

22" light blue zipper from the zipper stash

2 7/8" black buttons from deep in the button stash

2 yards of black piping from Daytona Trimming via the trim stash

Construction ~

Thankfully, when I pulled the pattern out of the folder, all of the alterations had been done to the main pattern pieces. There was even the maxi version in pattern form.  So, happy about old me now.

The only change I made was to add a 1/2" to each sleeve side seam. I remember these sleeves as snug fitting and wanted to make sure that they didn't look tight on my even more bodacious biceps.

I added piping to the neckline, sleeve hems and pockets.


The pockets were getting lost in the busy print.  So added piping along with 
the black buttons to make the pockets stand out.

Added a facing to the sleeve hems to encase the piping.

Otherwise, it was a simple sew.

Wearability ~

I wore this dress to work this week and took pictures in my office.  This dress was comfortable to wear, however, because of the fabric's weight, it's not as drapey as I would like.  The thing that bothered me was that it tended to bunch at my knees when the wind was blowing. Otherwise, it was a good wear.

A few more photos ~


I'm glad I reused this pattern.  Since I own loads of linen for future makes, I will definitely sew this again next spring/summer.


*I know Blogger has made it more challenging to sign in but would you kindly sign your name if you use anonymous.  It makes it easier to talk back to you.  Thanks so much!*


...as always more later!


Friday, August 07, 2020

Apples and Oranges and Lemons ~ Oh My!

My TNT version of the Myosotis dress has been my go to this summer. I've made them in chambray, stretch cotton, linen/cotton blend and shirting cotton and each one has been worn for zoom meetings and grocery store runs. Gawd has Covid totally affected everything!


I have nothing new to share with this one. I bought the fabric back in February during a Sewing Weekend at UrbanSewciety in Westfield, NJ, a local fabric store. We had a weekend of sewing with raffles. I won one of the prizes, a gift certificate, so I purchased two pieces of fabric with it.


I actually thought that I would have sewn the knit before the rayon print but Covid changed that. Anywhoo, I purchased 4 yards of this print because I knew it would make a fantastic Myosotis and it does. It's so stunning that I'm thinking about rambling through the collection to find more rayon fabric to make another one.

The buttons are made from 3/4" covered button shells. I used the lemons in the fabric to cover the buttons. I really wanted yellow buttons and didn't have a dozen in the button stash. But I own dozens of covered button shells so I made 12 of them. I love that they match the fabric perfectly.

That's all I have to share about construction or notions. So how about a lot of  pictures. Once I got my daughter involved in taking the photos, you know she glammed me up. Then since she was taking the pics, I got a lot of good ones making it harder to choose, so I decided not to.


Since it's the first week of August and I probably won't be going back to the office before January 2021, there will be more of these. To me it's the perfect dress to wear at home.


...as always more later!


Tuesday, August 04, 2020

A Bold Floral Maxi

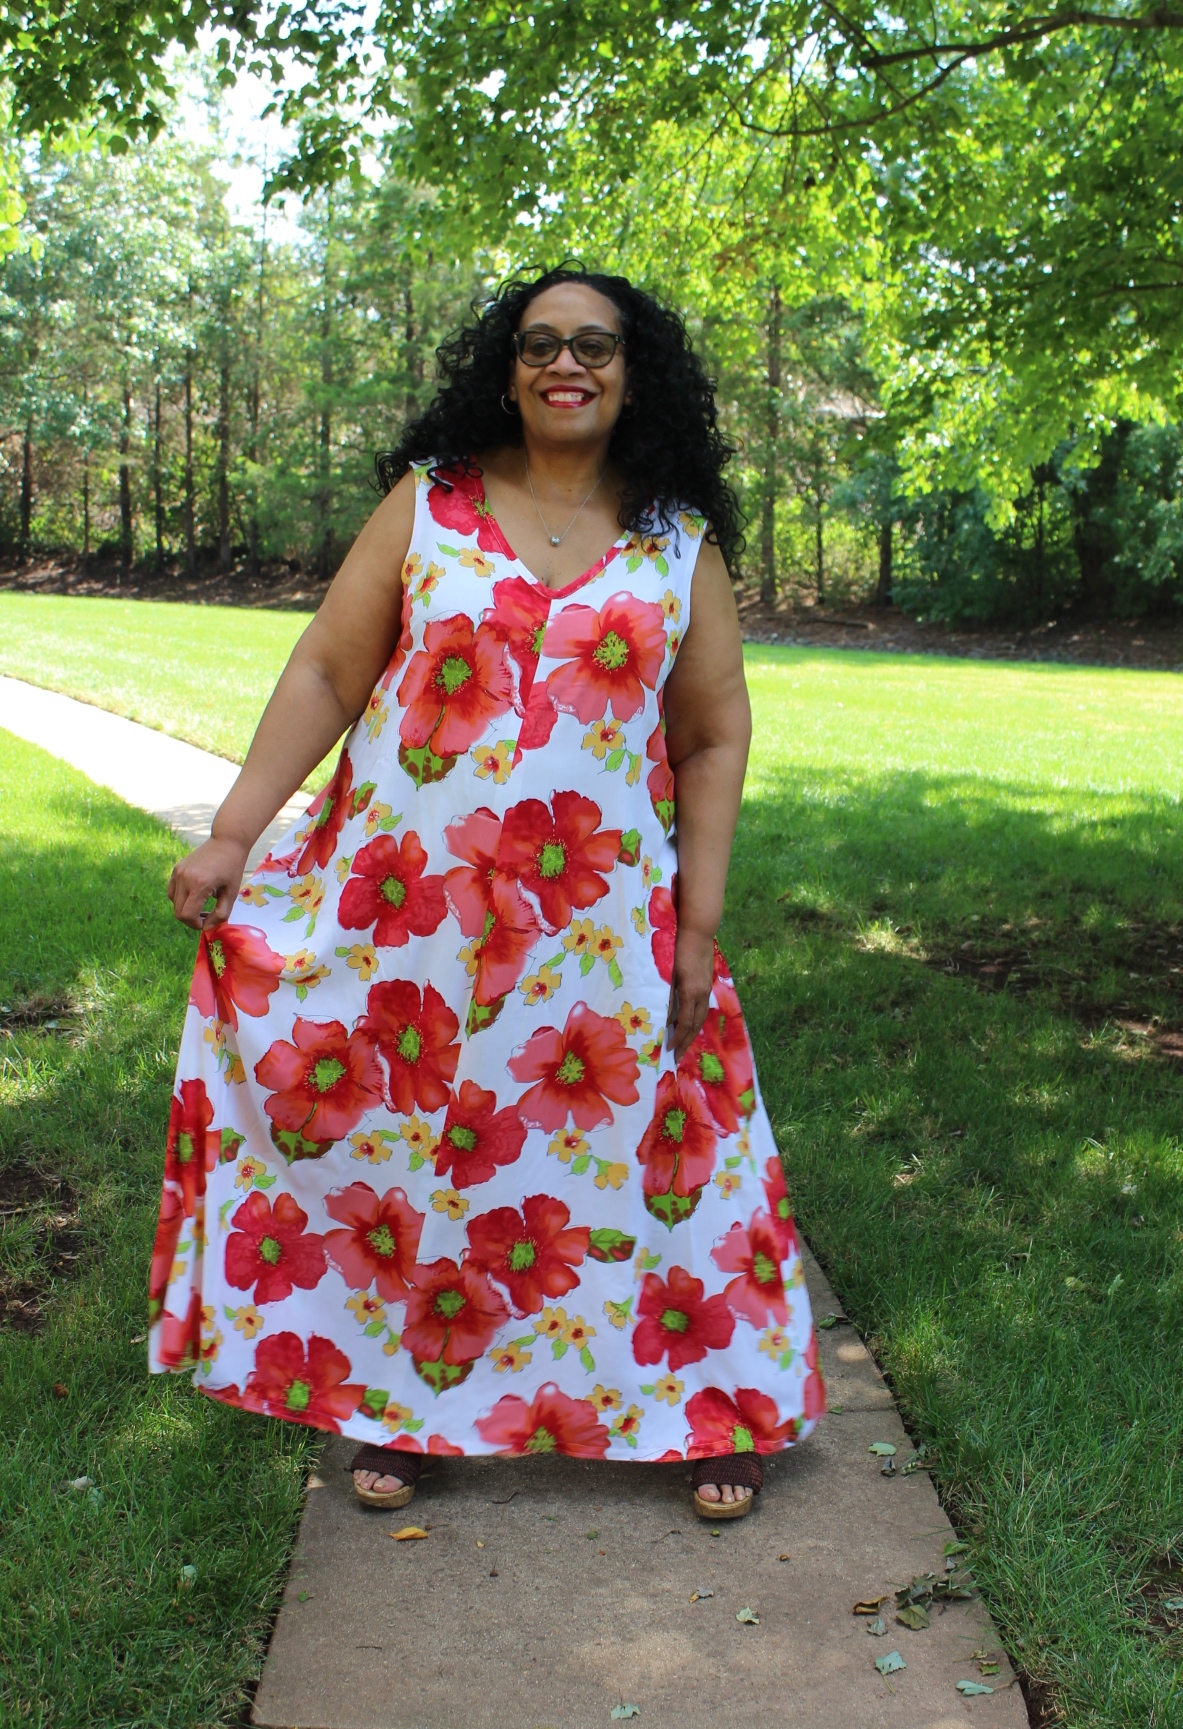
It's hot here.  It's August and we've recently gone through several heat waves.  August in the Mid-Atlantic states mean heat, humidity and high temperatures. With that in mind, I made the Lafayette 148 V-Neck Maxidress again.

Now even though I'm working from home, I still get dressed for Zoom meetings and for trips to the grocery store.  Plus I'm a little more nonchalant and slouchy at home with easy to throw on pieces getting the most wear. This is why I repeated this maxidress. It's comfortable, easy to wear and perfect for the heat!


I went deepstash for this one. The floral rayon fabric is from GStreet Fabrics in Rockville, MD. It's about 9 years old and it's from the last time I went to a GStreet Fabrics. I think this was in the first incarnation of the store and while it had nice fabric, it was not like the original GStreet of old. It was part of a fabric road-trip with Shams & Peggy in April 2011.

This piece of fabric was on the expensive side for me at the time - $12-15 a yard. I bought 4 yards of it. The tag only had GStreet Fabrics on it and the yardage. I remember loving it so much I just couldn't leave it. Otherwise everything else from that trip was from the $2.97 tables.

I used the pattern pieces that I'd altered with the changes described in my original Lafayette 148 knock off post.

The notions for this version are:
24" white invisible zipper
Design Plus Bias Fusible Stay Tape
Self made bias binding

The things I changed on this make:
o Made bias tape from the fabric scraps to bind the armholes
o Added stay tape to keep the neckline stable
o Omitted the neckline facings and used the self made bias binding instead
o There are no pockets in this one either

How the way the fabric drapes and moves makes this a favorite look!


The best thing about sewing repeats is that it's just about the sewing. I don't have to worry about fit or if pattern pieces go together because they do. I've already made it!

These photos were taken by my daughter too. Normally she travels in a group but today only one 9 year old little girl came with her. Of course she got in on the pictures too...


I have a couple more pieces to share before the month is out so they will be coming to the blog soon.


...as always more later!


Wednesday, July 10, 2019

Vogue 9371 in a Border Print

This fabric purchased in October 2018 plus a newly issued Vogue Pattern made this dress ~


The Vogue 9371 pattern is in the Summer 2019 release from Vogue Patterns. I loved the idea of the shirtdress unbelted and floating free. Just the kind of look I'm desiring this summer.

My fabric is a border print that I purchased from Fabric Mart. Originally bought to make a shirt. However, it didn't work with my pattern pieces so I put it back on the shelf.

I pulled it out again when I saw this pattern. I knew it would make a wonderful maxi. I cut this out in a size 22 and made no alterations to the pattern though honestly I should have added a few inches to the bottom of the pattern pieces. I was a little disappointed when I sewed it together and realized that it wasn't grazing the floor.

Normally I have a few in-progress photos but since I made this at Sew Camp, there are none. It was an easy sew. Nothing complicated about the instructions or assembling the dress. The fabric was the only challenging part ~ cutting it to most effectively highlight the fabric. Thankfully that was done at home before heading to Sew Camp.

I wanted some larger white buttons and had none that fit the bill in the button stash. Unbelievably, I found some at WalMarts in PA where we stopped to purchase some things. The buttons are a plastic white floral that coordinate with the fabric and at 88 cents for a card of 4, a real bargain!

Some Pictures ~


Finally I will sew this again.  However, I'm going to make some alterations to the pattern to give the dress a little more swing. I'm using some of the pattern's design ease to fit my body. Also I think a softer/less crisp fabric will give me the drapy look I want. I will lengthen the pattern pieces to make it a true maxi too. Hopefully the maxidress from this pattern, will make an appearance before the summer is over. Another one will be perfect for those hot, hazy August days.

...as always more later!


Friday, August 17, 2018

Deer & Doe Myosotis Dress - Take Two

I knew I was going to make this dress again after I wore the first one. It was such an easy wear and sew. For this version, I made the straight skirt and omitted the pockets.


What makes this version distinctive is that I used a Telio Denim Embroidered Floral fabric that I'd used before.


I bought the fabric last year and made this dress (the StyleArc Marilyn)...


...I really liked the fabric so I bought it again this spring with the original intent to make a version of M7470. I rebought this fabric because I got it in my head to make a shirtdress with an embroidered eyelet border after seeing a designer version. 

I had a totally different piece of embroidered cotton in mind to remake this dress. When I pulled the fabric from the collection, the embroidered edge wasn't as wide as I'd remembered, so it wouldn't work for what I had in mind. My hand touched this embroidered fabric and the search was over.

Additional Pattern Alterations ~
I made a couple of changes to the bodice front. One I lowered my dart by a 1/2". The second change was to add 1/2" to the lower half of the dress front. I mentioned that the bust dart was a little too high in my original dress post. However, I didn't notice that there was a little pull in the button band until I wore it and saw the pictures. I want the button area to lay flat so I added some to the front to achieve that.

The last change I made to the dress was to cut the dress skirt 6" longer.  On the first dress I only added 3" which placed the hemline right under my knee.  This additional 3" makes the dress hit a spot that I'm more comfortable wearing. In all honesty though it changes the look of the dress. The first version looked young and hip, this one looked a little dowdier.  

So after assembling the dress, I went back in and removed an inch from the top of the dress skirt. I also used a 5/8" seam allowance on the side seams of the dress where previously I'd sewn them with a 1/2" seam allowance. After adding the extra to the button band, the top was a little too loose. I liked the more fitted top of the original dress but wanted to eliminate the pulling. I think I accomplished that by sewing a deeper seam on the side seams.

Otherwise there were no other construction changes. I sewed this up exactly as I did the first version just omitting the pockets. 

A few pictures ~


Conclusion ~
I can't guarantee that I won't make another one of these before the summer is over. I keep wondering what it will look like as a maxi dress. Or if I need to make three tiers to make a maxi look work?  So there may or may not be a third version of this pattern.

This version is all about the embroidered fabric. I think it was the perfect choice for this simple silhouette.

...as always more later!


Monday, August 13, 2018

Solid Colored & Sleeveless Katie

I think of projects in threes...so this is my third Katie Dress.  


The difference this time is that I sewed them one right after the other! I am done with this pattern for awhile because I have three amazing dresses/tunics in a sleeveless, short sleeve and sleeved version.  That's not to say another shirt probably won't make it into my wardrobe come fall. I still haven't made the shirting version of this pattern which started this journey...but for right now I am done.

Each version has presented a sewing challenge but in a good way.  Each one has allowed me to use a technique or to change a detail. They've given me design, pattern alterations, and construction challenges which I love. All of which makes a great sew for me.

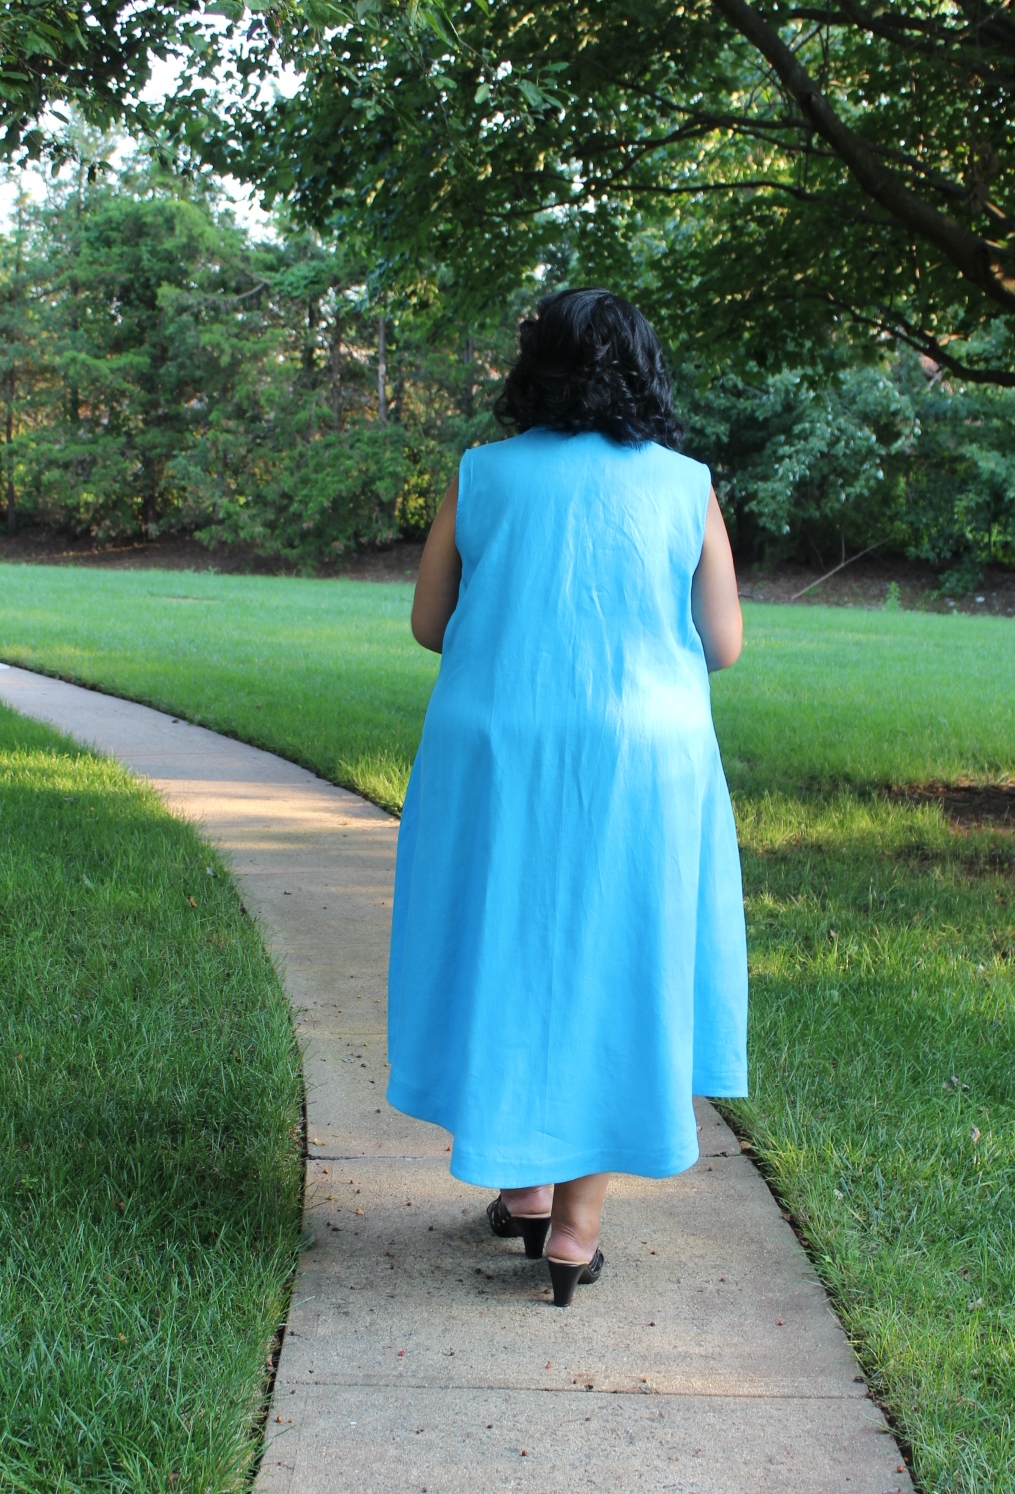
I chose a solid color with colorful accents for this version because after working with the other very bright & colorful prints, I needed something a little toned down...so why did I choose a bright sky blue linen...*LOL*

Supply List ~
- Linen from Fabric Mart's couture line 
This has been in the collection for a couple of years. They put it on sale one year and I bought all the colors...don't judge! *LOL* However, there is still couture linen on sale at FM so I've linked to one that's similar in color to mine.
- printed cotton fabric from Zooks Fabric in Intercourse, PA
- shell buttons from the button stash
- Fusible Interfacing from Steinlauf & Stoller

Pattern Alterations ~
- I added three inches to lengthen both the front and back pieces. My original dress was just a tad too short showing my knees and I wanted a dress that fell in a spot that I liked.

- I also raised the underarm seam a 1/2" on both the front and back pieces. More on this further down in the blog post.

- The front facing also had 3" added to it to lengthen it.

That was all of the pattern alterations for this version.

Construction ~
There were no changes to the construction process...just omitting the sleeves and adding a bias binding to finish the armholes. However, I stretched the armholes out when I was applying the binding and they were too long, exposing my bra under my arm.

*Sigh* I also didn't take into account the linen's qualities when I was changing the underarm. I added a crescent piece of the cotton print to the underarm seams to cover the extra space.


When I first put the crescent in (made by taking the dress, putting a piece of tracing paper in the armhole and tracing the opening, then adding seam allowances all the way around) it didn't fit. It was wobbly and stuck out away from my body. My solution was to take a tuck in the center of the crescent and stitch it down. Now it works and I love that it's made from the accent fabric.

If I were to make another one (maybe next summer) I would make the armhole snugger so that it fit closer to my chest. I like the full shoulder coverage though others might make it a little more cut-in. 

Design Changes ~
I had fun adding details to this dress to make it mine. Of course the inner collar stand is cut from the printed fabric...


as is one of the front button bands...as well as the crescent underarm inserts.


The front and back hem facings were also cut from the printed fabric and where I started this journey. I had it in my head to add coordinating facings to a solid color fabric.


I used shell buttons for the front of the dress. I also left a small sliver of the printed fabric band by sewing the buttons over a 1/4" which exposed the print and added a slimming effect down the front of the dress.

The final addition to the dress front is a small breast pocket with a square of the printed fabric. I wanted to cut down on the wide expanses of blue fabric and all of these details assist with that.

A few pictures ~


Conclusion ~
This is my favorite of the three Katies. I love the flow of the dress. I love the pockets - who is dis woman?! *LOL* Cause I'm so not a pocket person. I love the length and the drama of it...and it was perfect when I wore it on a 90+ degree, hot and humid summer day. I was cool, comfortable and it was so humid that quite a few of the wrinkles fell out as I walked to the bus station to go home.

As I said earlier I'm retiring the pattern for a minute. Though I will admit that I almost went back and added short sleeves because of the underarm issues. I just love that I improvised all of those details. They weren't in my original plan for the dress but they made it perfect...adding drama and interest and elevating the look of it.

Next up on the blog is my denim chambray version of the Myosotis dress. Indie month continues.

...as always more later!


Saturday, August 11, 2018

The Dark Floral Katie Dress

This was my first version of the Katie Dress made straight from the download.

As originally sewn

Worn with black capri leggings

Supplies ~
The fabric is a cotton/linen print purchased from Fabric Mart last month. It was from a special offering to Premium Members and I bought several of these prints then. They are now online here but the print used in my dress has sold out. 

The black linen is from the collection probably from Ebad Fabrics in the garment district purchased years ago...back when I kept black yardage on hand for basics.

Finally the buttons are from M&J Trimmings.  I bought them after I placed some stash buttons on the dress and posted it to Instagram. Some of the comments made me think, so I went shopping and found some different buttons to use.

A little backstory ~
Before I headed to banking land and an entirely corporate wardrobe, I use to sew ALOT of prints. So much so that my sister, who was a recruiter for a major corporation at the time, told me when I went to her for advice on getting a new job, to lose the bold prints. This was about 20-25 years ago. I was coming out of garment district jobs where I could basically wear what I wanted...trying to move into a corporate job with some serious benefits. 

So I toned down some of my wilder prints. Then I moved into a banking job where I had to tone them wayyyyyy down! Now that I've finally dislodged all of that corporate noise from my creative brain, I'm wading back into the deep with deliciously loud prints. See I'm actually a bold color and print sewist who likes simple shapes. I hate ruffles and ditsy little prints. I love a bold primary color and I also love a great menswear influenced garment. A little contradiction for sure.

Construction Info ~
So this dress...like I said earlier its made straight from the pattern and it worked. One of the things I love the most is the faced hemline. By adding the facing, you give the hem weight so that the fabric hangs the way it's supposed to and doesn't rise up or float around.

The changes I made were creative and not structural.  The front buttonband, collar and sleeve hems were all cut from the black linen. It was to give your eyes a place to rest. It also makes the floral print POP! 


The banded sleeve is a technique I've used over and over again but if you want a step by step tutorial, check out this blog post. Disregard the piping info or hold onto it for a future make! And I omitted the sleeve ruffle because seriously I'm tired of this trend. Can it go away already in sewingland? Cause I hardly ever see it on the streets of NYC anymore and I work in the heart of the garment district!

For the next dress, I'm lengthening the front and back by two inches so the dress front will cover my knees and the back dip will have more drama. You know I LOVE a dramatic high/low hemline!

A few pictures ~

The first photos are of the dress as is...it's a little short and shows my knees...and I'm just not comfortable showing my knees at my age.  Now this is me and says nothing about other women my age...just MY preference.


The next set of photos are of the dress worn with black capri leggings under it...like a tunic...and how I will wear the outfit! 


Y'all Imma be honest, I hate my arm fat pads in this picture...but a friend of mine said I was making my sleeves too long. So I'm including it so she can see why I make them longer. I was doing it to cover these fat pads & Imma go back to making my short sleeves longer to cover that area because I have to be happy with wearing the garment. Sorry...not sorry! *LOL*


This was the first of the Katie dresses but I'm posting it out of order because of the EB post...one more version to come to the blog!

Parting Shot ~
This was my daughter's favorite shot...so I'm including it because she's so patient and giving of her time to take these pics for me. We did these late one evening because with four kids, a full time job, and a partner, I take her when she has time!


...as always more later!


LinkWithin

Related Posts with Thumbnails