Showing posts with label Myosotis Dress. Show all posts

Sunday, October 05, 2025

Florals and Eyelets Myosotis Dress

I bought this fabric from Marcy Tilton last year.  It was a subscriber special that was so beautiful I couldn't leave it. I hadn't seen anything like it before. So, I bought it even though I wasn't sewing much because I knew it wouldn't last. 

There are a lot of pictures in this post both for construction and finished shots. One, this dress turned out so much better than I imagined it! Two, I wanted to memorialize the construction for future me.

That eyelet embroidered floral cotton became this...


Yes, another Myosotis dress but the first one in my smaller size.  I know it's late in the year to be making a cotton eyelet dress but we still have a few more days of 80 degree days.  Also, the darker floral print makes it perfect for late summer/early fall wearing.

Supplies...

4 yards of a cotton printed eyelet from Marcy Tilton

10 clear/purple buttons from my M&J Trimmings button hauls


1 - 11/16" gold snap originally purchased from Fabric Mart via the snap stash

Baby knit interfacing via the interfacing stash originally purchased from Farmhouse Fabrics

Several yards of beige Snug Hug rayon seam binding

Decision Making ~

  • Sewing eyelet fabric is always interesting because of the eyelets.  
  • I used a smaller stitch length - 2.5 on my Janome to make sure I had enough stitches per inch to hold the seams together so they didn't separate. 
  • Then I did sewing machine and serger thread tests to match the threads as closely as possible to the background fabric.  
  • I also did a fusible interfacing vs. silk organza test to see which one I liked best for the collar, undercollar and button bands. The fusible interfacing won.
  • Seam finishing was very important to me because I didn't want serged edges to show through the eyelet.  I went with an enclosed or french seams on the skirt and bodice side seams.
  • For the button bands, sleeve and skirt hems I enclosed them using hug snug hem tape. I thought about using the snug hug on the finished waist band seam.  It wasn't necessary and gave up the idea because the serged waistband seam was enough. It also did not show through the dress.


  • I did serge the sleeve underarm seam because who is going to see it.  I also serged the armhole seam. I didn't think I would be comfortable with the snug hug seam binding on the armhole edges.
  • I also used the button band sample below to make a couple of sample buttonholes so I could see how the fabric took to the buttonholes or if I would need to come up with another idea. 

Here is a photo of all the samples I made before I started to sew...

(from my Instagram stories)

There are no new construction techniques in this dress. However, here are a few construction photos of making the bodice:

Binding the shoulder and front facings with hug snug 
bias tape and french seams on the side

Front finished before adding the collar

Bodice finished with the collar

There are a lot of "couture" techniques to make the dress sturdy on the inside. I also hand sewed the sleeve and skirt hems. It allowed me to hide the stitches in the fabric. The clean finishing on the inside was important to me because of the fabric.

Here are a few photos of the finished dress...


One more thing to note - I'm wearing a beige colored slip from Spanx underneath the dress. That's why you can't see anything from the eyelet holes.  

Now that my sewjo is back and chomping at the bit to create, I have so many things I want to make for fall/winter. For my next project I was supposed to start another fall dress but that project probably has been pushed until next spring.

I'm also removing items from my closet.  Garments that are too big for me now but I'm loath to donate them.  What happens if I gain the weight back?  Then I'm starting all over again.  Luckily I was to lazy to donate my smaller sized garments and now I have them all to wear again.  So while I'm removing the others, they sit in limbo.

I have two more posts after this one.  A vest that I've mentioned before and a white border print shirt that I can't wait to wear. I'm working on a shirt that I've stopped and started several times for various reasons but I KNOW it's time has come.  So that's what's on my sewing table.  What's on yours?


...as always more later!


Tuesday, September 09, 2025

Inspired by...

This dress is totally inspired by a dress I saw on an Avenue ad in my Instagram feed. Because honestly, at this stage of my life I'm not walking away from a flowy dress especially since COMFORT and then style are the driving forces of what I'm wearing.

...and my version of the dress

Now the dress is regularly priced $80 and since the summer season is coming to an end it's $44 so I could have bought it.  But I already own a similar fabric and patterns to make this dress. All I needed was time and the materials I on hand instead of spending money.

Materials:

4.5 yards of a lightweight crinkle rayon linen purchased last year in Chicago from Rainbow Fabrics

3 - 5/8" buttons purchased from Pacific Trimmings via the button collection

1/4 yard of lightweight interfacing from Steinlauf & Stoeller

1/4 yard black bias tape from the stash

Patterns:

Top is made in a size 20 using the Deer & Doe Myosotis bodice

Tiered skirt made from the Style Arc Nova tiers - size 20

Construction:

  • I deliberately chose a size 20 to make this dress.  I wanted a flowy dress for late summer but I don't need all of the space of my previous makes. I'm back to using the size 20 myosotis bodice so I matched the same size skirt tiers.
  • My change to the design is to add straight sleeves.  Wasn't really thrilled with the tabbed sleeves, not a look I like and this allowed a cleaner look where the print did all the talking.
  • Also, I added 4" to the bottom tier in my original Nova (that no longer fits btw) but with the weight loss I don't need to add the additional 2" I talked about in my original post.  This length works now. 
  • The other change to the dress is I didn't add the collar. So to enclose the back neckline seam, I cut out a fuller back facing. 
  • My first thought was too bias bind the back neckline but after I thought about it a fuller back interfaced facing would give the dress some structure...and leave me a place to add my tag along with a size tag. After doing that I realized the neckline front wasn't covered.  I needed to figure out a way to enclose it.

That led to some bad patching...I mean it works but it's not the clean finish I usually have in a garment. Also, that back facing was flopping around so it needed to be stitched flat.  Because of the print you can't see this detail but that's okay.

Otherwise, this was a straight forward sew.  Just lots and lots of gathering!

A few photos of the finished dress:


Wearability Report ~

This was the most comfortable easiest dress to wear.  Because yes, I've worn it twice already.  However, the fabric has started to pill slightly under the arms and on the dress sides from the rubbing of my purse. It's interesting because when I purchased this fabric nothing about it said that it would pill...yet here we are. I'm monitoring it but I've put this away for next spring/summer. 

Y'all I wanted to say thank you for going back and reading past posts.  I've been blogging here for 19 years (can you believe it?!) and to know that my words aren't just laying here dormant is such an honor for me. So, THANK YOU, THANK YOU, THANK YOU!


*I know Blogger has made it more challenging to sign in but would you kindly sign your name if you use anonymous.  It makes it easier to talk back to you.  Thanks so much!


...as always more later!


Thursday, July 03, 2025

Water Lilies Myosotis - UPDATED!

I've thought about why I return to this dress pattern over and over again. Like why don't I use another pattern? Honestly it's because this pattern checks all of my boxes. It's comfortable to wear. It works in a variety of fabrics, patterns and colors. Mostly I feel pretty in it.  Let's not forget that!

At the end of May 2023, I spent my birthday with my bestie in Lancaster, PA.  The home of cheap sewing supplies and a short ride to Fabric Mart.  The true Disney World of my life! We visited a few quilting stores and shocked several employees with me stating that I wanted to use some of the quilting cottons for clothing.

At one quilt store (Burkholders), I purchased the Water Lilies border print by Michael Design Works and the coordinating striped water lilies & print pattern because as I held the fabrics in my hand, I could see another Myosotis.  So why would I deny this fabric what it wanted to become!


One thing though, this is a complicated sew. Therefore, there are a lot of progress photos making this a very long post.  Right here I'd like to thank my pass self for being diligent in taking them because when I finally finished this a year later I would NEVER have remembered these details without them.


Supplies ~

5 yards of 100% quilting cotton Water Lilies


2 yards of 100% quilting cotton coordinating Water Lilies print

9 - 5/8" green sheer and patterned buttons (purchased from the Quilt Store) Normally I use 12 buttons but they only had 9 so I made due.

Construction ~

Working with a border print is always a challenge. It makes me think outside the box to make the fabric sing yet end up with a wearable yet amazing garment. This was a complicated sew because I was basically remaking the pattern pieces to fit the vision in my head.  There was some pattern work done to accommodate the fabric.  

Bodice:

The bodice piece was enlarged and then the button front piece was removed.  I made a separate piece for the button front. 

I knew I wanted the bodice to be from the lighter part of the fabric. So I needed to sit on it a minute to figure out how to make the fabric work for me. I ended up cutting it on the crosswise grain to make the most of the lighter fabric.

After the bodice piece was cut out, I did a trial of how the fabric from the other pieces of fabric would work with the bodice.

I also did a test with the buttons I choose to see how they would work once the bodice was completed.

Skirt:

The skirt is cut on the crosswise to use all of the border print in the design. 

I removed the original border and added the border from the coordinating piece of fabric after adding the button band to the front.

Sleeve:

Was cut from the main border piece so it coordinated with the dress' skirt. I added elastic to the sleeve to make them short and puffy.  I like this style because it adds some grown up whimsy to the dress and it covers my bodacious arms.

Collar/Front Band:

This was made entirely from the border piece of the coordinating piece. It's the ultimate border/stripe to the entire piece. And the reason it took so long to finish the dress.  Fussy cutting that border held me up for WEEKS! 


Then I had to recut the collar and collar band because of the way I added the border to the front of the dress.  I was hoping that I had enough of the border print left to just cut larger pieces. Ummm no.  The collar had to be pieced to get the length I desired.

I will admit that this went through a few iterations before I settled on this one. But this one highlights the water lilies but yet brings the drama a good border print garment should.

It took me over two months from the time I started this to finish it.  When I say my sewjo had been vacationing, I wasn't kidding.  However, I had a few days off at the end of July/beginning of August 2023, so I finished this up.  When I say this was an involved sew, please believe me that it was.  I had to rethink everything to make the border print work the way I saw it.  All of this took time and since my sewjo was weak, those things took longer than normal.

Then it sat while I waited to get the urge to sew the buttons and buttonholes on the dress.  It sat almost a year before I decided I needed to wear it to church one really hot July Sunday. Then and only then was I motivated to do the last 2 steps!

Tie Band:

As you know, I've lost quite a bit of weight, and I didn't want this dress to sit in the closet or get packed away. I decided to add a ribbon tie to the bodice side seams to remove some of the fullness of the top. 

  • I thought I had a solid green wider ribbon in my trims stash.
  • However, the green I had was a 1/2" wide and would get lost on the dress. 
  • There was a 2" pink ribbon on hand. 
  • I cut a 15" length of both ribbons.
  • Then I laid the green ribbon on top of the pink ribbon and used 1/2" steam-a-seam 2 to iron the two pieces together.
  • I didn't want to stitch the two ribbons together because they both have a distinctive stitch on their edges. 

A few pictures of the dress in 2025. I wore it to work the other day and my co-worker graciously took the photos below:


I'm calling the sewing I'm doing now, "Art Teacher Chic" cause I'm all about the fabric.  How can I manipulate it.  How I can make something unusual and different. I know I will make another Myosotis because it's my go to pattern.  

I know it's a lot of photos but we took them near my job at Broadway & 39th Street at the Art Installment, I'm calling the bones. I only wore this beauty only once last summer and I received so many compliments. I'm glad I finally got to wear it to work this summer and document that fact.  This was such a complicated sew, I'm glad I posted it in case I want to refer to it in the future.


...as always more later!


Saturday, January 04, 2025

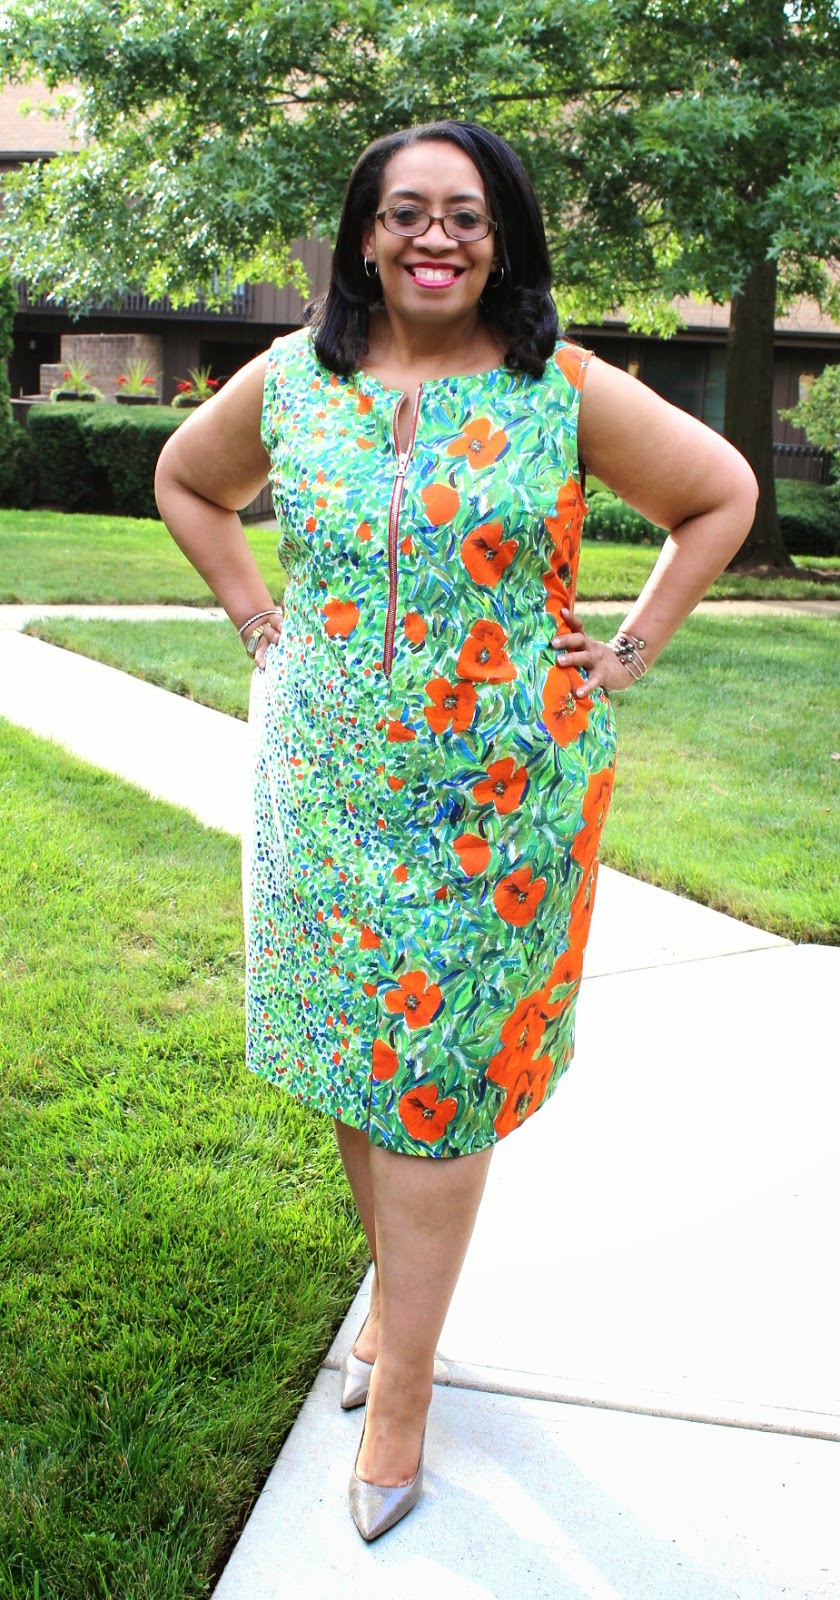
A Pretty Poppy Border Print Mysostis

It is common knowledge that I love border prints. Like my brain stands up to attention when the good ones are around.  Cause we know all border prints are NOT created equal.


My Idea:

Use the main piece as the skirt part.  The bodice would be cut from the fence part so that it would flow into the skirt piece. I personally dislike when the border print doesn't flow so I always try to plan for that. 

Here are a few photos of the cutting layout:

Cutting out the bodice, sleeve and collar

Dress bodice and skirt layout

And because I can here are...

My Top Five Border Print Rules:

1. Overbuy the amount of fabric that you usually purchase for a garment.  If a dress/shirt takes 3 yards, purchase 1.5 to 2 yards more.  Why?  Because it allows you extra fabric to match and play.  One of my very first border print dresses, I was cheap on the fabric and this was the result.


The internet was not kind. A lesson learned and never repeated because the comments were so cruel I never wore the dress.  Though I guess I really do like poppy print fabrics!

2. Find a resource that helps you with placement and how to purchase border prints.  I wrote a blog post based on an old Sew News border print article.

3. Take your time. Move the pattern pieces around until you get your desired result.  DON'T RUSH!

4. Use a pattern that doesn't have a lot of seams - though I have done that. 

5. And TNT patterns work the best because you don't have to work out fit issues.

The Poppy Print Dress:

Using my TNT Myosotis Dress pattern meant there were no fitting challenges.  Just how to manipulate the fabric to get the most pleasing result.

As I said above cutting out and using the fabric to it's best advantage is key with any border print.  Here are some photos of the finished dress...


...and a video.

I finished this and wore it back in October 2024.  Just getting around to blogging about it. If you follow me on Instagram, you've seen it already.  Just sharing a few details now.

...as always more later!


Monday, December 19, 2022

Metamorphosis

Once upon a time in the year 2020, back when the plague times first descended upon the world, I came into existence. I was created to hold back some of the horror of the death and disease that was in our midst. In the home times, when we weren't allowed to venture forth, I came into being...

Now two years have passed and the world has moved on so I've evolved too. I've become a fifth of a quartet of makes. But I'm the only one that is birthed from an original Myosotis make. It is my claim to fame.

Here are my components ~

4 yards of pink chambray from Fabric Mart

1 yard of Rifle Paper & Co. from the original dress

12 pink buttons from the original dress

Please note the difference in me versus the other versions are my sleeves which were borrowed from Vogue 9266 and enlarged. Here are a few photos of the process...

Enlarging the sleeves using the Vogue 9299 sleeve pattern

The "Slice & Spread" method

Followed the instructions in this book!

Some other construction photos...

The bodice constructed using the accent fabric for the collar and the sleeve cuffs

I was almost finished when I realized I wanted the contrast print 
to not only be the bodice facing but the skirt facing too.  
This is that facing being applied.

When I FINALLY start adding buttonholes and buttons, I'm almost done!

Otherwise, I'm like my summer companions. Myosotis' who've been created to replace the ones made during the plague or in the before times when hope lived.

A few more shots of me shining...

Originally I put covered buttons on the dress front but 
after criticism by my daughters I removed them...

...and went with my original plan of reusing the original buttons!

One thing my Maker has realized is that not all creations should be donated. Some of them have more life to live and should be lovingly dissembled to bring forth a new garment. 

I am that new garment...

I've worn this dress several times.  Out to dinner with my daughters and to work but I've never gotten a picture of me wearing it. I shared it on the dressform because I really need to clear these 2022 posts out of my queue and make space for 2023.

...as always more later!


LinkWithin

Related Posts with Thumbnails