Saturday, July 25, 2026
Simplicity 2894 Again
Wednesday, July 22, 2026
A Resurrection or Simplicity 8875
Back in June of 2022, I declared this dress dead.
After said declaration, did I trash the dress? No, I did not. Instead I stuck it in a drawer with a few other UFOs. If you've been following me for awhile, you know I didn't use to have UFOs. I worked that garment until I either got it to fit or it was tossed only if I felt it was unredeemable. Now, I have a UFO drawer. Things are there that I'd worked on but just couldn't discard the fabric once the garment was started.
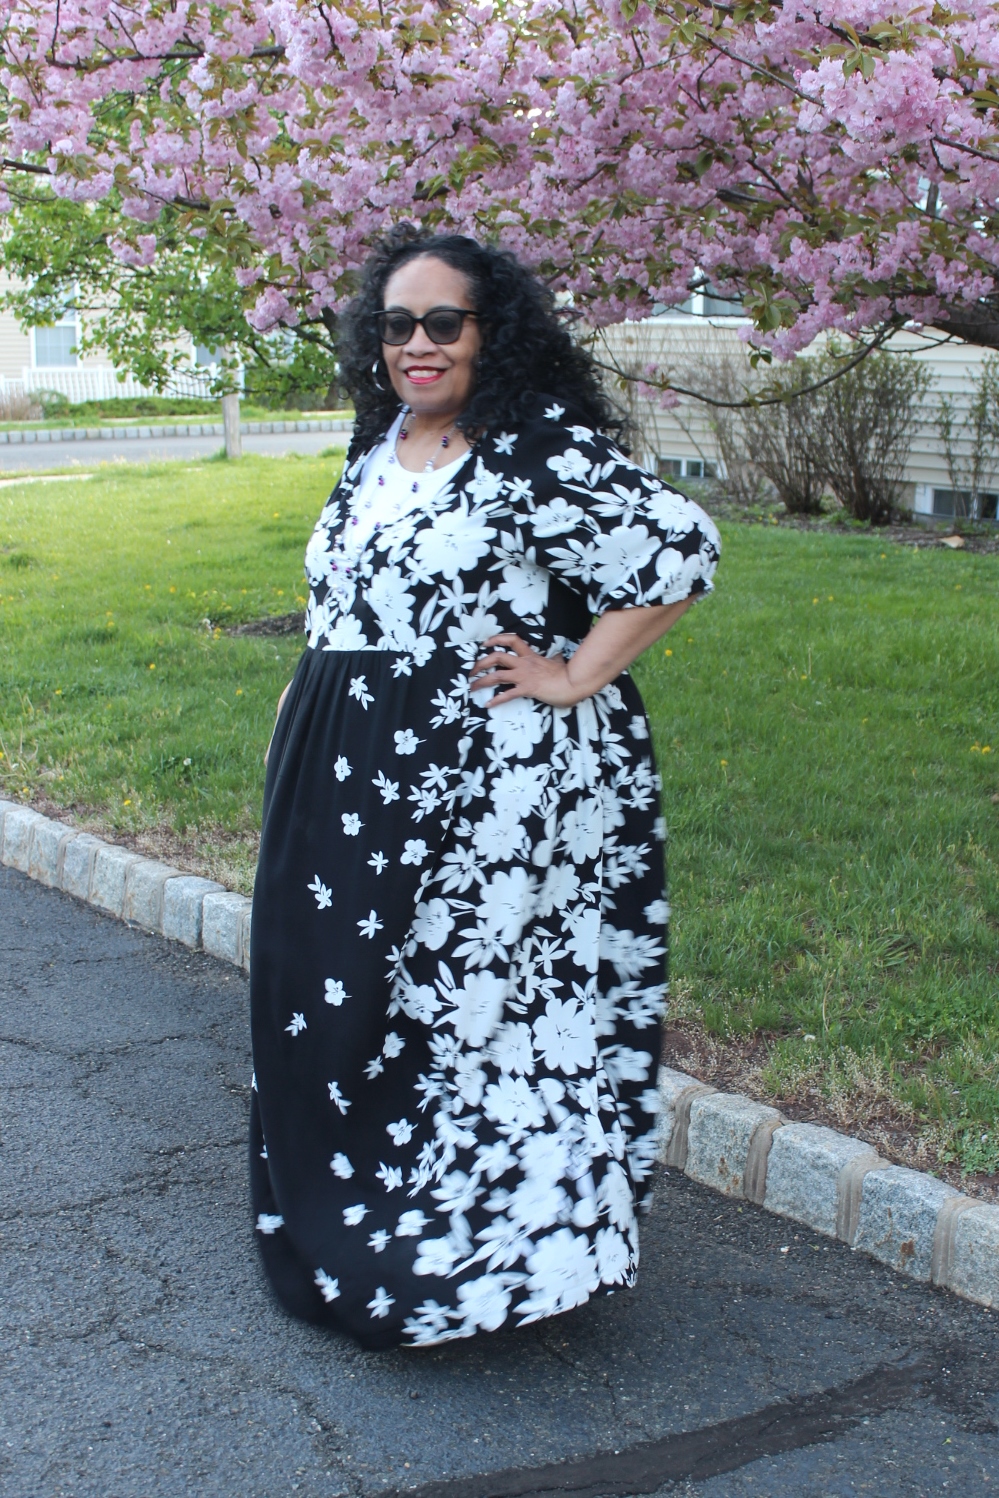
I was rambling in that drawer and came across this dress. I loved this fabric. Had hunted a fabric like it on several websites, finally found this one at StyleMaker Fabrics. Extensive alterations were done to the pattern pieces to get it to fit my larger body. One of the reasons I abandoned the project was because I didn't like how close-fitting the dress was. Well I'm a lot smaller these days so I tried it on again. Y'all it now fits like I wanted it to originally.
So, while on my May sewcation, I completed the dress. Now all of my pattern alterations and observations were recorded on this post. This new post is just to share the finished dress that was finally photographed on me when I worked in the office this week.
A Few Photos:
I'm thrilled that I saved this dress but especially thrilled because of the fabric. My summer dress wardrobe looks so different now than in years past. I'm so happy about that. While I only work in my officetw o days a week, it's nice to have new looks to wear again.
There are a few more completed dresses from my July sewcation that need to be photographed and shared. As soon as I can arrange more pics they will make their way to the blog.
...as always more later!
Thursday, July 16, 2026
OOP McCalls 6117
This will be the beginning of a series of new summer dresses. This year instead of planning and going on a trip, I opted to take 4 weeks off. One for every month this summer - one in June, one in July, one in August and one in September. I pledged that I would sew for some of those days. During the last 2 vacations, I've made 7 new dresses.
My daily schedule was to wake up and sew, stop to cook and eat dinner and then read the evening away. For the June week - I fiddled around with my Cashmerette t-shirt dress pattern and ended up with three very different t-shirt dresses. They have yet to be photographed. But that week I did pattern fittings, handled the fabric, cut and sewed the dresses. That's why there were only three completed.
For the July vacation, I cut out six garments the week before I went on vacation. It made all the difference in the world. I was able to just sew a dress from start to finish. Well I did that with 2 dresses. The third dress was a little more involved and took 2 days to finish.
Anyway, this post is about the first dress that I completed during the July break. This out of print McCalls 6117. It was originally distributed in 2010 so I'm reaching back in my pattern stash.
However, I wanted to make this dress because July has been hot as hades here. I wanted a pretty, loose fitting dress that was comfortable to wear to work when the temps were in the 90s+. This pattern achieved that look.
Some details:
Pattern -
McCalls 6117 in a size 24W because this is a very slim fitting straight dress.
Fabric -
Purchased from fabric dot com back before they went out of business. Actually have six yards of this fabric because at one point it was going to be a layered maxi dress. Y'all know those dresses were fabric hogs!
Notions -
1 - 22" invisible zipper
1 yard blue satin ribbon
4 beads
26" of 3/8" elastic
Pattern Alterations & Construction:
Pattern alterations needed to be made because The finished hip measurement was my measurement. The dress needed some wearing ease. To get it:
- I added 1" to the front side seam blending from below the bust dart down to the hemline.
- A pivot and slide was done to the dress front piece to give me an additional 1.5" at the hipline.
- One inch was added to the dress back side seam.
- One inch was added to the center back of the dress - blending from the waistline down.
My fabric was a 3 yard piece so the very wide sleeve pattern piece did not fit on the fabric. No matter how I tetris'd it. I ended up slimming the pattern piece down 2-3" inches on both sides to make it work. I even consulted the cutting guide, which I rarely do, before folding the pattern piece on the sides to make the sleeve work. So, my finished sleeves are not as voluminous as the pattern's photos are.
The other change I made was to add a center back invisible zipper. While the pattern seems to be wide enough to slip over your head, I'm 67 years old. I like stepping into dresses not battling for my life trying to get it on over my head.
The back facing was also changed from a cut on fold to 2 single pieces that I added a 5/8" seam allowance at the back center seam.
Finally, I hand hemmed the dress because I just didn't want that line of stitching to ruin the dress' finish.
Some photos of the finished dress...
Sunday, October 05, 2025
Florals and Eyelets Myosotis Dress
I bought this fabric from Marcy Tilton last year. It was a subscriber special that was so beautiful I couldn't leave it. I hadn't seen anything like it before. So, I bought it even though I wasn't sewing much because I knew it wouldn't last.
There are a lot of pictures in this post both for construction and finished shots. One, this dress turned out so much better than I imagined it! Two, I wanted to memorialize the construction for future me.
That eyelet embroidered floral cotton became this...
Yes, another Myosotis dress but the first one in my smaller size. I know it's late in the year to be making a cotton eyelet dress but we still have a few more days of 80 degree days. Also, the darker floral print makes it perfect for late summer/early fall wearing.
Supplies...
4 yards of a cotton printed eyelet from Marcy Tilton
10 clear/purple buttons from my M&J Trimmings button hauls
1 - 11/16" gold snap originally purchased from Fabric Mart via the snap stash
Baby knit interfacing via the interfacing stash originally purchased from Farmhouse Fabrics
Several yards of beige Snug Hug rayon seam binding
Decision Making ~
- Sewing eyelet fabric is always interesting because of the eyelets.
- I used a smaller stitch length - 2.5 on my Janome to make sure I had enough stitches per inch to hold the seams together so they didn't separate.
- Then I did sewing machine and serger thread tests to match the threads as closely as possible to the background fabric.
- I also did a fusible interfacing vs. silk organza test to see which one I liked best for the collar, undercollar and button bands. The fusible interfacing won.
- Seam finishing was very important to me because I didn't want serged edges to show through the eyelet. I went with an enclosed or french seams on the skirt and bodice side seams.
- For the button bands, sleeve and skirt hems I enclosed them using hug snug hem tape. I thought about using the snug hug on the finished waist band seam. It wasn't necessary and gave up the idea because the serged waistband seam was enough. It also did not show through the dress.
- I did serge the sleeve underarm seam because who is going to see it. I also serged the armhole seam. I didn't think I would be comfortable with the snug hug seam binding on the armhole edges.
- I also used the button band sample below to make a couple of sample buttonholes so I could see how the fabric took to the buttonholes or if I would need to come up with another idea.
Here is a photo of all the samples I made before I started to sew...
There are no new construction techniques in this dress. However, here are a few construction photos of making the bodice:
There are a lot of "couture" techniques to make the dress sturdy on the inside. I also hand sewed the sleeve and skirt hems. It allowed me to hide the stitches in the fabric. The clean finishing on the inside was important to me because of the fabric.
Here are a few photos of the finished dress...
One more thing to note - I'm wearing a beige colored slip from Spanx underneath the dress. That's why you can't see anything from the eyelet holes.
Now that my sewjo is back and chomping at the bit to create, I have so many things I want to make for fall/winter. For my next project I was supposed to start another fall dress but that project probably has been pushed until next spring.
I'm also removing items from my closet. Garments that are too big for me now but I'm loath to donate them. What happens if I gain the weight back? Then I'm starting all over again. Luckily I was to lazy to donate my smaller sized garments and now I have them all to wear again. So while I'm removing the others, they sit in limbo.
I have two more posts after this one. A vest that I've mentioned before and a white border print shirt that I can't wait to wear. I'm working on a shirt that I've stopped and started several times for various reasons but I KNOW it's time has come. So that's what's on my sewing table. What's on yours?
...as always more later!
Saturday, September 07, 2024
A Nova with Short Sleeves
Originally I had an idea to make the Style Arc Nova but adding a "Bridgerton" slant to it. I wanted a small piping at a deepened neckline with puffy short sleeves. As you can see below that DID NOT happen!
Instead I got a dress with a deeper neckline without binding and sleeves that were added but with much trial and tribulation. See this was the first make after not having sewn in almost a full year. I was still finding my footing. I made a new pattern piece for the front adding to the shoulder width for the short sleeve. However, I DID NOT do the same to the back pieces. Can we say drama?
I figured it out and got a sleeve on the dress but it's not a process I will share...because too messy and I would never do that again. Also because IF I make this dress again, I would do it differently.
Here are the materials:
4 yards of a black floral & polka dot cotton lawn purchased in July from Mood Fabrics online
1 yard of 5/8" wide elastic
I made this dress during the July heatwave here on the East Coast. I wanted this to take with me to Chicago and luckily my daughter took some pictures while we were at Millenium Park. I have no construction information to share with this dress. The tiers were sewn using the Style Arc instructions. It was just the bodice I deviated from the pattern. Good thing, it did work out so...
A Few Photos...
I'm happy I made it even with it's challenges. It's a comfortable, flowy dress to wear in the summer heat. Will I make another Nova next summer? Who knows. But I do love the pattern!
...as always more later!
Saturday, April 29, 2023
McCall's 7969 in Black & White
I loved my first one and understand why there are so many versions on Instagram and Pattern Review. I'd always planned to make another one and when I found this black/white floral double border print I knew it would be perfect. Especially since lately I've really been in a fabric manipulation mood.
Materials ~
4 yards of the black & white rayon floral double border print purchased from StyleMaker Fabrics in July 2022 which of course is no longer available.
Cutting Out ~
As you know the most important part of making a border print stand out is how you use it. A double border print presents it's own unique challenges because technically you only have 1/2 of the fabric to use. I will admit that it took some fiddling to make this fabric sing.
I knew that I wanted the front & back bodice pieces to be floral. The sleeves would also be made from the floral print because I wanted the bodice to pop. Determining how the skirt would work using the border print was the intriguing part. I was thrilled when I settled on using the borders as the sides of the skirt panels.
Construction ~
The only change between this one and the first is the sleeves. I really like the flare sleeves on my first dress. It's airy and easy to wear plus it covers my larger upper arms. However, there are so many sleeves with elastic hems being shown now that it seemed an easy adjustment to make. I added a casing and some 1/2" elastic to make the hem elasticized.
One more thing to note. I didn't adjust the neckline so that it would sit closer to my body. I like wearing a tank top under the dress. Especially since for this one I can use the solid color as a focal point for this very busy print.
A Few Pictures ~
As of right now I have no plans to make this pattern again...but never say never! *LOL*
...as always more later!
Thursday, December 22, 2022
Think Twice, Cut Once...
Originally I titled this post, "Remaking" but as I got into it I realized that Think Twice, Cut Once is way more appropriate. As you know fabric drives my creative spirit...and I've been looking for a fabric like this for awhile. It reminds me of some Dolce & Gabbana dresses from a few seasons ago.
Anywhoo, I found this RTW duster on HSN for sale. The fabric was everything I'd been looking for but hadn't found for an exorbitant price. So I purchased two of the largest sizes which were a 2x.
They arrived in a few days and I spent a couple of evenings ripping them apart. There was enough fabric to make a short sleeve maxi dress...the summer maxi dress of my dreams.
That was the easy part. Deciding exactly what pattern to use, making sure that there was indeed enough fabric for my hopes and dreams, and then pinning and laying everything out, going over it several times, before finally taking a deep breathe and making those first few cuts...
Here is what I ended up with...
Now how did I get here...
First the pattern:
I used my Christine Haynes Verano bodice for this dress. The skirt is made from the two back pieces of both dusters. They had the length and width I needed plus a bonus they were already hemmed.
This is the third time using the Verano pattern so I would say it's reached TNT status. The title of the post, Think Twice Cut Once, is because I had to cut the backs twice. I thought I had two different backs but ending up cutting two of the same side. Not good.
Supplies:
Fabric ~
Using this fabric is like working with a border print, so I had to slow down the construction a little to think about how I wanted the finished dress to look. Also what I was willing to put up with since I had no extra fabric to pattern match!
To cut out the fronts, I used the already cut, interfaced and topstitched fronts...
The backs came out of two of the duster front pieces. I used the remaining front to cut facings. Yes, facings.
Piping & Buttons ~
In my mind's eye, I'd seen the bodice with piping and matching/coordinating orange buttons. I just KNEW I had both in my abundantly equipped notions stash. Well yes and no...
I did have an orange ribbon that had polka dots on one side and was solid on the other. I could make the coordinating piping using the ribbon and some purchased piping as the insert.
I did have a cache of orange buttons...but none worked. That meant I was going to resort to my favorite button matching method - covered buttons. Which I do have a stash of for moments like this. However, when I went through the plastic bin that holds my covered button making stash, I found a bunch of other buttons in the bottom.
While the buttons don't match, they do coordinate with the fabric and the piping that I'd inserted. So I used them because I'd been dragging my feet on making the covered buttons.
Next I used facings to cover the piping. Since my fronts were already sewn down I needed to move away from the instructions and figure out how to make it work. The facings solved my issues.
Once the bodice was complete adding it to the skirt was no problem...
Here are my remade RTW dusters...
I thought this was going to be a quick one day project even with the piping. However, when I cut the backs out wrong, I set the dress aside and decided it could wait for my sewcation. BTW, RTW garments whether purchased new or thrifted are a great source of interesting fabric. And in this case solved a fabric desire and ended a chase.
I'm thrilled with the finished garment. While I wanted short sleeves, once I chose the Verona bodice, I decided I didn't want the "challenge" of making and fitting a short sleeve to the bodice. It was supposed to be a fun, easy sew and I'd already complicated it with the piping & possible covered button situation.
I finished this garment during my Summer Sewcation. As mentioned before, I didn't feel like taking pictures earlier this fall. So here I am - sharing them now before 2022 becomes a distant memory!
...as always more later!