Showing posts with label sewing tools. Show all posts

Monday, May 18, 2015

Curvy Sketchbook by Cashmerette

I was gifted both the small and larger versions of these sketchbooks for my upcoming birthday. However, I would have bought them both anyway, to support my friend Jenny.


I think that it's an awesome idea that she decided to make the croquis full sized so that us curvy girls can get a better idea of how garments look on our fuller shapes when we're imaging/dreaming/designing our own new garments! 

I'm sure you're asking why I would have bought both versions ~ but hey one can go in my handbag for when I'm shopping in the garment district, or dreaming up new ideas on the bus, or daydreaming at my desk. The larger version allows me to keep it in the sewing cave and to add a swatch, capturing all of the pertinent information that I need to sew/create a new garment.

We've all seen the other sketchbooks that have swept through the sewing community. However, can I state again that this one is for us curvy girls. If you want to own a copy of either version or both, please order them here. They are presently 20% off so get one now... you won't regret it.

Finally, I need to say that I only endorse products that I actually use and believe in. I've known about these sketchbooks from the inception through the actual publishing. It's a wonderful tool to help with planning your creations and worth spending your precious sewing dollars on!

...as always more later! 

Saturday, August 09, 2014

Pimping Out My Ironing Board Cover

A couple of weeks ago, I bought a new ironing board after my older one faltered. I set it up and started to use it when I realized something was missing.  See I'd added extra padding to my old ironing board and my new one was definitely missing it. 


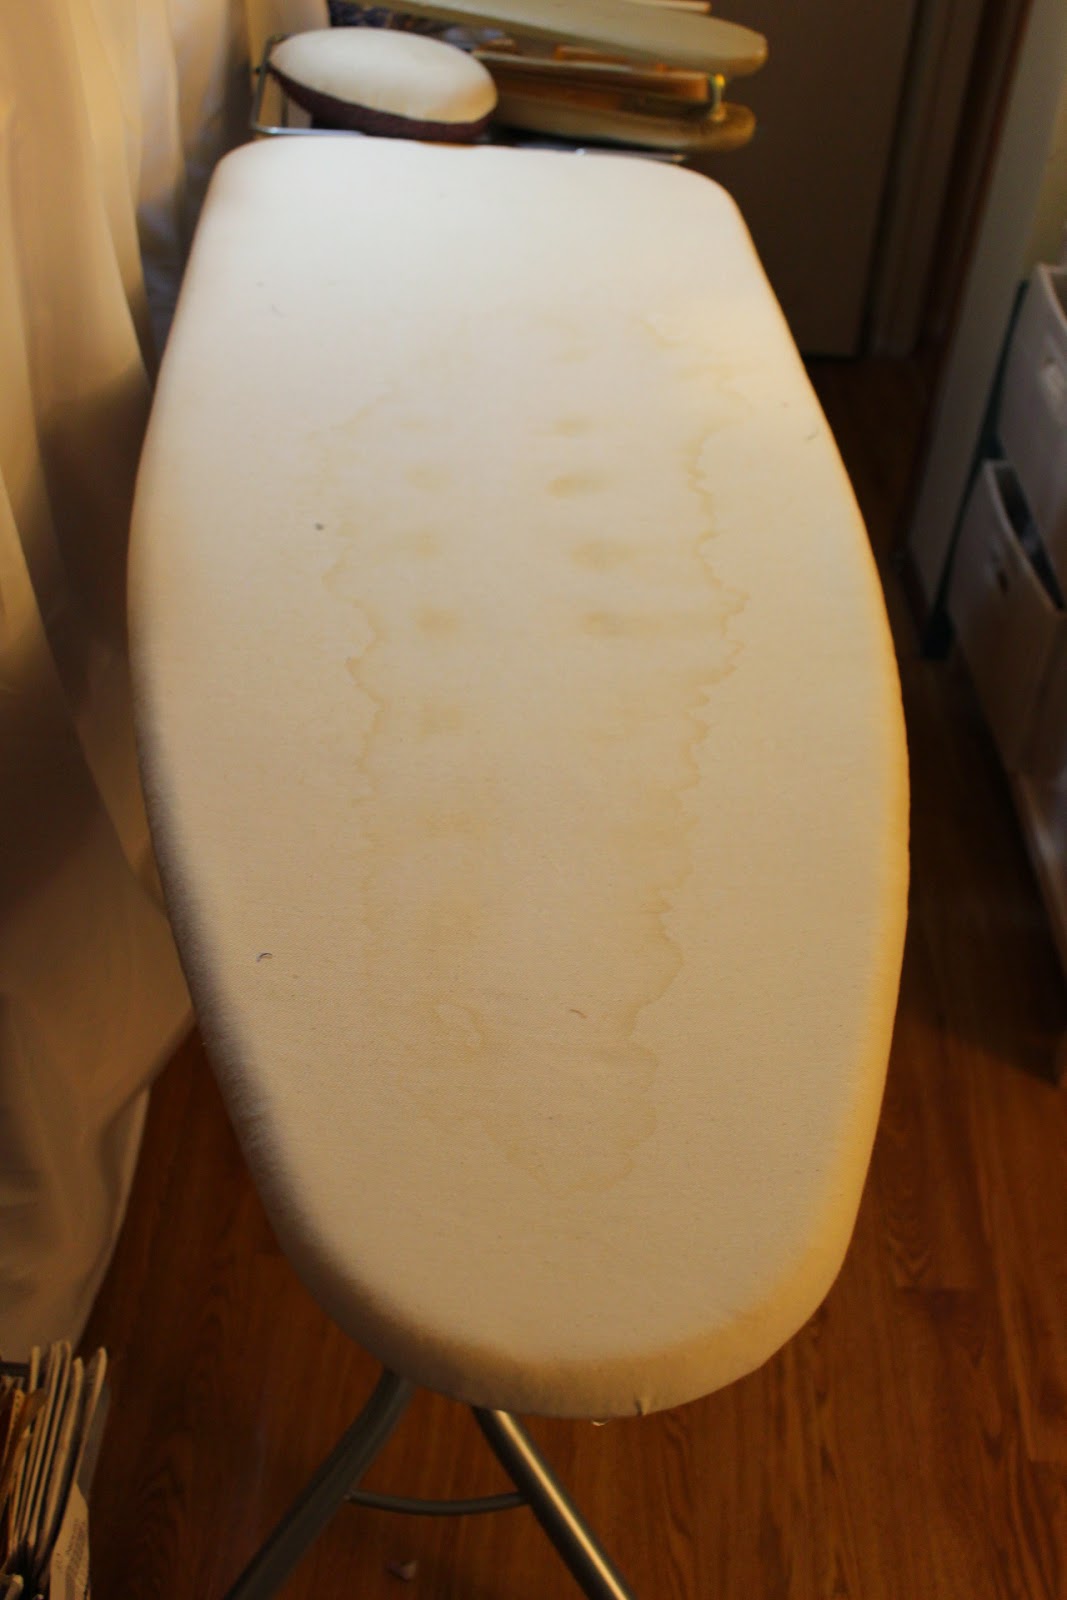
It's thin and every time I used the steam feature on my Rowenta it left drippy marks on the muslin. See the photo below...


So to solve this situation, I bought another cover and added to the top of the ironing board.  Even this proved to be a little thin.  So I added a layer of batting which was taken from the swag bag we were given at The McCalls Reception...the tag on the batting says it is Bosal - Foam, Fiber, Interfacing and Crafts.


Then the second cover was added.  


I love the extra layers on the ironing board now.  I can steam without the steam bouncing back to the top. I can stick pins into the ironing board and they stay! Hopefully this ironing board will serve me faithfully for another decade.

Has anyone else ever pimped out their ironing board?

...as always more later!


Tuesday, December 27, 2011

Before and After


I made this Michael Kors knock-off dress earlier this year.  It was scrimped out of 2 yards of fabric and I really believe that I shorted the sleeves because they were always tight.  However, when I went to put the dress on earlier this fall, the sleeves were just too dayum tight.  Part of the problem was definitely the trim that I added to the sleeve's hemline and I guess the other part would be that my biceps have gained in bodaciousness.


Anywhoo, I decided to remove the sleeves...I mean it's a perfectly good dress that can be worn sleeveless with a cardigan.  

So here is the before:

...and here is the after:


I simply removed the sleeves. Pressed down the 5/8" seam allowance, stitched it flat and then pressed it again.  It has only slightly changed the look of the dress especially since I'd styled the dress before with a cardigan. But it will still be wearable and that's what's most important.


Finally, one of my Christmas gifts was an American Express Gift Certificate which I promptly took to Bed Bath & Beyond and bought a new Rowenta iron.


My old one was leaking and caused me much grief during the construction of the Christening Gown.  I'm glad that I bought it because there is a vast difference in the amount of steam the new one is putting out versus the older one...and I never even noticed it!


Finally, it's the last week of 2011 so the next couple of posts will be my yearly wrap-ups before we barrel into 2012.


...as always, more later!


Wednesday, November 23, 2011

The Right Tool for the Job

Do you ever think about why a sewist needs so many tools?  Do you really need 3 or 4 pairs of scissors when a single pair should do the job?  Why do you need several pieces of pressing equipment to press open a seam?  Several different types of pins?


I used several different types of sewing paraphernalia to get the faux leather accents to work just right on my recent dress.  First up was my silk organza pressing cloth.  This allowed me to press with steam the leather without ruining the fabric...yet I was able to add enough steam to mold the leather around the dresses neckline and the sleeve hems.


My duckbill scissors were also very helpful with insuring that I cut only the excess fabric from the seam line.  I didn't want to cut away any of the underlying fabric or cut too closely to the seam line.  I love these scissors whenever I need to clip or cut in close quarters.


So when you're sewing your next fabulous outfit, think about how many tools you use to get that outfit to look just so...and remember that using the right tool for the job is what really makes it easy to achieve that look!


...as always, more later!

LinkWithin

Related Posts with Thumbnails