Saturday, November 20, 2021

Another Cardigan + A Swingy Tee

Prior to Covid, cardigans played a huge part in my wardrobe.  I threw a cardigan over a shirt, tee or turtleneck and wore those layers over skirts and pants.  I even wore a lot of cardigans, aka Michelle Obama, over a dress in my Corporate Days.  Add a pair of pearls and pumps, you were professional and ready to go! 

While I was home for 18 months, I only wore the old junky cardis which were also worn as a layering piece.  I haven't actually thought about making more even though I own several TNT cardigan patterns, because they used to be an essential part of my wardrobe.  

So of course in the unsewn cut pile I moved last year, there was one last cardigan cut out. Since it's in my blue color scheme and perfect for back to work wear this spring, I started working on it Mother's Day weekend.

The cardigan was cut from Simplicity 8059.  I've made 8 versions from the pattern.  All but one of them remain in my wardrobe.  The vanilla cable version pilled so badly that I let it go. I love this cardigan because it's a simple throw on, easy wear cardigan that can be made from any kind of knit fabric. I have used ponte, wool jersey, velvet, sweater knit and even made a border print ponte version.

It's everything I like in a pattern. Easy to wear, made for simple variations (changed up the closures) and can be sewn in a variety of fabrics. It's been sitting for a few months, waiting for the temps to cool down so I could photograph it. Like with everything else I've sewn lately, this has already been worn out and about.

Supplies ~

Pattern: Simplicity 8059 which is out of print

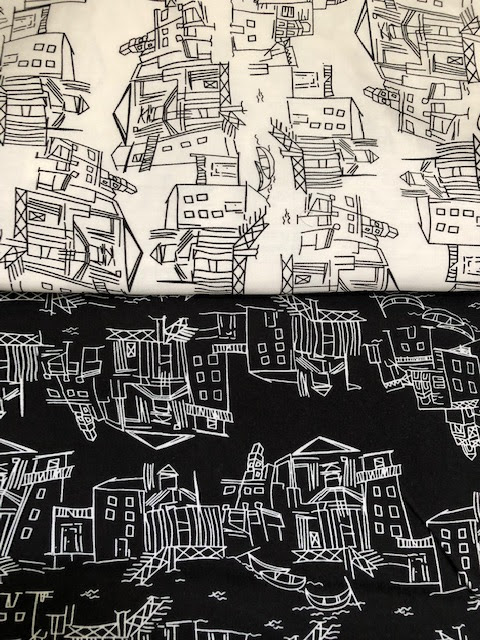
Crochet knit fabric purchased from Fabric Mart

Black Silk organza from Thai Silks

Black fusible stay tape from Design Plus

Construction ~

For this cardigan I sewed the sleeves in using the flat application.  My favorite method. It's so much easier to get a knit sleeve in without puckers if you use the flat sleeve sew-in method...well to me!

Also because it was a knit, I used the silk organza facings that I'd use in my last version.  However, I did not add the fusible interfacing. Sewing wrong sides together, flipped in, pressed flat and then the fusible bias tape was added to insure the neckline did not grow...


I also used the fusible stay tape to stabilize the neckline of the cardigan...


Since this is a special knit it needed more techniques to insure that I did not stretch out the neckline or mishandle the application of the sleeves. So I added Seams Great to the neckline to stop the stretch.

Honestly, I have a few challenges with the finished cardigan - I've gained a few pounds since it was cut so it doesn't really close well.  Then I added the ties up too high on the v-neckline.  I've worn it and it didn't really bother me but aesthetically it's annoying.  However, not annoying enough to go in and fix it! *LOL*

A Few Pictures ~


A Swingy Tee ~

This is my Pembroke pattern that I added a couple of inches from the waist to the hemline on the front and back pieces by using the pivot and slide method. When I cut this out, I really wanted an easy slip on top to wear over jeans or leggings while working from home.

However, it pairs so well with the cardigan I've worn it to work this way. Though to be honest I've worn the top more than the cardigan. It's such a great layering piece and I definitely want to make more of them, possibly with a cowl neckline.

Supplies ~

Pattern:  Cashmerette's Pembroke Top

Fabric:  100% cotton knit from Organic Cotton - this has been in the collection for a few years and deserved to be sewn.

Construction ~

o The thing I like about Cashmerette Patterns is that the construction is done with a flat application.

o As always, I add some stay tape to the shoulder seams to stabilize them.

o I omitted the cowl AND the neckband facing.  Instead I turned the neckline down 1/2", pressed and used a twin needle to hem it.

o To make the swing, I did a pivot and slide from the neckline on both the front  and back pieces.  I slide it about 2-3 inches from the fold to gain the swing through the waist and hip area. 

o The sleeves are perfect for pushing up when wearing alone or wearing a little longer under the cardigan.

A Few Photos ~


This is another one of those outfits it's taken me forever to photograph so I've worn this top a few times already. But I love the extra swing in it because it's comfortable...and honestly comfort is more important to me than almost anything else these days!  Comfort with a little style are my guiding sewing lights now.

Finally, thank goodness this outfit has been blogged!


...as always more later!


Sunday, November 14, 2021

Do You Presew?

There hasn't been a "Question of the Day" posted in awhile so I thought it was time to have a good question to discuss.  See as I was choosing fabrics and matching patterns for my next cutting session, I started to ponder on this.  I realize that I think about the cutting and sewing process as I'm making my project choices.

To me my most successful projects are when I've thought out the pattern alterations, how I'm going to cut the fabric out and the sewing order BEFORE I've done a thing. I do a lot of "presewing" way before I ever get to my sewing machine to do any actual sewing. And as I was working through my next set of projects starting with making a "To Sew List", I wondered if anyone else presews?

Of course this leads to several more questions.

  1. As previously discussed, do you cut one project at a time or do you make a cut pile?
  2. If you make a cut pile, how many projects are normally in the cut pile?
  3. When you're cutting out your project, do you compartmentalize the process?  You know only thinking about one task at a time?
  4. Or do you visualize your project all the way to the end ~ again presewing?

As always, I'm interested in hearing/reading your and hope you will share them with me.  So talk back to me about the "Question of the Day - Do You Presew?"


...as always more later!


Monday, November 08, 2021

My Sewing Spaces are Done

I've been dragging my feet for months, trying to avoid dealing with the boxes and stuff accumulated in the loft after moving my sewing machines downstairs. The Loft had become a storage space while I dithered on what to purchase, how to get it assembled (does NOTHING come premade anymore!), and then sorting through the boxes.

As each new item was purchased and assembled, the dream of the Resource Center became more apparent yet seemingly even further away! I made my last purchase Friday and spent the weekend, going through boxes, sorting things out and making a donate pile for clothing.  It seems as if it's taken forever to get to this finished point.

A Little Backstory ~

Once I dissembled my "Dream Sewing Room", moved the sewing machines and cutting table downstairs, I realized that ALL of the extras (patterns, fabric, notions) could be stored in the Loft. However, to get it to work, I needed to buy more stuff to organize the items in both the Loft and the Sewing Room.

I bought:

- a 5 shelf bookcase for the Sewing Room

- 2 9'x12" wire grids for the Sewing Room

- 3 filing cabinets to hold patterns in the Loft

- a bunch of totes in various sizes to hold miscellaneous things in both the Loft & Sewing Room

- a 30 lb garbage can on wheels to store scraps in (there were several boxes full of scraps that I had stored here)


The Resource Center Now ~

Patterns and more patterns are stored in and on top of the filing cabinets
as well as the grandkids games, coloring & sketch books and crayons

The table (things on top need to be disposed of) 

A photo with the curtains open so you can peep some of the fabric

There are still two bins of fabric upstairs on the far side of the table holding coating & fur fabric. I emptied nine bins of scraps and fabric that somehow got shoved onto the shelves. Whatever extra fabric space I had is gone now! Look at that tower of fabric on top of the shelf by the doors. Almost every new purchase has been added there. 

I still want to add some better lighting (I already own) just need to move it upstairs and buy some folding chairs. But I believe it works now. It's doing double duty as a spot for the grandkids to hang out, color, play games and watch TV when they visit for the weekend...and a place where I can pull fabrics, patterns and match notions to them.  Most importantly, I can move around and touch all the fabric. Doing a lot of pre-work in the Loft/Resource Center will allow me to bring it downstairs to just cut and sew.

The Sewing Room Now ~

Yes, I primarily work from home here 
Though sometimes I work from the sofa too...

The set up for my Janome 9450QCP which I primarily sew on

Cutting table and bookcase that I use to store pressing 
things, threads, patterns and extra fabric

Just need to add the Mixtiles I purchased last fall and some pictures from the Sewing Cave to the walls and I'm done.

I'm thrilled that the majority of the work is FINALLY completed...just 14 months after I moved in! *LOL* However, having everything in it's place has removed some of the stress I was holding on to. Isn't it amazing how having things out of sorts affects your creativity?  

Anyway, that and a new order of fabrics from StyleMaker Fabrics has reignited the sewjo. 


I bought 3 yards of Abstract Brushstroke Sweater Knit Blue/Chocolate to make a cardigan. This Cozy Wool Double Knit Solid Cranberry is what starting the buying spree and I bought 4 yards of it. No plans for this yet but a few ideas percolating. Four yards of Cozy Wool Blend Double Knit Espresso, I want a warm maxidress from this. Y'know for those cold wintery days in January, February and March when I'm working from home. The last one is a functional piece but you always need black in your wardrobe. At least I do! It's four yards of Soft Reversible Sweater Double Knit Solid Black again no plan but necessary for new sweater pieces this winter.

I'm making a list. Freeing up some weekends and planning to sew to my heart's content. That's what I've been up to the last couple of weeks. 

There is one more garment post from my previous sews and it's up next.

...as always more later!


Thursday, November 04, 2021

Panel Print Magic

This shirt has been finished for weeks. It's taken time to get another appointment with my daughter to photograph it. Technically it should have been photographed with the last bunch of summer dresses but that day was so dayum hot, I just couldn't handle wearing it for pictures.

Y'all know I love panel prints, border prints, directional prints, any fabric really that makes me think outside the box when using it. So of course in August during the Fabric Mart shopping spree, border and panel prints were on the top of my purchase list. I've recently acquired quite a few border/panel prints from Fabric Mart and many have made it to the blog ~ here, here, here and here.   Also, if you're new to the blog, I've written several blog posts about working with border prints, just follow the highlighted link.

For this panel print, it was the bold floral that called my name. It was such a strong calling that I sewed this up weeks after I got home. 

Supplies ~

Pattern:  Vogue 9299

Fabric:  6 cotton sateen panels from Fabric Mart's brick 'n mortar store

Buttons:  12 black domed 5/8" buttons from MJ Trimmings

Interfacing from Steinlauf & Stoeller

There are no new construction techniques in this make. For this tunic it's all about the fabric placement. 

So I'm sharing some of my construction/pattern placement pictures...

Laying the pattern pieces out to get the best placement

Matching the print on the back

Matching the print at the sleeve cap to the shirt body

Front using a sliver of the black fabric 
to add contrast to the front

Back with the yoke added to it

A Few Photos ~


I've worn this tunic to work and received a couple of compliments on it. The tunic makes a dramatic statement that's tempered by the solid black sides which add a slimming effect to it. This is the reason I love border prints and panels so much! 

It's not the last time I will use this pattern this fall/winter because it works perfectly for my lifestyle. I have more ideas using prints & stripe placements to make it sing! Plus can you really have too many comfortable tunics that layer well during the chillier weather?


...as always more later!

Monday, November 01, 2021

Style Arc Hope Dress

Like many of you, I own a lot of patterns!  And as you know in 2021, I've been on a mission to sew more new patterns and not just use my TNT patterns.  Since I've accumulated quite a few Style Arc Patterns, they've been on every one of my to-sew lists.

This Style Arc Hope Dress is one more that made the list and my summer cut pile.

(The Model Shot - hahahaha!)

I was attracted to the embellishment possibilities and also because I love a big loose dress in the hot/humid summer.  While I cut this one out in a black/white rayon print, luckily it works well as a transition dress too.


Supplies ~

The coordinating black & white fabric was purchased in 2016 from Marcy Tilton's booth at Sew Expo in Puyallup.

9" black invisible zipper

black corded piping purchased from Daytona Trimmings

All of the supplies for this dress were in-house. I didn't purchase anything to make it happen and that makes me proud!

Construction ~

This is an easy to construct dress.  There are over 300 versions on IG.  You can see them here.  I, of course, complicated my dress. First, I added an invisible zipper to the dress bodice back. I HATE, HATE, HATE, loop and button closures on the backs of tops and dresses. They always make me feel like the button is going to pop open and my back will be exposed. So it was the first thing that had to go.

Even though honestly, I didn't need a back neck opening. My head slides into the dress easily. Meg from Cookin and Craftin did that with her version and I understand why she omitted the back closing.

I was really intrigued by Birdy's version where she added piping to the front and back bodice sleeves. I knew I had to do the same. Birdy used piping that was the same color as her fabric. I wanted piping that would incorporate the black into the white top so I contrasted mine.

Otherwise, all of the sewing construction is the same. I even added the pockets because I was intrigued by how they came together. Totally understand why other sewists are using this method when adding side seam pockets because it gives it a little more elegance.

A Few Pictures ~


Conclusion ~

This is a one and done dress.  While I like the idea of the pattern, it's not a dress I want to own several versions of. Also, mine is just a little too loose. I think I cut a size 26 and could have gone down to a size 24.  Here's a good photo of how much fabric there is...


If you're looking for a dress with a little more fitting, my version ain't it! Will I wear it?  Sure will.  Cause you know there's gonna be one of those hot, humid and sultry summer days and this will be perfect because it won't be touching any skin. Right now I'm gonna wear it with a pair of black tights, the boots in the picture and my black sweatshirt hoodie. Perfect for fall!

I also pushed my sleeves up to give them a little more puff so you can't see the elastic hemline. It is the one feature I like because I'm loving big puffy sleeves right now.

We did take more pictures today...so the Panel Print Shirt is finally up next!


...as always more later!


LinkWithin

Related Posts with Thumbnails