Showing posts with label Vogue 8972. Show all posts

Wednesday, August 13, 2014

The Smugglers Daughter Dress or Vogue 8972

About two months ago, I eagerly started this dress.  I made all of the pattern alterations which were quite extensive and detailed them in this post and this one. Then there was the post on how to use a border print and how I cut out the border print for this dress, all of which has turned this into an epic sew. I've used three different fabrics for the dress.  Three different fabrics to make the lining. Some silk organza, a picked zipper application and lots of hand basting...to end up with this...


The Beginning~
I was gifted this fabric by the Smuggler's Daughter and some is still available on the site. I wanted to make something special with it. I probably should have gone a little less epic but it was worth the journey, even if I had to take a short break to regain my inspiration.

Fabric and Notions ~
The starting pattern is Vogue 8972


Fabric:
The Smugglers Daughter border print
Gray medium weight linen from the fabric collection
Black medium weight linen from the fabric collection

Notions:
22" black zipper
Lt. Green piping
White cotton batiste for lining
Gray cotton batiste for lining
Dark Steel Gray bemberg lining

Pattern Alterations and Construction Details~
All of the pattern alterations were documented in the posts mentioned above. However, the construction of this garment is quite detailed probably because I chose to make the dress way more difficult than it needed to be. Let me give you a few details...
  • The black linen skirt front and back had black silk organza basted to each piece...that's seven pieces in total.
  • I tried to use the cotton border print in such a way that it would enhance the pattern of the fabric. I carried it over into the sleeves to give it the greatest impact.
  • The back zipper is black but it was hand stitched in. I knew I didn't want to deal with matching an invisible zipper in two places on the back.  So I hand stitched it using a regular zipper.
  • There are a lot of pieces...to the bodice and the skirt...a lot of cutting...a lot of seam finishing...a lot of sewing them together.
  • The lining has white cotton batiste for the bodice and gray cotton batiste for the center panel then dark steel gray bemberg lining for the skirt.
  • The lining top is seamed but the skirt lining pieces were cut based upon the finished fashion fabric pieces.
  • I added piping to the neckline.  I wanted to capture some of the green blocks that are in the top piece.
  • I did have some challenges with getting the side bodice and the center front to match. I don't know if it happened during the pattern alterations but I cheated and used a little ease stitching to get them to work together.
  • This added a little gathering in the bust area that the fabric's pattern hides.
  • That was a little discouraging and helped with me putting the dress down for a minute.
  • I basted the sides together prior to machine stitching to insure the sides matched.
  • The sleeves went in so easily! Since that was near the end of the dress' construction, it was really great that they weren't a challenging insertion.
  • The sleeve hem is topstitched using a double needle.
  • The hem on the lining and on the dress are doubled and stitched.  The lining is machine stitched and the dress is hand hemmed.
  • Being anal about thread, I changed the thread for each piece sewn on both the sewing machine and the serger.
  • I omitted the topstitching that the pattern suggests.
  • There was a lot of handsewing in this dress - to match side seams, to insert the sleeves, to add the piping,  to attach the lining to the zipper tape, hemming the dress...a lot!
  • Finally, I used a lot of steam to press this dress.  At one point I had to send Lena, precious grand baby number 2, upstairs because there were clouds and clouds of steam fog!
Construction Photos ~


Back bodice sewn to waist insert

Front bodice sewn to waist insert


Sides basted to insure they matched when sewn

Checking the basted back prior to adding the zipper

Dress shell finished

Lining for the dress

Adding the piping to the dress neckline

More pictures of me wearing the dress ~


Conclusion ~
This dress was a lot of work.  I put it down for a minute because it got to be overwhelming. Even now I'm on the fence about the dress. My daughter and I did two photo shoots to catch the dress just right. (As an aside, lighting in the house, in the evening, doesn't even begin to compare to outside shots anymore!)  I loved wearing the dress during the first photo shoot but hated the pictures. During the second one, I realized that the dress is a little too big. I was never going to make it as tight as the pattern depicts it but I went back in and took in the side seams 1/2" on either side in the waistline area.

See I'm trying to expand beyond the simple sheath silhouette that I love to wear. This dress was suppose to help me step outside my comfort zone. I'm not sure if it accomplished it's goal.  I keep thinking back to the fit and wearing ease of the Milly dress, this one just doesn't have that. However, I would like to try it in a ponte knit for fall, I'm thinking it will fall better than the linens I used for this one...we'll see!

...as always more later!


Sunday, July 06, 2014

Cutting out Vogue 8972

The interesting thing about this pattern is that I chose to use three different fabrics for the dress ~ a border print for the top ~ a gray medium weight linen for the center band ~ and a black mid weight linen for the dress skirt.


The Smuggler's Daughter fabric is a border print that needed special cutting to maximize the print and make it most effective for my version of the dress. I used the darkest part of the border print at the bottom of the bodice with the lighter part at the shoulder line.


I reversed the placement for the sleeve ~ using the darker part of the fabric's pattern for the sleeve cap and the lighter area for the length of the sleeve. The sleeves will be unlined unlike the rest of the dress.


A few other things to note about this dress ~

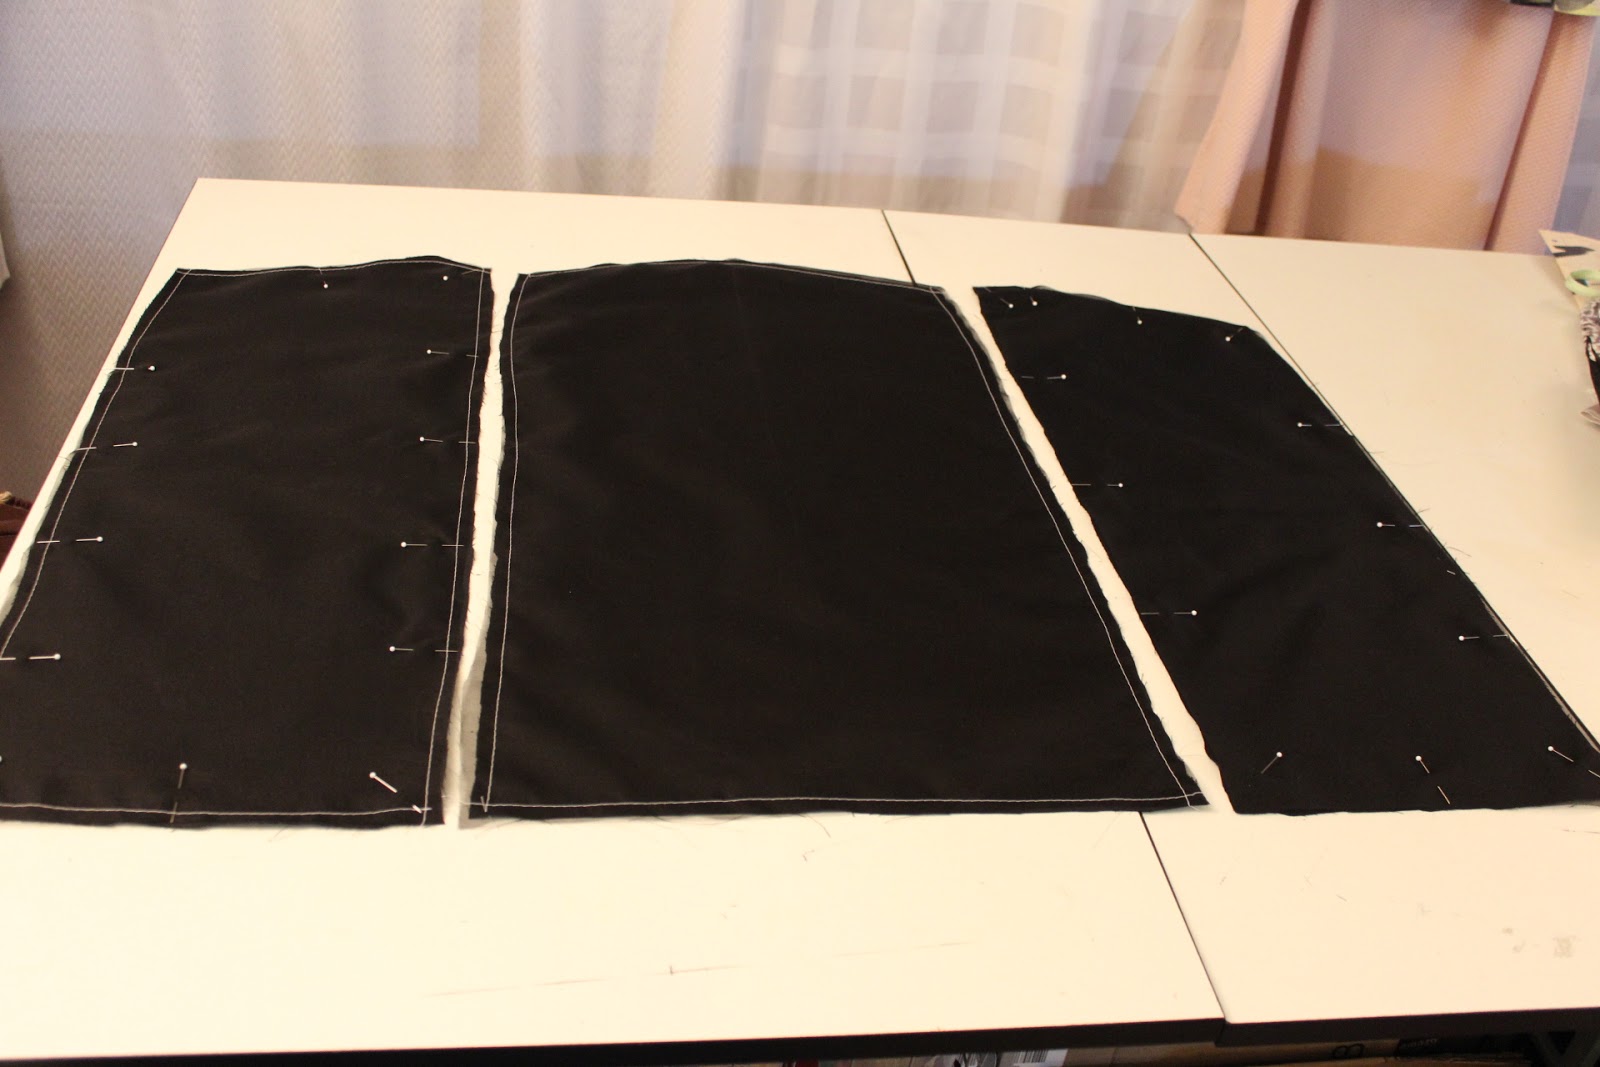
The black linen was used before in this dress.  The reason the fabric has sat on the fabric collection shelves so long is because it wrinkled terribly. I'd planned to use it for another dress but was so disturbed by the wrinkling that I moved on.  So for this version, I cut black silk organza for each of the dress' skirt pieces and basted them together. 

left to right:
1st piece - silk organza pinned and basted to line, 
2nd piece that's already stitched, 3rd piece pinned waiting to be stitched

I will use a rayon bemberg for the skirt of this dress.  Why?  Because being real here it works best with my spanx. Cotton linings catch and rise on the spanx, where the rayon bemberg lays smoothly on top of it. But, I don't like rayon bemberg on the top of my summer linings these days.  Being post menopausal, I perspire differently than I did before.  So I cut a white cotton batiste lining for the top of the dress using my pinking sheers so I wouldn't have to worry about raveling.


The center yoke pieces were cut from a gray broadcloth lining...though that picture is looking more tan than gray...

Yes, that's right the lining was cut from three different fabrics, just like the dress was. I cut the pattern pieces from each lining fabric except for the skirt pieces. Those pieces were cut as one front and two back pieces.

I've already started to assemble the dress so that will be the next post...then the reveal...probably next weekend. 

...as always more later!


Sunday, June 15, 2014

Vogue 8972 - Dress Back Pattern Alterations

As I stated in my last post, there are ALOT of pattern alterations to get this dress to fit my plus size body.  Because the alterations are so extensive and I really wanted to show the entire process, I split the posts into two. Again, let me state that if you're not interested in the process, please wait until the final post that will show the dress modeled. AND one more codicil, this is how I fit the pattern to me...these are my methods which work for me...things that I've learned through trial and error...they may not be what the experts deem the proper way to fit a garment.

Now, the back pattern piece alterations...
  • I used the same starting point for the back pattern pieces as I did for the front dress pieces...my back TNT pattern piece.
  • I pinned the new Vogue pattern pieces to my TNT back pattern piece to determine where I needed to add space to make the dress fit me. 
  • So I pin the pieces on and notice that I don't have a side back piece. WTF? I check the pattern instruction to see if maybe I forgot to cut a pattern piece out.  Nah, I cut them all out!  
  • So I read the pattern instructions maybe I'm missing something. Nope. 
  • Start looking at all the pieces again and realize that the front piece is also suppose to work for the back. 
  • Personally I hate that so I start to draft a new piece but then notice that that after making changes to the center back piece, that the side piece does work for the back too.
  • Now I don't know how well this is going to work on my body...but we're going to see!
Some pictures...


Back TNT pattern piece with Vogue pieces attached

Center back bodice piece with 1" alteration

Back side bodice with 1" alteration

Center back yoke with 3" alterations

Skirt back center back with alterations to adjust for fit

After reading Beth's comment on the last post, I did make a change to the front and back underarm to add some space. I also added some space to the sleeve pattern which I altered using my TNT pattern...we will see how that works out!

Next up is cutting out and construction. As I stated before, this is taking longer to get finished because I'm working on it in real time instead of over a sewcation. Also June has been a bit busy for me!

...as always more later!


Sunday, June 08, 2014

Vogue 8972 - Dress Front Pattern Alterations

You should know this before I write it...I used my TNT dress pattern as the basis to make the pattern alterations to the dress.  Now one good thing about this pattern having so many pieces is that there are plenty of opportunities to fit the garment to me.  However, that also means that there are a lot of pieces that need to be altered.

And as an aside, I understand why if you're plus sized, you sew a lot of knit garments, or garments that don't need as much pattern work. Because honestly, even though this Vogue pattern goes up to a size 22, it is not a plus size pattern.

Since the pattern has a custom fit bodice, I'm using the pattern pieces for the D cup size.

Let's start with a picture or two of the size 22 pattern pieces pinned to my TNT dress front pattern:


Full length TNT pattern with Vogue pattern pieces pieced to it

Waist and skirt bottom pattern pieces pinned to the TNT pattern

Top and waist pattern pieces pinned together

There's quite a bit of changes that need to be made. I started with the easiest piece first the yoke. This piece I sliced in half and added 3" to make it fit my dress front.


For the top bodice pieces, I made two changes. I lengthened the side bodice piece by one inch.


The center front bodice piece was widened by one inch at the bottom notch and two inches at the bottom seam.


I'm making one big change with these pattern alterations for the skirt portion of the dress...instead of using a 5/8" seam allowance, I'm using an inch seam allowance.  I've just found in my last couple of garments that I've needed to sew the seams really tight as in 1/2" to 3/8" seam allowances...so this will just give me a little more room to adjust the fit for me.

Then I added 2" to the center skirt front piece...


...1" was added to the side piece.  All of these additions were done at the inside seam allowances so that I wouldn't affect the basic shape of the dress.


Then I started the process all over again on the back pieces...but since there are just as many changes to the back...I'm going to give it a separate post because this many pattern alterations has got to make your eyes glaze over. Hey they would make mine go blurry!  However, there are some sewists that appreciate seeing the changes made to patterns and how to make them work for a body that isn't the standard. If that's not you, I totally understand! Come back when the title post says "Vogue 8972 - Final" then you know that you'll get to see all the pretty pictures "hopefully" of the finished dress.

...as always more later!


Friday, June 06, 2014

So I've been thinking...

...about what to sew next.  I have the fabric from Smugglers Daughter out on the cutting table with a pattern and it's just not doing it for me...


It's not the fabric but the fabric/pattern combo...and then it hit me.  As much as I want to sew a blouse, I ain't a blouse wearing woman.  Seriously when have you ever seen me in a blouse.  I think I've sewn a shirt or two on the blog.  Maybe if I had a different lifestyle but this current one...mmmmpphhh not so much. However, I really want to use my "gifted fabric" next.

So I went back to my first love - a dress.  I sketched something that I got reasonably excited about and then I realized I had to have a pattern that looked like my sketch...and sure enough I did...Vogue 8972.


This dress is so me...probably why I bought it at the same time that I bought the Vogue 8995 pattern...and look how well that turned out!  So as I thought about it...worked out a few things in my mind...I've come up with a plan. Here's what I'm working with...


My colors aren't looking too true but it's the Smugglers Daughter fabric on top
a gray medium wt linen for the center band
and a medium wt black linen for the straight skirt

I've made a few notes on design and construction ideas in my handy sewing journal...and I'm pretty excited.  See this is the thing...I own a lot of clothes because I sew a lot. The challenge of making Vogue 8995 thrilled me.  Since I own so much clothing, I should be indulging that "challenge" thrill more often because it's not like I "need" anything.  Therefore, my next couple of makes are going to take a minute because they are going to be quite involved...and sewn in regular time not over a three day weekend!

Also, I've decided to try and use a current pattern when I dream up a new idea.  I buy them...I really should use them.  So even though I'm pulling fabric from the collection...if you see a pattern that I've made up that you like...at least you can sew your own version.

I'll be working on pattern alterations this weekend.  Hopefully I can get the fabric cut out too!

...as always more later!


LinkWithin

Related Posts with Thumbnails