Showing posts with label Designer Inspired. Show all posts

Sunday, June 12, 2016

An Eyelet & Lace Skirt

I saw this skirt on the Ann Taylor site months ago. I knew I had a piece of blue cotton eyelet in the collection. All that I would need to make my own version of it would be a similar lace...and for the temperatures to get a little warmer.


Well the temps are finally summer-like here, so over Memorial Day weekend, I made my version of the Ann Taylor skirt.


Worn with a RTW t-shirt 

Supplies ~
2 yards of cotton eyelet from the collection via Fabric Mart
2 yards of rayon bemberg lining from the collection via Michael Levine fabrics
5 yards of embroidered lace trim from Joyce Trimmings 
1 yard of 1" non-roll elastic
Pattern- TNT 4 gore skirt pattern

Construction ~
My first challenge was to determine if I wanted the skirt lined or underlined.  I went with underlined to make it easier to handle the seams. After the pieces were basted together and then serged to finish the edges, the skirt went together easily. I did add rayon seam binding to the edge of the skirt's waistline before folding it over to insert the elastic. I just wanted a clean finish on that edge.


The most important feature of the skirt is the lace at the hemline. To attach mine, there are three rows of stitching to keep it laying flat on the hemline. A lot of thread that's basically invisible but I felt necessary to keep the trim on the skirt. I love the transparency of the lace at the hemline.

Some Pictures of the Skirt ~


One of the reasons that I wait to take pictures with my daughter is because she makes 
me so relaxed and keeps me laughing while we're doing this. Also she thinks 
I'm beautiful and I think it shows in the pictures she takes!


Conclusion ~
I knew when I came across the skirt online that my TNT 4 gore skirt would work for interpreting this look. However, if you want to make one of your own and need a current skirt pattern to achieve this look, try this one:


Burda 6766 (Pattern envelope)

...or this one:


Simplicity 1200

Both of these have the silhouette you would need to interpret the Ann Taylor skirt.

The best thing about this "simple" silhouette is that once again it had some details which made it interesting to sew. I can sew "fast and easy" but it doesn't satisfy as creatively as the more complicated sews do.  This skirt will work fabulously in my work wardrobe with some slip on sneakers or it can be worn hanging out with friends with heels.


I wish I remembered how much the skirt cost because it's no longer on the website, probably in the $99-130 range, since that's an average of skirts presently on Ann Taylor's site. 

My skirt totals are: 
$30 for the fabric & lining 
$40 for the lace trim 
$5 for the notions
total cost $75 

I definitely saved by making my own version but the important thing is that Ann Taylor skirts only go up to a size 14-16, so I couldn't have purchased this anyway. Even though this wasn't a cheap knock-off, I'm thrilled that I've found a way to interpret RTW and/or designer goods again for this stage of my life. 

One thing though, because of the lining and cotton eyelet this skirt is a little heavy and warmer than my normal summer skirts. I know why AT showed this as a spring skirt now. I just couldn't wrap my mind around the fact that it would work in spring like temps. Now that it's officially summer weather here, this might not get worn until September, and I'm fine with that. Hey it gives me a new piece to start my fall wardrobe with...but it is the dangers of not sewing spring garments earlier in the year!

...as always more later!


Tuesday, November 03, 2015

I'm Not Having Enough Fun Yet

What do I mean by this? I'm gonna start at the beginning...see I'm still eating soft food and frozen yogurt is a favorite.  My all time favorite frozen yogurt joint is Pinkberry.  I loves me some Pinkberry.  When I moved to the Herald Square area I thought I would nevah have Pinkberry again until I googled it and found out that there's a Pinkberry in Macy's.  Yeap on the 7th floor between Women's and Children's - Pinkberry.

Normally, I use the 33rd Street & Seventh Avenue side door, slide into the elevators and make it down the main aisle to Pinkberry. Gotta have my frozen yogurt crack...but today I decided that I wanted to ride the escalator up to the 7th floor cause I didn't want to rush back to work. Y'know sometimes you just need a minute...

So on the third floor, the Vince Camuto shop caught my eye and I stepped off. Then I wandered around headed for the INC department but this stopped me in my tracks...

...so I stepped into the Rachel Rachel Roy shop and just gazed in awe at the beauties.  The garments were so cool, yet casual and perfect for my new lifestyle that I realized, I'm still not having enough fun with my wardrobe yet.

See in my head, I've known that I've wanted to use some of my corporate menswear fabrics from my fabric collection in cool and funky ways. In Rachel Roy's shop there were quite a few pieces like that and I want to make my own versions of them. The one above uses a menswear plaid for the bodice, a striped shirting for the skirt and sheer fabric for the rest of it.  IF I made it exactly like this, I would wear leggings (my new favorite piece of clothing) under it.

Then there was this one ~

It's a sweater knit top with a plaid shirting attached to it at the waistline. I have a few sweaters that I was wondering what to do with them and now I know the fate of at least one of them!  Of course my dress will be a little longer in the front worn with some tights...but isn't this just funky and kewl!?!

This is a dress on the website but when I picked it up I thought cool tunic!


Made from a neoprene or a ponte with lots of topstitching. Add a cool zipper/zipper pull with some sleeves to wear over a pair of slim pants or some leggings...yes! I even love the burnt orange color.

I could have wandered around for another hour or two, because I saw a faux leather tunic with a suede pocket, a black 'n white asymmetric top from a lightweight ponte with a zipper inserted at the hemline on an angle and loads of floaty tops.  However...Pinkberry was calling!

As I rode the escalator to 7, I realized that I'm being pedantic about sewing new pieces. I still haven't grasped that I can sew "creative" casual clothing...that just because my fellow employees embrace the jean/tshirt or jean/plaid shirt look, it doesn't mean that I have to also...especially because it just doesn't feel like me.

BTW, I did stop and speak to the saleswoman to check on sizing.  Rachel Roy doesn't presently have a plus size line but the saleswoman said that RR is working on one. Even though these aren't pricey goods, I couldn't purchase them if I wanted to!  Sewing my own versions is the only way to get them!

Now I have some more direction...some new inspiration and later this month some time off to do a little sewing...and I Can't Wait!!!

...as always more later!


Tuesday, September 30, 2014

Tri-Color Ponte Dress Final

In the week's time between cutting out the fabric and stitching it together, I realized that I did not like the color combination I was using.  I couldn't figure out what was wrong with the combo except that it didn't pop for me.  So I changed it up a little, resulting in this dress ~


Now this dress has a lot of color and not what I normally wear to work. However, how many black dresses can I own? This dress also has a tighter fit and a slimmer silhouette due to the seaming and my fabric choices. 

There are no new sewing techniques in this dress.  Yet another reason for sewing a TNT dress - no fitting challenges and no sewing surprises.  It is also an exercise in lazy sewing. Originally I was going to add a lining...once I was actually sewing the dress...nope didn't want one.  I considered adding fusible interfacing to the center back seam for the zipper...nope didn't add any...and the dress turned out okay. Turned down the neckline seam and the hemlines at the sleeve and dress hem, added some stitch witchery in the hems and topstitched them down.

See sometimes I just want to sew up a cute dress.  I don't want to get involved...lose myself in construction details...sew, rip and sew again. Sometimes I just want to sew a cute a dress and that's just what this dress is.  

So some stats...
Pattern ~
TNT dress pattern altered from an already altered version of the pattern.

Fabric ~
Berry ponte from Fabric Mart
Black ponte from Fabric Mart
Black & White print ponte from Fabric Mart

Notions ~
22" berry invisible zipper

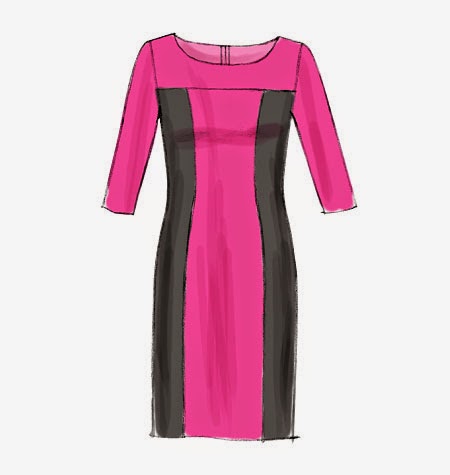
Here is the inspiration dress again ~


Besides the color and print changes, the designer original sells for $995. It's made from a 53% wool/47% rayon blend and is unlined. My version is from rayon/lycra ponte blends and costs about $20. Approximately $18 for the fabric and about a $1 for the zipper all from The Sewing Cave.  In my book this was a very successful interpretation of the designer garment.

A few more pictures of the dress ~


I know we say all the time that we shouldn't point out the faults in our garments, but I'm so-so on the sleeves.  They could be better...but since this is lazy sewing...they are okay...and I will wear the dress as is.  What's really interesting is that everyone who saw me in the dress said how pretty it was. I really think the color combo is so striking that it's what you notice the most.

Next on the cutting table is McCalls 6988.  


I have two versions planned - the one discussed here and another one that I want to try with some knits first.  These are involved sews so it will be a minute before the finished garments appear on the blog.

...as always more later!


Sunday, April 27, 2014

Sunday in the sewing cave...

Four days on antibiotics and I still don't feel like myself.  I spent yesterday catching up on things around the house that culminated with a trip to Home Depot.  Taking care of a house is a lot of work.  I understand why I lived in an apartment for so long!  Somethings not working you call the Super. Something not working in the house, find someone to fix it...and a lot of trips to Home Depot or Lowes.  Thank goodness I live in a condo with an association so someone else handles all of the outside responsibilities!

That leads me to this...


The only sewing I've done in two weeks.  This is the pantry in the kitchen.  It use to have a folding door on it. It fell off.  We tried everything to get it back on.  It kept falling off.  The tension rod and curtain is the solution. 

...and of course since I've been sick I haven't felt much like sewing...even with spending some considerable time in the sewing cave yesterday.  Finally this morning, I decided that I should work on this dress. I pinned it to Pinterest 9 weeks ago.


In that time I've managed to collect a black 'n white lace ponte from Fabric Mart (which is of course sold out) and a Sophia black double knit from fabric.com.


I will use the pattern alterations that I made to my TNT dress pattern for the black pleather and ponte dress for this version. I'll just add short sleeves.


I love this black pleather and ponte dress.  It's easy to wear and I feel very professional in it.  I'm making a ponte dress now because while the temps are rising, there is still a very up and down feel to the weather, so a ponte dress will work for a few more months.

Like I said a post or two back - I have another idea for the Oona Fat Quarter Challenge but I need to get a win under my belt before I go there again.  I also need to get the Deer & Doe Plaintain tees made up for my coworkers. Actually I thought about working on them today but again, I need a win before working on something that could shut down my fledgling mojo.

So this is what I'm working on today, in the sewing cave, while the NBA Quarterfinals play on the TV.

...as always more later!


Sunday, March 23, 2014

Inspired by Olivia Pope

Of course, I'm totally unable to make a simple garment.  I've made a few subtle changes to my version of the inspiration top which was highlighted in the last post.

After using the last week to think about the top, I decided that my version is too tight. I added side gussets to give myself 2.5 inches of ease and make the top fit more like a tunic. I also added black piping to the neckline. Finally I left the sleeves fitted...some because I was too lazy to take the sleeves out. They are perfectly inserted and I was loath to remove them. After trying the top on, I liked the slimmer sleeves, so they stayed.

A picture of me wearing the top with my little black dress...


Stats:
TNT dress pattern shortened to tunic level

Fabric:
A satin finish silk/wool gazar lace print designed by Milly purchased from Elliot Berman

Notions:
22" invisible zipper shortened to 18"
black piping
white bemberg lining
ivory rayon seam tape
white bias binding
(BTW, all of these items are from my notions stash!)

Construction:
I thought I would share how I added the gussets to the sides of the top. I started by cutting a 17" x 2.5" wide strip. I made sure that the bottom of the strip was the same as the bottom of the top so that the print would match up. Pictures of the insertion are below...

I opened the side seams up to the bust dart

Added the 2.5" rectangle using 1/2" seam 
allowances ending in a triangle in the bust dart area

How it appears from the outside.

I can never leave a good thing alone so I added some black piping at the neckline. I just felt like the top needed an ending point for the lace pattern. The piping isn't on the designer's top. I just didn't like the neckline unadorned.

Black rayon piping from the top's right side

Bias binding used to finish the neckline

Inside of the finished garment

My final finishing touch ~ I covered the hemline seams (sleeves and top hem) with ivory rayon seam binding.

Adding seam binding pressed in half to one of the sleeves

Seam binding on the hem of the top prior to hemming

A few more pics:

Top worn with my little black dress

Side view of top with black pants from 
Crazy 8 Tunic & Pants outfit

Front view

Back view

Conclusion:
Initially I thought this was a quick and easy top to sew. It wasn't. There was a lot of work to make this simple design look easy, so I'm understanding that costly price tag better now. However, it was worth my time and effort because the top works with most of my black bottoms.

I'd like to give a quick shout-out to my youngest daughter who was visiting and volunteered to take these pics. Just so that no one thinks I got these from my tripod/camera set up.

This has been a slow sewing month.  As usual I've had more plans than time to make them. I honestly don't know if I'm going to get to the red wool pieces now. I really want a pastel pink wool crepe dress and I have an idea for one that I'm aching to sew. Also, I downloaded the Deer & Doe Plaintain tee and I want to try that out. By the time I get these finished, it will be well into April and time to start spring sewing.

I know that I've made some great basics for fall/winter but I'm sad that I'm putting away my wools since I love sewing with them so much.

...as always more later!


Tuesday, March 18, 2014

Inspired by Olivia Pope - Part 1

When I saw these pictures of Olivia Pope wearing this top on Pinterest, I knew I had to make one...


Oliva/Kerry's top is from Dolce & Gabbana and it's selling for $1,775 on Net-A-Porter...


It looks similar to the black tunic top I made earlier this year...


I already own fabric purchased from Elliott Berman that resembles the Dolce & Gabbana fabric. There is only one yard of the black/white lace print left on the site but plenty of the green/black printed lace combination.


My thought was ~ Olivia Inspiration + Top from TNT pattern + Milly Fabric = Quick and Easy top that I could wear to work on Monday.  Well not so fast. I made a few miscalculations.  I put a 9" zipper in the back of the top - WRONG!  With the long sleeves the top is hard to get on and off, and I can't zip it up without assistance. So the zipper needs to come out and a longer one put in...I'm presently ripping the back apart.

I underlined this version instead of lining it.  


Also the pattern pieces were cut on the cross grain to take advantage of the border print.


The designer version of the top has wide/bell shaped sleeves.  I used a closer fitting 3/4 sleeve that I've used previously ~ again not such a great idea because the sleeve is kinda tight around my forearms...not my biceps...my forearms!!! I'm trying to decide if I should recut the sleeves with a wider sleeve since I have more fabric...probably going to do that because the sleeves are just uncomfortable and I won't wear the top if it doesn't feel good.

So I didn't have a finished garment this weekend.  I guess it's okay since I only spent Sunday in the sewing cave but I was disappointed because it really should have been a simple sew.  There was just too much operator error. Those challenges along with the fact that the sleeves have to come out of the Vogue 8343 dress means that I haven't completed anything since February...*sigh*

I have no plans for next weekend so maybe I will be more productive...at least I hope so!

A few shots of the top on Lulu...


...as always more later!


Thursday, December 12, 2013

Sewing Daydreams

I spend a lot of time commuting back and forth to work especially during this time of the year when it seems there is so much more traffic.  I spend a lot of that time surfing the web on my iPad and dreaming of sewing projects.

Although lately I've noticed that even though some of the garments inspire me, I'm much more interested in figuring out the garment's construction versus actually sewing it up.  So as I was perusing Erdem's Pre-Fall 2014 line, I happened upon this dress...


I like this dress.  I really do.  It's the combo of printed top, solid bottom and turtleneck that caught my eye.  But I have a really long list of garments I want to sew this winter and I know that only a half to 2/3rds of them will actually make it from idea to my closet.  So what to do about all of those other things that inspire...

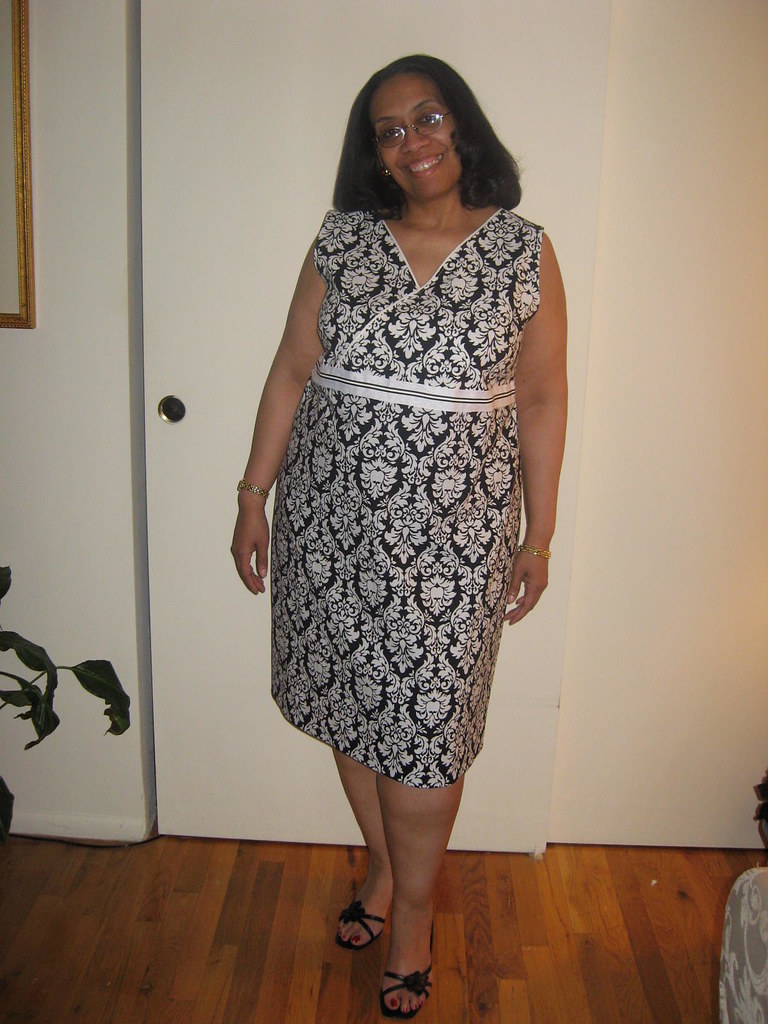
Sewing daydreams...where I take a few minutes/hours/days to work the construction out in my mind.  For the dress above, I realized that I could use my TNT pattern as the basis.  I've already used the crossover v-neck top, a band and a skirt bottom on two summer dresses I made back in 2007 ~ here and here (the post accompanying the dress' photo is actually quite funny). BTW, I wore both of these dresses last summer, though I've made some alterations to them to fit a little better.


That part of the dress would be covered.  It was how do I make the turtleneck work and it hit me - dickey sewn into the dress. I could take an old cotton turtleneck or buy one and cut it up to add it to the neckline.  The thing is that I would want the dress lined so I would have to work out how to add a lining, but it could be done.  

The only thing I don't like is that there is no back shot of the dress. Since these collections are just being shown and not shipped to the stores yet, I really have no idea of how the designer made the back.  Me, though, I would use an invisible zipper in the turtleneck and dress back.  Why?  It would just make the dress easier to get into.  And why a back zipper versus a side zipper in the underarm?  I don't like side zippers but it's definitely an option.

Do you see now how I can while away hours sitting in bumper to bumper traffic happily immersed in sewing daydreams?  And it's not only the construction but what fabrics would you choose to make this up in ~ that can suck up hours of time, too.

Now I'm sure you're wondering, why go through these exercises if I'm not going to actually make the dress.  Sometimes it's just because.  Sometimes it's because it gives me clues/answers to future garments or things that are languishing on my must sew list...and sometimes after going through the construction sequence, I get inspired and the dress makes it onto my must sew list.

So while I may not be physically sewing...I am always sewing in my daydreams. How about you?  Do you have sewing daydreams?  Do you think about how garments are constructed and work out construction sequences? Just wondering if I'm daydreaming alone! *LOL*

...as always more later!


Monday, September 09, 2013

A Wool Crepe Dress ala Michael Kors

This dress is on my fall sewing list but it wasn't one of the items I was thinking of working on during the sewcation.  However, I saw this on "The Lisa Robertson Show" on QVC...


...and I had the original Michael Kors dress saved in my inspiration file...


Kerry Washington wore it as Olivia Pope in Scandal

I've thought about making this in several different color and lace combinations but settled on this one...


I wanted some color since it seems like I've sewn black, black and more black for the last week.  Since this is a simple sheath dress with a black lace insert, I started with my TNT dress pattern.


Notions ~
22" red invisible zipper
7" wide black lace purchased from M&J Trims
red bemberg lining
red rayon seam tape
Ltwt. fusible knit interfacing strips

Construction Information ~
One of the interesting parts of this dress is the lace insert and it's placement. Since I'm plus size the lace emphasizes my hips (at least to me) rather than the slim waistline emphasized in the pics above.  Honestly at one point while applying the lace I wondered if this look would actually work for me but after getting the lace applied...I do like the look.

Applying the Lace to the Dress ~
Before inserting the lining to the dress, I tried it on to find the best point to place the lace on my dress and my body.

*Then I pinned the lace at the center fronts top and bottom and the side seams.  Managed to do this with a minimum amount of twisting and turning...


*Pinned the lace to the dress front and back at the top and the bottom. Double checked by measuring from the top and bottom of the dress front to insure that it was the same all the way around.

*Stitched the top of the lace to the dress by hand.

*Put the dress on again to check placement.

*Hand stitched the bottom band of the lace to the dress.


*Carefully cut around the lace motifs at the zipper center back insuring that the lace wasn't too close to the seam to get caught in the zipper...even added an additional piece of lace to cover some empty spots...

Second design feature ~
The neckline must have been stretched out when I was handling the dress. This could have been prevented if I had stay stitched the dress' neckline but of course, I didn't.  I could have used the pattern piece to snug the dress' neckline back up but after taking a tuck in it, I decided that I liked the tuck. 

It made a great design feature. So I edge stitched both tucks and pressed it flat.  Then the top of the tuck was basted down prior to the lining being inserted into the dress. Finally I added a few quick stitches at the bottom of the tucks so that they wouldn't release.


When I added the lining to the dress, I added a row of gathering to snug up the lining so that both necklines would match when sewing them together.


Technically this is a mistake.  I should have taken better care when handling the fabric BUT I like to think of it as a design feature. *LOL*

Otherwise the dress was assembled as I normally do. Here's a few pics of the dress in motion...


...and how I'll wear it with a black cardigan


I know I've just made another version of my TNT dress with lace on it but lace is still trending strong for fall.  I've got an entire Pinterest folder to reflect that trend and every day I find more things to add to it.  I also really like how lace softens office wear so there may be more of it showing up in my work wardrobe.

...as always more later!


LinkWithin

Related Posts with Thumbnails