Showing posts with label Cashmerette Patterns. Show all posts

Saturday, April 22, 2023

Dueling Wexfords

As I stated in my fabric fail Wexford, I was definitely making the pattern again. While the fabric shred as I wore it, the silhouette held up really well.  So I made 2 more unintentionally making them both in the black family.

In the first post, I didn't talk about any of the changes I made to the pattern or the size I used. I cut a size 24 and added 1" to the hemline...though I may add another inch for future versions.

While I've only used this pattern as a top, I will be making the dress portion later this spring. It's such a relaxed and comfortable wearing garment that I can see a longer version of this for summer wearing.

Wexford One:

The first Wexford is made from a black & white rayon knit purchased from Fabric Mart's brick & mortar store.  The changes to this one are that the neckline and sleeve hems are bound in some black knit scraps. As with the first one this is an easy sew. 


Wexford Two:

The second Wexford is made from a luxurious rayon knit that was purchased from Elliot Berman's shop pre-Covid.  This means that it was from the old place and not the new one.  Also the hand on this fabric is lush. I chose this fabric in an attempt to replace the pleather version.  

For this one, I used a black fold over elastic trim instead of the binding piece included with the pattern.  Other than that there were no changes.  Again a quick sew that let the fabric do the talking.


Besides making the dress version of this pattern, I have a few more top versions floating around in my head - a lace one, maybe a mesh one and finally I have several cool knits that would look amazing in this silhouette.  So sooner or later more of these will show up here.

Don't forget this is a Cashmerette Club pattern so if you want a copy of the pattern you will need to join the club either monthly or yearly. Oh and they're PDF only patterns...


...as always more later!


Saturday, March 11, 2023

Floral Pleather & Black Knit Wexford

I've hoarded this pattern since it was introduced for the Cashmerette Club. While it debuted last summer, I always knew I wanted The Wexford for a winter top. It reminds me of my Pembrokes and this white cotton top that I wear all the time.

Rambling through the fabric collection, I found this floral pleather that I used in a denim dress in 2016 and some black knit I bought from StyleMaker fabrics in 2021. I've used the black knit before in one of my house dresses.  

Seems like this black knit was purchased to be the assist in garments instead of the star player.  

Here are the players for this version...

This is an easy sew complicated only by the pleather fabric I chose for the front.  I like everything about this even though I did lengthen it 2" and may lengthen it 2 more inches for future versions.

I use to have a policy where I wouldn't wear a garment until it had been photographed.  Since I'm no longer always up to pictures, I wore this to work 2 weeks ago.  This was one time I wished I'd taken the pictures first because then I would have realized that my pleather was bad.

The pleather separated from the knit backing at the side seams and it fractured in other places on the front. It was so much that I was shedding white confetti or pieces of pleather EVERYWHERE.  The black knit pants I wore with the top were covered in white sprinkles.  Even my black sneakers looked like a box of confetti had blown up on them.

A Few Pictures of the Damaged Top  ~


This was definitely a fabric fail and not a pattern fail.  This top was very comfortable to wear and I will be making more. Actually have one cut out to sew now. 

This pattern is part of the Cashmerette Club of which I'm a member.  I don't download the pattern every month but the ones I do I really like. I really like this one so plan on seeing several more versions of it.  


...as always more later!


Monday, July 11, 2022

It's all about the fabric...

I saw this fabric online back in late January when I was making my housedresses. I thought it would make an excellent one to wear around the house.

It's a cotton/spandex jersey knit. I purchased some...but I thought I was buying by the panel...and it ended up being by the yard. So the fabric sat while I waited for the weather and my attitude to change. It ended up being just a tad expensive to wear around the house. While I deserve to look good ummm not this good.

Now I thought this was an amazing panel print, I just didn't realize how amazing it was until I sewed it up. But may I state here that it was challenging to control the rolled edges and I cursed the fabric out several times during the construction stage.  

But it was soooooooo worth it...

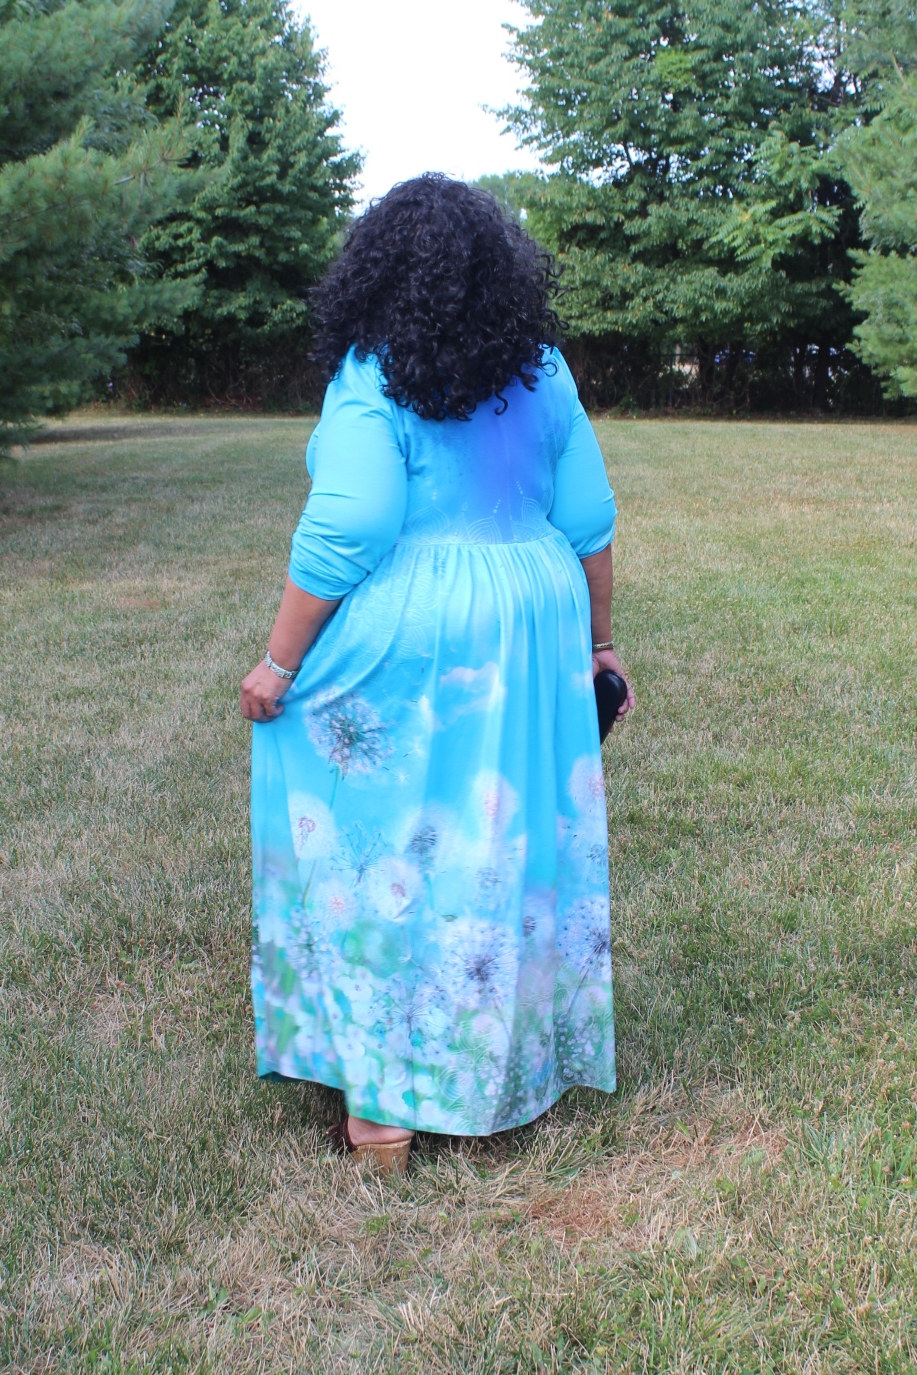
This is my fourth version and I have nothing new to add to it's construction. The bodice is from Cashmerette's Washington Dress, the sleeves are from Cashmerette's Pembroke wide bicep version. The skirt is just the full width and the length of the fabric (42" for me) gathered onto the skirt and hemmed. This is a really easy sew. The finished dress is amazing because of the panel print.

A few more photos ~


I have fabric to make more of these when fall/winter returns. Indoor fabric! LOL! However, this one turned out so well that I'm planning to wear it to the NYC Frocktails in October!


...as always more later!


Sunday, April 17, 2022

An Easter Fuller Cardigan

Easter is such a tricky day.  Some years it's warm and sunny so that spring dress you picked is perfect to wear.  Some years it's sunny but chilly so you need a little more coverage.  This year Easter was on the chilly side.  Sunny but definitely needing a little coverage to stay warm.

I've been working on this Fuller Cardigan since last year. I cut it out at the same time I cut out this shirtdress in February. Finally finished it last week...in perfect time for Easter.


Some background ~

This was one of those bonded cable knits that were everywhere in 2021. I bought my piece from Fabric Mart. There's still a couple of yards left in the fabric closet for another garment.  

The thing about this fabric is that it doesn't like topstitching or button holes. I learned that from making this cardigan. So when planning this sew, I decided no topstitching, no buttonholes/buttons and everything needed to be hand stitched. I'm happy with those design decisions.


Pattern Alteration & Construction ~

The Fuller Cardigan has two views.  A v-neck longer verson and a high u-neck shorter version. I combined the v-neck with the shorter version to get my cardigan. I wanted a neckline that would accent the neckline of the shirtdress.

I used 11/16" gold snaps instead of buttons on the cardigan front. The snaps were purchased online from Fabric Mart.

The facings were from a navy blue ltwt ponte from the scrap bin.

The sleeve hems were pressed up 5/8" instead of adding cuffs. Navy blue Hug Snug rayon tape was sewn to the hems and they were hand stitched. Chosen because I could hide the stitching in the busy knit.

A clean finish and allowing the fabric and design to shine were what this make was all about.

A Few Photos ~


Conclusion ~

This concludes my winter sewing. I know I still have a dress hanging out waiting for buttons/buttonholes and a hem.  However, I've decided to push it until fall. Spring is here with warmer weather and long sunny days. So I'm looking forward to making & wearing all the spring dresses and tops.


...as always more later!


Wednesday, January 19, 2022

Adding to my Housedress Collection

During the winter I primarily work from home. I hate commuting in the cold and snowy weather so being able to work from home daily is perfect for me. Being home, I tend to wear house dresses. Or in my case comfy maxidresses when I don't have a lot of meetings. I do tend to dress (shirt/blouse & jeans or leggings) when I have a day full of zoom meetings but primarily house dresses are worn. Since mine were getting ratty, I was on a mission to add some new ones in a couple of different styles. 

So the premise of these dresses are well put together, comfy yet casual dresses to be worn to work from home. One thing...this post is photo heavy because I included all three dresses I made using this pattern combo in one post. 

I made this dress exactly five years ago...

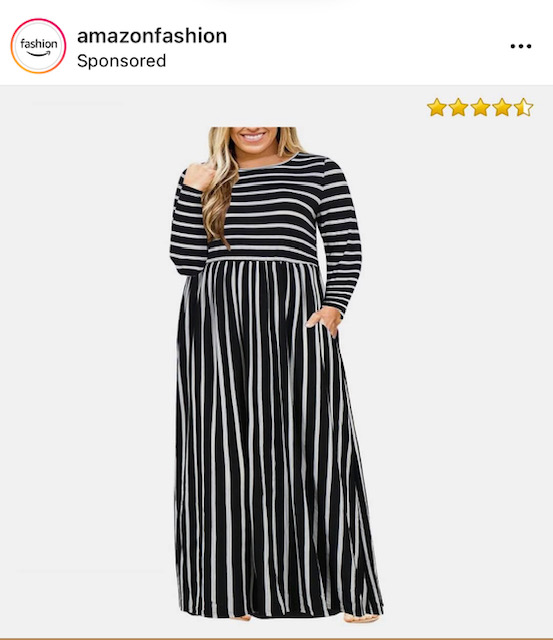
...and I wore it to death finally relegating it to a nightgown/housedress. When I saw this ad on Instagram this summer, I knew I wanted another one or two!  


So I saved the ad and am just finally getting around to making more. To make my version of this dress, I started with the top of the Cashmerette Washington Dress and added the long sleeves from Cashmerette's Pembroke top. This is truly taking pieces of patterns I like and making them into the garment I want.

In this post I'm highlighting the first three versions I made ~

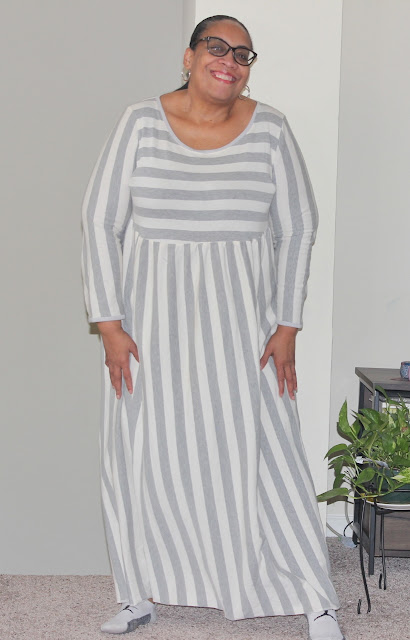
The first one is a grey/creme knit purchased from Fabric Mart last spring


The second version is a tie-dyed french terry purchased from Fabric Mart's online store last fall.


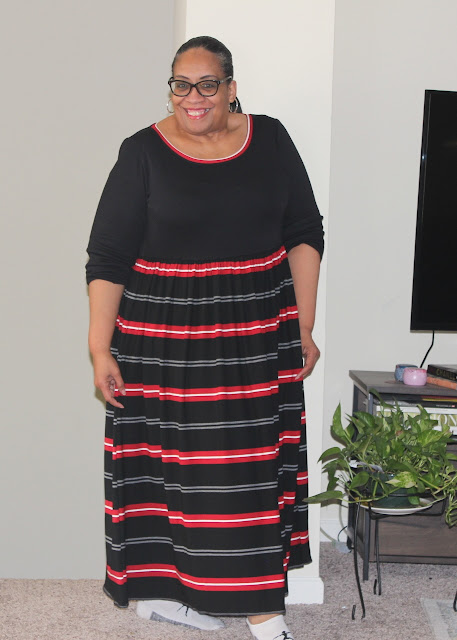
The third is a solid black bodice and striped skirt.  The bodice is made from a black poly/rayon/spandex knit from StyleMaker Fabrics.  The skirt is made from a rayon poly knit from Fabric Mart's brick & mortar store.  Purchased during Carriage Corner Sew Camp last August.


One thing to note ~
I was 45 lbs. lighter in the original maxidress than I am presently. Which is really interesting because I still wear the dress to sleep in - probably because the knit top has stretched and pilled. I started with a size 26 bodice for these versions instead of the size 22 I last used, because of my weight gain.

I'm also using the Pembroke sleeve pattern because Jenny updated her sleeves for wider arms in her newer patterns. This sleeve works so well in my Pembrokes that I made it work for these dresses.

The skirt is 88" wide and 42" long.  Basically I cut 3 yards in half, then cut off several inches from each side to take in some of the width.

The Grey/White Striped Version ~

Supplies ~
4 yards of a cotton/rayon knit purchased from Fabric Mart last spring
Knit bias binding gifted to me by Jenny several years ago

Construction ~
The defining factor of this dress is the stripe matching on the bodice. I took a lot of care to insure that it matched all the way across the bodice. 
  • Cutting the back pieces with a seam instead of on the center fold of the fabric.
  • After cutting basting the pieces together to insure the stripes matched
  • Then machine stitching them with a large basting stitch
  • This put the construction order out of whack
  • When it was time to put the sleeves in, I unpicked 2 of the stripes so I could sew the sleeves in flat.
Using this method insured that the stripes continued to match across the bodice and matched 80% at the bodice and sleeves. I'm fine with this. I used all of these techniques to make an upscale house dress.  Yes, I know...overkill!

A Few Pictures ~


The Yellow Tied Dyed "French Terry" Version ~

I recently bought some French Terrys from Fabric Mart. I loved the tie dyed colors. However, I was a little disappointed in the weight of them when they arrived. They felt more like ltwt. rayon jerseys than the French Terrys I'd touched in the store. Honestly, I wasn't thrilled with this purchase but decided to use the yellow for a house dress because bright color on dreary winter days.  

I'm glad I chose it because even though it's lightweight, it is comfortable, easy to wear, feels like a big warm hug and works for my work from home life. This one was a straight sew. I used no special techniques because the fabric needed none.

A Few Pictures ~


The Black Solid/Striped Version ~

I was putting fabric away when my hands touched the fabric used in this dress.  I was actually in the middle of finishing up a shirt and the urge to make this one was so strong that I set the shirt aside.  I mean there will be another sewing weekend when I can finish it right?

The fabric that I used for this one elevated it. Because I used a knit with more rayon in it, I did something with this one that I didn't do with the first two. I added bias tape to the shoulder seams and to the waistline seam. Specifically I added an iron on bias tape to the waistline thinking I definitely didn't want this one to stretch out of shape.

Well, I almost can't get into the thing because of that. The waistline is so rigid it's bordering on tight.  I'm hoping that with it's first washing maybe some of the tape will wash out...but I'm not counting on it...because I encased the bias tape with a serge finish. That beautiful gathering is basically pressed than serged in...*sigh*

Some photos ~


Conclusion ~
My goal is to get a two week work wardrobe of house dresses. I made one in 2020 out of ponte that's still going strong. Now I can add these three. I also have two more patterns that I want to use to add some variety to my house dresses. One thing I've realized is that I will never spend as much time as I once did in an office. So I need to have a good work from home wardrobe now.


...as always more later!


Saturday, November 20, 2021

Another Cardigan + A Swingy Tee

Prior to Covid, cardigans played a huge part in my wardrobe.  I threw a cardigan over a shirt, tee or turtleneck and wore those layers over skirts and pants.  I even wore a lot of cardigans, aka Michelle Obama, over a dress in my Corporate Days.  Add a pair of pearls and pumps, you were professional and ready to go! 

While I was home for 18 months, I only wore the old junky cardis which were also worn as a layering piece.  I haven't actually thought about making more even though I own several TNT cardigan patterns, because they used to be an essential part of my wardrobe.  

So of course in the unsewn cut pile I moved last year, there was one last cardigan cut out. Since it's in my blue color scheme and perfect for back to work wear this spring, I started working on it Mother's Day weekend.

The cardigan was cut from Simplicity 8059.  I've made 8 versions from the pattern.  All but one of them remain in my wardrobe.  The vanilla cable version pilled so badly that I let it go. I love this cardigan because it's a simple throw on, easy wear cardigan that can be made from any kind of knit fabric. I have used ponte, wool jersey, velvet, sweater knit and even made a border print ponte version.

It's everything I like in a pattern. Easy to wear, made for simple variations (changed up the closures) and can be sewn in a variety of fabrics. It's been sitting for a few months, waiting for the temps to cool down so I could photograph it. Like with everything else I've sewn lately, this has already been worn out and about.

Supplies ~

Pattern: Simplicity 8059 which is out of print

Crochet knit fabric purchased from Fabric Mart

Black Silk organza from Thai Silks

Black fusible stay tape from Design Plus

Construction ~

For this cardigan I sewed the sleeves in using the flat application.  My favorite method. It's so much easier to get a knit sleeve in without puckers if you use the flat sleeve sew-in method...well to me!

Also because it was a knit, I used the silk organza facings that I'd use in my last version.  However, I did not add the fusible interfacing. Sewing wrong sides together, flipped in, pressed flat and then the fusible bias tape was added to insure the neckline did not grow...


I also used the fusible stay tape to stabilize the neckline of the cardigan...


Since this is a special knit it needed more techniques to insure that I did not stretch out the neckline or mishandle the application of the sleeves. So I added Seams Great to the neckline to stop the stretch.

Honestly, I have a few challenges with the finished cardigan - I've gained a few pounds since it was cut so it doesn't really close well.  Then I added the ties up too high on the v-neckline.  I've worn it and it didn't really bother me but aesthetically it's annoying.  However, not annoying enough to go in and fix it! *LOL*

A Few Pictures ~


A Swingy Tee ~

This is my Pembroke pattern that I added a couple of inches from the waist to the hemline on the front and back pieces by using the pivot and slide method. When I cut this out, I really wanted an easy slip on top to wear over jeans or leggings while working from home.

However, it pairs so well with the cardigan I've worn it to work this way. Though to be honest I've worn the top more than the cardigan. It's such a great layering piece and I definitely want to make more of them, possibly with a cowl neckline.

Supplies ~

Pattern:  Cashmerette's Pembroke Top

Fabric:  100% cotton knit from Organic Cotton - this has been in the collection for a few years and deserved to be sewn.

Construction ~

o The thing I like about Cashmerette Patterns is that the construction is done with a flat application.

o As always, I add some stay tape to the shoulder seams to stabilize them.

o I omitted the cowl AND the neckband facing.  Instead I turned the neckline down 1/2", pressed and used a twin needle to hem it.

o To make the swing, I did a pivot and slide from the neckline on both the front  and back pieces.  I slide it about 2-3 inches from the fold to gain the swing through the waist and hip area. 

o The sleeves are perfect for pushing up when wearing alone or wearing a little longer under the cardigan.

A Few Photos ~


This is another one of those outfits it's taken me forever to photograph so I've worn this top a few times already. But I love the extra swing in it because it's comfortable...and honestly comfort is more important to me than almost anything else these days!  Comfort with a little style are my guiding sewing lights now.

Finally, thank goodness this outfit has been blogged!


...as always more later!


LinkWithin

Related Posts with Thumbnails