Sunday, February 28, 2021

What I Sewed in February 2021

While the weather was miserable for most of the month, my sewjo was on fire so I got a lot of sewing done.

I shared the following:

Denim Simplicity 8687 - finished February 1st

Style Arc Mildred Jumpsuit - finished January 30th

Dover Maxidress/Coat - finished middle of January

and 2 Pembrokes that were completed but haven't made it to the blog yet.


A black & white ponte Myosotis dress that also hasn't made it to the blog yet.

...and a half made shirt that needs more fabric to make it work.


A lot of this was accomplished because I took the week off after President's Day. I needed time to sew because ideas were flying out of my brain. I was so on fire, that I spent time cutting out several garments and have a full cut pile to work from going into March.

I bought quite a bit of fabric too.  I was at 44 yards until 16 more yards showed up from Fabric Mart yesterday. BTW, I've tracked my fabric intake/output for the last couple of years. I'm not doing it this year. One reason is because I do have more storage space now. The second reason is because since I can see ALL of my fabric, it's a natural deterrent to purchasing a lot more.  Now doesn't that last sentence make me sound like a liar.  However, I can say that quite a bit of what was purchased lately has already been cut and is waiting to be completed.

I'm not buying fabric just because it's cute. I need a purpose for it and two of the projects I cut needed 5 yard pieces which were not in the collection. I am, however, using collection fabric too so I'm calling it all good.

The blue collection sewing is proceeding and more of those pieces are being worked on now hopefully making it to the blog soon.  Weather and my pandemic mood is definitely playing a part in picture taking.

However, since my sewjo is back I wanted to document my sewing progress.


...as always more later!


Sunday, February 21, 2021

Thoughts While Sewing

My sewjo has been screaming and since I have no where to go I've been going with the flow and sewing.  Of course this means that my thoughts run to different places while I'm sewing.

Here are a few of them ~

o  I'm sewing much slower than I use to.  Prior to the pandemic, I was always in a rush so I could wear my newest creation to work or out with friends. There's no need to rush anymore since lately I go nowhere...not to the grocery store...delivery.  Even the drugstore offers delivery or curbside pick up now.

o  In the last month I've purchased 44 yards of fabric. That fabric fast is OVER! I found that as I started to sew new fabric fueled my sewjo. So I bought a little bit.

o  I bought an inexpensive clothing rack to hold my makes.  Why not just put them in the closet, you ask?  Well I've decided that I want to sew a bunch of blue garments. As I complete each one I will add it to my rack...making my own blue collection. 

o  It's a wardrobe BUT not one where all the pieces have to work together. The thing that binds them together is that they will all be in the blue color family. I got the idea from the JJill ad above.

o  I've pulled some blue fabrics from the collection and I've bought a few yards. There will be shirts, dresses, a pair of pants, the jumpsuit and my denim jacket. Like I said some will work together but not all. The driving force will be that they're all blue.

(my latest cut pile)

o  It's given my sewing some direction which I've needed. I've also let go of the notion that I have to be able to wear it now to sew it. I have hope that I will be able to work in our office by fall. So the days I go in I will have new clothes to wear!

o  Here's my rack so far...

(A few pieces have been completed that haven't been photographed yet)

o  My blog is becoming more of a documentation of what I've sewn rather than a techniques driven/chatty blog like in the past.  I've been blogging for 15 years...January was my 15th anniversary...so I'm trying to link to techniques or information from my older blog posts now. No need to reinvent the wheel.

o  Sewing is becoming my refuge again. Weird to type that almost a year into the pandemic. I'm trying to learn to dress every day. I'm not always successful but cheer the days that I am.

o  And even in the middle of a pandemic, I have not learned to sew casual clothes. I'm beginning to think I'm either a slob or a fancy dresser...there's no middle ground. LOL!

o  On that note, I've decided to sew all the things. Before I was waiting...for the pandemic to end...to be able to go outside again...for a reason to wear them. That's not bringing me joy and actually at one point was stifling my creativity. Now, if I dream about it, I'm going to make it.

o  I want to share the Janome 100th Anniversary video which I was thrilled to be able to participate in. I love my Janome machines and I love being a Janome Maker!

o  One last thought...when I was digging through some bins upstairs I noticed that I have two bins and a garbage bag full of scraps. I use to donate these and now I'm in a quandary. I know I want to make a pouf with some of them but the rest I don't know if I should hold onto them (waiting for things to open back up) or dump them.  BTW, I'm not looking for suggestions, just musing upon the situation.

I've been sewing and have new things to share.  They will be up soon.


...as always more later!


Wednesday, February 17, 2021

A Denim Simplicity 8687

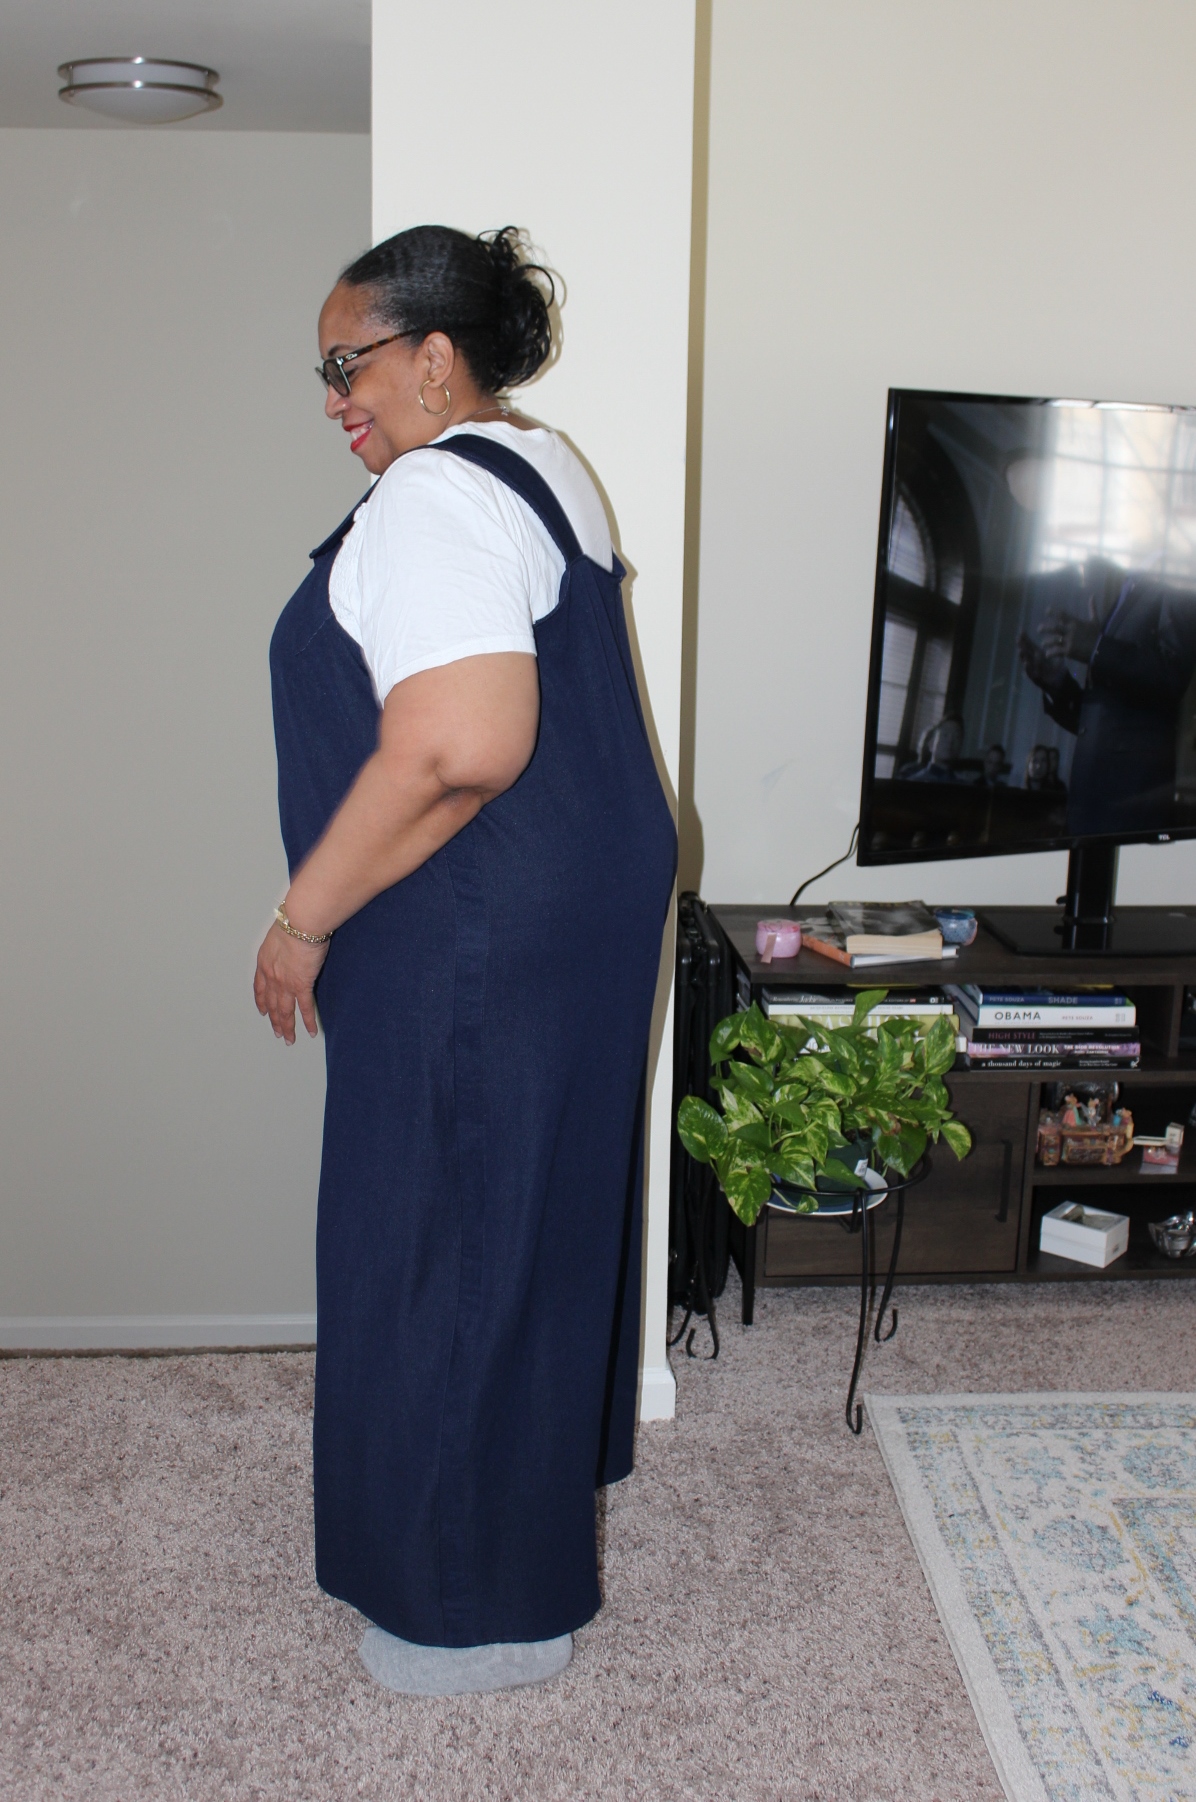
After finishing the Mildred Jumpsuit, I decided to sew something I'd previously made.  I have a drawer in my cutting table holding the projects I cut prior to the move. When I was going through the drawer I found this project and it coordinates so well with my jumpsuit that it had to be sewn next.


The reason I hadn't worked on it previously was, "Where was I going to wear it to?" Which has become the question regarding almost everything I think about sewing now. And in actuality has held me back from making some things, because WHY? I decided to finish this anyway for two reasons:

1. I needed to sew something I'd made before that would encourage me to continue to sew, and

2. Why the hell not? I mean the pandemic is still here almost a year later from when we originally locked down. It's going to take a minute to vaccinate everyone for us to get to our new normal...so I'm going with it and sewing things.

Supplies ~

A patchwork denim fabric from Stylemaker Fabrics purchased in 2019. It's still available here.

Yds of Blue & White Bias Binding from Bessie Pearl Textiles


Remnants from this dress that I cut into a vest also r
emnants from jeans that I cut up to use for facings and pockets in other garments.

6 - 7/8" gold buttons from the deep stash button collection - I've had these for years!

Pattern Alterations & Construction Info. ~

I cut this out awhile ago but I believe there were no additional pattern alterations that weren't covered in the other two posts about this jacket. I did make one change to the jacket from the other versions.

o  Instead of making the tucks in the sleeves, I gathered the sleeves into the ties.

o  At the same time, I also topstitched a tuck into the cut opening in the sleeve hem to make it fit a little tighter.

o  I used bias binding on all the interior seams since I really liked how the finishing looked in the first version. 

o  However, I bought a 1" double folded quilt binding and that's just too much binding on the seams. 

o  So I cut the binding at the main fold basically cutting it in half and giving me a lot more binding for my money.

o  Since I used denim from previous makes, I made sure the lighter blue denim was cut for the collar and cuffs.  

o  The darker black denim scrap was used for the front facings.

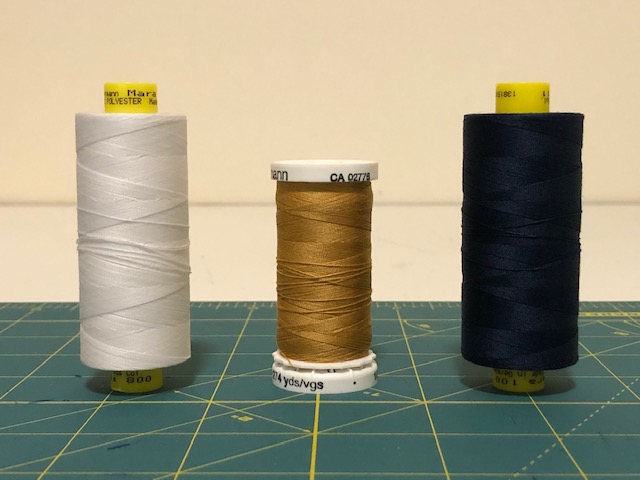
Besides being extra careful sewing the seams because the denim's patchwork seams are bulky and making sure to grade the seams, I used three different thread colors on the jacket.

Yes, I have thread coordination issues...but choosing to topstitch in the gold jeans thread tied everything together and gave it a true denim jacket feel to me.

The Buttonholes ~

Finally adding the buttonholes and buttons were a little challenging because of all the patchwork seams. I tried hard to insure that I was making the buttonholes in between the patchwork seams but I wasn't always successful.  

To make it easier for the automatic buttonholer I trimmed down all of the seams that were near the buttonholes. And STILL in some places the sewing machine struggled. I managed to get the six buttonholes made with patience and slow sewing...also accepting when they weren't perfectly lined up.

There is a little more and less space between the buttonholes because my sewing machine DID NOT care about being accurate when making the buttonholes. One is downright crooked but I'm leaning into the fact that my machine made all of the buttonholes and I didn't have to unpick any of them.

A Few Pictures ~


This will be the last time I use this pattern for awhile. I'm just not wearing jackets cause I'm not going outside. And at the rate America is vaccinating folks, Imma be working from home quite a bit longer.

I pulled some fabrics to make some winter Myosotis dresses so that's what's coming to the blog soon.


...as always more later!


Saturday, February 13, 2021

Style Arc Mildred Jumpsuit

Y'all I wondered if I'd lost my ability to sew making this jumpsuit!  I made sooooooo many mistakes:

1. I cut it too big because I've gained so much weight (pandemic, surgery, meds) and have no real good image of myself.

2. Then I made it too small - ummm girl maybe take some measurements before you cut it. 

3. Added to and changed pieces that didn't need to be adjusted...cause I don't always know better than the pattern designer...

Here's what I ended up with...


But not without a lot of crying, whining and just wondering if surgery and the anesthesia took my sewing ability with it!

One more thing before I go into particulars ~ in my opinion this pattern is not really designed for a middle aged fat woman.  It has a very slim cut to it and not enough seams for fitting options...so let that be your guide if you're thinking about using this pattern.

Supplies ~

  1. Fabric purchased from Chic Fabric a stretch knit denim (this was in the collection) and is at least 2-3 years old
  2. 2 5/8" shades of blue plastic buttons from the collection
  3. 20" inch navy invisible zipper shortened to 12"
  4. 1" navy blue linen bias binding from the collection 

Pattern Alterations & Construction ~

I started with a size 30 the largest size the Style Arc has...I know, I know.  Then I proceeded to add a 1/2" to all of the side seams.  And 5" to the legs because I wanted a floor length jumpsuit. Y'all know how this ends right - it was too dayum big.

Then I checked my measurements against the pattern and chose to cut a size 24.  I unpick the jumpsuit and lay the size 24 pattern pieces on it. Oh wait, important thing to note, this pattern has a LOW crotch, which hung to my knees in the size 30.

I fixed the crotch issue by taking FIVE inches out of the body of the jumpsuit.  Then I cut it out again and stitched it up.  Now it's too dayum tight. I'm not a fan of seeing my belly button or the generous rolls that Gawd has blessed me with so at this point I'm done.  Seriously DONE! I KNEW that I couldn't sew anymore. Maybe the anesthesia took it.  Maybe the meds sucked my talent out of me - who knows but this wasn't working for me.

Then I did what I always do.  Put my big girl panties on, dusted myself off and figured out a way to make it work.

o  I added a 2" strip to both sides. Thank Gawd I always buy too much fabric!


o
  The invisible zipper was added to the back seam because I was having a hard time getting the jumpsuit over my backside. This will allow me to zip it down and step into it.  My favorite way of getting dressed.


o
  I widened the straps by a 1/4" on each side. Then I made 2 of each strap.  Sewed them together, turned them inside out instead of sewing them in half. The other straps looked too small on my body so I made bigger ones.

o  Instead of sewing them into the facings, I only sewed the back straps into the facing.  The front ones were made so that I could button the straps on. Again, there was no way I was sliding into this with shoulder straps sewn into the front and back facings.


Let me stop here and say the directions are hella confusing. These are more like Burda directions than easy to follow along instructions. I've been sewing a minute and figuring out how to insert the straps almost blew a fuse in my brain. I had to actually sleep on it before I figured out what the words and diagrams were saying.

After I got the jumpsuit to fit, it was just a matter of sewing it together and styling it. So I present my very dressed up yet loungy at home jumpsuit...

A Few Pictures ~


Now, I know I've talked badly about jumpsuits in the past. AND the only reason I considered making this one was because I'm home until who knows when! As such my home bathroom is WAYYYYYY bigger than the stalls at work so I can get undressed without contortions to use it.

Finally, I don't know if I will make this again. I took a leap to add something different to my wear at home wardrobe. I don't dislike the way it looks on me, I'm just worn out by bringing it to life. Halfway through the process I thought what the hell was I thinking making a "new from the envelope" garment. I really should have eased back into sewing by using a TNT pattern.

Anyway, I'm full on sewing again.  The Winter Sewing Room is treating me good. The patchwork denim jacket is up next.


...as always more later!


Wednesday, February 10, 2021

A Dover for Winter

When I was putting fabric away in September 2020, I touched this gray jacquard and thought it would be wonderful as a Myosotis maxi.  I mean I'm working from home this winter so I can pretty much wear whatever I want. I seem to reach for my maxi dresses the most.  They're comfortable, easy to wear and since I'm not really a pants girl, perfect for me and working from home.


However, when I went to prep it, it told me that it wanted to be something totally different. I thought a Dover Duster would be perfect and checked to make sure I had enough fabric. Luckily I did.

Materials ~
3 yards stretch jacquard from Fabric Mart via the collection
(Y'all better get used to me saying that because I'm committed to sewing from the collection more in 2021!)

11 3/4" black & clear buttons from the collection

7 yards black binding purchased from Bessie Pearl Textiles on IG for this project

Construction ~
There are no new construction techniques in this version. Although I feel like I didn't have enough fabric to lengthen this the additional 2" it needed for a hem. It's part of the reason I added the binding to the front and then decided to leave it off the hemline.  Though I think that was more from project fatigue!  I've used this pattern four times as a jacket and once as a maxidress. This version will work as a jacket and a maxidress.

A Few Photos ~

Worn with a turtleneck and black denim leggings...


...and then as a dress with a turtleneck under it


I will probably use this pattern for another maxidress in a softer fabric when spring arrives. I love the original one and would like a couple more to add to my maxi dress collection.

...as always more later!


Saturday, February 06, 2021

The Cardigan - Simplicity 8992 - UPDATE!

This cardigan was started in December 2019 when I also began writing this blog post. I write them as I sew so I don't have to remember details which is lucky in this case since I finished the garment a year later!

Today I finally got my act together and took a bunch of pictures of garments made in the last couple of months. I decided to shoot this sweater with me wearing it...so I've updated this post to include those pictures...


I think these photos are closer to the actual fabric color than the pictures below. BTW, this fabric is still available from Stylemaker Fabrics in a variety of colors where I purchased it in 2019. It was also available from Melanated Fabrics and a few other fabric sites. 

When I moved, I threw some unfinished garments out and brought a few with me. This is one of the ones that came along and is now finished.


So here is the original blog post with some updates to it...

I bought this Simplicity Pattern in August 2019 because my favorite cardigan pattern (also by Simplicity) only has a tie closure and I want a button front closure option. I love the cardigans I made using that pattern but 9 times out of 10, the cardigan unties beneath my coat. I'm sure a button front cardigan won't have the same challenges. 


Then I saw this cable fabric on StyleMaker Fabrics and I bought a couple of yards of it. It seemed perfect to make my first version of this cardigan. 

Materials ~
3 yards ocean knit fabric from StyleMaker Fabrics
Navy blue ponte scraps for facings
1 large button from the stash by way of Fabric Mart Fabrics
1 large gold snap from Pacific Trimmings

I need to talk a little about this fabric. I loved this fabric and bought it as soon as Michelle posted it. However, I didn't think about what it would take to work with the fabric. I can honestly say that if you're a newer, beginner, returning to sewing or advanced beginner, I wouldn't purchase this fabric. This fabric is challenging to work with and while it gives a good result, it took some extra to make it work.  

Pattern Alterations ~
While this pattern goes up to a size 22/24 (XXL), it's close-fitting. My other cardigan pattern has a looser fit and I wanted to combine the fit of the two patterns to add the button front closure.  To make that happen, I used my pattern sandwich method. Where I lay the TNT pattern piece down first, then the new pattern piece and finally a fresh piece of tracing paper.  This allows me to create a new pattern piece that fits me. 

An example below of how the new cardigan front was made. Also when I altered them, I did add a little of the waistline curve in the Simplicity 8992 pattern instead of the boxy shape of the original pattern.


All of the accompanying pattern pieces were also altered for a looser but shaped fit.

Construction ~ 
This fabric needed some special handling. It was heavy. When you sewed into the cables it pulled out of shape and hung funny. 

1. The facings were cut out of a dark royal blue ponte to add some structure to the cardigan so I did not need to add interfacing to the facings. 


2. I added fusible twill tape to the shoulder seams and to the back neckline so it would retain it's shape.


3. I made a hem facing for the sleeve hemlines because the cables were stretching them out. Adding the hem facing gives the sleeve hemline some structure which this cardigan needs.

4. The cardigan hemline also had hem facings added to them. However, I did this after I moved and couldn't find the royal blue ponte scraps so I used black ponte scraps instead.

5. All facings and hems were hand stitched down. It made it easier to control the fabric and to avoid wavy hems.  

6. Even though I wanted buttons and buttonholes, I realized that my home machine would never make buttonholes in this fabric. My original plan was to take it to NYC and have professional buttonholes made. But I dragged my feet and Covid happened so that plan went out the window.

7. To make this work now, I added a large snap and a large button to hold the cardigan together.  Since I'm working from home, I have no worries about wearing it under a coat for the foreseeable future.


Conclusion ~
I have a several more garments that need finishing touches. To ease back into sewing, I'm finishing them up before starting a "from scratch" sewing project. So my next project is another unfinished garment. BTW, I'm only spending a couple of hours a day sewing and still don't feel like posing in garments yet. Hopefully that will be back soon too.  However, I thought a garment post would be a better update on my progress than anything else.

...as always more later!


LinkWithin

Related Posts with Thumbnails