Showing posts with label refashioned garments. Show all posts

Saturday, November 16, 2019

Changing It Up

I made this denim shirtdress in June 2018 during my shirtdress making season.


I wore it a couple of times.  Every time though I felt like a jailhouse matron. When I pulled it out in the spring it just sat with all of the bad feelings attached to it. I thought it would make a great vest. Not something I would wear during the spring/summer months, so I left it to make the alterations in the fall. Then my sewjo went on vacation and the dress sat. 

I'm missing my sewjo. It's my friend and keeps me company...engages me creatively...takes amazing adventures with me...so I want it back.  In an effort to coax it to return, I thought I would do some simple creative tasks. Clean off my cutting table, trace a pattern out that I want to sew and alter this dress.

Alterations to the dress ~

Of course I removed the sleeves first.


Next I cut 7.5" off the bottom of the dress because I wanted a cardigan length vest not a maxi one. As pictured below, I chose to cut it off right before the last buttonhole. It would allow me to have enough space to hem the vest without having to remove a buttonhole.


The hem was topstitched with a 6.0mm twin universal needle using a 4.5" stitch length. This was done to match the existing twinstitching on the garment.


When I was reworking this, I realized that the accents for this dress/vest were made from some of the same blue gingham fabric I used for this shirt (which is one of my faves). So naturally I paired them together for a photograph.  This is how I will wear the vest and shirt over a pair of jeans or leggings.


I won't be taking "modelled" pictures of this alteration.  Just wanted to share how I updated the dress and made it wearable. I'm happy I shortened it into a vest. It will definitely get more wear this way.  Don't know if this actually made my sewjo come home but Imma keep plugging away at smaller sewing tasks so it knows its missed. Though this little bit of sewing felt good and I'm hoping my sewjo will come home soon! 

...as always more later!


Friday, June 14, 2019

A Palate Cleanser

I made this dress in 2016 when I'd just changed jobs and lost 35lbs. I was really into maxi dresses because I couldn't wear them at my previous job. I was also still trying to get used to the fact that I could wear jeans to work. It was a culture shock to go from totally professional dressing to wearing whatever I felt like...so I gently slid into the whatever I want...meaning that I was a little overdressed my first year at the job.


When making this dress even though I'd washed both fabrics separately before I used them, I'd never washed the two together.  This is what happened when I washed them as the maxi dress...


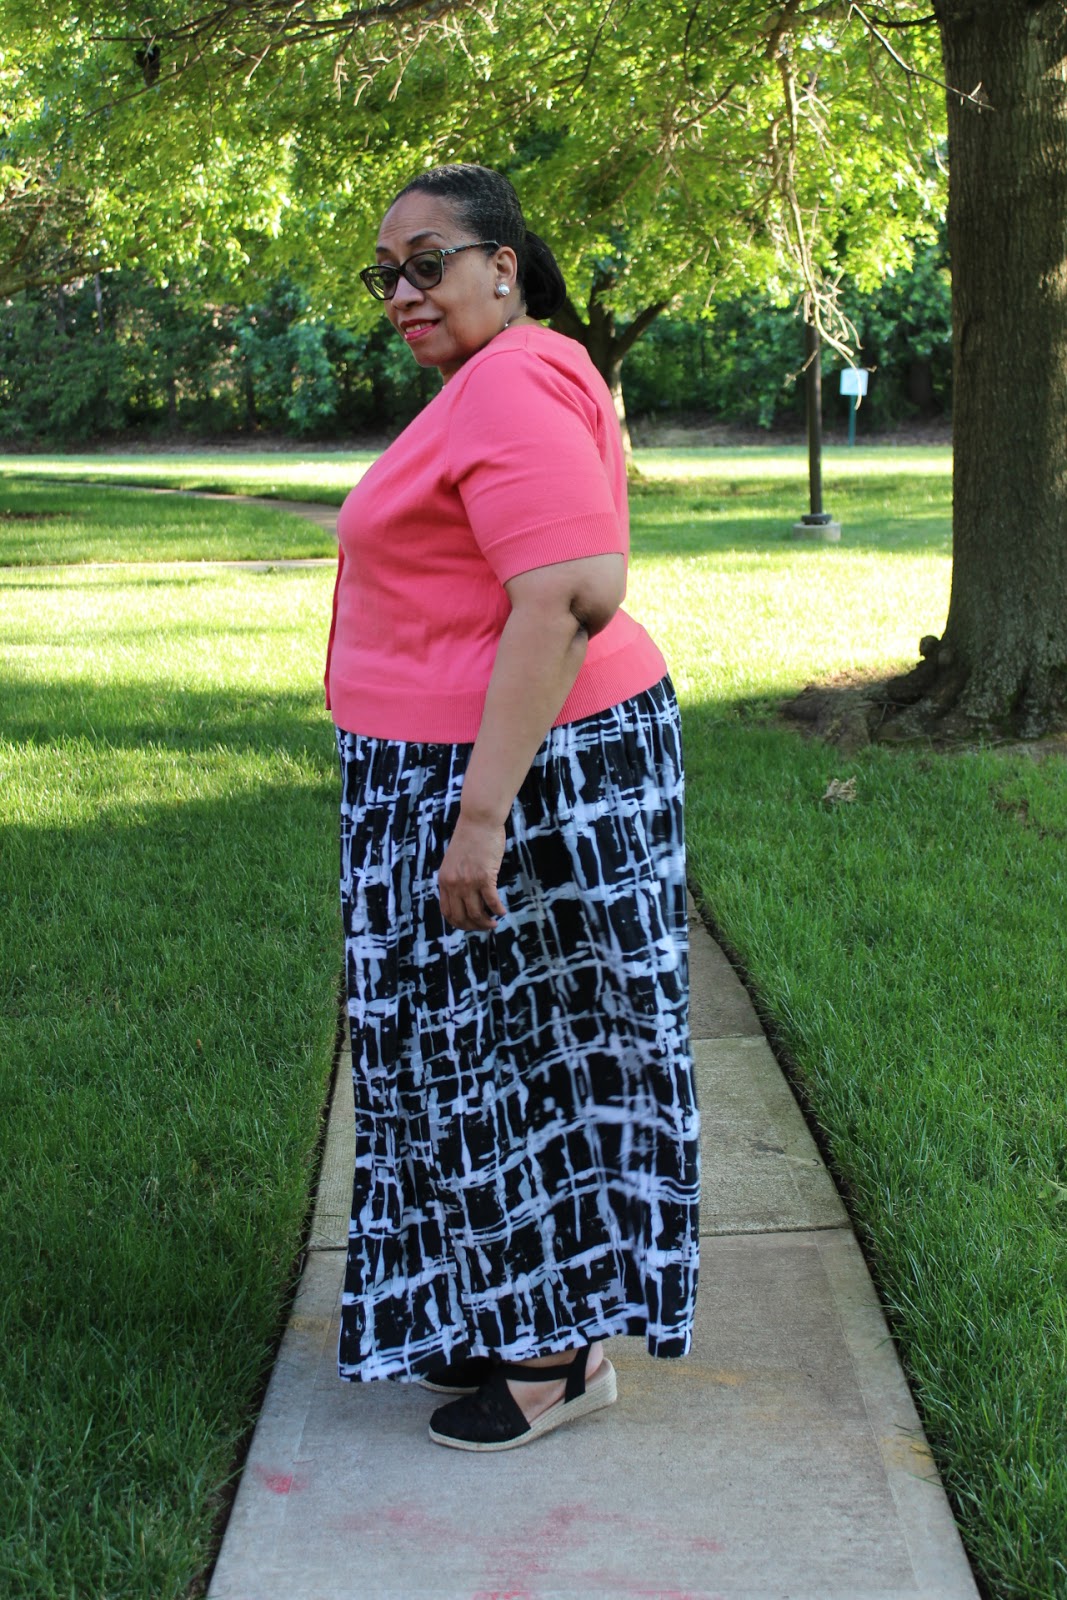
At first I thought I would be able to shout or bleach out the stains so it sat waiting for me to do that. It sat for over a year. Sometime earlier this spring I started to think I should just take it apart and make a maxi skirt. I finally did that.

It was easy to rip apart as I watched TV. In the meantime, I've added another one of these maxi dresses in these fabrications to my "To Sew" list. Hopefully that match will fare better.

To make this a maxi skirt ~ 
- I added the skirt portion to a 2" wide black elastic cut a couple inches shorter than my waistline
- I purposely did not iron the skirt before pinning it to the elastic. 
- Since the top was already gathered, it made it easier to pin the gathered fabric to the elastic.
- I added one line of stitching at 5/8" and then again at 1/4" to secure it.
- Because it was already hemmed, once the elastic was attached, the skirt was done.

A few pictures ~


It only took a couple of hours to add a new skirt to my closet. This summer I'm concentrating on adding more maxi skirts, maxi dresses and wide legged pants to my wardrobe. I've accumulated so many maxi dress patterns over the years that I'd like to challenge myself by actually sewing a few of them!

...as always more later!


Saturday, October 29, 2016

A TNT Dress becomes a Tunic

I bought this linen fabric in 2015 at the Sew Expo from Marcy Tilton's booth. I loved how bold the print was and bought it thinking I'd make a TNT dress from the fabric.


The linen on the left was purchased from Marcy Tilton

That year I was at Sew Expo, I had no idea where I'd end up work wise...but I liked the fabric so I bought it. Then I made the dress up this spring, thinking that I'd wear it with a sweater to work. 


I never shared the finished dress here on the blog because TNT dresses are no longer blogged unless there is something really special about them. However, my daughter did photograph it and after viewing the pictures I never wore it. Mostly because in my opinion the fabric doesn't work for this dress.


See even I misjudge fabrics ~ because this is more of a top/jacket type of fabric. So I decided to cut it off and make a tunic to go over my skinny jeans. Since it's my wave of the future...


As you can see from the photos above the original dress was sleeveless. Using the dress' short sleeve pattern, I made new sleeves.  The bottom portion of the skirt was cut off and I placed the sleeve pattern on the side seams using the finished hemline. Cut them out and assembled like normal.


I added some darts to the back to remove the excess fabric. While this reduced some of the extra fabric, it still left the top with the boxy look that I wanted. I topstitched the hem with a double needle and the revised top was done.

I will be wearing this under a RTW or me-made jeans jacket now and later in the winter under a black cashmere cardi.  It will bring a bit of brightness to those dreary winter days.

(My #nastywoman pose!)

I'm thrilled I salvaged this amazing piece of fabric and turned it into a wearable garment. 

...as always more later!


Sunday, August 07, 2016

Denim

Denim has been on my mind a lot lately and if you know me you've heard me speak about recently.  Denim is the fiber of choice at my company. So not being a jeans girl it's taken me a minute to rethink my thoughts on denim.

Back in the spring I made a couple of denim dresses.  You can see them here, here and here.  It's been so hot here lately that they've been shoved into the closet to await cooler weather in the fall. 

During the making of these dresses, I realized that I can make anything from denim.  So all of those dress and skirt patterns that I've been gloaming on thinking that I'd never be able to sew them now, have gained new life in my creative mind. Serious mike drop moment here!

Then I'd been hearing about the Refashioners Denim Challenge on IG and a couple of sewists blogs. The premise totally intrigued me so I tracked down the origins of the posts using #refashioners2016 on Instagram.  That led me to Portia's blog, Makery...random acts of creativity, where all of the information on this year's refashioning challenge using denim jeans is contained. There are some amazing outfits being made from discarded/unused and unwanted jeans.

I've collected a few items on my Pinterest board using recycled jeans to make maxi dresses but these new refashions are so imaginative and creatively stimulating adding more fuel to my creative fire. Not being a jeans girl myself, I only have two pairs of jeans that can be recycled. One is a pair that is a little too tight. I probably could wear them in another couple of months but I have an idea to "boho" them up a little so I'm going with that. 


My other pair is a brand new pair that are 3 sizes too large for me...they were accidentally shipped to me in an online order. These will definitely be cut up. I have no plans to enter the Refashioners competition, but I do want to do a little refashioning and reusing.

I have an idea for a new dress using parts of both of these jeans and the leftover scraps from my previous denim makes. Refashion and reuse, right?! Anyway, this isn't next on my cutting table. There are a new pair of pants cut out with coordinating pieces and I want to try McCalls 6886 in a couple of ITYs. It's still really hot here and probably will be into September. So while fall is on my radar, it's just on the perimeter.


There will be a lot of denim showing up here this fall and winter in a lot of different patterns both new and tried-n-true. I'm pretty psyched about that!

...as always more later!


Sunday, July 10, 2016

Another Remake...

So last year I gave away 5 large construction garbage bags full of clothing. They were mostly filled with dresses and pants. I held onto most of my sweaters, tops and tanks. I thought they could always be taken in or refashioned.

Fast forward to this summer and my drawers are overstuffed and I'm a little annoyed so I've decided to remake some of the pieces or donate them. I'm going through a drawer at a time (cause that's all I can handle) putting some things in a donate pile, a piece or two in a refashion pile and refolding the rest and putting them back in the drawer.

I'm slowly but surely clearing things out...which brings us to this refashion.

I sort my drawers by color because if I'm looking for a white top/sweater, I don't want to sort through 8 drawers to find one. I started this adventure with the white drawer first because it was the top drawer in my bureau. I had two of these tanks. They were part of twinsets that I purchased from QVC about 7 or 8 years ago. Somewhere I lost one of the cardigans but still had both tank tops. Since I don't need both tank tops, I decided to remake one of the tanks into a maxi dress.

This is another one of my easy breezy maxidresses that is simple to make. This time I used a bright floral rayon that I bought from fabric.com in 2011/2012. They were a part of the Van Gogh series from the Free Spirit Collection. I fell in love with these rayon prints and bought two from fabric.com and three of them from Low Price Fabrics. You can read all about it here since I actually documented their arrival. Again more pieces of fabric that I bought because I loved them and not because they actually fit into my work wardrobe at the time.
  • To make this one, I cut two pieces of the fabric 45" long and serge finished both edges. 
  • Then I stitched 3/4" side seams making sure to include all of the selvage markings.
  • I added a line of gathering to the front and the back separately and then gathered each one about 1/2" from the side seam on either side.
  • Gathered the fabric to match the front and back pieces and sewed it together.
  • Pressed the seam up.
  • Stitched a 1" hem into the skirt.

Construction Pictures ~
The top before I cut it off
The top after I cut it off

The dress at this point had a nice look but it was kind of loose fitting and I was seeing a closer top with a wide skirt in my mind's eye. So I went looking for a green striped ribbon that I knew was in the notions collection.


I added it to the dress right beneath the empire seam line, stitching it to the side seams. It added some interest and it allowed me to tie the bodice closer. I was worried that the ribbon with the bow was too juvenile looking for me but I think it works.

A few pictures of the completed maxi dress ~


There is a lot of fabric in this skirt and the wind blew it out so beautifully.

With the matching cardigan ~


Sometimes I think I should apologize for going my own way and not always using a pattern because it makes it hard to duplicate an item. BUT I know that I have to sew for me and this fits my lifestyle now. It was so worth it refashioning a piece that would have otherwise been donated. 

Plus I LOVE all of the extra fabric in this maxi dress. The black crochet/striped maxi dress that I recently remade has a slimmer look so I have to take smaller steps in it. I wanted something that moved & flowed and this dress more than meets that requirement. This dress makes me happy. Seriously, it's just a fun dress!

I do have a lot more sewing from the 4th of July weekend and this pass weekend to share with you. Most of it is actually from a current pattern - hahahahaha! So more items up on the blog soon.

...as always more later!


Sunday, June 26, 2016

Remaking A RTW Dress

I've honestly forgotten how long and involved it is to sew a wardrobe. I've been sewing for so long that I've grown accustomed to my almost totally made by me wardrobe. I'm also spoiled. I've sewn so much in the past that I had many outfits to chose from on any given day. That is no longer true...

So while I continue to sew more garments, I caught a sale at Jessica London and thought I would add a dress or two to my closet. They were really reduced and so inexpensive that I thought even if I need to make some adjustments to them, it would be worth it.

Two dresses arrived this week. After trying them on I realized that neither fit particularly well and so I decided to make some changes.

Black cotton lace with black gauzy like body

The first one I fixed is the black cotton lace and silky like fabric which was not that in real life. The bodice was made from the black cotton lace but the skirt was too short and made with a really cheap cotton broadcloth that stuck out at the sides ~ totally unappealing and not worth the $26 I paid for it. 

Here is my finished maxi dress ~

Construction ~
Since I was really only interested in the black cotton lace bodice I cut it off of the skirt bottom and set the bottom aside. Then I also took the sides in a little to snug it up against my body because it had the requisite RTW ease.


I added this knit that I recently purchased from Fabric Mart to the bottom of the top to make a new maxidress.


  • To get the skirt bottom I cut a piece 45" long and left the full width.
  • Then I sewed up the back seam.
  • There are gathers in the front to make it fit a little softer and tucks in the back to make the fit better over my backside. 
  • I serged the hemline of the skirt piece and then stitched it to the bodice top.
  • Sewed the skirt to the bodice using a 5/8" seam allowance.
  • Pressed the seam up.
  • Pressed a 1" hem on the bottom of the skirt.
  • Added stitch witchery to the hem and pressed flat.
  • Stitched the hem down and pressed it.

A Couple of Photos ~


Conclusion ~
I made this in about two hours. The total cost of my new and improved dress is $29.60. For the cost of my finished dress, I'm using the full price of the dress for the bodice plus $3.60 for a yard of fabric. If I were to make this from scratch, I think it would have cost about the same amount of money. So in the end this was a good investment and well worth the time to transform it.

The second dress I bought won't be altered as much. The changes are more simple and it will show up here soon. I wanted this maxi dress to wear to an afternoon barbecue yesterday. Since my daughter and the grandkids were going with me, we snapped a few quick pictures while we waited for the rest of the family to join us.

Finally I don't know if I'm on the tail end of this trend or not...however...I can tell you that I love wearing maxi dresses and will probably be wearing them for many more seasons. They are so comfortable to wear and give me that casual yet well put together look I'm striving to achieve. There will be more variations of maxidresses here on the blog sooner rather than later!

...as always more later!


LinkWithin

Related Posts with Thumbnails