Friday, August 30, 2019

End of August 2019

The end of August always brings mixed feelings. I know summer will be ending soon and the cold weather is coming. However, I try not to dwell on that so I can still enjoy the warm weather that will hang around until October.

My clothing needs change as the weather changes. Since it's been cooler this week, I've been thinking more about transitional garments especially since I'm off for five days for this Labor Day weekend. I do plan on spending that time sewing...new fabric purchases and the last garments from my cut pile are stimulating my sewjo.

Okay lets get to this month's sewn garments update ~
Six new garments were made this month...five were blogged. I've carted the last maxi dress around just haven't been in the mood to have pictures taken yet.


This month I made:
- Two Simplicity 8871 - both maxi versions of the short woven dress
- Another Katie tunic
- Three Myosotis dresses
   All maxi versions - 1 w/short sleeves, 1 w/o sleeves & 1 totally hacked 
   (this one that has yet to make it to the blog)

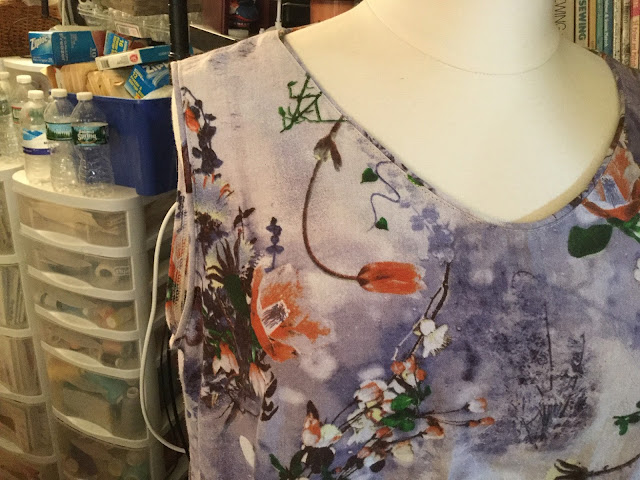
Blue/White Myosotis during construction

My sewjo was in full effect and I filled a major hole in my summer wardrobe by adding 5 more maxi dresses to the closet. I'm currently working on the last maxi dress from my cut pile ~ a new pattern. One of my goals for this sewing weekend is to develop a new cut pile. This system seems to be working for me so I'm carrying it forward into fall.

Fabric In & Out Update ~
I broke my fabric fast when I went to Zooks last weekend and purchased 10 yards. I'm not upset that I purchased fabric especially since Zooks fabric doesn't last long in my fabric collection. The top two pieces are already slated to become shirts and will be cut this weekend.


I also purchased another 9 yards from Fabric Mart. A Milly print I'd drooled over for weeks was getting low at FM and a scarf type print. This scarf type print was one I've been searching for, so another fabric off my "must find" list.  Neither of these fabrics will be sewn soon but again I'm good with that.


Actual totals ~
August MTD In: 19 yards
August MTD Out: 2.25 yards

YTD In:  265
YTD Out: 210.75

I'm still 54.25 yards more in than out. Honestly though I'm good with this. I have no plans to fabric shop in the upcoming months. I'm looking forward to putting my summer fabric away and pulling out some transitional/fall pieces.

End of the Quarter Update ~
As I said earlier I am moving into transitional sewing. So here's a recap of all my summer sewing ~


I have sewn 17 garments since the end of May. I'm looking forward to sewing some tops and shirts to wear over my jeans. Yes, I will still be wearing my maxi dresses and skirts for the rest of September but I know colder weather is coming.

So I will be sewing some this weekend and I hope you get the chance to sew too!


...as always more later! 

Monday, August 26, 2019

The Crown Exhibit at The Winterthur

After Renee (MissCeliesPants) posted to her Instagram stories that she and Carly had gone to see The Crown Exhibit at The Winterthur Museum, I started plotting a trip with Gaylen. Luckily I worked my last Summer Friday this past Friday, so I was on a 3:05pm train to Lancaster soon after.


After dinner out, I had a relaxing evening at Carriage Corner B&B. I swear staying there is way more enjoyable to me than staying at a hotel. Less people, more personal attention and large comfortable rooms.

Saturday morning after eating an amazing breakfast, I headed over to Zooks. Another thing I like about Gaylen's B&B, most of where I want to go is within walking distance...and I always want to go to Zooks! I left Gaylen saying I'm only buying two pieces...only two!  

So here is what I came back with ~

I looked at this border print when I was at Sew Camp and decided
against purchasing it but I just couldn't leave it behind this time!

Purple Mod 60s print on the left
Blue/Yellow floral print on the right

The button bags are 24 buttons for 98 cents 
and the bags of a dozen were 20 cents a button

After showing considerable restraint at Zooks, cause I really could have purchased four or five more pieces, I ended up with just three. I was really proud of myself y'all! I also ended up buying every button I could at Nancy's, cause cheap shirt buttons...ummm yeah!  Then I headed back to the B&B where Gaylen was ready to head out to Delaware to the exhibit.


You can see the exhibits, take the house tour, and the tram around the gardens. Unfortunately we scheduled a late house tour first. Honestly I wanted out of the house tour 10 minutes into it. I'm just not into house tours of racist rich white Americans where the tour guides whitewash history. 

Next we went to see The Crown Exhibit and then missed the last garden tour tram which Gaylen really wanted to see. 


I was really thrilled with The Crown Exhibit though, probably because I love the show and am anxiously awaiting the next season! The interesting thing about the exhibit, is these garments are replicas of the actual garments the Royals wore and are displayed how the actors wore them in the Netflix series. There are lots of placques and information about how the costume designers designed and created the costumes. Thrilling me to no end with all the behind the scenes information about them.

You begin the Exhibit with Queen Elizabeth's father dying and how she became Queen.  So the Coronation Garments are first...

Queen Elizabeth's Coronation Outfit

The robe & suit that Prince Philip wore to the Coronation

The Coronation Crown and Scepters

The outfits were separated out by characters and events. I'm not going to highlight all of the outfits just my favorites. So after the Coronation robes, the next garments I adored were the wedding gowns of Queen Elizabeth and Princess Margaret.

Queen Elizabeth's Wedding Gown to Prince Philip

Placque showing Queen Elizabeth & Prince Philip and Claire Foy,
the actress playing Queen Elizabeth wearing the wedding gown

Even the train was hand embellished!

Princess Margaret's wedding dress was a contrast 
because it was simplier in make and design

A few other pictures of evening wear because it was just stunning...

The dress Queen Elizabeth wore to meet Jackie Kennedy

Princess Margaret's Evening Dress (notice the pockets!)

Queen Elizabeth's evening dress

Queen Elizabeth's Coronation Dress with the special honors on it
and the Life Magazine cover showing the dress


I loved the exhibit. Gaylen wanted just a few more costumes. I guess I knew what to expect because I watched Renee's Instagram stories several times. To me that was worth making the trip to Winterthur alone.

On the way back to the Inn, we stopped at the craft store because Simplicity Patterns were on sale for $1.99. I only purchased three - trying to only buy things I will actually sew before the season is over. I also bought 10 skeins of yarn to start a new crochet project...but more on that later!


I came home Sunday evening after a wonderfully relaxing weekend! While I didn't sew, I had an amazing time with my friends and am so ready for Labor Day weekend sewing. 

If you get a chance to see The Crown Exhibit I highly recommend it. The Exhibit will be at Winterthur until January 5, 2020, so plenty of time to plan a trip!

...as always more later!


Tuesday, August 20, 2019

Simplicity 8871 ~ Number Two

I really liked the first Simplicity 8871 BUT there were a few things that I thought I could do better. Which meant I had to make it again...


I used another linen/cotton print from the batch I purchased from Fabric Mart. So a few details about this version.

I changed the following:
1. In the first one I used a 14" invisible zipper.  For this one I used a full 22" zipper so I can step into the dress.

2. I added 1/2" from the bustline down to the hemline.  I like the closer fit through the shoulders and bustline but wanted just a little more room in the rest of the body.

3. Originally I was going to close the slit up. I got an idea when I was cutting the dress out to add a small gathered ruffle to the bottom of the dress but towards the end of making the dress, I ditched the ruffle idea and left the slit in place.  

4. While I added piping to the neckline of the first one, I used purchased piping. I really loved the piping at the neckline but there wasn't any purple or lilac piping in my notions stash. 

5. So I made my own from the leftover fabric. The self fabric piping doesn't stand out like the piping does on the original dress. It does, however, finish the neckline and the armholes which is what I wanted.


6. I omitted the side seam pockets and did not add any to the front of the dress. This version is pocketless and I'm good with that.

Supply List ~
22" beige invisible zipper
4 yards of piping I made several years ago
Interfacing from Steinlauf & Stoeller

Making the Piping ~
In my trying to "Make Do" I decided to make my own piping for this dress. I rambled through the collection and found some remaining piping I'd made & used on another project.

I cut bias binding from the fabric scraps to cover the premade piping.


Sewed the bias binding onto the piping.


Finished the neckline and armholes off with the piping.


Since I only sewed the bias binding onto the piping it was an easy make. 


A Few Pictures ~


I know I seem to have piping and border print fever since both techniques have appeared quite a bit in my summer sewing. I really like both of these techniques. I like manipulating the border prints and I like how piping adds a finishing touch to my garments. So I'm sure they will appear again on future garments.

So I learned a few things from making the alterations to this version. One the 1/2" on each side gave me 2" of ease making the dress a lot looser fitting throught the body than I thought it would be. I almost went back in and took some of the extra ease out but realized I needed a loose-fitting woven maxidress for the next humid and hot summer day...so I left it alone. Of course the next 90+ degree days are on the horizon so I'm glad I have this one ready to wear!

Next up is another Myosotis dress. I kinda went nuts cutting out versions of this pattern. This is the second to last version and most hacked one I've made.

...as always more later!

Saturday, August 17, 2019

A Zooks Katie

This is my second Katie make of the summer. It is seriously one of my most comfortable summer garments. I wear this one all.the.time and everywhere! I wear it so much that I have to remind myself NOT to reach for it. So it became apparent that I needed another one like it because I love the combination of the tunic with a pair of knit capris.


The thing is that I wanted a lighter color version to wear with white capris or white jeans. Luckily I had 4 yards of this shirting cotton recently purchased from Zooks during Sew Camp.


Supply List ~
Blue & white quilting cotton from Zooks
White linen from the collection via Fabric Mart - this is stash fabric
10 5/8" white mother of pearl buttons
Interfacing from Steinlauf & Stoeller

Sewing Info ~
Since the fabric was only 45" wide I didn't cut the back piece on the fold because the pattern piece did not fit. This version now has a back seam as does the back facing. Although you can't tell its seamed because the print is so busy.

I imitated the black version by using white linen for the front bands, collar and under collar. My change to this top is the sleeves. It was a simple change to make.


1. The sleeve was folded in half, pressed and cut in half.
2. Both side seams were serged finished.
3. Then I sewed 4" from the cap down. 
4. The rest of the seam was pressed open and topstitched.
5. A band was cut 4" wide and 16" long from the white linen
6. The band was then sewn to the sleeve at the openings and pressed flat.
7. Next a 3/8" seam was pressed to the unsewn band side.
8. The band was pressed in half and topstitched down to the top of the seam - enclosing the band seam.
9. The entire band was topstitched, closing in the pressed 3/8" seam allowances.

There are no other changes made to this version of The Katie Dress.

A Few Pictures ~


This will be my last Katie for the summer. I still have a few other patterns I want to squeeze in and sew before the weather turns...and more garments in my cut pile that need to be completed.  So look for more garments coming to the blog soon!

...as always more later!


Wednesday, August 14, 2019

Lemons, Lemons and More Lemons

I've wanted a garment made from lemon fabric since lemon fabric started appearing on the scene. I'd tried unsuccessfully to purchase some but it always sold out before I got my act together. A couple of months ago I was able to score a cotton sateen lemon print from StyleMaker Fabrics. I knew when I purchased it that I wanted it to be a Myosotis Maxi.


I've made this dress several times now and consider it a TNT pattern.  So I have no new construction tips that haven't already appeared in another blog post. However, I do want to talk a little about why I own this Deer & Doe Pattern when their expanded size representation is weak. First, I own this one because I fit into the largest size with a couple of small tweeks. I didn't have to redraft any of the pattern pieces to fit me and I was able to purchase it as a paper pattern.


If I did not fit into those measurements, I wouldn't have bought or used this pattern. And no, I'm not actively promoting this pattern line because they do two things that I don't like.  One, the expanded sizes are only available as PDF patterns and two, the expanded sizing measurements are smaller, not typical plus size measurements.

Honestly, I'm lucky enough to be able to fit into the higher end of a lot of indie patterns. I don't purchase many of them because of their sizing and the fact that they're only available as PDF Patterns. Team Paper Pattern all the way!

Now with all that said, I've made some amazing Myosotis dresses. The Velvet Maxi and the Black Tie Maxi being my all-time favorites. However, my most worn one is the rayon print one made last year. It's the reason why I'm adding more Myosotis Maxis to my closet this summer.

Supply List ~
3 yards of cotton sateen lemon print from StyleMaker Fabrics
Yellow & White gingham accents from Fabric Mart
12 1/2" yellow buttons from M&J Trimmings
Interfacing from Steinlauf & Stoller

Design Changes ~
Besides the collar that's been added to almost all of the versions I've made, I also added piping to the collar and the front. This version is sleeveless and I added the button front band to the skirt. I also used the yellow gingham to add some amazing highlights to the inside of the dress.


For the pocket bags

Bias binding to finish the armholes
and for the under collar

For the inside collar band and front facings
plus close up of yellow buttons

I love being able to put my arms through the armholes instead of having to pull this over my head. I love how the buttons look marching down the front of the dress. And I love the fact that since the fabric is 54" wide, the gathering adds beautiful folds to the back and front of the dress' skirt.

A few pictures ~

Eyes closed thanking God this turned out so well!
Okay I was actually blinking but I love the shot anyway!


Look at those folds in the back...

Of the three I've made recently, I will admit this is my favorite. I'm sure I will wear it alot this summer and early fall. I'm so happy that I got to use my lemon fabric in such a great garment. Though honestly I want more and since I'm participating in #projectfabricfast, that's just not happening.  Well not now but maybe in the future! *wink wink*

I did a lot of sewing the last two weeks.  My sewjo was on full blast and I hunkered down in the sewing cave and took full advantage of it.  So there are a couple more new garments coming to the blog shortly.

...as always more later!


Sunday, August 11, 2019

A Maxi Shirtdress Myosotis

I love my Maxi Myosotis dress so much that I've made it several times. However, they've all been more formal versions of the one I made last summer.


The inspiration for this dress was from this Myosostis hack on Instagram ~

Inspiration care of @lilly_grace_cabotine

I really wanted several of these for summer.  They fit my lifestyle, are comfortable to wear and eat up large amounts of fabric ~ which I'm all about this year! *LOL* I'm annoyed that I just started to sew Myosotis dresses so late in the season because it's everything I want in a summer dress.

A Few Things ~
It was very easy to hack this version of my maxi. 
- To make a button front on the front, I halved the front piece and pressed it.
- Then I cut the front in half.
- The button band was made by folding over an inch, pressing down then folding over another inch.
- This was done on both pieces and topstitched down.

Design Changes ~
1. I add piping to this version just like my last few versions. 
2. Because I used short sleeves for this one, piping and bias binding was also added to the sleeve hem, as well as, piping to the front opening and the collar. 
3. I omitted the piping from the waistline seam. I thought it wouldn't play well with skirt's button band.
4. The skirt is a large rectange - the width of the fabric and a length of 39". 

Supply List ~
4 yards of 100% cotton purchased from Zooks Fabric Store in Lancaster, PA
4 yds of piping from the collection by way of Daytona Trimmings
12 1" plastic 4 hole orange buttons from M&J Trimmings
Interfacing from Steinlauf & Stoeller

A Few Pictures ~


I really want more Myosotis bodies but with changes/hacks. I think I achieved what I wanted to with this one. It meant thinking through some of the design changes, slow sewing to add piping and careful thinking about how to make the fabric work for this design. 

In all honesty, when I tried this dress on during fitting, I wasn't sure it would work. I'm not usually a fan of small prints and haven't had much luck with them. Adding the larger buttons gave the dress front a pop which I think it needed. Oh and since this dress is made from 45" wide cotton, the gathered portion of the skirt is smaller (86" vs. 104") when I use 54" wide fabric. 

This dress screams comfortable summer wearing to me and reminds me of a good Carolina Herrara dress...which is definitely my style. I cut out three different Myostis dresses at the same time.  So another hacked version is up next!

...as always more later!


LinkWithin

Related Posts with Thumbnails