Showing posts with label Janome Maker. Show all posts

Sunday, January 22, 2023

Do You Jelly Roll???

Let's start out by saying I'm not a quilter.  Even though I've made several "quilting" projects, they're not my top must sews.  However, I love jelly rolls.  The thought of them, how the fabrics play so well together, how they can become so many different things.  

Whenever I see one, the possibilities of what the new yardage can be inspires me.  Especially black & white jelly rolls.  So while I'm not a quilter, I was inspired to buy several jelly rolls and make two yards of fabric from them to create a top.


Supplies used ~

2 packages of black & white Ankara strips purchased from Cultured Expressions.  Each package had 20 strips.

1 yard of solid black cotton fabric from StyleMaker Fabrics for the strips, sleeves and back insert.

7 3/4" buttons purchased several years ago from Pacific Trimmings

1/2" black bias binding also purchased from Pacific Trimmings


First let's discuss making the fabric ~

Honestly, this was the most tedious part of the sew and took me about 4 days to complete. I whined through this part because not only was each seam sewn but they were pressed open, then flat, and serge finished.


Here's how I made it ~

1.  Sorted the strips into piles.

2.  Determined how I wanted the layout of the strips to look.

3.  Sewed the strips together using a 1/4" seam. My sewing machine has a 1/4" foot with guide and one without a guide.  Using the one with the guide was SOOOOOOO helpful!

4.  After 11 strips were sewn together, I added a black strip cut in the same dimensions (2.5" x 45") to differentiate the sections.

5.  When each section was sewn, I pressed the strips to the left side.  Then each strip was serge finished. I did this because my yardage will be used for a garment and needs a cleanly finished inside.

6.  Continued this for 3 sections to get the yardage I desired.

You can see I made this yardage during my Christmas break!

Once you decide how much yardage you need - I needed 2 yards to make the top front, back, front facings and sleeve bands - then you can start your garment's construction process.

Since I had all of those seams, I chose a pattern that didn't have a lot of pattern pieces. I didn't want to cut apart the fabric I'd just sewn together. So I started with Anna Allen Clothing's Anthea Blouse.


Design/Construction Changes ~

I need you to know that while this pattern goes up to a size 22, in my opinion, it's not size inclusive. The hip measurement on a size 22 is 51" way below the amount of space I need for a flowy hemline.

I made some simple pattern adjustments to get the top to fit me.

  • I'm bigger on the bottom than the top.  So the shoulders and bustline on the size 22 fit with no problem.  My challenge is my abdomen and waist.
  • I also had no challenges with the sleeves since the design is for very wide sleeves.
  • On the front pattern piece I did a slice and spread from the abdomen to the hemline - spreading the pattern 1" at the hemline.
  • To add width to the back, I went with a design technique to get the necessary width. Especially since I needed to go from 51" to 65" at the hemline (this includes ease for wearing). 
  • I added an 8" insert to the back that when opened, gave me more than enough space in the abdomen and hip area.
  • The back pattern piece says to cut on fold. I cut them as single pieces adding 1/2" seam allowance to both. 
  • Then the insert was sewn to either side of the back pieces using a 1/4" seam allowance. 
  • I chose a point about 6" down the back and stitched the original two back pattern pieces together using a 1/4" seam allowance. 
  • Press flat and open and walah, extra width and cool design feature.
  • The last design feature was to cut the sleeves from the solid black fabric and the sleeve bands from the jelly roll fabric. 


A few more things ~

- I did lengthen the blouse by 3" because my comfort level is that everything adequately covers my abdomen and backside.

- I didn't want topstitching to show on my blouse front.  So I hand stitched the bias binding down and didn't include topstitching on the front facings.

- The pattern tells you to double roll the hem and topstitch it down. I used a bias binding to finish the hemline because the bulk in double rolling the hemline would have distracted from the finished look.

I have this thing about "corralling" patterns so your eye has a place to rest. I think it makes the finished garment more appealing to the eye. That is why I used the black sleeves, black strips, and black back insert.

Here are a few pictures ~


I did make a few design decisions that affected the end result but everything was done to highlight the beautiful fabric made from the jelly rolls. This was the only thing I made during my Christmas break.  Making the fabric took 4 days alone, then construction took another 2. I was fine with this project taking up the bulk of my sewing time.

Especially since this is my last post as a Janome Maker.  I've been a Janome Maker for almost three years and it's been a privilege and an honor to rep one of the best sewing machine companies out there. I'd like to thank everyone who worked with me at Janome to make this one of the best experiences ever!


...as always more later!


Wednesday, July 27, 2022

A Simple Summer Maxi Skirt

Are you looking for that simple to sew garment with a lot of style?  One that's easy to make at the last minute for a holiday?  Or one that dresses up and down for any occasion?  Well, I've been making a version of this simple to sew summer maxi skirt for years. 

Skill Level:  A beginner to advanced sewist

Machine used for this project:  Janome 9450QCP   

Materials ~

  • 1 to 2 yards of fabric of 45" wide or 60" wide fabric based upon your measurements.
  • A tape measure, tracing paper, pencil
  • A yard or two of 1" wide elastic based upon your waist measurement


Prep ~

Fabric:

Please wash and dry your fabric before starting this project. This skirt is perfect for any fabric type you want or have on hand. A knit, a stable ponte, a woven, silk or cotton. Whatever you want to use is fine. 

Measurements:

1. Take your waist and hip measurements and record them. 

I'm going to emphasize making this for a plus size sewist. When taking your measurements, take them sitting down. You will notice a difference of 1" to 5" because the larger we are the more we spread. I'm strongly suggesting that you use the sitting measurements to make the skirt.

2. The next measurement you should take is a waist to floor measurement or waist to ankle measurement if you want an ankle length skirt.

Again, this skirt can be any length you want. Mini, knee-length, calf-length, tea length or maxi. I've made a maxi skirt because that's my jam now.

3. Make a pattern using your measurements or trace them right onto the fabric.  

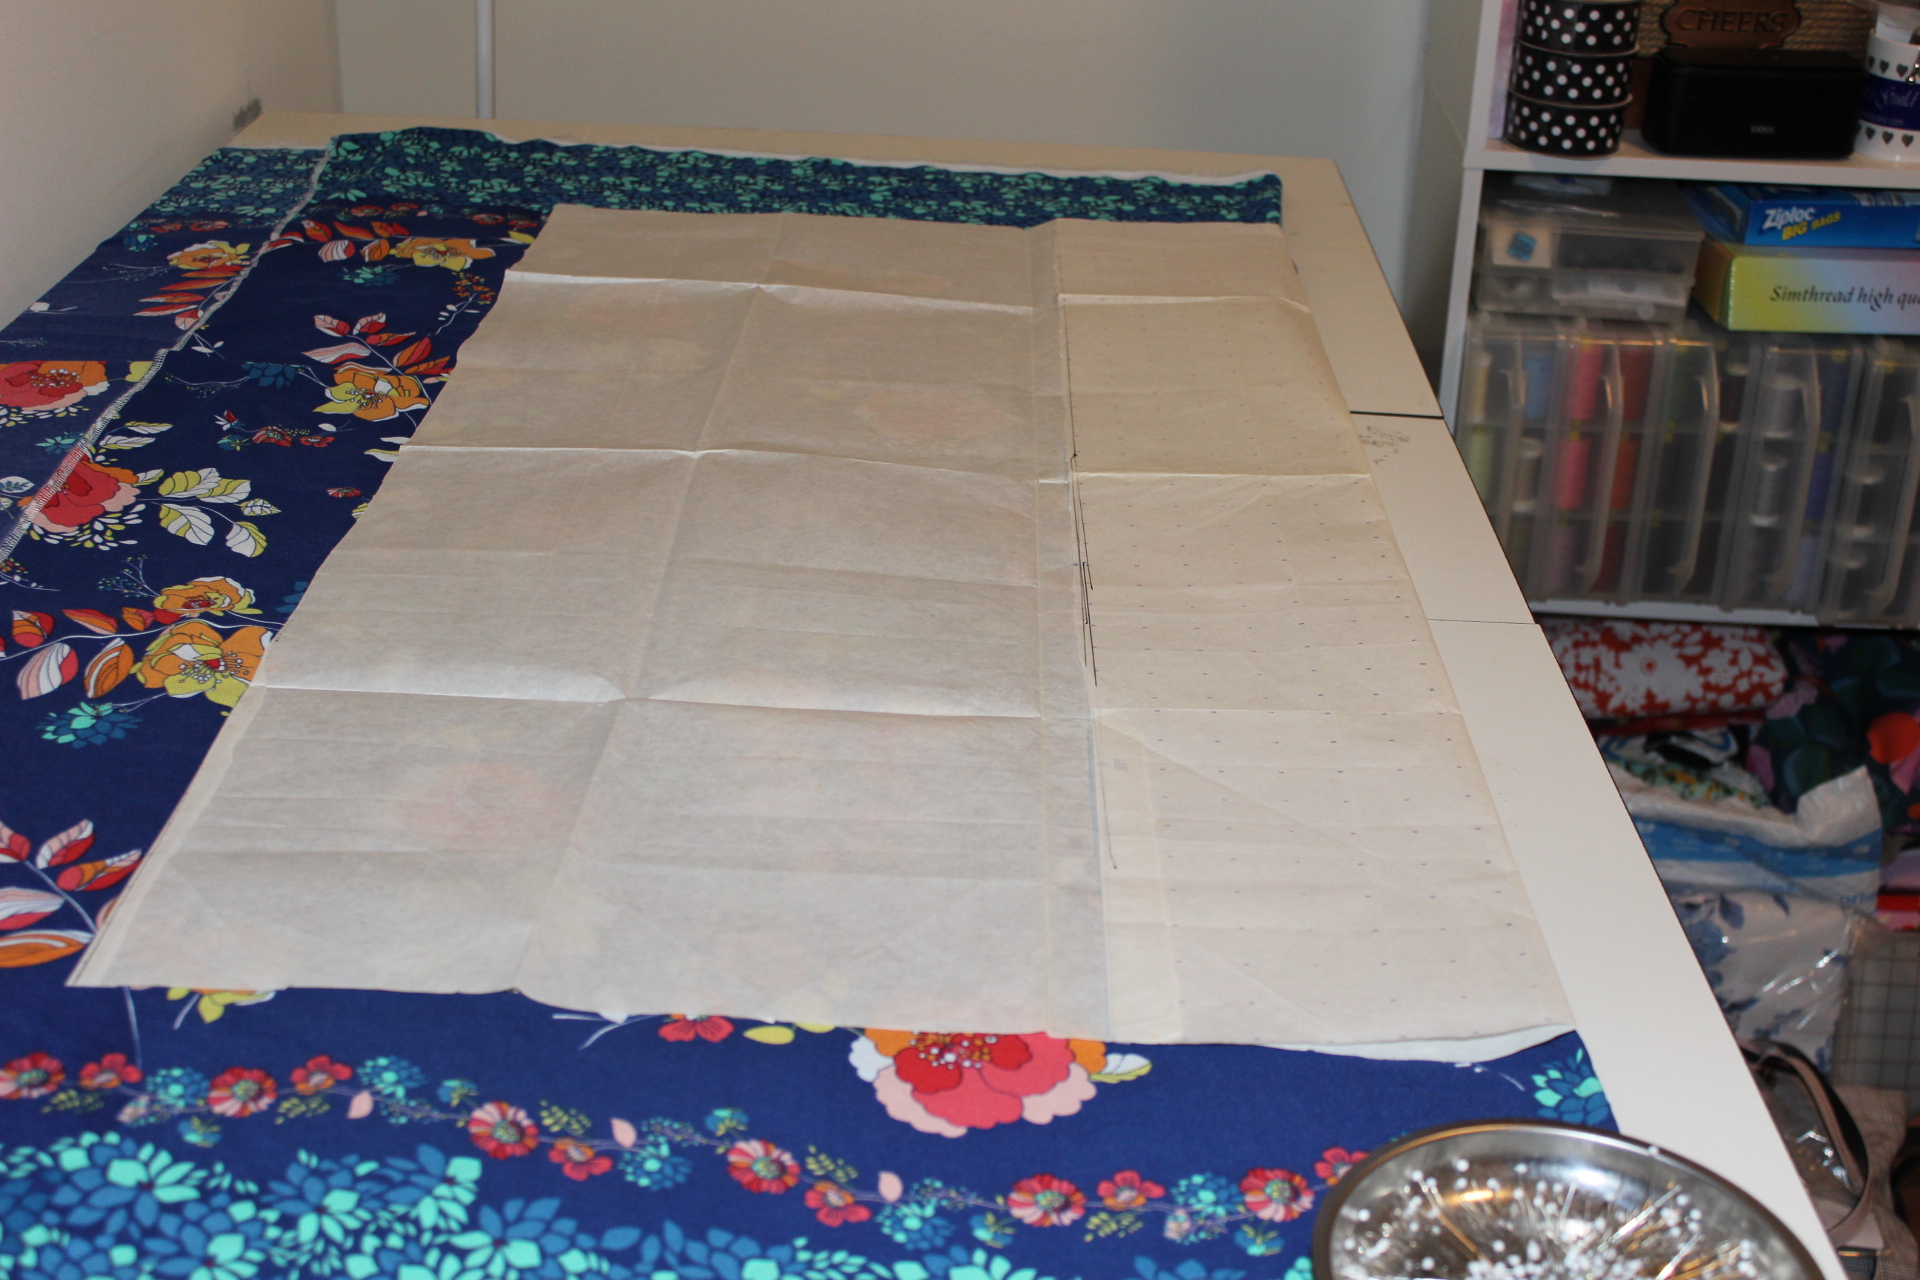
I usually make a large square (pictured above) using my hip measurement and the length I want for the pattern.

- I add 5" of ease and 2.5" for seam allowances for 5/8" wide seams.

- To finish the square I add the length measurement plus 2.5 inches for the elastic casing at the waist. 

- You can change the amount of ease you want on the sides if you want it a tighter fit by adding less ease. You can also do this after you've cut the skirt out and tried it on.  Make larger seams if you want a tighter fight or smaller seams if you want your skirt a little looser.

- If you're in a hurry and need this quickly by all means trace your measurements onto the fabric and then cut. However, I suggest making a pattern because once you see how easy this to make you will want to make more.

Construction ~

o  After the fabric squares are cut out mark the front/back and top/bottom of the squares.

o  I like to finish all of the seams using my serger prior to constructing the skirt. 

o  Pin the side seams together.

o  Hold up the skirt to you to determine where you want the side seam slits to begin.  Mark and pin that.


o  I use a pin with a different colored head, so I know to stop stitching right there when sewing the seam.


o
  Sew the skirt using a 2.8 straight stitch on your sewing machine and an 80 universal needle.

o  When you sew the side seams, stitch in a piece of stabilizer. It can be seam tape, twill tape, or selvage edge piece to prevent the seam from tearing when you walk.

o  Press seams open making sure to press the side seams flat below the slits too.

o  Turn down 1.5" for waistline casing.  Press.  A tip, stitch the side seams flat prior to stitching the waistline casing. The thread will melt into the casing and it will make it easier to pull the elastic through the casing.


o  Stitch waistline casing flat leaving a 2" opening in the side seam.

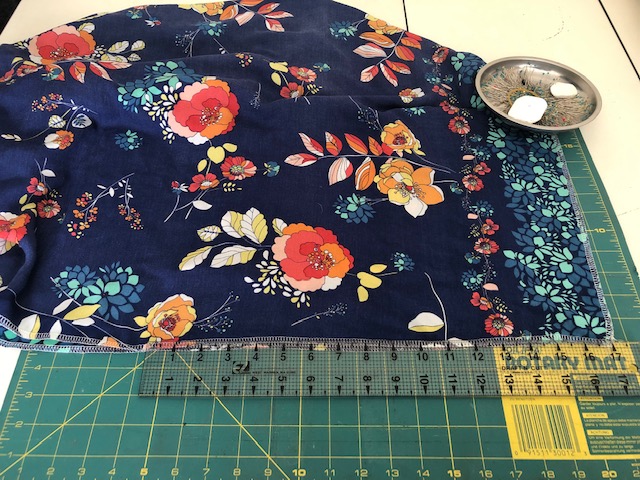
o  Measure the elastic to fit your waist.  Subtract 2-3" depending on how tight you want the elastic to be then cut it.

o  When inserting the elastic into the casing, I use an extra large safety pin at the end of the elastic.  However, you can also use a bodkin to do this. 

o  I also pin the end of elastic to the casing so I don't accidentally pull it into the skirt.

o  Once the elastic is inserted, layer the elastic 1" over each other and stitch down. I use a lot of stitching on this piece because I don't want it separating during wearing.

o  After you've stitched the elastic together, distribute the gathers around the skirt. Another tip, if you're plus size and carry your weight in the front like I do, put less gathers there.

o  Next stitch the elastic down in the ditch of the side seams. This will prevent the elastic from moving around in the waistline casing.

o  Add a piece of ribbon or a tag to the back of the skirt so you know the front from the back.


Finally press up a 1" hem and machine stitch the hem and side slits flat...and you're DONE!

In 2-3 hours, depending on how quickly you sew, you will have a fun and flirty skirt.

Wanna see my version ~


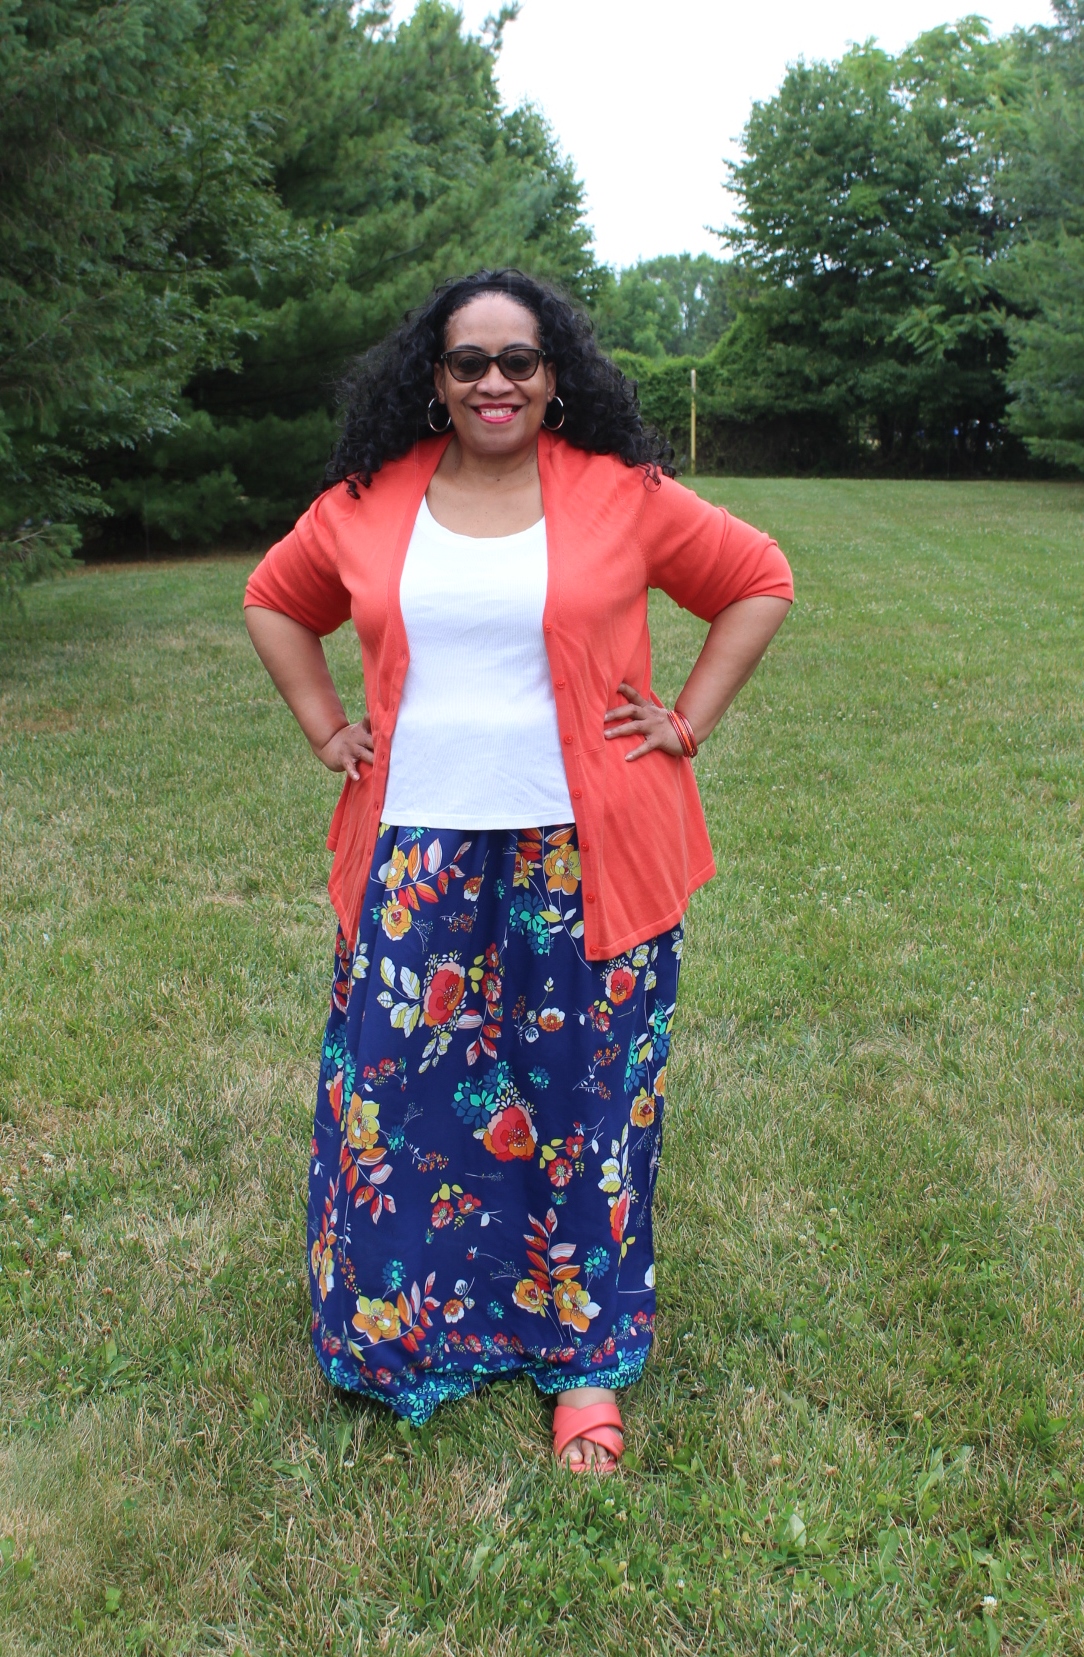
I used a crepey rayon border print to give the skirt so oomph and paired it with a tank top and cardigan. Perfect for work, dinner with friends or a casual date. I hope you will give this a try because it's a lot of bang for the buck and a quick and easy sew!

This was my July Janome project which you can see here.  Sharing it here to the blog too.  I've started a new cut pile so will have new outfits to share soon.


...as always more later!


Sunday, May 08, 2022

A Sofa Lap Quilt for Mother's Day

My latest Janome project is all about sustainability, reusing textiles, and remaking older quilts into new projects. I found several hand-quilted pieces when my Mom moved out of her townhouse to senior living.  I held onto them because we do NOT throw out handmade goods.

My Mom took up quilting as a hobby when she retired and she only hand stitched the pieces. I probably should say she took up piecing because while I found several of these, none of them were finished. After starting a few of these she stopped because this really wasn't for her.

So she was throwing out the panels because she saw no value in them. I saw their beauty and knew they could become something worthwhile. I knew I needed to update it to become a sofa lap quilt. That journey is documented below.

First though, let me say that I'm not a quilter.  I didn't use a walking foot or engage in any real quilting techniques. I used my dressmaking knowledge to put this together.  So any quilting inaccuracies are solely based upon user error. 

How to Change the Panel into a Lap Quilt

Materials ~

Found quilted top

2.5 yards of 59" wide fleece

8 yards double fold bias binding

Construction ~

Using a "found" or "passed down" patchwork piece, this should take a weekend to finish.

I re-stitched all of the hand stitching on the panel. My Mom used quarter inch seams so it was really easy to just sew over the hand stitching to reinforce the seams.

After the piece was reinforced, I laid the panel and the fleece out, wrong sides together making sure to leave 2-3" of extra fleece around the panel.


Then I pinned the panel and the fleece together. I stitched around the entire outside of the panel to secure it to the fleece using a 4.0 straight stitch.

I stitched the lines down on either side of the main sashing pieces, also. After all those lines were stitched down, I cut off the extra fleece around the piece to prepare it for binding.


I added bias binding to the edges of the lap quilt. Special care was taken to fold the bias binding in at the corners.

This was a quick project so I didn't do a normal miter at the edges. I folded the fabric over the edges using the steps above. It was quick, easy and served its purpose.

I'm giving this to my Mom for Mother's Day. It's a sentimental gift that I know she'll love. We see these unfinished pieces/panels at thrift stores, garage sales and flea markets. I'm encouraging you to pick one up, finish it and add it to your home decor or give as a gift.

I do have two more panels of hers so sooner or later they will show up here reimagined as something else. BTW, a version of this post has already appeared on the Janome blog.


...as always more later!


Saturday, July 17, 2021

Circling my Shirt

I'm always inspired by external things.  Nature, people watching, RTW, designer gear, etc.  I see something and it triggers my creative process.  That's what this white shirt from Lafayette 148 did...

Now it's an inspired by shirt because the idea of decoration on the white shirt intrigued me.  In my mind, I began to consider how I could create that affect on my own.  That's when I turned to the Circular Attachment that's a common attachment on most high end sewing machines.  I, however, love the simplicity of working with it on my Janome 9450QCP.

The Shirt Construction

Supply List ~

Pattern:  MimiG Katie Top

3 yards white cotton/poly broadcloth purchased from Metro Textiles years ago 

10 7/8" flat 2-hole blue buttons from the button stash

Amann Group Isacord 100% polyester ombre thread or a rayon thread of your choice

There are no new garment construction techniques to share about this shirt. It's the same as all of the other Katie's I've made. However, the instructions on how to make the circle design for the shirt are here on the Janome blog. This shirt is one of my Janome Makes as a Janome Maker/Brand Ambassador.


To highlight the blue threads used for the circular decorations, I added blue topstitching to the collar and sleeve hems.  And of course, the blue buttons down the front emphasizes the blue theme - cause you know I do trim in threes!

A few pictures of the finished garment ~


It was interesting to use some of the decorative stitches and the circular attachment to "interpret" a RTW design. It's one of the things I love about top of the line sewing machines, the extra features allow you to easily create any flights of fancy you may have.

One other thing to note - we took these pictures in 100 degree weather and the poly in the shirt was stifling. This is very much an early spring or fall shirt...not the summer shirt I was envisioning. There are some sleeve issues that I believe are caused by my fabric because I didn't have this pulling in any of the other Katies I made.

I am slowly sewing...recently posted my cut pile to IG. I have a few more items to add to it but hopefully another make or two will make it to the blog before the month is over.


...as always more later!


Sunday, February 21, 2021

Thoughts While Sewing

My sewjo has been screaming and since I have no where to go I've been going with the flow and sewing.  Of course this means that my thoughts run to different places while I'm sewing.

Here are a few of them ~

o  I'm sewing much slower than I use to.  Prior to the pandemic, I was always in a rush so I could wear my newest creation to work or out with friends. There's no need to rush anymore since lately I go nowhere...not to the grocery store...delivery.  Even the drugstore offers delivery or curbside pick up now.

o  In the last month I've purchased 44 yards of fabric. That fabric fast is OVER! I found that as I started to sew new fabric fueled my sewjo. So I bought a little bit.

o  I bought an inexpensive clothing rack to hold my makes.  Why not just put them in the closet, you ask?  Well I've decided that I want to sew a bunch of blue garments. As I complete each one I will add it to my rack...making my own blue collection. 

o  It's a wardrobe BUT not one where all the pieces have to work together. The thing that binds them together is that they will all be in the blue color family. I got the idea from the JJill ad above.

o  I've pulled some blue fabrics from the collection and I've bought a few yards. There will be shirts, dresses, a pair of pants, the jumpsuit and my denim jacket. Like I said some will work together but not all. The driving force will be that they're all blue.

(my latest cut pile)

o  It's given my sewing some direction which I've needed. I've also let go of the notion that I have to be able to wear it now to sew it. I have hope that I will be able to work in our office by fall. So the days I go in I will have new clothes to wear!

o  Here's my rack so far...

(A few pieces have been completed that haven't been photographed yet)

o  My blog is becoming more of a documentation of what I've sewn rather than a techniques driven/chatty blog like in the past.  I've been blogging for 15 years...January was my 15th anniversary...so I'm trying to link to techniques or information from my older blog posts now. No need to reinvent the wheel.

o  Sewing is becoming my refuge again. Weird to type that almost a year into the pandemic. I'm trying to learn to dress every day. I'm not always successful but cheer the days that I am.

o  And even in the middle of a pandemic, I have not learned to sew casual clothes. I'm beginning to think I'm either a slob or a fancy dresser...there's no middle ground. LOL!

o  On that note, I've decided to sew all the things. Before I was waiting...for the pandemic to end...to be able to go outside again...for a reason to wear them. That's not bringing me joy and actually at one point was stifling my creativity. Now, if I dream about it, I'm going to make it.

o  I want to share the Janome 100th Anniversary video which I was thrilled to be able to participate in. I love my Janome machines and I love being a Janome Maker!

o  One last thought...when I was digging through some bins upstairs I noticed that I have two bins and a garbage bag full of scraps. I use to donate these and now I'm in a quandary. I know I want to make a pouf with some of them but the rest I don't know if I should hold onto them (waiting for things to open back up) or dump them.  BTW, I'm not looking for suggestions, just musing upon the situation.

I've been sewing and have new things to share.  They will be up soon.


...as always more later!


Friday, August 21, 2020

A New Title - Janome Maker!

I've been having conversations with Janome America for several months. As you know I am a loyal and faithful Janome sewing machine user. I've written several blog posts about them. I love the machines and their ease of use.  So I was thrilled when Janome America invited me to be a member of their Maker Team!


Now I don't know if you've read or heard about the resurgence of sewing in America due to how much time we're spending at home.  Not only have we started to cook more but we're also crafting, sewing and knitting since we're home a lot more. Because of that sewing machines in both beginner and more advanced models sold out in the early days of quarantine...and it took a minute for them to be restocked and for me to receive my new machine.


Y'all I did a jig yesterday when the UPS truck dropped off my new Janome 9450QCP sewing machine...even though I was in the midst of packing up my sewing cave...and since I'm packing we took it out to ooooohhhhh and aaaaahhhh over and then I packed my machine back into it's box.

A Few Pictures ~

Taking the Styrofoam out of the box!

Sitting on my current sewing table

Showing the pieces to the granddaughters

The grands sharing the pieces for the gram!

Holding the cover and the extension table

The 9450QCP also comes with a knee length, 3 different needle plates, 23 standard feet, plus an extra large foot pedal and separate thread cutter. This is the evolved version of my 8900QCP and I can't wait to explore the upgrades!

I really wanted to devote this post to my new Janome sewing machine and becoming a member of the Janome Maker Team.  My next blog post will discuss a few changes that are coming to my life...so stay tuned!

....as always more later!


LinkWithin

Related Posts with Thumbnails