Showing posts with label Elliott Berman. Show all posts

Sunday, November 25, 2018

McCalls 7817 - A Jacquard Jacket

I'm always looking for toppers that will work with my casual lifestyle.  Now while I'm drawn to very tailored jackets, realistically they don't fit into my work life. So when I saw this McCalls pattern in the fall offerings, I thought it would fit well in my wardrobe...


Even though this pattern has several sleeve variations, I'm sticking with the kimono type sleeves because I like simplier silhouettes. Refer to my sentence above about tailored jackets. I really am a classic silhouette loving sewist who likes bright colors and prints. This pattern gives me a great layering piece, which I need for the winter. It's simple, classic and stylish.


Supply List ~
Blue/Black Jacquard from Elliott Berman Fabrics
12 yds black bias binding from Pacific Trimmings
1 small snap

Pattern Alterations ~
- The shoulder seams were shortened by an inch 
- Did a pivot and slide to add 3" at the hemline and 2" at the hip area
- Added inseam pockets from McCalls 7481 

Construction Info ~
This is a simple sew and it goes together quickly. There are four pattern pieces - back, front, sleeve and sash. The time consuming element is the bias binding...and that's what drew me to the pattern.

I did add some time to the construction by adding pockets after I sewn the side seams. So everything had to be ripped open and sewn again. Because I used big and deep pockets, I had to hand stitch them to the jacket front so they wouldn't flop around inside the jacket.


The bias binding was applied using the Hong Kong method. The pattern tells you to fold it in half and sew it down. I wanted a cleaner look. Applying it using the Hong Kong application means that the bias is longer on the inside. Stitching in the ditch causes it to have a more finished look on the jacket front. 

I also added some ribbon ties from the bias binding to the side of and the front of the jacket to tie it together. I wanted to insure that the belt wasn't the only thing holding the jacket together.

A snap was sewn to the v-neck junction at the front of the jacket. This helps the v-neckline to lay flat. To me all of these additions enhance the wearability of the jacket.


After I added the snaps I noticed that the left side hangs a little lower than the right. I was going to fix it but I like the quirkiness of it, so left it. When you're looking at the pictures below realize that the fronts not meeting is deliberate.

A Few Pictures ~


The fabric is what makes this jacket work. I suggest if you make one for yourself that you use a bold fabric (like the pattern envelope) or a denim so that the jacket is distinctive. Your bias binding can be coordinating (like mine) or contrasting to add even more pop! Also, buy more bias binding than the pattern recommends. I bought 13 yards and used 12.

This is where I tell you that Elliott Berman supplied the fabric as part of my Brand Ambassadorship with them. If you're interested in purchasing fabric similar to the one I used, check out their new french jacquards here. One more thing about the fabric, it's warm. I'm looking forward to pairing this with other turtlenecks during the cold months of January through March.

I would make this again...probably in denim. Though I will have to adjust the pattern fronts.  To achieve the look on the pattern envelope, I need a little more fabric across the front. Even though I'm fine with the way this one hangs. But if I do make it again, I will definitely make the adjustments.

Even with that I highly recommend purchasing this pattern. It's a simple sew especially if you don't add all the elements I did. The finished jacket has a lot of bang for the buck and I'm sure it will get a lot of wear this winter.

...as always more later!


Monday, September 03, 2018

NSM: Fabric Gift Card Giveway from Elliott Berman

People I could sing the praises of Elliott Berman loud and strong for days at a time cause that's how much I love them!  I was first introduced to them by Meg from McCalls Patterns. I've loved them since.  Some of my most memorable garments have been made from Elliott Berman fabric.


I started with a few cardigans then I made a designer knock-off dress. This year,  I became a Brand Ambassador for them. 

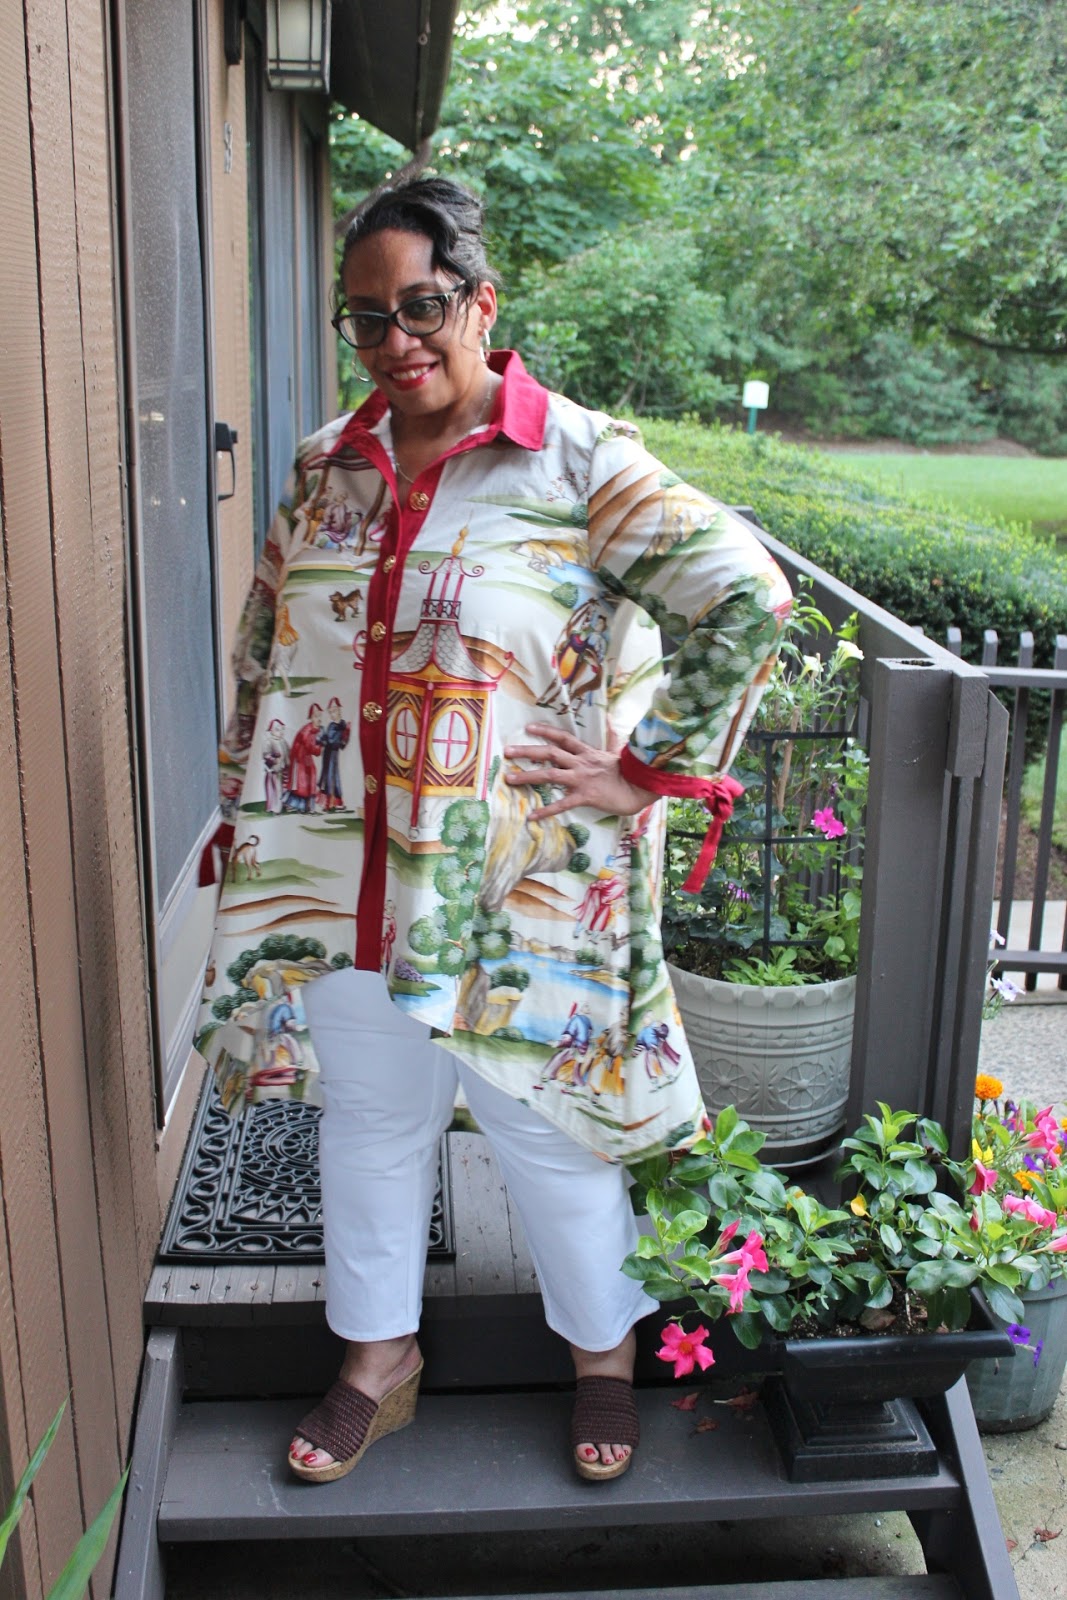
Since joining forces with them, I've made two amazing shirts from shirting fabric...

(You can buy this print here)


A Duster in cotton voile


...and a dramatic shirt in a designer toile


All from the amazing collection of fabrics they offer.  Now you can visit Elliott Berman if you live in the NYC area or if you're visiting from out-of-town for garment district shopping. However, they're only open from Monday - Friday...no weekends. But if you need a fabric fix, they do have a website plus active Instagram and Facebook accounts.

To me if you're looking for interesting upscale fabrics, Elliott Berman is the place to go! So the first giveaway for National Sewing Month is a $100 gift card from Elliott Berman.

How do you win this gift card?
1. You must leave a comment in the box below. Remember only comments left on this post on blogger will be acceptable for the giveaway. Comments left anywhere else will NOT be eligible.

2. You must follow Elliott Berman on Instagram.  So when you leave your comment, leave your Instagram name too so we can verify that you follow them.

3. You must leave the comment by Friday, September 7th by 11:59pm EST. 

All of these rules MUST be followed to be eligible to win the gift card. A winner will be announced on Saturday, September 8th.  You will have until Saturday, September 15th to send me an email.  If I don't hear from you by then, I will pick another winner.  Also, please refer to the rules that were stated in the initial post for National Sewing Month.

Ready, set, comment and Good Luck!


Happy National Sewing Month!

Saturday, July 14, 2018

Simplicity 5075 - A Duster from Elliot Berman Fabric

One of the things preparing to attend the Baltimore Destash did, was it made me look at my pattern collection.  Like many of you, I have a lot of patterns.  However, in the collecting of sewing items, patterns are not my nemesis - fabric is! 

Lately I'm not purchasing as many patterns as I use to...partly because I use so many TNT patterns and partly because I own a lot of older unused patterns.  Sifting through them for the Destash caused me to touch almost all of them and I found some oldies but goodies that will be making their way to my wardrobe and the blog.


Simplicity 5075 is one of them.  It's a Khaliah Ali pattern from her partnership with Simplicity.  If you were sewing then, you know she helped design this amazing collection and these patterns went from a size 8/10 to 28/32W.  It was one of the first pattern lines that gave plus size women current and trendy patterns in our sizes. It was literally an earth-shattering moment in the Big4 and I collected quite a few of them.  BTW, none of the Khaliah Ali patterns made it into the Destash giveaway...some things need to be held onto y'know what I mean!


So all of that to say, that even though I have two or three current kimono/duster patterns, I went with this out of print pattern. This pattern can still be found online with a simple google search so if you like my version, there are patterns out there to be purchased.

Next - the fabric used in this project is from Elliot Berman and is part of my brand ambassadorship with them.  The last time I was in EB's NYC warehouse, I spotted this navy voile and loved it.  However, at the time, it was too cold to sew it. Plus I knew I would use it for summer.


The thing I love about Elliot Berman is the vastness of their collection AND how interesting the fabrics are - nothing dull or pedantric here.  So if you want to see their online selection of cotton voiles look here.  

I need to apologize now because there are alot of photos in this post. I wanted someplace nice to show off how awesome this duster is and how the fabric was THE PERFECT CHOICE for this pattern. My daughter chose the Douglas campus of Rutgers University. These are taken at the Student Union Building.

Supply List ~
3 yards of a cotton voile from Elliot Berman
gray foldover bias tape - Wrights
1 yard of piping from Joyce Trimmings that I used for the ties

Construction ~
This pattern has 4 pieces and was easy to construct. I made no alterations to the pattern and cut a straight 26W because I wanted a little more flow to the body. The one change I should have made to the pattern was to raise the bust seam up. Also making a straight 26 was a little bigger in the bust area than I am, using the size 24 would have probably worked better. You have to really look for this because the print hides alot. If I had made this in a solid it would have been more noticeable.


After wearing it for a couple of hours, the flowy sleeves is one of the things I like best about the pattern. Now this pattern is pretty distinctive and I do have a few other kimono patterns in the stash I still want to use, so I don't know if I will be making the pattern again.

A Few More Pictures ~ 


A Little More Info ~
I'm wearing this duster with a RTW tank that's been in my wardrobe for years and a new pair of pants from my TNT pattern. I've made a few alterations to the pants pattern and those alterations will be discussed in an upcoming post.


The pants are made from a navy linen/poly blend fabric. This fabric is from deep stash so I have no idea where it came from because the tag wasn't on this 4 yard piece. I know it's old because I haven't purchased a linen blend like this in over a decade.

I've made no changes to this pair other than the alterations mentioned above.  That's what's so good about using a TNT pattern...a new garment without a lot of angst!  I love that I'm wearing two made by me pieces together.  This doesn't happen often anymore so it makes me very happy.


Conclusion ~
This outfit is sooooooo me! I can see me wearing it in all aspects of my life. To work, to hang out with friends...with my wedges pictured above...with my sneaks and even with a pair of heels. I love this outfit so much!!! So please excuse me for spamming this post with so many photos but my Daughter took so many amazing ones.

Finally, definitely try out some of these high quality cotton voiles from Elliot Berman. You can follow them on Instagram to see photos of their stock and behind the scenes of the showroom. Or you can follow them on Facebook where they offer giveaways and Deals of the Day/Weekend!  Also if you're ever in NYC visiting the garment district, don't leave without going by their showroom and touching the amazing fabric in person. You won't be sorry that you visited them!


...as always more later!


Saturday, April 07, 2018

The Hurrying Spring Along Shirt!

This is what I woke up to on April 2nd...


It was supposed to be spring like 3 weeks ago! So continuing to sew shirts is appropriate for April. Especially since I'm thinking it's gonna be a minute before it gets really warm in my neck of the woods, especially since more snow is forecasted for today.  Oh spring, where art thou?

At the same time, Macy's is having their Annual Flower Show on the main floor of the Herald Square store. I thought it would be the perfect place to take photos of my latest make but of course being the slub that I am I just couldn't make that work. It's a lot harder than you realize to cart clothing, camera pieces and extra hair from NJ!

So my ever resourceful daughter thought up going to Michaels to take pictures in their floral department. She said that there is a #MichaelsChallenge where the store is encouraging people to take photos in their floral department. So we headed there to take the pictures and no one bothered us. 


Onto the shirt ~
This is my quarterly make for Elliot Berman Textiles.  I saw the fabric on their Instagram feed and walked over to see if I could have some. Now I got this fabric in early February. My plan was to make this shirt over President's Day weekend. Well we all know that didn't happen and why! But I was determined to get this finished, so I took it to Sew Camp with me.

This was from EB's feed on IG

It was also available on Emmaonesock but is long sold out!
I'm sharing this pic because of the amazing shots EOS took of the fabric.

Supply List ~
* Cotton Sateen Border Print from Italy - this fabric was in panels and I used 3 panels.
* Light Crisp Shirting Fusible Interfacing from Fashion Sewing Supply
* 8 1/2" flower buttons from the collection


Construction & Design Thoughts ~
Now that this pattern's fit issues have been resolved, my shirts are all about the fabric choices. When I saw this on Instagram, I KNEW it would make an amazing shirt if I could get the border print to lay down the front of the shirt. This is challenging because I don't use a flat front on my shirts. My shirts have a shoulder princess seam...so layout would be important.

This is what I shared on IG when thinking about my layout:


Then it was how do I make the border print work most effectively for the shirt. 

A few things:

1. The border print ran horizontally, so I made sure that all of the main pieces (fronts, bottom back and sleeves) were cut in the same direction.

2. While I cut the collar, cuffs and back yoke on the straight grain, I've done this before and know that it doesn't affect the hang of the shirt.

3. I cut these pieces to work most effectively with the shirt's design flow.

4. Full cuffs for the sleeves instead of a button cuff was the way I went with this shirt. I just liked it. It was totally my choice - it could have gone either way - this is just the direction I chose.

5. Originally I thought that I would pleat the lower back piece where it joins to the yoke. I did pleat and baste it together but the pleat seemed to diminish the effect of the border print. So I went with gathers because it worked better with the yoke and collar.


6. I've been making shirts for awhile now but I haven't been able to master "the burrito method" from all of the written instructions. However, after a lesson or two cause Imma admit Kisha helped me with the second shirt too, I think I've got it now! 

I used three panels and only had scraps left. Some other design ideas thought of but discarded:
- covered buttons from the floral area of the border print (decided it was too much)
- really full sleeves (wanted them fuller but there wasn't enough white space between the border

One more thing ~ 
I chose sew on button bands instead of the fold on ones due to fabric layout. As I was adding the front button bands on, I realized that I sewed one on folding to the front and one folding to the back. I was kinda upset thinking that I would need to unpick the back one. When Coralee piped up and said you should just leave it alone.

Coralee at Sew Camp looking sassy in her Miyake coat!

She was right! With the band going to the back it leaves a cleaner finish on the button band and I will now be using the "Coralee Method" when sewing on button bands!


Here are a few pictures of the finished shirt ~

Doesn't that pink plant falling forward look like an octopus or sea creature?


I love the back swing of this shirt along with how the 
border print works for the cuffs and back!


Sewing Tip for Sewing Shirts ~
Since it's Shirt Month here on the blog, I've decided to add a sewing tip for all of those sewing or reading along and thinking of making their own shirts. Today's tip would be to use the speciality feet for your sewing machine to make the sewing as easy as possible.

This shirt was sewn on my back up sewing machine - Janome 6600P - during Sew Camp. I own a straight stitch foot for this machine and it made constructing this shirt so much easier than on my main machine. I've since rectified that and purchased a straight stitch foot for my main one. However, look at the stitching line and how close I got to the edge without having to change to the edge stitch foot.


Purchasing extra feet for your machine may seem like an unnecessary expense but believe me it's money well spent!

Conclusion ~
Just a reminder that this fabric was given to me by Elliott Berman since I'm collaborating with them to showcase the awesome fabrics they have in-store and online.  I did a quick search of their online store and here is compilation of border print fabrics if you're interesting in purchasing some of your own! Cause y'all know I love a good border print!

This is the kick-off to Shirt Month and emphasizes that fabric CAN make all the difference in making shirts...so step outside the box and use a fabric that's not typically thought of for a shirt.

Next up is my black shirt ~ do you own one?

...as always more later!


Sunday, January 21, 2018

A New Collaboration and a New TNT Shirt

Anyone who knows me knows that I love Elliott Berman's fabrics.  If you come to visit the NYC Garment District either with me or ask for my recommendations, Elliott Berman is ALWAYS on the list. 


So I was thrilled and honored when Eugenia of Elliott Berman asked me to collaborate with them. Over the course of this year, I will be making several garments from fabric that can be purchased either on their website or at their site in NYC.

During the last decade or so that I've been blogging, I've made a few garments with fabric purchased from Elliott Berman. My favorite being this Versace Inspired Dress that I made in 2011 using a wool knit.


Why do I love Elliott Berman fabrics?
One reason is the quality of their fabrics. They import a selection of unique fabrics, designer goods, the diversity of their inventory and the fair pricing for the goods. Also, they are a great friend to the sewing community - sponsoring events with PatternReview.

It also didn't hurt that my friend Shams is blogging for them and spoke so highly of how easy it was to work with Eugenia and the team at Elliott Berman.  Now you don't have to go to another blog to see my makes, all of them will be here alongwith some pics on Instagram.

So this is my first garment for them - a TNT shirt from my Crazy 8 Wardrobe. 


I chose a printed cotton sateen with a tribal inspired influence for my shirt. I asked Eugenia for a shirting fabric to use as my first make. We were walking the floor and she was pulling out various fabrics for me to look at. When we got to this one, it was love at first sight!

Now while I picked this one from the NYC store/warehouse, here are some on their website that you can order if you're looking for a high quality, interesting print for a shirt. 

This is my TNT shirt pattern so there are no new techniques with this shirt. However, for this version I chose to use a mandarin collar instead of a stand and separate collar. 


To make the shirt interesting I manipulated the fabric, cutting the stripes horizontally for the cuffs, the mandarin collar and the back yoke.


I also used some interesting yellow & black buttons I had from the collection. The challenge was that I needed eight buttons and only had six. So I made a covered button for the mandarin collar and the last buttonhole carefully matching the fabric so that the buttons would blend into the garment.


Buttons, fabric manipulation, a collar change and this amazing piece of fabric are the standouts in this shirt.

A few pics of the shirt ~


As I stated above I will be making a new garment using Elliott Berman fabric about every three months. If you're on Instagram, may I suggest you follow them at ebtfabrics. They offer some amazing discounts for their Instagram followers. Also, don't hesitate to check out the website. They do ship overseas. I've ordered from them in the past, their orders ship quickly and are well packed.

I finally spent some quality time with my daughter/photographer so there will be a few more posts after this one. If you've read this far, you should know that the same daughter is the family hairdresser, and she added the curly fall to my hair for these pictures. Since we shoot several garments at once, the photos in the next couple of blog posts will also feature this hairstyle. Just thought I would tell you before you asked! 

...as always more later!


LinkWithin

Related Posts with Thumbnails