Showing posts with label The Denim Collection. Show all posts

Sunday, June 24, 2018

The Embellished Shirtdress - A Denim Vogue 2090

I chose to make this pattern again in denim during my Sewcation because I really want to own as many denim dresses as I can.  They are easy to wear, fit in with my work environment and my lifestyle.  Dressing them up or down, wearing them out with friends or to work, makes them a very desirable garment for me.


This version is made from a midweight denim that works for cooler spring days and will transition from summer to fall days. I will probably only get one or two wears out of it before it gets really hot here but I'm good with that. 

Supply List ~
Denim is from Stylemaker Fabrics and is the last of the 10 yards I purchased from them.
Navy/White Gingham scraps from Fabric Mart
5/8" Goldish Buttons from Pacific Trimmings
Jeans Gold Gutterman Thread for topstitching

Construction ~
The embellishment for this dress is the topstitching done in the jeans gold thread. All of the seams are topstitched - some with a double twin needle and some seams like the collar and the front button bands are sewn with single seams of topstitching.

I also added a small pocket on the front of the dress which is different from the original pattern which has faux pocket flaps. I probably would have used the pocket flap but I couldn't find the pattern piece so I had to make my own pocket piece.


To make the pocket pop and to coordinate with the collar stand, I cut a 5"x5" square from the blue & white gingham. I used a quilting square to get a good square, then I serged the ends twice. I thought about rolling the hems of the square but wasn't that invested in the process. Serging twice allowed me to cover the edges adequately and looks good on the square folded in the pocket.

The side, back and shoulder seams have a faux flat fell seam finish. Seams sewn normally, pressed open, pressed to the side and topstitched using a twin needle. The twin needle size I used is a 6.0mm size 100 universal from Klasse'. 

This version has short sleeves too. The hems were topstitched with a twin needle using the jeans gold colored thread. The dress hem was topstitched singly merging into the button band seam lines.

BTW, I never put a buttonhole on the collar stand. I don't button it closed and I hate trying to get a buttonhole to work in that area...so I just leave it off. Sometimes I will add a button to the collar stand to continue the style, but for this dress I didn't.

Some pictures of the dress ~


Conclusion ~
This was a TNT sew and since the fit issues were worked out it left my mind free to work on the creative aspects of the dress. I really like the fit through the shoulders and bustline and how loose it is from the waistline down. If you noticed in the photos, this was a little wrinkled because I've already worn it to work. It passed the wearability test with flying colors.

At the end of my Sewcation, I thought I would probably make one or two more. However, now that I'm back to work and thinking about what else I want to wear this summer, these two will probably be the only ones I make this year. I own so many patterns, both new & old, as well as TNT, that I want to go on some other creative journeys.

BTW, if you Google "Vogue 2090" there are still some copies of this pattern available on the internet. It's a great wardrobe pattern and if you like those Vogue designer patterns from the 90s, then this one would be a great addition to your pattern stash.

The last dress from the Sewcation is McCalls 7470...it will be up on the blog soon!

...as always more later!


Tuesday, June 19, 2018

Simplicity 8612 Wrap Skirt - Shorter Length

I knew when I made the first S8612 wrap skirt in the longer length that I would be making the shorter version too. So this version is made exactly as the first one except for one change I made to the pattern. I made separate pattern pieces for the right and left fronts.   

(wearing my birthday present necklace - thanks Marce!)

The right front is a size 34 and the left is a size 26. I wanted the underlap to cover my entire body when I sat down. It spreads a little too much on the longer version. But since the longer version has extra fabric it covers me when I sit down.

For this one, the length is just under my knees. I added one inch to the hemline of the pattern to lengthen it. I also made the ties differently than the pattern instructions. 


As I stated in the last post, the ties were a b*tch to turn. So for these ties, I pressed the seam allowance flat. For the end of the tie, I pressed it down in both directions, then cut diagonally across to remove the excess fabric, so the tie end would lay flat. Besides the length it's the only change I made. Then I stitched the tie flat all the way around before following the pattern instructions to attach it to the skirt.

The fabric for this make is a denim looking fabric I purchased from Fabric Mart's brick and mortar store during Sew Camp in March 2017. As an aside this is the third piece I've used from that purchase.

A Few Pics ~


Conclusion ~
Originally I was going to wear this with the Montrose Top but the two pieces just didn't work well together. So I went with plan B.  I wore it my white TNT sleeveless shirt.  I know it's basically the same look as the longer skirt but hey if it ain't broke why fix it. 

This is my favorite of the two skirts probably because I used a lighter weight fabric and the shorter length. I also like the way it wraps better.

I won't be using this pattern again this season.  Too many other things to sew and fabric to use.

...as always more later!


Saturday, June 16, 2018

Simplicity 8612 Wrap Skirt & A TNT Shirt

When I was at Sew Camp LaQuana was making this Simplicity wrap skirt and I was intrigued. After she posted it to her blog, I was even more intrigued. See I'm trying to be open to new styles I wouldn't typically wear now that my lifestyle has changed.


So when I told Gaylen I was thinking about the pattern she picked it up for me from the craft store when they were having a sale on Simplicity patterns. 


But Imma be honest - I'm not the sewist that gets excited about a new pattern. Y'all know I love me a TNT...however, I own so many patterns and every now and then desire a new pattern so I need to get over it. Cause this was supposed to be a simple sew...

Supply List ~
* A midweight patterned denim from Fabric Mart purchased during my December 2016 trip there - as an aside I've used four pieces from that trip!
* Fusible interfacing from Fashion Sewing Supply

Pattern Alterations ~
I didn't make any alterations.  I made a straight 26 out of the envelope.

Construction ~  
I made the longer version of this skirt first and I've probably used a heavier weight denim than recommended on the pattern envelope. I really liked the pattern on the denim and I think it turned out okay. 

So a few things:
1. I hated the way the ties are assembled.  They are really long and hard to turn. No matter what trick I tried I had to suck it up and pull them through. Thank goodness I was binge watching Scandal...

2. I don't know if it's me or my body but the overlap didn't work completely. It separates underneath when I sit down.  Not enough to make my bare legs show but enough that it annoyed me. It doesn't separate or open when I walk probably because I made the longer version first.

3. So for the shorter version, I made a right and left overlap with the right one being bigger so it would cover all of me when I sit.

4. The buttonhole is definitely tricky if you don't think it through. Since my machine makes automatic buttonholes, I chose a button that was the size of the end of the tie. I used it in the buttonhole foot to make a buttonhole and it worked perfectly.

5. Also I didn't use the markings on the pattern piece to determine where to put the buttonhole opening. I put the skirt on my body and chose a point. I also topstitched the waistband and the ties.

6. For the waistline, I used the longest pattern piece for waistband available. I knew it was too long but it was easier to cut off the unused portion than have to worry about fitting the skirt. This is cheating I know but hey it works so I went with it.

7. When wearing this I've tied the ties really tightly and added a safety pin to the back to hold the ties together.  I wanted to insure that the two pieces don't separate and provides some piece of mind to me.

A few pictures ~


My TNT Shirt ~
A. The shirt is from my TNT pattern and a navy handkerchief linen from the collection by way of Fabric Mart. 


B. It uses most of the same construction techniques as in this shirt, however, I didn't burrito method the yoke. 

C. I stitched the yoke to the back seam and pressed the shoulder seam allowance flat.  Then topstitched it down on the shoulder seams. 

D. The other thing to note is that for the collar stand I doubled the navy blue handkerchief linen on one side because the inside piece of fabric I chose was a cotton sateen floral print. The print was showing through on just one piece of the linen.

E. Because I doubled the fabric, I did not add interfacing. The cotton sateen plus the doubled fabric give the undercollar enough stability.

The buttons and bias binding are from Pacific Trimmings. I made a special trip to pick up some shirt buttons because they have them in every color imaginable. It was important that the buttons matched the fabric so that it will be wearable with other things in my wardrobe including this skirt.


Conclusion ~
I really like this skirt and the construction.  There is a simplier version of this pattern on the Butterick website. However, I believe the addition of the side panels on this pattern makes it a superior choice. 

I haven't made alot of skirts for spring/summer in the last couple of years. I've concentrated on casual dresses for work but now that I have a good basic wardrobe, I want to add in some other pieces.

This outfit is the first one in my spring/summer sewing series - say that three times fast! I've made a list and it includes a few indie patterns, some Big4 and a couple of repeats from last year. I'm pretty excited about the list of things I want to create this spring/summer.  I completed this skirt and shirt prior to my sewcation. However, since I just wanted to sew during my sewcation, this is the first chance I've had to take pictures of all my recent makes. 

The short version of this skirt is up next on the blog.

...as always more later!


Sunday, November 05, 2017

Simplicity 8303 - A Denim Coat

This was a project and honestly I'm an instant gratification kinda girl.  I don't mind taking a simple project and then throwing the kitchen sink at it and complicating the heck out of it.  However, actual longer projects give me pause which is probably why I don't make a lot of jackets. Somewhere near the end of making them, I start to whine. Don't believe me, ask Gaylen. LOL!

I really wanted to make the duster. I started out making the duster. I got to the point where the collar and front facings were on and it looked like a jacket. Thank goodness I had enough fabric leftover to cut out the sleeves...to make the jacket.

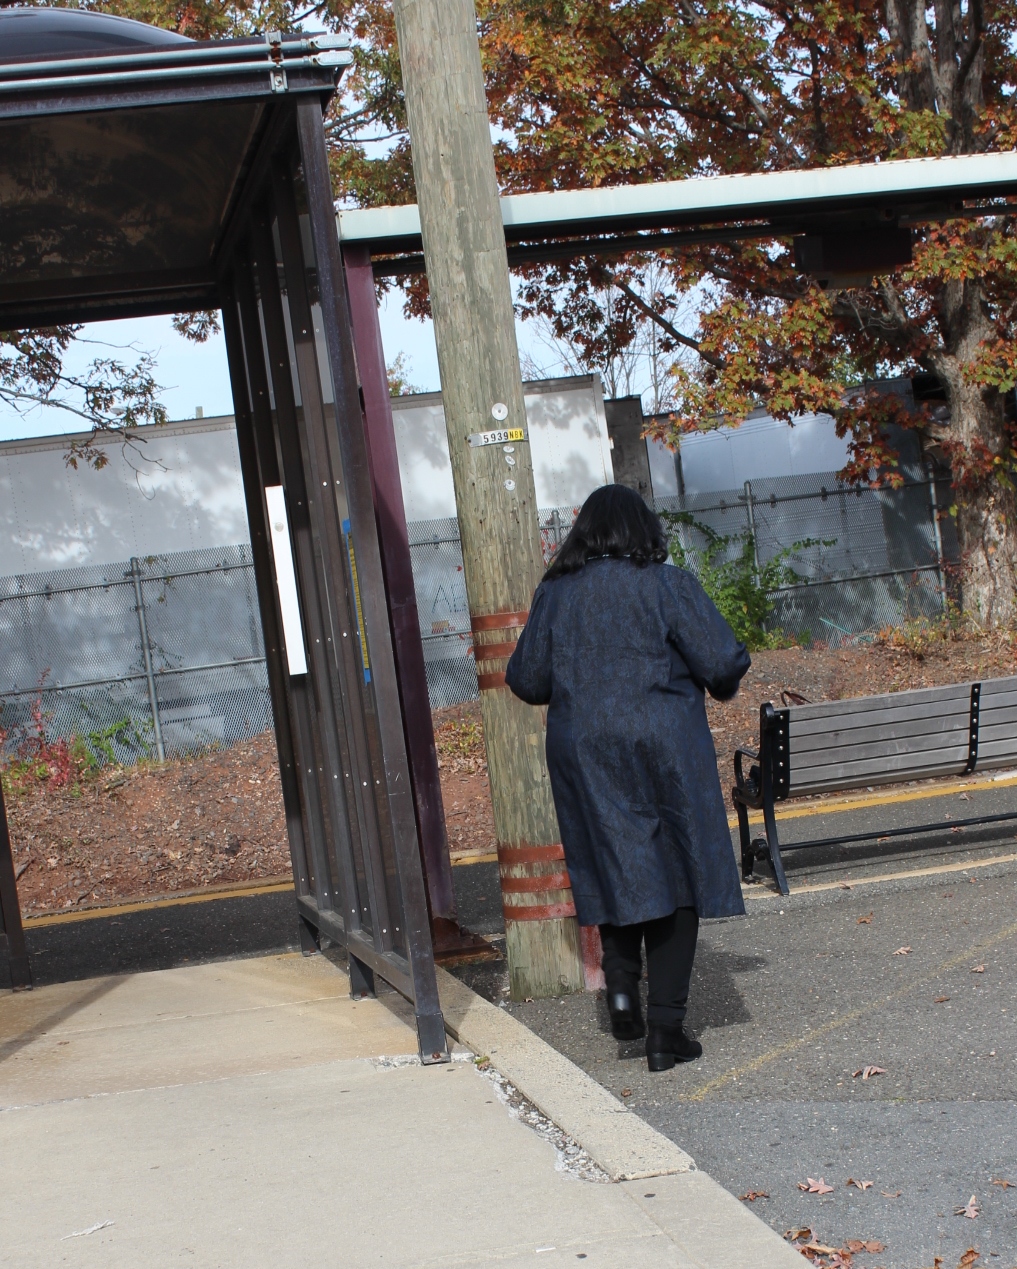
First a picture of the finished jacket~


The Pattern - Simplicity 8303 ~


Next a supply list ~
5 yards of a printed denim purchased recently from Chic Fabrics
1 yard of paisley printed cotton purchased from Mood Fabrics
5 yards of blue/white/black piping from Daytona Trimmings
A couple of yards of me made bias tape
1 elastic for the button loop
2 - 2" silver D rings from Pacific Trimmings
1" silver shank button from the collection

I made no pattern alterations. I cut a straight size 24 knowing that the jacket is supposed to be loose fitting. The only sewing change I made was to take wider seams at the front and back princess seams to narrow the shoulders. I will fix this on the pattern pieces so it will just work for the next version.

Cost to Make ~
The coat cost $54 to make. Not inexpensive but not exorbitant...and well worth the time and effort to make it. The fabric was $35 for the denim and cotton stretch paisley.  The notions cost $19 with the piping taking up most of the expense.


Design Decisions ~
I really didn't want to change much design wise on this pattern. At first I played with adding some epaulets to the shoulder seams to make the jacket look more trench-like but when I decided to add piping to the front and sleeves, it seemed a tad too much.

Here are the touches I added to make the denim jacket uniquely mine:


Piping:
I added piping to the collar, the fronts, the overlap and on the sleeves. There are no tips on how to apply piping in this post because I've detailed how I add piping to garments on the blog before

Bias Binding:
I really wanted to add bias binding to the exposed seams on the jacket. However, after putting the back together and topstitching it all down, it looked so nice and neat flat that I discarded the idea of adding it to the back seams. One of the side seams is covered by the front facing so I decided to press the side seams forward and topstitch them down. That only left the front facings exposed and that's where I decided to use the bias tape.

I haven't actually made my own bias tape from scratch in years. I could have gone to the sewing library but I wanted a tutorial that everyone could use and found a great one here. It's from the website, Make It, Love It. The instructions were easy and simple to follow and what I used to make the bias binding.

Sleeves:
I will admit that I have fat arms from the bicep to my elbow. Because of that I need to fix almost every sleeve I insert into a garment. Every.Single.One.

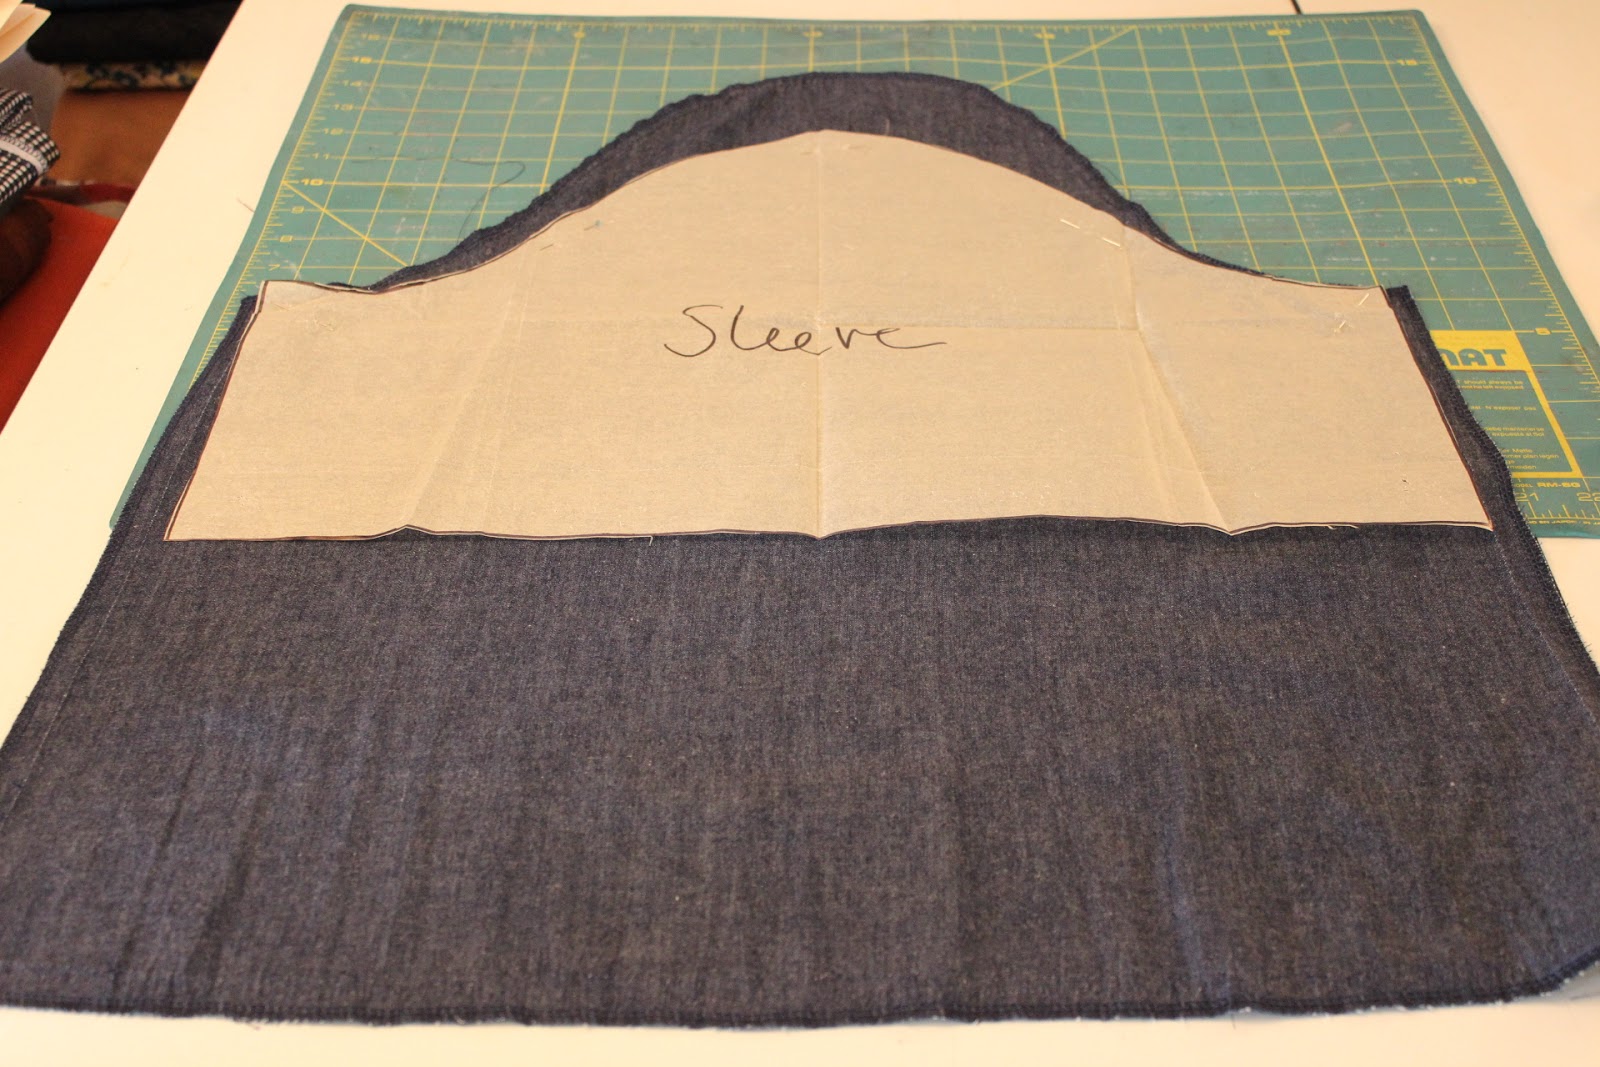
First thing was to measure the width of the sleeve and it's just a little too small. Now I could go through making the bicep larger but look at my first sentence. I have to add width all the way through. So I chose to use a sleeve I knew would work. I pulled the sleeve from my blouse pattern to start with...I went through my normal stages of making a pattern sandwich and adding the width. I also removed some from the sleeve cap to make an allowance for the extra width at the sleeve edges.

I cut the cuff part off and added 5/8" to the sleeve and the cuff. This was done to add piping to the sleeve hem. Once the piping was applied and the sleeve and cuff were sewn together.  Then the sleeve was sewn into the jacket.

After inserting the sleeve into the jacket, I hated the extra wide seam allowance and serged it down to 1/2" wide. It gave the sleeve edge a clean finish and made getting in and out of the jacket easier.  But I noticed when trying on the jacket that the tops of the sleeve were collapsing. So I added a shortened sleeve head just to the sleeve cap so it wouldn't buckle. A shoulder pad would accomplish the same thing, I just didn't want to add one.

Belt:  

The belt was made according to the instructions but I added rows of stitching down the length of the belt. Again another detail that no one will really notice but something that I really wanted. Honestly I didn't think that I would wear the belt and never made the belt carriers for the coat for that reason. However, after we took the pics...I really like the belt!


Finishing:
I cut 3" off the bottom of the jacket because it was lower midcalf length and once I switched to a jacket, I wanted it a little shorter.

For the sleeve hems, the hem of the jacket and the belt, I sewed multiple lines of topstitching. Because of the print of the denim, you can't see this topstitching but I'm fine with that. I know it's there and it weighs the hems and stops them from shifting. The duster has side seam slits. I omitted them for the jacket.

And if I haven't peppered this post with enough photos here are a few more:


Conclusion:
First a shout-out to Gaylen who put up with my bitching for three weeks as I made this! Second, thanks to all the Instagram Peeps who opined about piping and which one to choose. Finally, this pattern is an easy sew. Of course, adding piping and deciding to add sleeves at the last minute added some time to it's construction but I'm so thrilled with the final garment!

I plan on using the pattern again to actually make the duster. I have some lighterweight, flowy fabrics that will accomplish what I want so hopefully I will get to it before the winter is over!

However, now I have a brand new denim jacket to wear for fall/early winter and spring. A sweater will go under the jacket and it will go great with jeans or leggings. Also, I'm kinda in awe of the fact that I got this jacket made...

...as always more later!


Sunday, October 08, 2017

Simplicity 2894 - An Out of Print Pattern in Denim

Or as a subtitle ~ "How Carolyn Complicates a Simple Pattern!"


This Simplicity pattern has been out of print for awhile.  The first review on PatternReview is from 2008 and it's been on my "To Sew List" every summer since Rachelle made her version. However, it really didn't fit my lifestyle when I purchased the pattern...I just loved the style. 


Fast forward a couple of years and I pulled the pattern out again last summer to make a dress. I had the perfect striped linen for this but summer slipped away from me, again. However, this pattern has lingered in my mind and while it didn't get made in a summery fabric, it was perfect for some mid-weight denim for a new fall dress.

Of course I never do anything simple so I had to manipulate the stripes for added interest and I added a white piping to the collar and front opening to bring some definition to it.

Let's talk materials ~
The fabric is a midweight striped denim purchased from Fabric Mart earlier this year.  Since you don't need buttons or a zipper for this dress, the notions I used to make my version of this dress are:
  • purchased white corded piping from Daytona Trimmings
  • baby white interfacing from Farmhouse Fabrics via the notions stash
  • three 1" white & clear buttons from the collection 

Construction details ~
I really wanted to mix up the stripes on this dress. Since the yokes are separate pieces, I cut the yokes on the lengthwise grain instead of the horizontal grain like the body of the dress. What I didn't count on was the difference in color shading that occurred when the two pieces were sewn together. When it was all said and done, I was fine with the color shading because it's a casual denim dress.

I added piping to the collar to bring out the white in the stripes. I went back and forth over whether I should add interfacing to the collar and the front because the denim is fairly heavy and I wondered if the interfacing would add anything to it.  Finally decided on using a baby fusible interfacing that I purchased from Farmhouse Fabrics for the collar and front piece. It stabilizes the piece without adding additional weight to them.


After I added piping to the collar, I decided that I needed some on the front opening too.  So *sigh* I added piping there too. What an ordeal...I was gonna say challenge but I added a couple of hours work to a simple dress adding piping in the front of the dress...and was on pins and needles while I was doing it hoping that it would work the way I wanted it to...breathing a huge sigh of relief when it did work!

The last change I made to the dress was after taking the time to match the pocket stripes to the dress front, I decided to add piping and a large white button to the pockets. Why not just leave them be? I mean they would have been fine but they wouldn't have popped...and I wanted the "pop" appeal for the dress.

Topstitching was the last decorative element that I added to the dress. It's on the yokes - front & back, at the hemline and on the pockets. Again I used the triple stitch with a length setting of 5 on my Janome 8900 QCP.

Can I state yet again what a challenging sew this was. Honestly, I took a very simple pattern and I added a whole bunch of design elements to it. Yes, the design elements did elevate the finished dress, but getting there was a pain!

A few pictures of the finished dress ~


Conclusion ~
I'm glad that I made the dress, it's such an easy and casual wear. I'm glad that I waited to use this pattern because this is the right time for it. I'm also glad that I love the dress now that it's finished! LOL! This was definitely a one and done pattern. As cool as it is and as thrilled as I am to add another denim dress to my wardrobe...I won't be making another one of these.  I'm moving onto my next fall garment.

Finally, it seems like it's become a thing for my daughter to take pictures of me with the grandbabies while they're here...so I'm ending this post with two pics that I liked of the babies and me...

Me and Joshua


Me and all three (Aleena, Samantha and Joshua) walking together


...as always more later!


Thursday, September 14, 2017

New Look 6340 in StyleMaker Fabrics Denim

I've been saving denim dresses on Pinterest for awhile. Every now and then I go back through the file and review what I've saved.  Looking at the images in the file, I really wanted to use the New Look pattern to make a denim version of the dress with a few updates.


Fabric ~
Midweight denim with a little stretch purchased from StyleMaker Fabrics last fall. Here is one and another one similar to what I bought.

Notions ~
2 7/8" orange & metal buttons from the collection
22" blue invisible zipper

One more thing to note, everything to make this dress came from the Sewing Cave, the fabric and the notions. It thrilled me that it all was in the cave. I'm trying harder to use the items stored in the sewing cave for my fall/winter sewing.

Construction ~
The pattern alterations that I made to the pattern are the same as I made for the border print version. This time instead of making the alterations directly onto the fabric, I made the adjustments to the pattern pieces.

The hemline was lengthened for the front and back pattern pieces by 2". The shorter length works for summer but since this is a fall version, I wanted just a little more length on the dress.

Then I added the pockets to this one since I hadn't used them in the prior versions. Buttons were added to the pockets along with topstitching to highlight the pockets.


This version definitely needed the invisible zipper I added to the back. It makes getting into and out of the dress easier and the loop/button closure isn't appropriate for a fall dress, in my opinion.

Also all of the seams were topstitched except for applying the pocket to the dress and around the invisible zipper.  I used the triple stitch lengthened to a 5 on my Janome 8900 QCP. I wanted the topstitching to look similar to what's on jeans.

A few pictures of the dress ~


Conclusion ~
I love this dress pattern. My three other versions were perfect summer wears and I'm glad I was able to figure out a way to use the pattern for fall. I also loved making this one because even though it's a simple silhouette, the changes made it a more substantial sew. Also I got to work out some design issues that intrigued me creatively. Added up, all of these factors made this a favorite sew. It also fits into my work wardrobe and the style of dressing I'm sewing/wearing now.

Of course now I'm thinking of other ways I could work with this silhouette to make a few more dresses for fall. This was the first garment completed during my end of summer/Labor Day weekend sewfest.

As I stated before, the fabric for this dress was purchased from Style Maker Fabrics. Michelle has a great selection of denim in various weights. You can see her denim selection here. I've purchased a few more pieces of denim from them so look for more garments this fall/winter made using Style Maker Fabrics.

If you're interested in purchasing any of the amazing fabric from Style Maker Fabrics, use the discount code - DIARY17 - to receive a 10% discount off your order. Don't forget that Michelle is matching discount amounts to give to local charities for hurricane relief. The discount is good until Saturday, September 16th at midnight PST.


HAPPY NATIONAL SEWING MONTH!


Wednesday, March 15, 2017

Denim McCalls 7095

This top really worked my last nerve. My fabric choice, the sleeve cap and my sleeve choice all made this top much more difficult and time consuming than it should have been.


Let's start with the pattern. I've made this pattern three times before always using a drapier fabric. I thought this fabric was lightweight enough to handle the gathering but my fabric choice was debatable for this pattern.

The fabric ~
It was purchased last fall from Michael Levine's online store, where there is still some left. When I bought it I thought it was a little heavier, topper weight instead of blouse/shirt weight. It took awhile before I figured out what I wanted to do with it. 

A note: I also found this fabric on fabric.com for a couple dollars less a yard where it's presently out of stock but the site says it will be back by March 31st.

I prewashed this piece even though I was concerned about the embroidery on it. However, if there was going to be a problem I wanted to know about it before I started constructing the garment. It went through the washer & dryer okay with a small amount of puckering around the embroidery that was easily pressed out. I'm glad that I did prewash it in hot water with a very hot dryer, being hard on the fabric let me know how it would react. In the future, my tunic will be washed and hung to dry to avoid future shrinkage around the embroidered area. 

Construction ~
I decided on a tunic/top because I like the ease of wearing and I can add a sleeveless turtleneck or tank top under it for a little extra warmth. I assembled the shell and it was pretty long. It made me rethink where I wanted to go with the tunic. 

Before I decided on the length, I went ahead and put the sleeves in. What a disaster! My previous makes were from ponte, rayon and velvet. Soft fabrics that I could ease the extra from the sleeve cap into the armhole. It must not have been too bad because I didn't remember the sleeves being a pain to insert. However, the denim was not as friendly to work with and inserting the sleeves was a total pain. The sleeve cap has way too much ease in it for a less drapier fabric.

Honestly it stumped me for a minute. I measured the armhole of my garment (which I'd widened about an inch or two) then measured the sleeve cap. There is an 8" difference. I realized that my TNT dress/top/tunic sleeve has a sleeve cap about that width so I decided to make a new sleeve using that pattern piece as a guideline.


The sleeves are different on all four versions of this top. The first has flared sleeves with a pleated lace/ribbon added to them. The second is color blocked with elastic in the sleeve hems. The velvet version's sleeves are lengthened and flared. This time I gathered the sleeves into cuffs. The cuff pattern was borrowed from my Butterick button downs.


Pictured above is the finished sleeve that just wouldn't go into the tunic. So I ripped it apart. I laid my TNT pattern piece on the fabric and recut the sleeve cap.


However, I didn't want to give up on the embroidery at the sleeve hems. So I took my scraps and pieced them together to make a band of embroidery which I added to the sleeve hems.

After wrestling with that problem, I realized the top was dress length but a little too short for my comfort level. That resulted in a couple of wasted hours of trying to make the dress long enough to cover my knees. I added a ruffle to the hemline made from the scraps of the remaining fabric. However, the ruffle only made the dress look juvenile ~ great for a 12 year old but not a 58 year old woman ~ so I removed it.

The tunic sat while I figured out what to do.

Finally I decided to remove some more of the fullness in the body, unpin the ruffle, cut some of the bottom off, hem the tunic to just below the border and hem the sleeves.

A few photos of the tunic in action ~


Conclusion ~
I'm not sure if I did this amazing piece of fabric justice. To me this is definitely a case of a so-so fabric/pattern match. By the time I was hemming it I was so tired of this garment. Why did a simple little tunic become an epic sew? Especially after I saw this picture of the fabric used in the latest edition of Vogue Pattern Magazine. My version seemed tame & predictable.


I like tunics ~ just tunics that hit me a couple of inches above my knees. I want more of them but I definitely need to choose my fabrics better to achieve the right drape and coverage. When I finished this tunic, I wasn't sure it worked for me until I took the pictures. 

What's up next? Another repeat top is on the cutting table hopefully I can do it justice...

...as always more later!


LinkWithin

Related Posts with Thumbnails