Showing posts with label McCalls 7095. Show all posts

Wednesday, March 15, 2017

Denim McCalls 7095

This top really worked my last nerve. My fabric choice, the sleeve cap and my sleeve choice all made this top much more difficult and time consuming than it should have been.


Let's start with the pattern. I've made this pattern three times before always using a drapier fabric. I thought this fabric was lightweight enough to handle the gathering but my fabric choice was debatable for this pattern.

The fabric ~
It was purchased last fall from Michael Levine's online store, where there is still some left. When I bought it I thought it was a little heavier, topper weight instead of blouse/shirt weight. It took awhile before I figured out what I wanted to do with it. 

A note: I also found this fabric on fabric.com for a couple dollars less a yard where it's presently out of stock but the site says it will be back by March 31st.

I prewashed this piece even though I was concerned about the embroidery on it. However, if there was going to be a problem I wanted to know about it before I started constructing the garment. It went through the washer & dryer okay with a small amount of puckering around the embroidery that was easily pressed out. I'm glad that I did prewash it in hot water with a very hot dryer, being hard on the fabric let me know how it would react. In the future, my tunic will be washed and hung to dry to avoid future shrinkage around the embroidered area. 

Construction ~
I decided on a tunic/top because I like the ease of wearing and I can add a sleeveless turtleneck or tank top under it for a little extra warmth. I assembled the shell and it was pretty long. It made me rethink where I wanted to go with the tunic. 

Before I decided on the length, I went ahead and put the sleeves in. What a disaster! My previous makes were from ponte, rayon and velvet. Soft fabrics that I could ease the extra from the sleeve cap into the armhole. It must not have been too bad because I didn't remember the sleeves being a pain to insert. However, the denim was not as friendly to work with and inserting the sleeves was a total pain. The sleeve cap has way too much ease in it for a less drapier fabric.

Honestly it stumped me for a minute. I measured the armhole of my garment (which I'd widened about an inch or two) then measured the sleeve cap. There is an 8" difference. I realized that my TNT dress/top/tunic sleeve has a sleeve cap about that width so I decided to make a new sleeve using that pattern piece as a guideline.


The sleeves are different on all four versions of this top. The first has flared sleeves with a pleated lace/ribbon added to them. The second is color blocked with elastic in the sleeve hems. The velvet version's sleeves are lengthened and flared. This time I gathered the sleeves into cuffs. The cuff pattern was borrowed from my Butterick button downs.


Pictured above is the finished sleeve that just wouldn't go into the tunic. So I ripped it apart. I laid my TNT pattern piece on the fabric and recut the sleeve cap.
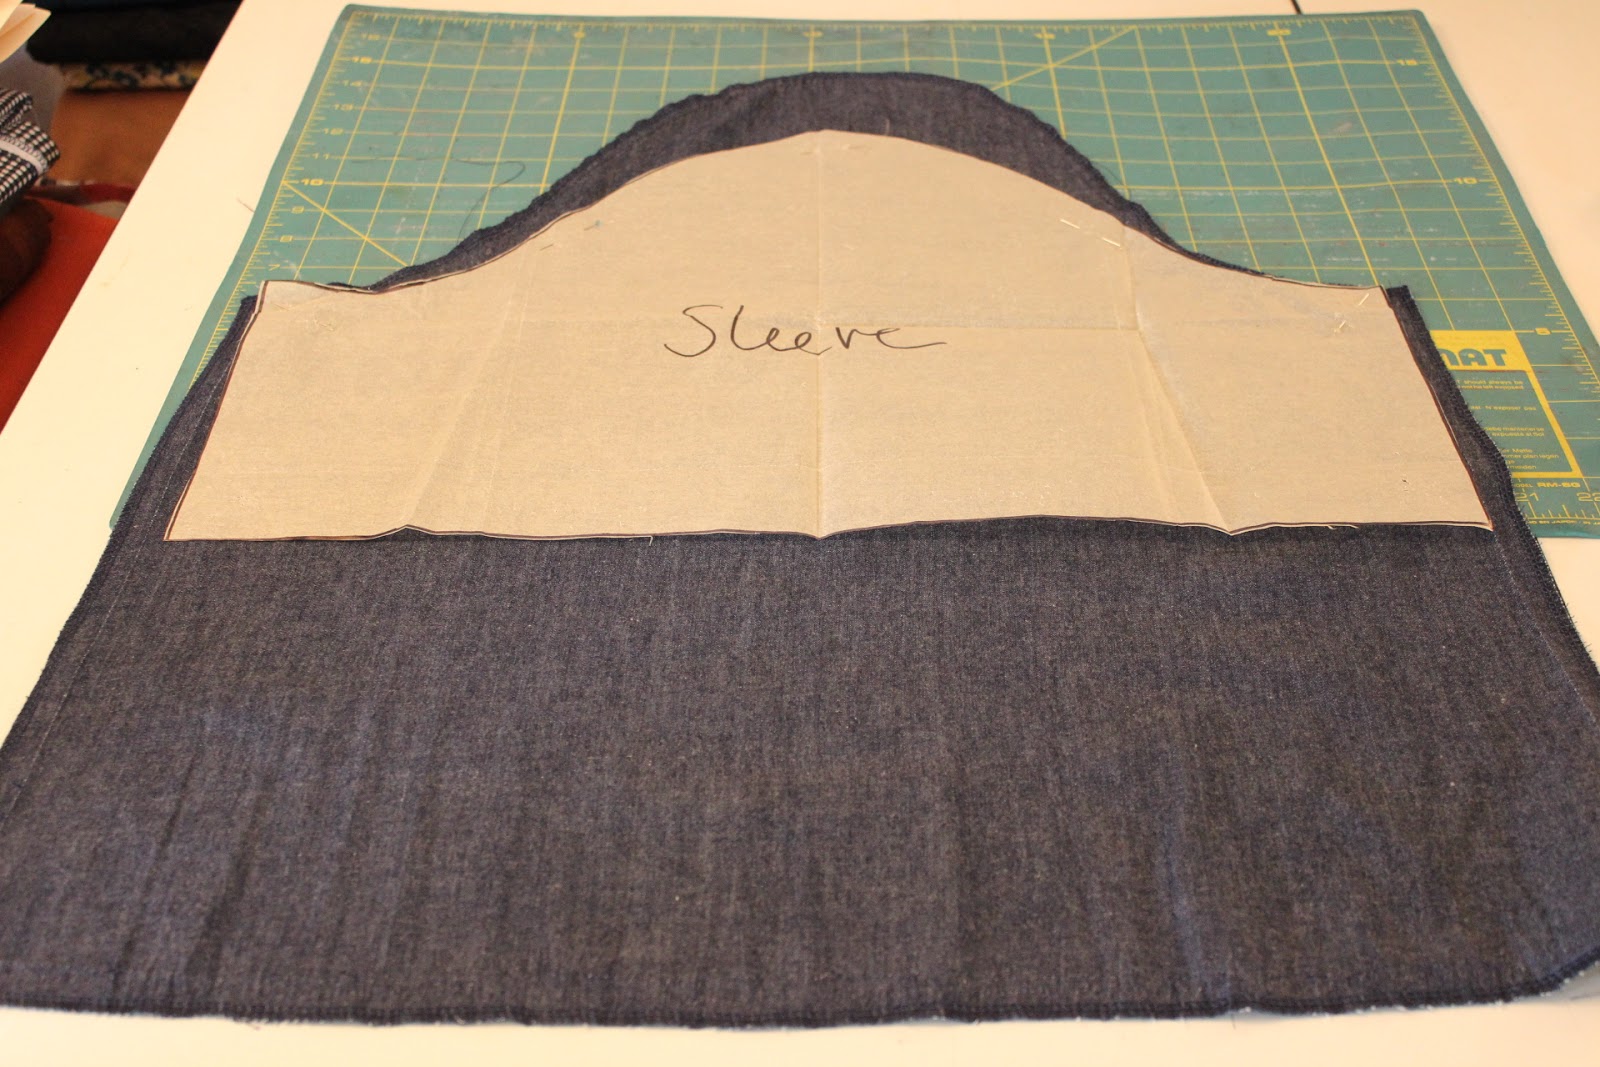


However, I didn't want to give up on the embroidery at the sleeve hems. So I took my scraps and pieced them together to make a band of embroidery which I added to the sleeve hems.

After wrestling with that problem, I realized the top was dress length but a little too short for my comfort level. That resulted in a couple of wasted hours of trying to make the dress long enough to cover my knees. I added a ruffle to the hemline made from the scraps of the remaining fabric. However, the ruffle only made the dress look juvenile ~ great for a 12 year old but not a 58 year old woman ~ so I removed it.

The tunic sat while I figured out what to do.

Finally I decided to remove some more of the fullness in the body, unpin the ruffle, cut some of the bottom off, hem the tunic to just below the border and hem the sleeves.

A few photos of the tunic in action ~


Conclusion ~
I'm not sure if I did this amazing piece of fabric justice. To me this is definitely a case of a so-so fabric/pattern match. By the time I was hemming it I was so tired of this garment. Why did a simple little tunic become an epic sew? Especially after I saw this picture of the fabric used in the latest edition of Vogue Pattern Magazine. My version seemed tame & predictable.


I like tunics ~ just tunics that hit me a couple of inches above my knees. I want more of them but I definitely need to choose my fabrics better to achieve the right drape and coverage. When I finished this tunic, I wasn't sure it worked for me until I took the pictures. 

What's up next? Another repeat top is on the cutting table hopefully I can do it justice...

...as always more later!


Friday, December 11, 2015

Really Another Top?

Yeah by the time I got to this one, I was thinking really another top?  So if you feel like that too, I understand.  Without further ado, here's another version of McCalls 7095.


Materials ~
Maroon printed velvet from Fabric Mart
White velvet
White burn out velvet

Background & Construction Info. ~
All of the materials are from deep within the collection. I actually had to hunt through several bins to find the velvet stash to coordinate the white velvet with the maroon velvet.

There are no new construction techniques in this top.  However, I did cut 2" off each side for a total of 8" deleted from the side seams. My first two versions are a little fuller and it was okay because they were made from rayon challis. For the velvet one, I just wanted to omit that extra fullness.

As I said before, this was the last top of the sewing vacay. I needed to finish the week with a tried and true top and not another involved fitting session. While it's interesting/challenging/necessary to sew new patterns, the fitting requirements for each one can be taxing if you do four of them in one week. I miss tried and true patterns...*sigh*

Anyway, the velvet did require special handling. The pieces had to be cut all in the same direction to insure the nap would run the same on all of the pieces. The seams were pressed open using my needle board which I ended up wrapping around my sleeve board to get a good press. 

For this version I went with the bell sleeves again. To me the bell sleeves really give the top a boho feel. I used the same lace used on the yoke pieces to lengthen the sleeves...and while the yokes are lined, the sleeve bands are not. It really was the perfect top to end my sewing vacay with...

A few photos ~


This is my third version of this top and not my last. I love the coverage of this top and how comfortable it is to wear. Also it works well with leggings and my ponte jean leggings so perfect for my new lifestyle. And who doesn't love a velvet top?!  So luxurious feeling, right?!

...as always more later!


Tuesday, October 20, 2015

Seconds

I liked both of these patterns enough to make them again.

McCalls 7095 ~
For this version I pulled a crepey green floral print from the collection and a coordinating green ponte.

  
I made two changes to this version:

  • The first one was to lengthen the sleeves by adding a coordinating band of the green ponte.  The band was 3.5" wide and the length of the sleeve at the hemline. I also used the casing at the sleeve hem to gather the sleeve that the pattern suggests.
  • The second thing is that I cut a Large for the body of the tunic especially since the brown one is very loose. I also cut the hem 3" shorter than the pattern.
  • Those are the only changes.

So a few pictures of it in action ~


I really think I want to make this one more time but as a dress, to be worn with some tights and boots.  We'll see...I have an idea in mind just gotta fabric dive into the collection to see what I can find!


Butterick 6183 ~
This is the second top but it's actually the 4th time I've made it. This will not be the last because this top is very comfortable to wear. It also adds a sophistication that I like in my casual wear. 


It's made from scraps of black ponte used in various projects and the houndstooth ponte used in the #wineandcheesewithkashi dress. There was a black 'n white Calvin Klein version in the fall fashion mags and that inspired my version.

There are a couple of differences between this version and the other three, 

1. I added two inches to the length
2. It's unlined 
3. Instead of using the band to finish the neckline, placed it on the outside of the neckline. 

Otherwise since all of the fitting issues have been worked out it was straight sewing after I determined how I wanted to place the houndstooth and black pieces. Okay, not exactly. I never tried the top on until it was time to take pictures...I mean this is the 4th time I'm making it. I tried it on and it was quite large with flared wings at the side seams.  I took it off, ran downstairs to the cave and eliminated the wings by removing 1.5" on each side at the hemline easing to nothing at the waistline.

I photographed it with my black jean leggings but I'm not sure I will actually wear it this way. It's longer but not long enough to cover those thick thighs...I'm thinking it will look better with my black denim jeans.

Photos of the top ~


I've been on a real tops kick and see a lot more of them in my future since separates seem to work for my lifestyle now. Also, a couple of pieces that I made last year have been repurposed and worn with my ponte jeans leggings or slim legged pants and will probably show up here again in new stylings. 

I'm working on fitting and sewing a new slim pants pattern to go with the tops and a couple of skirt patterns too using several new patterns. I'm really enjoying this new lifestyle change and sewing challenge.

Thanks for taking this journey with me and for ALL of the encouraging words!

...as always more later!


Sunday, October 11, 2015

McCalls 7095 - A Tunic

I'm going to be honest...I've broken down and bought some ready-to-wear pieces over the last few weeks.  As much as I'd like to have a totally me-made wardrobe, I'm starting all over again and I need clothing to wear to work. I haven't purchased a lot of pieces, just a couple of things from The Avenue that have given me a little "breathing room." 


Now that I have a couple of pairs of pants and a great shirt pattern, I'm concentrating on a few more tops so enter McCalls 7095.


When I did a google search for McCalls 7095, I came upon Liza Jane's versions made earlier this summer. There are a couple of versions on PatternReview but they are all made from white lace & linen/cotton combinations...not exactly what I need headed into fall.

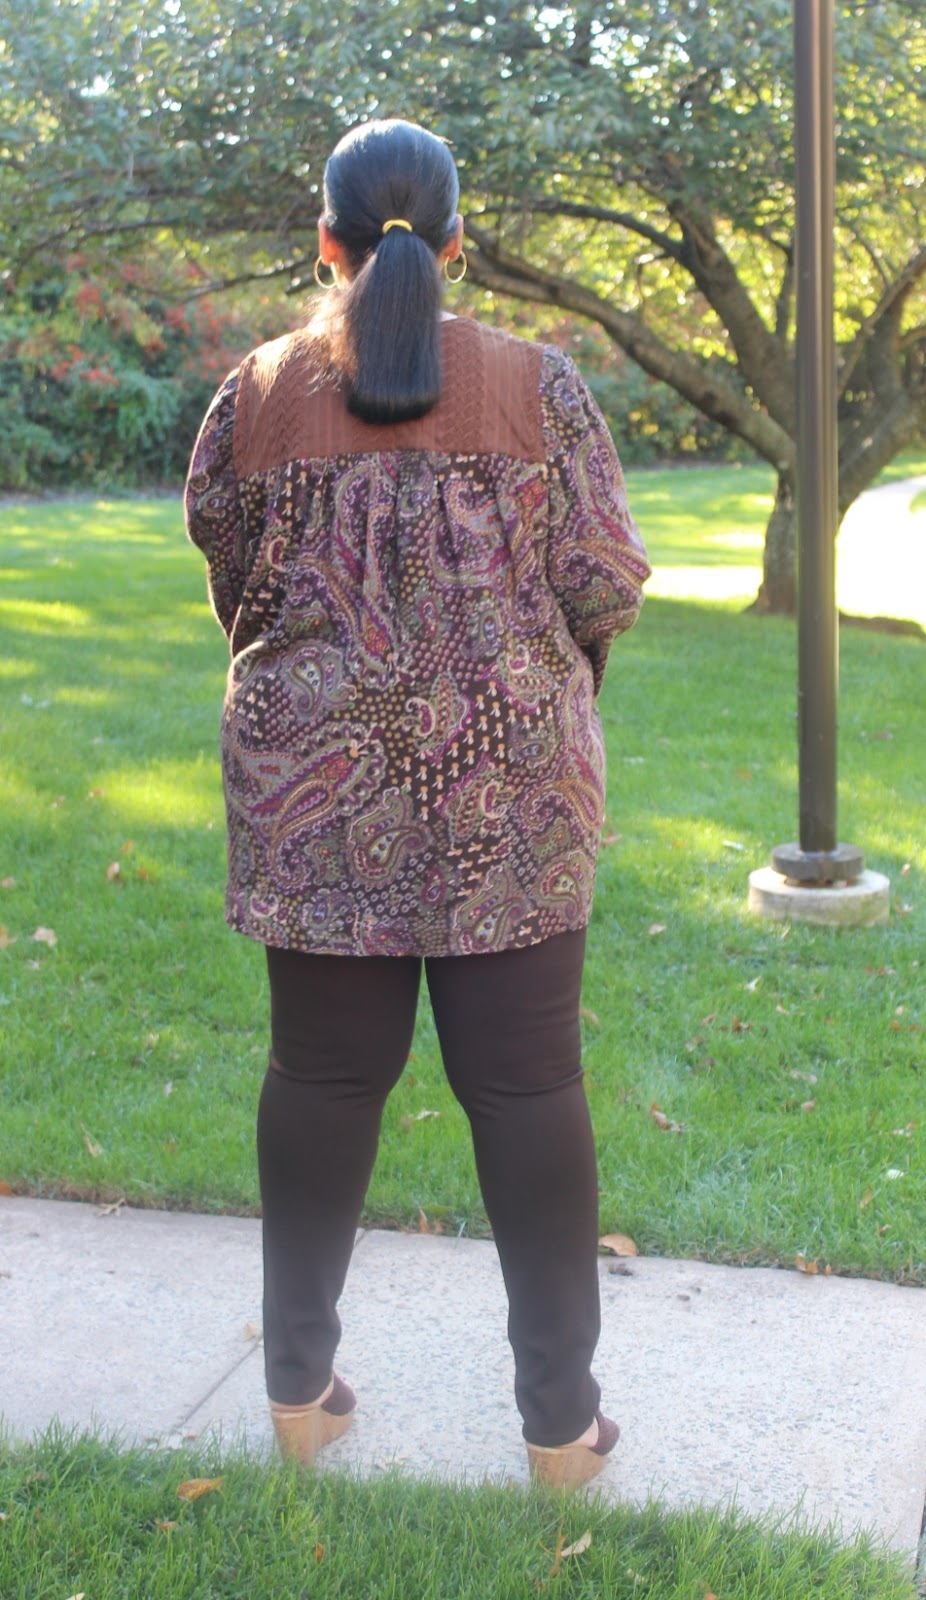
Instead I used this rayon challis and lacy print combo for my version...


...to wear with a pair of brown RTW ponte jeans.  I decided not to add the collar after seeing Liza Jane's versions, which I LOVE, btw! I started with a size XL because I wanted a loose fit but I didn't want it to look like I'm wearing a maternity top.

Materials ~
  • Brown/Green/Purple Paisley rayon challis from fabric.com purchased at least 10 years ago. It had marinated in the collection long enough.
  • A brown lacy knit for the yoke purchased from a now defunct online fabric store called Lucy's...about 8 years ago. This is leftover yardage which I originally used to make this dress.
  • Brown rayon bemberg lining for the yoke lining pieces.
  • Brown pleated lace with a brown satin border for the sleeve hems.

Construction ~
This is an easy sew only made complicated by the way I did things.

I left the collar off because I like how the facing clean finished the top of the yoke. Then after I went to turn mine I realized I must not have followed a direction because my front yoke didn't look like the instructions.  So I punted by turning and topstitching. I actually like this so no harm, no foul.


The bemberg rayon lining was used for the inside yoke pieces. This was done because I thought it would give it a nicer look to my top's inside and play well with my lace yoke pieces.

Even though I cut the XL, I should have cut the Large. Okay typing that is mind-blowing but there is A-L-O-T of ease in this top. If you're looking for a good maternity top this one would work well and that is not a put down, just an observation. I ended up cutting another 1.5" from each side to get a top that is still a little on the loose side.  

Next time I make this I will start with the Large.  I also cut 3" off the bottom of the top.  This is an extremely long top and if I had added a few inches it would have made a great boho dress!

I didn't add the elastic to the sleeves even though I planned to.  As I was working with the top, the sleeves reminded me of the bell sleeves that were on the tops I wore in the '70s. If I was going for the true '70s boho chic look, I decided the sleeves were best without the elastic.  

Then as I was inserting the sleeves I remembered that I had a brown lace trim in the stash. Once I added the lace trim to the sleeves, I was really thrilled with the look it gave the sleeves - different from the pattern envelope - but very boho chic!

A few more photos of the top ~


I'm wearing ponte legging jeans from the Avenue with the top. I bought them in black, brown and gray. The fit is not bad and they will allow me to work on my slim leg pants pattern yet have something to wear to work!

Conclusion ~
I cut this top out late last night. Got up this morning and made a new top in three hours...that's even with the alterations. I love this top! I love the way it makes me feel, comfortable yet well put together, and most especially this top/outfit will work well in my job environment! The other thing is that it will work into the winter months because I can add a sleeveless turtleneck under it for additional warmth.


Now to go diving in the fabric collection to find more fabric to make up another version before I go back to work on Tuesday! 

My daughter and I took pictures of several pieces this weekend so there will be more versions of Butterick 5678 up on the blog soon.

...as always more later!


LinkWithin

Related Posts with Thumbnails