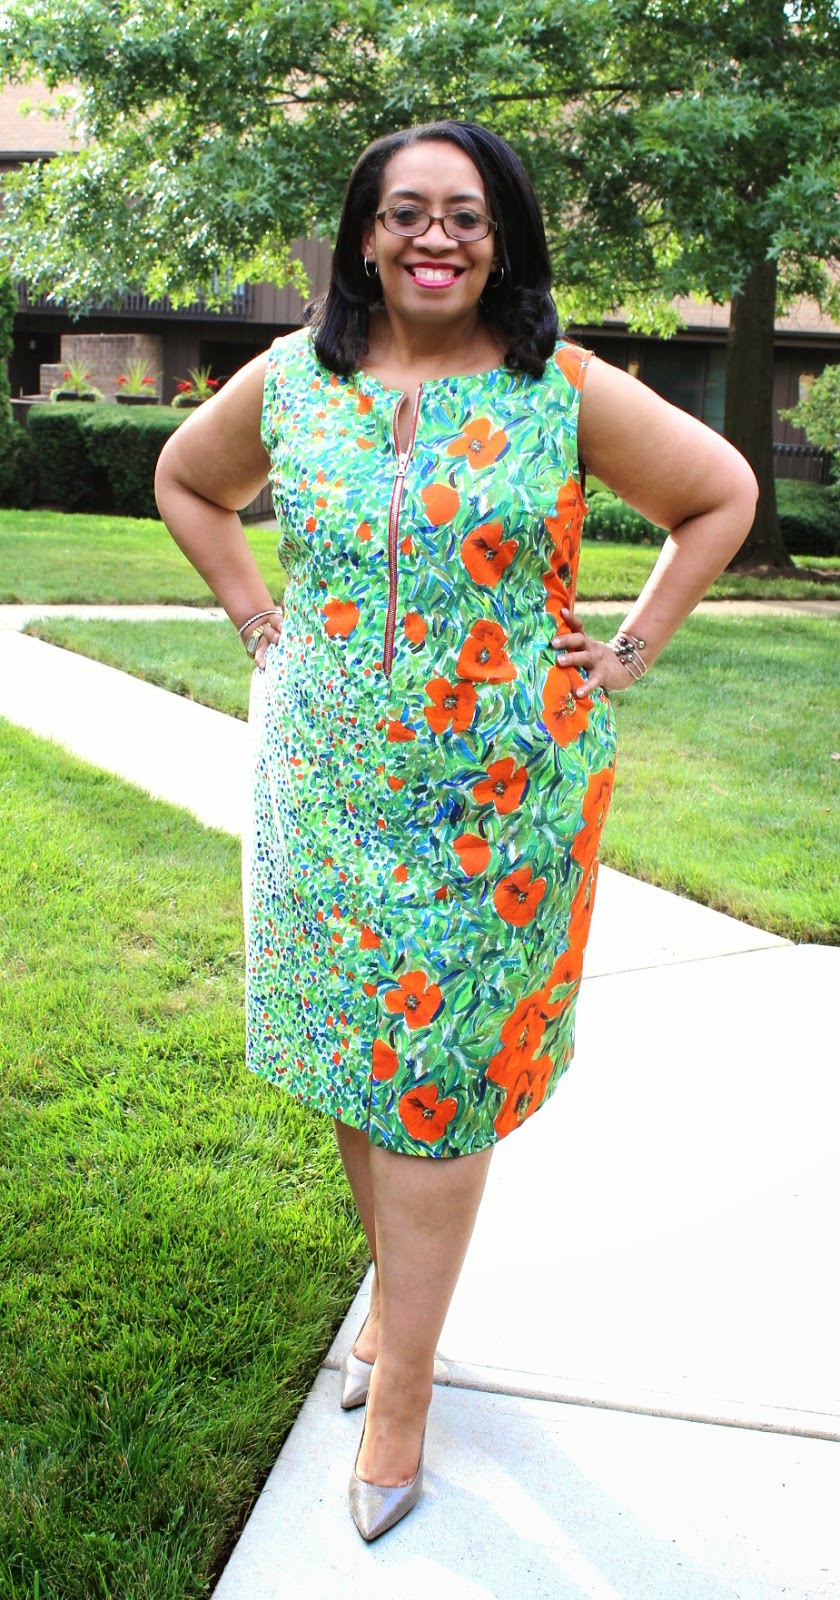
I've thought about why I return to this dress pattern over and over again. Like why don't I use another pattern? Honestly it's because this pattern checks all of my boxes. It's comfortable to wear. It works in a variety of fabrics, patterns and colors. Mostly I feel pretty in it. Let's not forget that!
At the end of May 2023, I spent my birthday with my bestie in Lancaster, PA. The home of cheap sewing supplies and a short ride to Fabric Mart. The true Disney World of my life! We visited a few quilting stores and shocked several employees with me stating that I wanted to use some of the quilting cottons for clothing.
At one quilt store (Burkholders), I purchased the Water Lilies border print by Michael Design Works and the coordinating striped water lilies & print pattern because as I held the fabrics in my hand, I could see another Myosotis. So why would I deny this fabric what it wanted to become!

One thing though, this is a complicated sew. Therefore, there are a lot of progress photos making this a very long post. Right here I'd like to thank my pass self for being diligent in taking them because when I finally finished this a year later I would NEVER have remembered these details without them.

Supplies ~
5 yards of 100% quilting cotton Water Lilies


9 - 5/8" green sheer and patterned buttons (purchased from the Quilt Store) Normally I use 12 buttons but they only had 9 so I made due.
Construction ~
Working with a border print is always a challenge. It makes me think outside the box to make the fabric sing yet end up with a wearable yet amazing garment. This was a complicated sew because I was basically remaking the pattern pieces to fit the vision in my head. There was some pattern work done to accommodate the fabric.
Bodice:
The bodice piece was enlarged and then the button front piece was removed. I made a separate piece for the button front.
I knew I wanted the bodice to be from the lighter part of the fabric. So I needed to sit on it a minute to figure out how to make the fabric work for me. I ended up cutting it on the crosswise grain to make the most of the lighter fabric.

After the bodice piece was cut out, I did a trial of how the fabric from the other pieces of fabric would work with the bodice.

I also did a test with the buttons I choose to see how they would work once the bodice was completed.

Skirt:
The skirt is cut on the crosswise to use all of the border print in the design.

I removed the original border and added the border from the coordinating piece of fabric after adding the button band to the front.

Sleeve:
Was cut from the main border piece so it coordinated with the dress' skirt. I added elastic to the sleeve to make them short and puffy. I like this style because it adds some grown up whimsy to the dress and it covers my bodacious arms.
Collar/Front Band:
This was made entirely from the border piece of the coordinating piece. It's the ultimate border/stripe to the entire piece. And the reason it took so long to finish the dress. Fussy cutting that border held me up for WEEKS!

Then I had to recut the collar and collar band because of the way I added the border to the front of the dress. I was hoping that I had enough of the border print left to just cut larger pieces. Ummm no. The collar had to be pieced to get the length I desired.

I will admit that this went through a few iterations before I settled on this one. But this one highlights the water lilies but yet brings the drama a good border print garment should.
It took me over two months from the time I started this to finish it. When I say my sewjo had been vacationing, I wasn't kidding. However, I had a few days off at the end of July/beginning of August 2023, so I finished this up. When I say this was an involved sew, please believe me that it was. I had to rethink everything to make the border print work the way I saw it. All of this took time and since my sewjo was weak, those things took longer than normal.
Then it sat while I waited to get the urge to sew the buttons and buttonholes on the dress. It sat almost a year before I decided I needed to wear it to church one really hot July Sunday. Then and only then was I motivated to do the last 2 steps!
Tie Band:
As you know, I've lost quite a bit of weight, and I didn't want this dress to sit in the closet or get packed away. I decided to add a ribbon tie to the bodice side seams to remove some of the fullness of the top.
- I thought I had a solid green wider ribbon in my trims stash.
- However, the green I had was a 1/2" wide and would get lost on the dress.
- There was a 2" pink ribbon on hand.
- I cut a 15" length of both ribbons.
- Then I laid the green ribbon on top of the pink ribbon and used 1/2" steam-a-seam 2 to iron the two pieces together.
- I didn't want to stitch the two ribbons together because they both have a distinctive stitch on their edges.

A few pictures of the dress in 2025. I wore it to work the other day and my co-worker graciously took the photos below:


I'm calling the sewing I'm doing now, "Art Teacher Chic" cause I'm all about the fabric. How can I manipulate it. How I can make something unusual and different. I know I will make another Myosotis because it's my go to pattern.
I know it's a lot of photos but we took them near my job at Broadway & 39th Street at the Art Installment, I'm calling the bones. I only wore this beauty only once last summer and I received so many compliments. I'm glad I finally got to wear it to work this summer and document that fact. This was such a complicated sew, I'm glad I posted it in case I want to refer to it in the future.
...as always more later!