Saturday, April 29, 2023

McCall's 7969 in Black & White

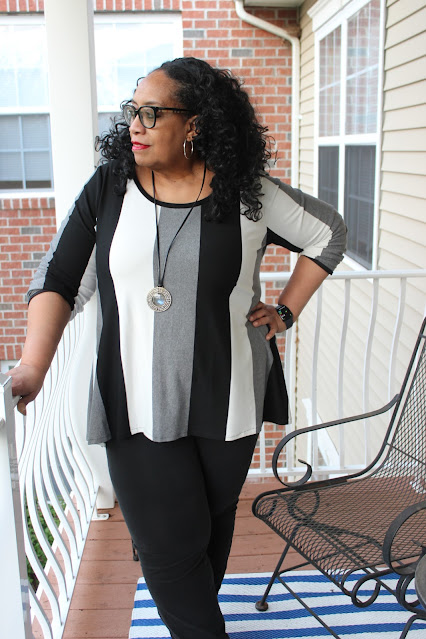
I loved my first one and understand why there are so many versions on Instagram and Pattern Review. I'd always planned to make another one and when I found this black/white floral double border print I knew it would be perfect. Especially since lately I've really been in a fabric manipulation mood.

Materials ~

4 yards of the black & white rayon floral double border print purchased from StyleMaker Fabrics in July 2022 which of course is no longer available.

Cutting Out ~

As you know the most important part of making a border print stand out is how you use it. A double border print presents it's own unique challenges because technically you only have 1/2 of the fabric to use. I will admit that it took some fiddling to make this fabric sing.

I knew that I wanted the front & back bodice pieces to be floral. The sleeves would also be made from the floral print because I wanted the bodice to pop.  Determining how the skirt would work using the border print was the intriguing part. I was thrilled when I settled on using the borders as the sides of the skirt panels.

Construction ~

The only change between this one and the first is the sleeves. I really like the flare sleeves on my first dress. It's airy and easy to wear plus it covers my larger upper arms. However, there are so many sleeves with elastic hems being shown now that it seemed an easy adjustment to make. I added a casing and some 1/2" elastic to make the hem elasticized.

One more thing to note. I didn't adjust the neckline so that it would sit closer to my body. I like wearing a tank top under the dress. Especially since for this one I can use the solid color as a focal point for this very busy print. 

A Few Pictures ~


As of right now I have no plans to make this pattern again...but never say never! *LOL*


...as always more later!


Wednesday, April 26, 2023

A Follow Up to "My Fabric Collection is my Retirement Fund" Post

I wrote this post, My Fabric Collection is part of my Retirement Fund, back in March 2016. I was about 10 years out from retirement then. I'm now three years away from it. My retirement date is on record at my company that's how close it is.

After rereading the post and the comments which are so interesting, I wanted to do an update to this post for a couple of reasons:

1. Covid

Covid changed everything in 2020.  The way we work.  The way we shop. How we live.  When the world shut down in the spring of 2020 due to the pandemic, it caused us all to reassess so much of our lives.  That reassessment affects us all to this day.  It also made me very grateful for the fabrics, notions and patterns I had stashed. I sewed without challenges when it seemed like the world was coming to an end.

2. Moving & Changing Lifestyle

I've lived in this apartment for three years now. I packed, moved, unpacked all of that fabric in the midst of an illness.  An illness that caused me to re-evaluate a lot of what was important to me.


Also, I no longer work in an office four days a week. During the spring until the end of the year, I go in two days a week which changes what I need to wear and sew. Hybrid work arrangements are more the norm since Covid.

My lifestyle is slower now. I'm happy spending time with a good book or a good TV show cause Covid even changed that! There are so many streaming options and movies released to TV.  TVs are larger, less expensive (relative to the inflation we're presently experiencing) with more options to give you that movie theatre experience at home.

3. Balance

My life is more balanced now.  Back in 2016, I worked, sewed, and hung out with friends/family a little. It was like a 50/40/10 split. I read a little but since commuting took up so much of my time, I used my commuting time to do several things.

Now since my commuting time is greatly reduced and even though I have more responsibilities at work, my life seems more balanced. I'm working on spending time equally between sewing, reading, time with my grandchildren and making sure I'm available for my friends. This seems a more realistic picture of what my imminent retirement will look like.

Now let's discuss the main topic of that post - my fabric collection. If you've been reading along, you know I want to reduce my collection by about 20%. That reduction that was discussed some in the comments due to retirement is in full affect in my life. I have several reasons for wanting to lose a portion of it:

  • I want some of my living space back in the Resource Center. I want to reuse some of the wall space currently holding fabric.
  • There are pieces I know I won't use and I want them to go to another sewist who will enjoy them.
  • I've been culling my collection all along but the thought of having to move this much fabric again gives me the heebie jeebies.  And who knows when or if I will need to do so.  Making plans ahead of time just seems wise.

While I'm not concerned about my fabric collection in the event of my death, my daughter has a list of sewists who live nearby who can have dibs to my collection.  She has first rights to everything and the sewists on the list know who they are. This allows for a smoother transition of my things for my daughters. Yes, I thought up this plan when I got sick in 2020.

Finally, while I didn't purchase a lot of fabric in 2020, I did start buying in large amounts again in 2021 and 2022. I've slowed down buying fabric in December 2022 and this year so far I've only purchased a few pieces. My purchases are more well thought and creative driven now. I've been using my fabric money for books.  

However, I also want to use some of those beautiful fabrics I've accumulated. I want to make amazing garments to move around the world in.  Pieces that won't be seen on anyone else. I want to take those sewing journeys while I can still enjoy them.  I want to enjoy the sewing while I can.

That's the update to my post. How about you?  How have your attitudes changed towards sewing in the last seven years? Did Covid affect you? Did the supply chain shortages from Covid cause you to keep more sewing related items on hand? Do you still work 5 days a week at your job's location? Or do you work from home now? Have you retired or is retirement imminent?

I want to hear your thoughts, so talk back to me!


...as always more later!


Saturday, April 22, 2023

Dueling Wexfords

As I stated in my fabric fail Wexford, I was definitely making the pattern again. While the fabric shred as I wore it, the silhouette held up really well.  So I made 2 more unintentionally making them both in the black family.

In the first post, I didn't talk about any of the changes I made to the pattern or the size I used. I cut a size 24 and added 1" to the hemline...though I may add another inch for future versions.

While I've only used this pattern as a top, I will be making the dress portion later this spring. It's such a relaxed and comfortable wearing garment that I can see a longer version of this for summer wearing.

Wexford One:

The first Wexford is made from a black & white rayon knit purchased from Fabric Mart's brick & mortar store.  The changes to this one are that the neckline and sleeve hems are bound in some black knit scraps. As with the first one this is an easy sew. 


Wexford Two:

The second Wexford is made from a luxurious rayon knit that was purchased from Elliot Berman's shop pre-Covid.  This means that it was from the old place and not the new one.  Also the hand on this fabric is lush. I chose this fabric in an attempt to replace the pleather version.  

For this one, I used a black fold over elastic trim instead of the binding piece included with the pattern.  Other than that there were no changes.  Again a quick sew that let the fabric do the talking.


Besides making the dress version of this pattern, I have a few more top versions floating around in my head - a lace one, maybe a mesh one and finally I have several cool knits that would look amazing in this silhouette.  So sooner or later more of these will show up here.

Don't forget this is a Cashmerette Club pattern so if you want a copy of the pattern you will need to join the club either monthly or yearly. Oh and they're PDF only patterns...


...as always more later!


Monday, April 17, 2023

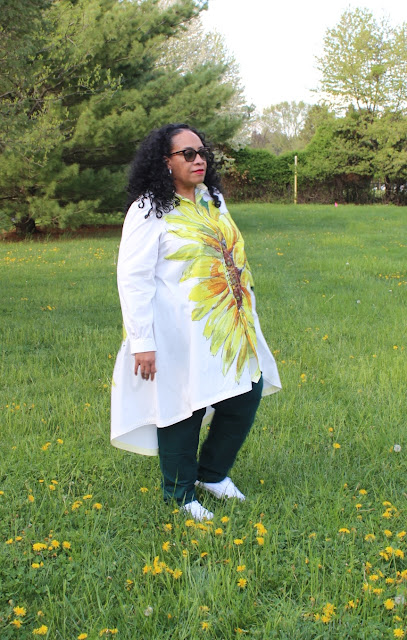
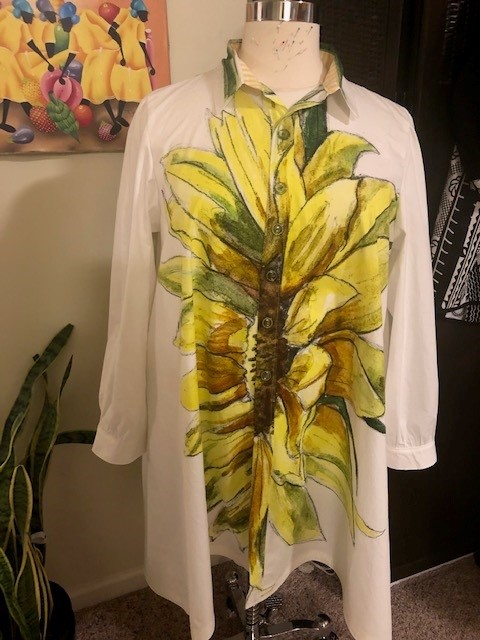
A Sunflower Katie

For this make, the panel fabric totally drove the idea. I saw this fabric on Julia Allisson Cost's IG account and I knew I had to have some because...

Sunflowers are one of my favorite flowers.  They remind me of my grandmother's garden and the summers I spent on my grandparents farm. BTW, it was my grandmother who taught me how to sew.

The fabrics come from Julia's hand painted art.  Which means the fabrics are different and unusual and that always excites me. 

The Pattern:

When I saw these panels on Julia's site, I knew they would make "the perfect" MimiG Katie shirt.  BTW, this is one of those TNT patterns I revisit over and over again.  I've made several and they're still on rotation in my closet. I love this silhouette because of the ease of wear, comfort factor and how different fabrics can make interesting variations of the pattern.

Pattern Layout:

The front & back pieces were placed directly on the sunflower print so all the other pieces could be pinned around them. I wanted the sunflowers to be the focal point.

The sleeves were cut into two pieces and stitched together because there wasn't a white piece wide enough for the full sleeve.

When I realized the button front bands were sewn on, I made sure the shirt front and the button front pattern pieces were laid side by side on the fabric.  This allowed the print to carry across the front of the shirt which is what I wanted.

The collar was cut from leftover stem pieces because I wanted the print to play well together.  A white collar would look disjointed with the sunflower print button fronts. I ended up having to piece the fabric together to get a full collar.  It works because you don't notice the seaming on the collar piece.

The collar band was cut from a yellow gingham that's been in the fabric collection for years but originally purchased from Fabric Mart. I was going to use this gingham for the collar band, the hem facings and the pockets. BUT the gingham was too bright underneath the white fabric.  

I pivoted by using it only on the collar band. I used a lighter yellow gingham bias binding that I bought during my last Carriage Corner Sew Camp weekend for the hem facing. I love how its barely noticeable on the hemline.

Other Supplies:

I chose a button with a transparent greenish cast because it worked with the variety of colors on the front band.

Construction:

This is a simple sew. Probably why I make it again and again.  The only changes I made was to omit the pockets. I know but I'm just not a pocket girl. Also I used the bias binding mentioned above instead of the hem facings.

One thing to note - I did change the thread to sew the buttonholes on so they would merge into the background instead of stand out.  I wanted nothing to diminish this fabrics beauty.

A Few Pictures:


I referenced this garment in my Threads Interview.  

Where they asked what I was currently working on.  A link to the article is here.  

I have a few more Katie's planned using some very distinctive prints. Sooner or later they will make an appearance here. This make falls into my taking my time, using an amazing fabric to make a distinctive, totally me garment.


...as always more later!

Tuesday, April 04, 2023

A Funeral Dress

My cousin recently passed away and I realized that I no longer own a proper funeral dress.  My lifestyle is so casual now and most funerals during Covid either happened via Zoom or YouTube so I didn't need to be "dressed" to attend a funeral.  And if you don't know, a Black funeral is a celebration of life.  So not only is the funeral a celebration of the person but people of my generation tend to dress our best.

So I needed a dress.  I did have enough time to rush order some black linen from Fabric Mart because spring has sprung here on the East Coast. My pattern of choice was the Style Arc Hope Dress using the extension pack. Buttons and black bias binding came from my notions stash.

Construction was easy and didn't take long, 8-9 hours over the weekend, that was cut out to finished dress. 

  • I did add 8" at the lengthen/shorten line and another 1" to the hemline of the skirt pattern piece to maximize the dress.  Probably why the Hope Dress is so popular.
  • The other construction item was I used a 5/8" seam allowance to sew the bodice to the skirt instead of the 3/8" the pattern recommends. This was to cover the 2 rows of basting stitches.  
  • I added my label to the facing.  
  • Then used bias binding to clean finish the facing because I wanted some pretty in the dress, even if I was the only one to see it.  
  • The black & white buttons were from my notions stash and gave the dress a pop...cause seriously all black.

I made this one in a size 22.  The last time I made this dress, I chose a size 26, why? That one the fit was too loose, this one fits way better. 

I know extension packs can seem like they're not worth the money. But this extension pack is GOLD! I have plans to make several more dresses using this button front version and the bias bound neckline. There are some rayons lounging in the fabric collection that would do this pattern with the extension pack justice.

The photos below are how I wore it to the funeral. These were taken right as I got home...


As I stated, I will be making more of these for spring/summer! BTW, I will be off the week after Easter.  A short trip with my grands and then a little sewing. Since the weather is changing, maybe some pictures too...

However, I do have a question, do you have a dress or suit for funerals?

...as always more later!


Thursday, March 16, 2023

It Feels Like Spring

The clocks have sprung forward an hour.  It's light longer and here on the East Coast it's been a relatively mild winter.  I, for one, haven't missed the snow piles or the bitterly cold days. So it's with a happy heart that I'm emerging from the darkness of winter and thinking of Spring.

My company has updated it's work from home policy and we're now required to be in the office 4 days a month. Since I absolutely HATE carting my laptop back and forth, I'm going to be in the office 2 days a week from now until at least October/November...which has made me want to sew some new garments.

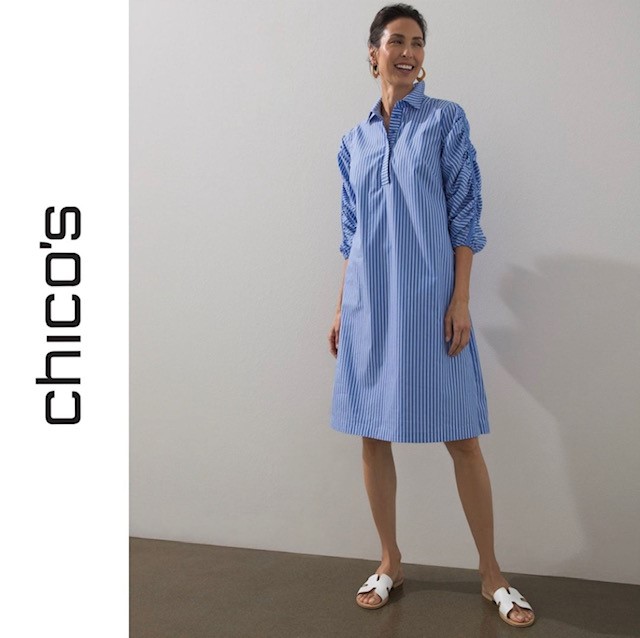
I've been looking at the spring/summer offerings online, saving pics of items that caught my eyes.  These two interpretations of the same dress sparked an interest.


Probably because I've made it before and this dress is still hanging in my closet. 

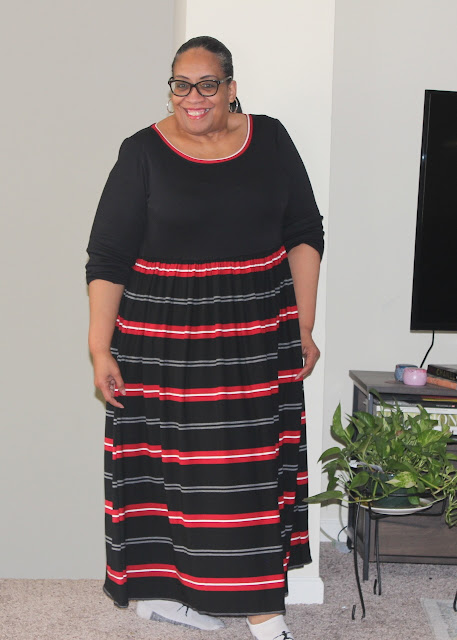
It's from an out of print, Simplicity 2894 pattern. When I made it in 2017, I had planned to make more.  That never happened but I really want to make a few this year because it was an easy to wear, very comfortable dress.  I have several printed linens that would look amazing in this silhouette.  Of course I will maximize it since my ankles don't look as good as they did in 2017. 

I've been thinking about what I want to sew for spring.  Again it won't be a garment a week because I don't have the need even with going back to my office.  However, I'd like to add some different dress silhouettes to work with the dresses I made last year.  I'd also like to add some tops/blouses and toppers to wear over jeans. Realistically it doesn't get dress warm until late May/early June so a couple of those would be nice to add to my wardrobe too. 

Those are my thoughts as we roll further into March with Spring on the horizon...


...as always more later!


Saturday, March 11, 2023

Floral Pleather & Black Knit Wexford

I've hoarded this pattern since it was introduced for the Cashmerette Club. While it debuted last summer, I always knew I wanted The Wexford for a winter top. It reminds me of my Pembrokes and this white cotton top that I wear all the time.

Rambling through the fabric collection, I found this floral pleather that I used in a denim dress in 2016 and some black knit I bought from StyleMaker fabrics in 2021. I've used the black knit before in one of my house dresses.  

Seems like this black knit was purchased to be the assist in garments instead of the star player.  

Here are the players for this version...

This is an easy sew complicated only by the pleather fabric I chose for the front.  I like everything about this even though I did lengthen it 2" and may lengthen it 2 more inches for future versions.

I use to have a policy where I wouldn't wear a garment until it had been photographed.  Since I'm no longer always up to pictures, I wore this to work 2 weeks ago.  This was one time I wished I'd taken the pictures first because then I would have realized that my pleather was bad.

The pleather separated from the knit backing at the side seams and it fractured in other places on the front. It was so much that I was shedding white confetti or pieces of pleather EVERYWHERE.  The black knit pants I wore with the top were covered in white sprinkles.  Even my black sneakers looked like a box of confetti had blown up on them.

A Few Pictures of the Damaged Top  ~


This was definitely a fabric fail and not a pattern fail.  This top was very comfortable to wear and I will be making more. Actually have one cut out to sew now. 

This pattern is part of the Cashmerette Club of which I'm a member.  I don't download the pattern every month but the ones I do I really like. I really like this one so plan on seeing several more versions of it.  


...as always more later!


Friday, February 03, 2023

I've Been Sewing

My sewing resolution for 2023 is to take my time, create more involved garments, and enjoy the journey more.  

My reasons are:

  1. I don't need a lot of new clothes.  I have a few holes that need to be filled but not enough for me to create large amounts of clothing.
  2. I want to explore the technique driven side.  Not just sewing techniques but fabric manipulation, dyeing, printing, quilting, the techniques that take time and aren't accomplished in a weekend.
  3. There have been some ideas that have been floating around in my mind that I've always said, when I have more time.  And as the saying goes, "You MAKE time for the things you want to do."  So I'm making time.

While I'm concentrating on making tops, because that's what I NEED right now.  I'm making tops with fabrics and techniques that need special handling. I want to take my time and enjoy the journey.  Sewing this way is going to slow my making way down...and I'm good with that!

I may even do more progress posts so my finished posts aren't so long and involved. I have one top finished, waiting for buttons and buttonholes and one top that I've just started.  However, the fabrics I used are what makes each top so distinctive and enjoyable to sew.

This is the first tunic I worked on in 2023. It's a MimiG Katie tunic that I've made several times before.  However, it's the panel print I used that made this sewing journey so enjoyable.

My second piece is a pleather and knit top from Cashmerette Club called the Wexford.

I have a few more tops queued up with fabric and patterns pulled and there are two more housedresses I want to add to my "house dress collection."  2023 is going to be an interesting sewing year and I hope you hang with me on my sewing journeys.

...as always more later!


Sunday, January 22, 2023

Do You Jelly Roll???

Let's start out by saying I'm not a quilter.  Even though I've made several "quilting" projects, they're not my top must sews.  However, I love jelly rolls.  The thought of them, how the fabrics play so well together, how they can become so many different things.  

Whenever I see one, the possibilities of what the new yardage can be inspires me.  Especially black & white jelly rolls.  So while I'm not a quilter, I was inspired to buy several jelly rolls and make two yards of fabric from them to create a top.


Supplies used ~

2 packages of black & white Ankara strips purchased from Cultured Expressions.  Each package had 20 strips.

1 yard of solid black cotton fabric from StyleMaker Fabrics for the strips, sleeves and back insert.

7 3/4" buttons purchased several years ago from Pacific Trimmings

1/2" black bias binding also purchased from Pacific Trimmings


First let's discuss making the fabric ~

Honestly, this was the most tedious part of the sew and took me about 4 days to complete. I whined through this part because not only was each seam sewn but they were pressed open, then flat, and serge finished.


Here's how I made it ~

1.  Sorted the strips into piles.

2.  Determined how I wanted the layout of the strips to look.

3.  Sewed the strips together using a 1/4" seam. My sewing machine has a 1/4" foot with guide and one without a guide.  Using the one with the guide was SOOOOOOO helpful!

4.  After 11 strips were sewn together, I added a black strip cut in the same dimensions (2.5" x 45") to differentiate the sections.

5.  When each section was sewn, I pressed the strips to the left side.  Then each strip was serge finished. I did this because my yardage will be used for a garment and needs a cleanly finished inside.

6.  Continued this for 3 sections to get the yardage I desired.

You can see I made this yardage during my Christmas break!

Once you decide how much yardage you need - I needed 2 yards to make the top front, back, front facings and sleeve bands - then you can start your garment's construction process.

Since I had all of those seams, I chose a pattern that didn't have a lot of pattern pieces. I didn't want to cut apart the fabric I'd just sewn together. So I started with Anna Allen Clothing's Anthea Blouse.


Design/Construction Changes ~

I need you to know that while this pattern goes up to a size 22, in my opinion, it's not size inclusive. The hip measurement on a size 22 is 51" way below the amount of space I need for a flowy hemline.

I made some simple pattern adjustments to get the top to fit me.

  • I'm bigger on the bottom than the top.  So the shoulders and bustline on the size 22 fit with no problem.  My challenge is my abdomen and waist.
  • I also had no challenges with the sleeves since the design is for very wide sleeves.
  • On the front pattern piece I did a slice and spread from the abdomen to the hemline - spreading the pattern 1" at the hemline.
  • To add width to the back, I went with a design technique to get the necessary width. Especially since I needed to go from 51" to 65" at the hemline (this includes ease for wearing). 
  • I added an 8" insert to the back that when opened, gave me more than enough space in the abdomen and hip area.
  • The back pattern piece says to cut on fold. I cut them as single pieces adding 1/2" seam allowance to both. 
  • Then the insert was sewn to either side of the back pieces using a 1/4" seam allowance. 
  • I chose a point about 6" down the back and stitched the original two back pattern pieces together using a 1/4" seam allowance. 
  • Press flat and open and walah, extra width and cool design feature.
  • The last design feature was to cut the sleeves from the solid black fabric and the sleeve bands from the jelly roll fabric. 


A few more things ~

- I did lengthen the blouse by 3" because my comfort level is that everything adequately covers my abdomen and backside.

- I didn't want topstitching to show on my blouse front.  So I hand stitched the bias binding down and didn't include topstitching on the front facings.

- The pattern tells you to double roll the hem and topstitch it down. I used a bias binding to finish the hemline because the bulk in double rolling the hemline would have distracted from the finished look.

I have this thing about "corralling" patterns so your eye has a place to rest. I think it makes the finished garment more appealing to the eye. That is why I used the black sleeves, black strips, and black back insert.

Here are a few pictures ~


I did make a few design decisions that affected the end result but everything was done to highlight the beautiful fabric made from the jelly rolls. This was the only thing I made during my Christmas break.  Making the fabric took 4 days alone, then construction took another 2. I was fine with this project taking up the bulk of my sewing time.

Especially since this is my last post as a Janome Maker.  I've been a Janome Maker for almost three years and it's been a privilege and an honor to rep one of the best sewing machine companies out there. I'd like to thank everyone who worked with me at Janome to make this one of the best experiences ever!


...as always more later!


LinkWithin

Related Posts with Thumbnails