

I chose this border print for the dress because I wanted something different from the first two versions. Then I flipped the script by using the border print at the neckline instead of at the bottom of the dress. It looks like I wanted it to in my head but it didn't occur without challenges.

For this one I used a cotton sateen border print from the collection. The fabric wasn't tagged so who knows where it came from...though I think Fashion Fabrics Club...but I'm not sure. The notions are a little interfacing for the facings and the purchased white piping from Daytona Trimmings also by way of the collection.
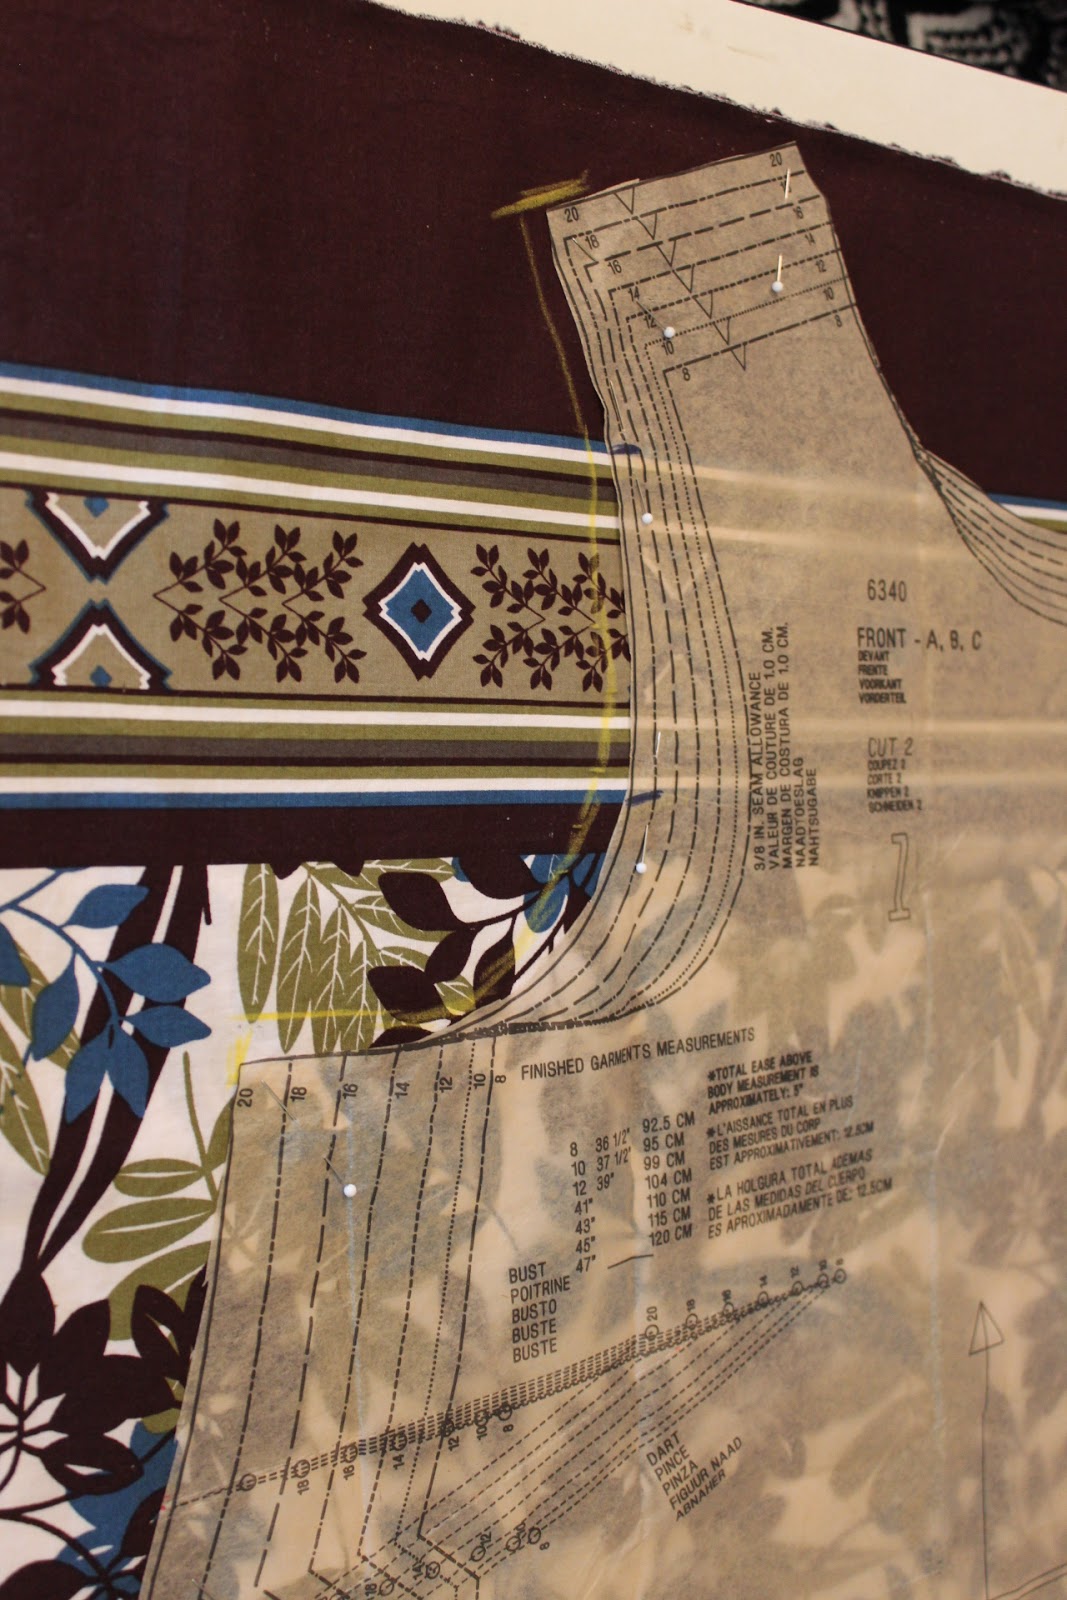
Pattern & Construction Information ~
As you may have noticed I added sleeves to this one which meant a few pattern changes.

Let's start with the sleeves...
To make sure I added back the space that was removed from the sleeveless dress pattern pieces, I measured the two back & front pieces against each other. Using that as a measurement, I drew the extra space back, right onto the fabric. I probably should have made new pattern pieces but I don't believe I will make this version again...and if I do I have my notes here to remind me of what I did.

That settled ~ the next challenge became how to match the border print across the top of the dress. I wanted it to work from the sleeves all the way across the front and back of the dress. I ended up making and inserting three sleeves to determine which one would work best.
Option One ~
The sleeve cap had too much of the brown in the top which made the border print look really disjointed across the front and back.

Second Option ~
This one had less brown in the sleeve cap but was too long and looked matronly. That was something I could correct though by cutting off some of the extra at the sleeve hem.

Third option ~
Then I decided to try a total floral sleeve adding a piece of the border as a band at the sleeve hem. But the sleeve was too long and heavy looking so I rejected it.

As you can see from the pictures of the finished dress, I went with the second option.
Though honestly, the border print doesn't work as well as I would like across the front of the dress. I wanted it to match completedly around the dress and it doesn't. I'm acknowledging that upfront but I'm still wearing it!
I went back and forth over whether or not I liked the dress. My disappointment in how the border print works across the sleeves, how it looks like a house dress on the hanger...helped to let it hang for a few days before I finished it. When I did, I decided to add some white piping to the neckline and sleeve hems to give it some punch.

I'm so glad that I added the piping. It gives it a little more upscale look yet delivers the comfort I want.
A few pictures of the dress ~


Conclusion ~
Since I used a cotton sateen for this one, it hangs differently than my linen versions do. Also, this dress would have benefitted from a back opening because while it's not so hard to get on, it's a little challenging to get off because of the sleeves. Yet again, not enough to make me not wear it.
Parting Shot ~
My other parting shot pics have featured the girls but the boys were here too. Now while The Little Prince, Danny, never left the comfort of the airconditioning, the Littlest Prince, Joshie, did venture out with his sisters.

This is my last version of this pattern. I'm putting it away. There are other projects that I want to work on. It's August so summer will be gone soon and I really want to make a few other garments from my summer sewing list.
...as always more later!

I love how these recent garments have the addition of piping! You are incredibly talented . . . And dedicated to make 3 sleeves.
ReplyDeleteI like the border print at the top. It draws attention to your face, almost like jewelry.
ReplyDeleteYou have a good eye for detail. Thanks for including your thoughts on choosing your favorite sleeve option. This is another lovely, striking dress. What really catches my eye is your use of the dense border across the top.
ReplyDeleteYour idea of the border print across the top was very creative and turned out so nicely. I love the addition of the piping! Your littlest prince is adorable. :-)
ReplyDeleteThis dress as all the others that you make is just stunning. I don't know how you find all the time to work full time, sew these wonderful works of art, right this wonderful, educational blog and enjoy your children and grandchildren. You are amazing.
ReplyDeleteAs always, Carolyn another winning dress. The border print at the top of the dress really looks good, the piping tops it off.
ReplyDeleteI know, as a sewer, you are hard on yourself about the matching of the prints, etc. but my first glance at the opening picture was "this is a fabulous dress" without regard to those details. I love how you can create something so unique with your vision. And this one will carry you into fall in style!
ReplyDeletelove the use of border print and putting it at the top - looks very RTW to me. Fantastic.
ReplyDeleteThis dress is very cute! Thank you for the visual on how to match the sleeves.
ReplyDeleteI follow your blog for quite a while now. And I like (allmost) all the clothes you are sewing. I envy you for beeing such a fast sewer. I always need ages to finish a garment. But you are very inspiring. I'm waiting to see more. Please change the pattern number in the title. It's wrong.
ReplyDeleteThanks it's fixed...didn't even realize I'd inverted the numbers.
DeleteI think it looks great.
ReplyDeleteI love the border at the neckline. I paid no attention to border matching of the sleeves until you pointed it out. Great looking dress and love the fabric.
ReplyDeleteYour dress is beautiful and I love reading your blog! I admire your ability to sew such beautiful garments. I started reading your blog (and others) in hopes it would inspire me to start sewing a garment. I have been quilting for about 6 years now but I haven't tackled any clothing yet! Thanks for sharing!
ReplyDeleteI love the colours in this fabric, they really suit you, and the dress looks fabulous. Maybe don't put it away just yet???!
ReplyDeleteHelen
Wait! I thought you just decided to make a fall denim version of this dress. Am I imagining that? I really like how this dress turned out. Sorry the sleeves gave you such fits. g
ReplyDeleteI decided that AFTER I wrote the blog post and I posted the denim dress idea to Instagram so you're not going crazy!
DeleteRe matching at the sleeves and armhole: I find it helpful to draw lines on the pattern at the seam intersection, to help match a horizontal element in the print. By tracing the top of the stripe on you front bodice piece - where you show it on top of the fabric, it would be easy to do - then you can lay the sleeve pattern on top as it will be when sewn, matching stitching/seamlines, and copy the traced lines. Your stripe or pattern will match across the front, and if all things are level and good, it should be darn close at the back as well.
ReplyDeleteGreat versions of this dress ! Also great use of border prints
ReplyDeleteI've been all about making multiples this summer too! I like the unexpected use of the border at the top instead of at the hem, and you're right that the piping adds that extra something. I feel like piping is becoming your signature finish now!
ReplyDelete