
So while I did work on a new cardigan during the Holiday Break, you know I also cut out a pile of shirts. Since I use my TNT shirt patterns over and over again, the only thing that differentiates each shirt is the fabric used, buttons and any embellishments. The first shirt is made from an overprinted plaid fabric that I took the time to match the plaids while cutting it out. Though since the fabric is overprinted it really doesn't matter!
This shirt was made to go with the Simplicity Cardigan that I'm still trying to determine how to add closures to! Since there are two shirts in this blog post, I've broken it out by each shirt.
SHIRT ONE:

Materials ~
4 yds of 45" cotton & silk blend fabric purchased from Fabric Mart's brick & mortar store during March Sew Camp last year
Interfacing from Steinlauf & Stoeller
11 1/2" frosted floral buttons from the button stash
As I stated above there are no new construction techniques for this shirt. The difference is in the fabric and the way I cut it out.
Construction Info. ~
1. Front band was cut on the bias but when I added it to the shirt, I realized it didn't add anything to the shirt front. So I turned it to the back on the buttonhole side and outwards on the button side.
2. Back yoke piece was cut on the bias as was the collar, collar stand and cuffs.

3. I went with a white button to make the print pop on the shirt. Even though I did take the time to match the plaid.
4. I don't always burrito roll my shirt but for some reason I wanted to for this one. The burrito roll is still (years later) not intuitive to me. Thank goodness for this video from Sew Camp that I can refer to time and again. Also thanks to Kisha and Andrea for the help!
As an aside it's one of the things I love about Sew Camp - the sharing of techniques and learning from my fellow sewists.
A Few Pictures ~


Worn with a RTW sweatshirt hoodie
SHIRT TWO:

Materials ~
4 yards of an embroidered cotton purchased from Marcy Tilton last year
Interfacing from Steinlauf & Stoeller
11 1/2" Mother of Pearl Buttons from the button collection
Construction ~
When I purchased this fabric I knew I wanted to cut the collar, collar stand, front button placket and cuffs from the unembroidered portion of the fabric. The pictures on Marcy's site were so good, I could see that part before I purchased the fabric.
Other than creative cutting there are no additional construction techniques for this shirt.
A Few Pictures ~


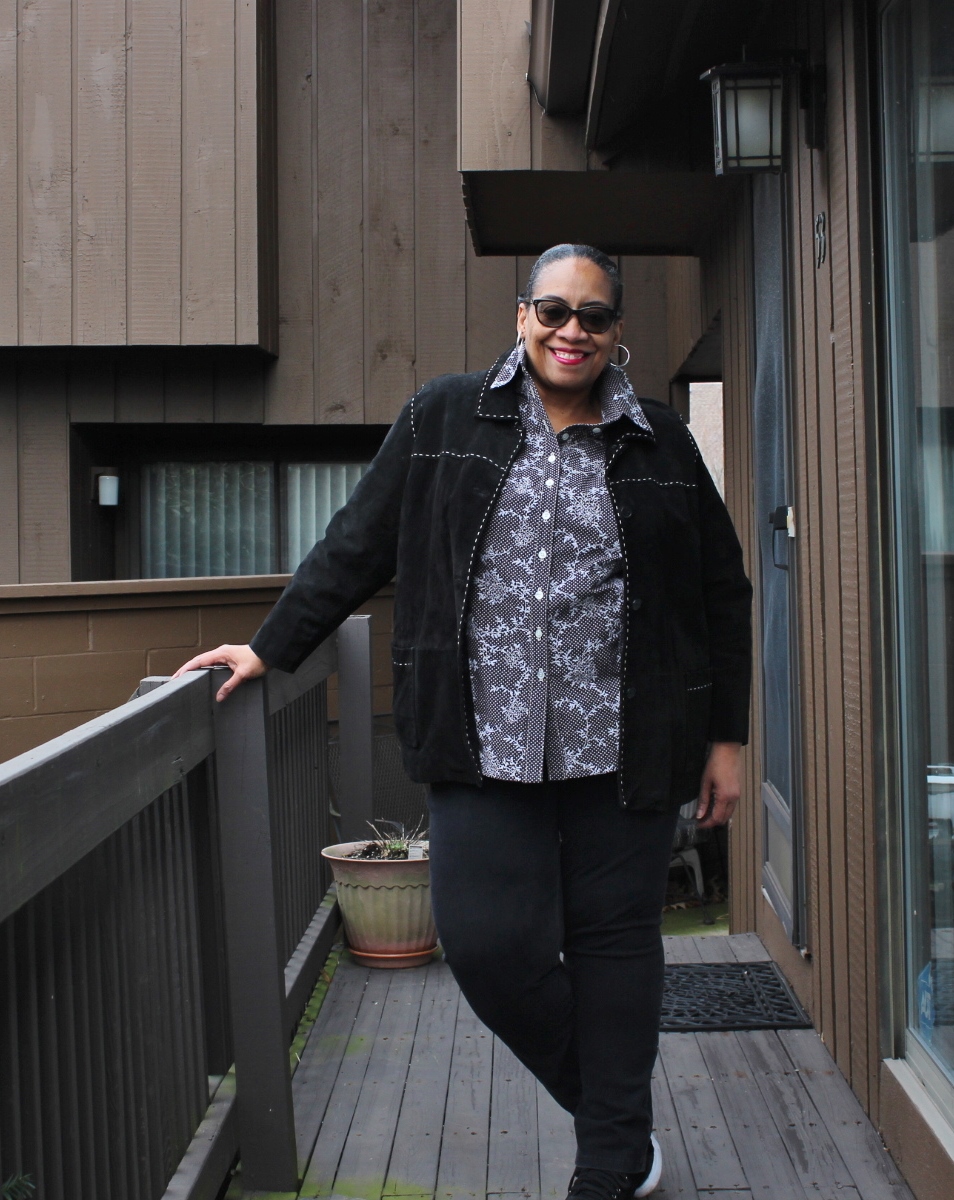
Worn with a RTW suede jacket that's been in my closet for ages...
This was shirt two and three of the shirts I've recently completed. Both of these are made using the princess seam back version of my TNT shirt pattern. Both are like basics in my wardrobe even though they have a print on them. Both will go into the rotation right away especially since this seems like it will be a mild winter here in the tri-state area.
...as always more later!

That blue really looks good on you!
ReplyDeleteBlue is my favorite color and I'm trying to sew more blue garments this year. Thanks!
DeleteGotta love a TNT pattern to whip up great fitting shirts like these!
ReplyDeleteKaren - it's the best part of sewing for me - using a TNT pattern.
DeleteJust love your series of shirts and how different they all look. I am currently experimenting with a top pattern (not shirt, as I don't like collars for myself as I have a short neck) and my aim is to get it to the stage where I am happy with one pattern I can use again and again, either short sleeves and long sleeves.
ReplyDeletejennede - it's worth the journey. I'm thrilled with every TNT pattern I own because my favorite part of sewing is the design & sewing portion.
DeleteI watched your video on Instagram, and that is the way I sew the yokes on the shirts. Very quick and easy.
ReplyDeletepatsijean - I don't always burrito, it's just not intuitive. I have to make a conscious choice to do so.
DeleteWhat's the pattern? These look great1
ReplyDeleteBeautiful! They fit so well and look so good.
ReplyDeleteCathy - thank you!
DeleteYour work is always beautiful and inspiring.
ReplyDeleteJulia - thank you!
DeleteYou're making me want to try sewing a shirt even though I hate ironing shirts! If I knew they would look and fit as good as yours, I'd be on it like a dog on a bone. For now, I'm just doing 'boxy' things, at least until I get my act together and find a pattern I can make that is TNT...... Thanks for all the examples of your creativity. You rock!
ReplyDeleteThank you for the material and construction details! I always find this very helpful!
ReplyDeleteThat blue is a beautiful shade! I love both shirts - so fun in those fabrics. I am not going to look for that cable knit!!! :-D
ReplyDeleteYou look good in blue! As far as closures for the cardigan - has anyone suggested pins? Not sewing pins, I mean jewelry pins, brooches, stick pins, etc. Or vintage sweater clips? Or if you don't want anything so showy, thread loop (elastic thread?) inside with a button on the other inside? Sorry if these have been suggested in comments on prior posts
ReplyDelete