Sunday, July 27, 2025

Let's Do It Again - Vogue 2947

As I mentioned in a previous post, I haven't sewn much because I've been discovering all the items I can wear again in my closet. But I do get the urge to create.  Since my weight is the same now as it was a decade ago, I've been rereading some of my posts from then.  Back when I sewed EVERY weekend and documented everything I did here on the blog.


I made Vogue 2647, an OOP Adri Designer Original pattern adding the neck tie.  I'm loving old me because I even included the instructions on how to make and add the tie to the dress.

This is the exact kind of dress I'm looking for. Something that's comfortable, stylish with a slimmer silhouette. I mean I've made enough long, loosely gathered dresses (most of which no longer fit btw) for awhile. I'm looking for something different than I've been wearing.  Also something that I don't have to do pattern alterations too.  Honestly I just can't muster up enough sewjo for that! 

So, I pulled a linen and a cotton blend out of the collection, the linen has been in the collection for the last decade. They were pretreated and I preceded to cut them out. But as I mentioned in a previous post, my weight may be the same but my measurements have shifted slightly and I did not take that into account when I cut the dresses out. After I finished the blue/white version, I decided to do something different for the beige/brown version.

Brown/Beige Version:


I decided to make this a tunic to wear over my white jeans.  To do this I cut 12" inches off the bottom of the front and back piece.

I used 3/8" seams when I sewed the garment together, leaving a 6" side slit on each side.  

Attached the tie like my previous instructions mentioned.

Then made bias binding from a brown linen bias binding roll I had in my collection.  BTW, I bought these bias binding rolls from Fabric Mart 20+ years ago and it's the purchase that keeps on giving.


May I speak on my Ozempic arms for a minute. I've had larger biceps/arms for years.  For the last couple of years I've sewn dresses and tops with sleeves because of that fact.  I've preferred covering them...it also meant I didn't have to carry a sweater with me for public transportation and buildings that were too cold. But after 8 months on Ozempic, the tone of every part of my body is different.  So with age, losing weight quickly, a lack of surgery and no exercise, I've got Ozempic arms.

Interesting enough so does Oprah...
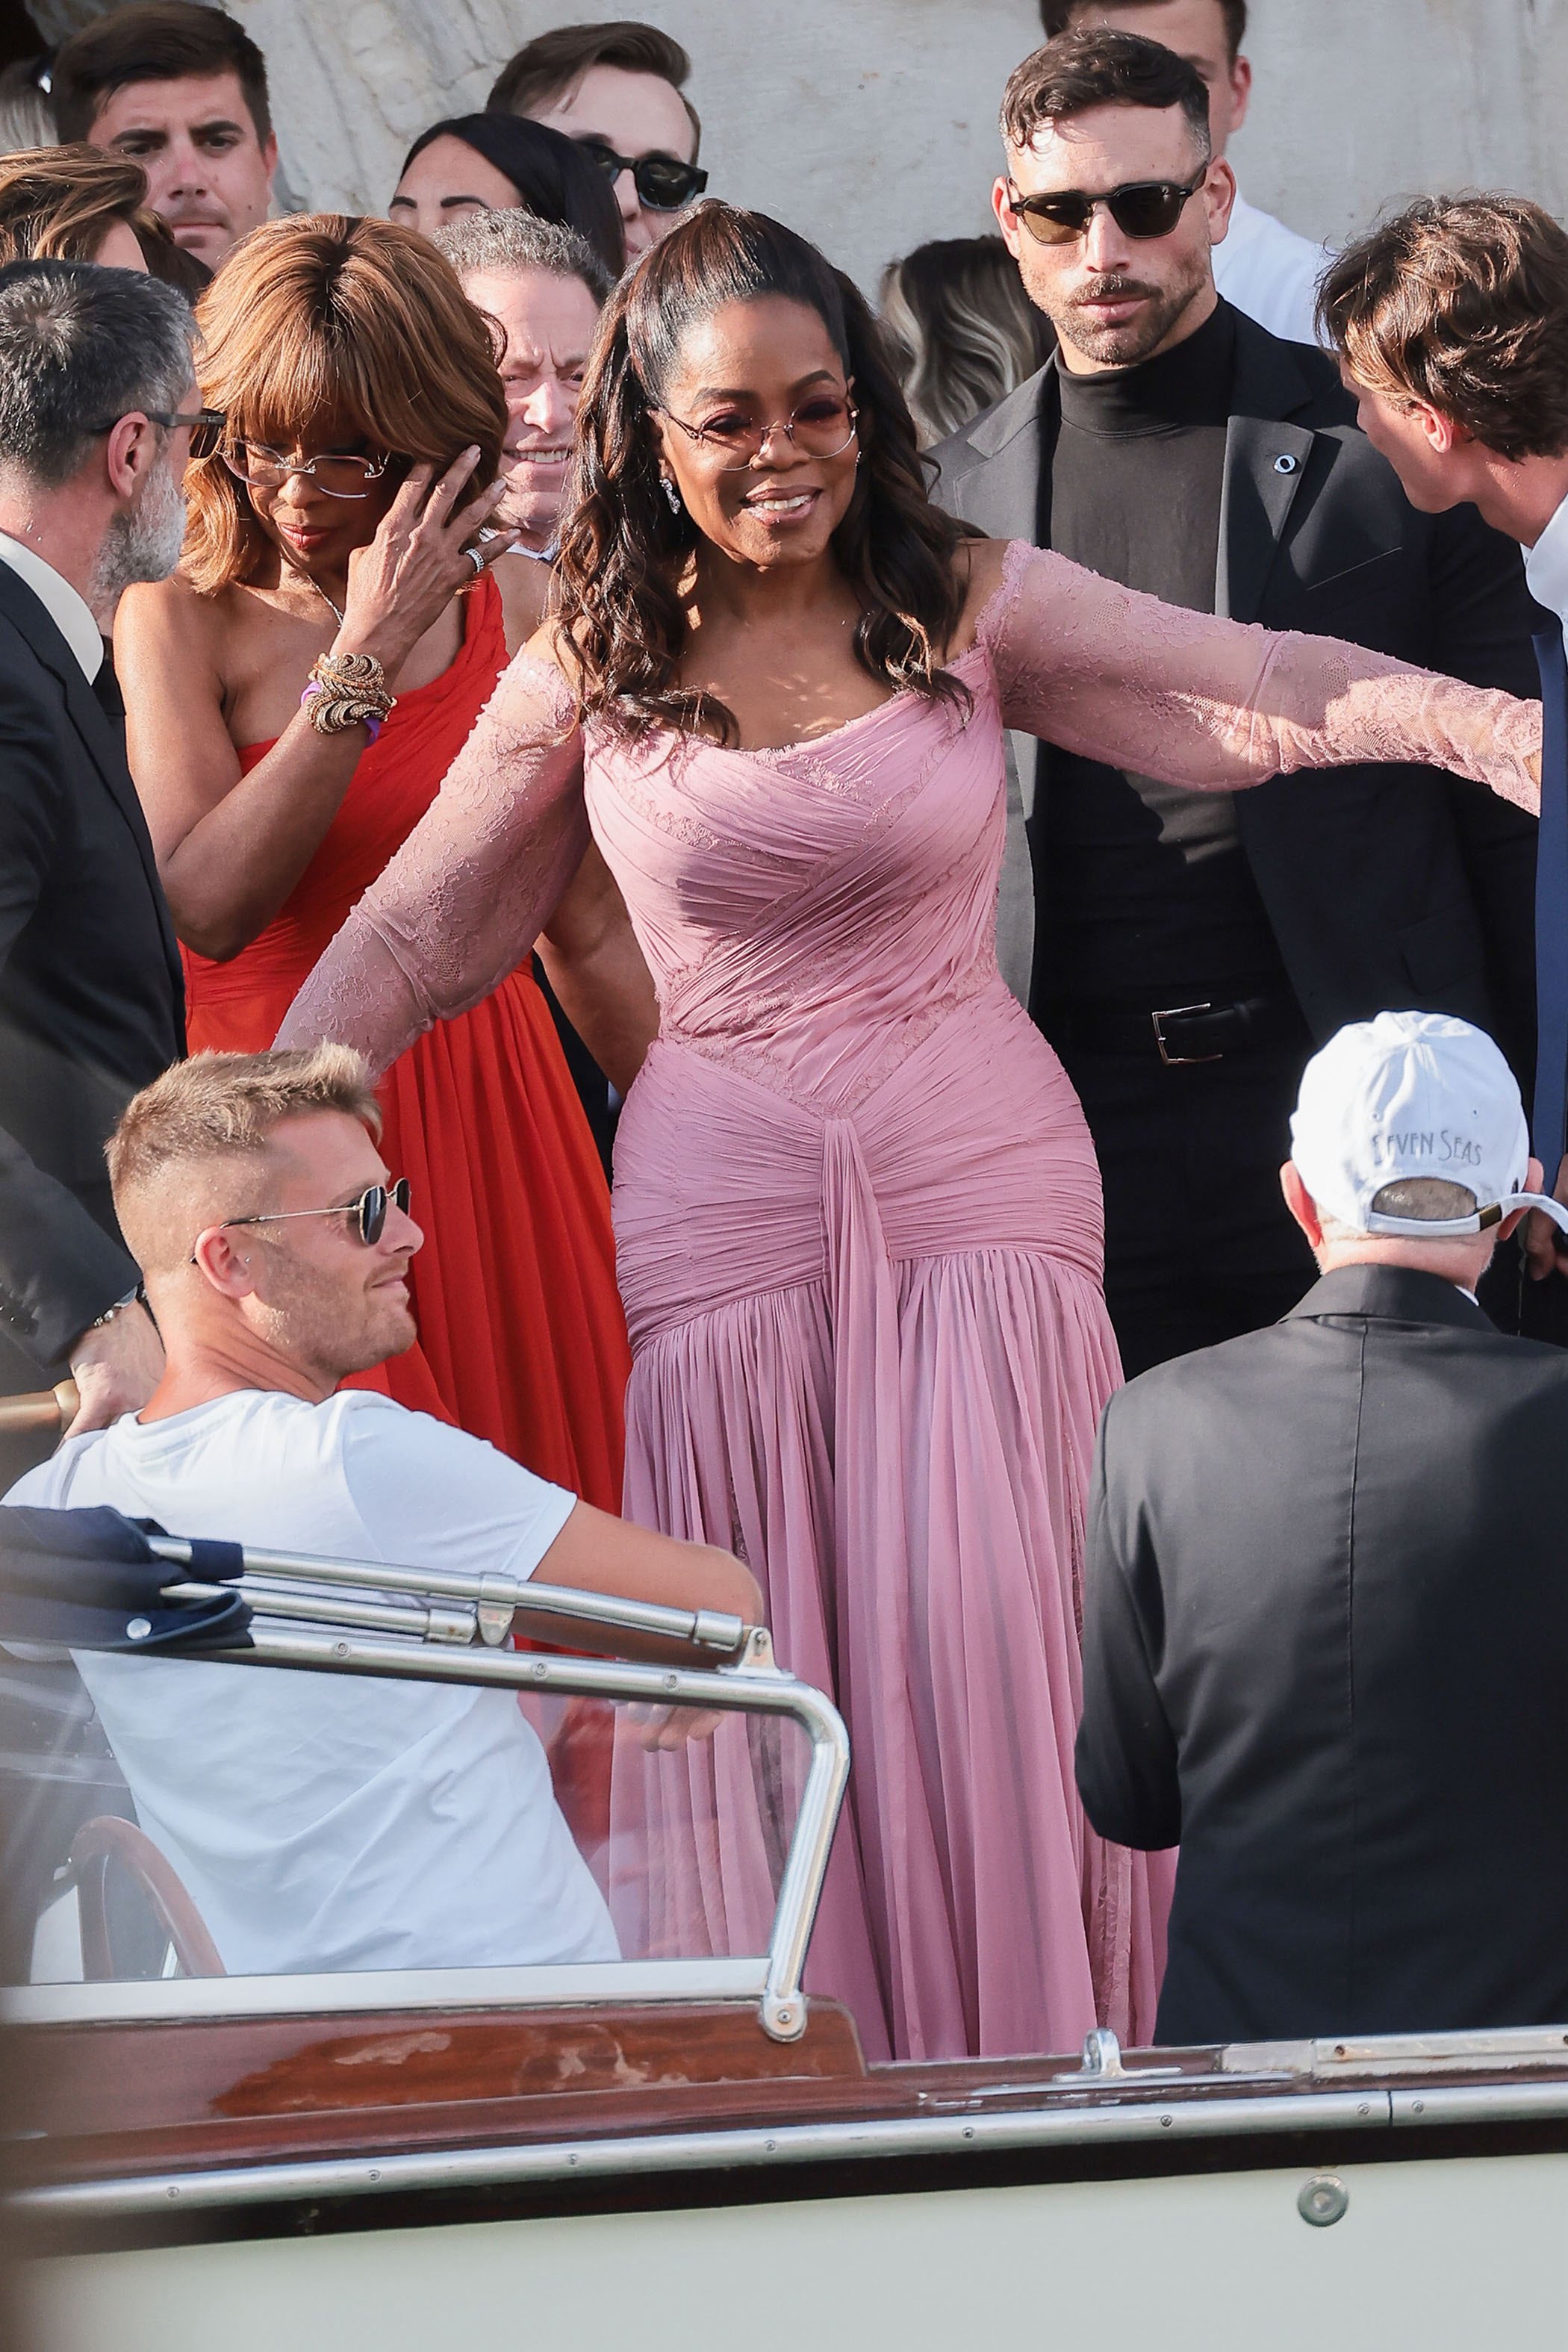
Oprah at the Bezos wedding

It's like the muscle is on top and the fat hangs to the bottom.  I won't be wearing the tunic or the dress without a cardigan over it.  Again the air conditioning in my office and on public transportation makes me freeze if I don't have a cardigan. However, I wanted to be honest about what's occurring on my body, even though I did purposely choose the pictures that didn't show it as much!

Blue/White Version
A few photos of me wearing the dress that while it fits is a little too close fitting for me. I used a poly/cotton blend that I bought from LA Finch Fabrics a couple of years ago for the dress.  A gingham bias binding purchased from Cedar Grove Dry Goods in Lancaster, PA was used to bind the armholes. As an aside, I bought every color they had so I'm swimming in gingham bias binding.

Now between the time I completed this dress and my daughter took photos it's looking a little better to me.  Still close-fitting but I will probably wear it before the summer is over along with a white cardigan. This one was made as the pattern suggests you make it.  So there is a front and back seam.  After I cut it out I realized that I did not use those seams on the original dress.  I used a pivot & slide method to add space for my abdomen and butt.

This was tight and a new look for my eyes.  To give it a little more space, I went in and made all of the seams 3/8" wide instead of the original 5/8".  It gave the dress a little more space and made it wearable. 

Inserting gingham bias binding on the armholes

Stitching the hem down

A few pics of the finished dress...


I think this photo best represents the color of the dress

While I've added both of these garments to the closet, I'm still not sure about this dress. I need to get use to wearing close fitting garments because I'm much more comfortable in a looser fit.  

I've already worn the tunic with the RTW white jeans.  They were my ride home from vacation clothes and worn with a white cardigan was perfect for the Amtrak ride.

Next up is my final attempt at making this dress work. But I'm realizing why I made this dress only once originally.


*I know Blogger has made it more challenging to sign in but would you kindly sign your name if you use anonymous.  It makes it easier to talk back to you.  Thanks so much!


...as always more later!


Monday, July 21, 2025

A Floral Vogue 9299

I love the painted fabrics that Julia Allison Costs sells. I've purchased a few pieces because they speak to my creative heart. This is my third garment using her fabrics. The Sunshine Katie and The Mountain Range jacket that is still under construction.

Supplies ~

3 panels of a large floral print from Julia Allison Cost

12 5/8" buttons purchased in Lancaster, PA

A scrap of interfacing

2" twill tape

This was the "Inspiration" for my shirt. I've been seeing this big, bold print on shirts everywhere lately.

Layout ~

This is always the challenging and exhilarating part of a make. How to use the fabric to it's best advantage. How to make the design and silhouette sing. This is also the part that's anxiety inducing because one wrong cut and everything goes south.  As an aside why I generally buy one more panel than I need to make a garment...making sure I have more if disaster does actually occur.

A few photos of the tunic during the construction phase...

Putting the label in the back yoke

Cutting table layout making sure the fronts match

Back without sleeves

Front without sleeves

Construction ~

There are no new construction techniques. However, since I hadn't made the garment in over a year, I did reread the instructions and didn't wing it. Was definitely interesting to see the steps I'd skipped when I remade the tunic as a TNT pattern.

This pattern has several sleeve variations. I've never used them. For this one, I added the sleeve I previously used but I added a cuff to it instead of the elastic in the hemline. I wanted a more classic sleeve and look for this bold printed tunic.

A Few Photos ~


This fits in with my new aesthetic..."Art Teacher Chic" It checks all the boxes for me.  Functional, comfortable, and a bold floral. Everything I like in a tunic and was the perfect garment for a long train ride to Boston this summer.


...as always more later!


Thursday, July 03, 2025

Water Lilies Myosotis - UPDATED!

I've thought about why I return to this dress pattern over and over again. Like why don't I use another pattern? Honestly it's because this pattern checks all of my boxes. It's comfortable to wear. It works in a variety of fabrics, patterns and colors. Mostly I feel pretty in it.  Let's not forget that!

At the end of May 2023, I spent my birthday with my bestie in Lancaster, PA.  The home of cheap sewing supplies and a short ride to Fabric Mart.  The true Disney World of my life! We visited a few quilting stores and shocked several employees with me stating that I wanted to use some of the quilting cottons for clothing.

At one quilt store (Burkholders), I purchased the Water Lilies border print by Michael Design Works and the coordinating striped water lilies & print pattern because as I held the fabrics in my hand, I could see another Myosotis.  So why would I deny this fabric what it wanted to become!


One thing though, this is a complicated sew. Therefore, there are a lot of progress photos making this a very long post.  Right here I'd like to thank my pass self for being diligent in taking them because when I finally finished this a year later I would NEVER have remembered these details without them.


Supplies ~

5 yards of 100% quilting cotton Water Lilies


2 yards of 100% quilting cotton coordinating Water Lilies print

9 - 5/8" green sheer and patterned buttons (purchased from the Quilt Store) Normally I use 12 buttons but they only had 9 so I made due.

Construction ~

Working with a border print is always a challenge. It makes me think outside the box to make the fabric sing yet end up with a wearable yet amazing garment. This was a complicated sew because I was basically remaking the pattern pieces to fit the vision in my head.  There was some pattern work done to accommodate the fabric.  

Bodice:

The bodice piece was enlarged and then the button front piece was removed.  I made a separate piece for the button front. 

I knew I wanted the bodice to be from the lighter part of the fabric. So I needed to sit on it a minute to figure out how to make the fabric work for me. I ended up cutting it on the crosswise grain to make the most of the lighter fabric.

After the bodice piece was cut out, I did a trial of how the fabric from the other pieces of fabric would work with the bodice.

I also did a test with the buttons I choose to see how they would work once the bodice was completed.

Skirt:

The skirt is cut on the crosswise to use all of the border print in the design. 

I removed the original border and added the border from the coordinating piece of fabric after adding the button band to the front.

Sleeve:

Was cut from the main border piece so it coordinated with the dress' skirt. I added elastic to the sleeve to make them short and puffy.  I like this style because it adds some grown up whimsy to the dress and it covers my bodacious arms.

Collar/Front Band:

This was made entirely from the border piece of the coordinating piece. It's the ultimate border/stripe to the entire piece. And the reason it took so long to finish the dress.  Fussy cutting that border held me up for WEEKS! 


Then I had to recut the collar and collar band because of the way I added the border to the front of the dress.  I was hoping that I had enough of the border print left to just cut larger pieces. Ummm no.  The collar had to be pieced to get the length I desired.

I will admit that this went through a few iterations before I settled on this one. But this one highlights the water lilies but yet brings the drama a good border print garment should.

It took me over two months from the time I started this to finish it.  When I say my sewjo had been vacationing, I wasn't kidding.  However, I had a few days off at the end of July/beginning of August 2023, so I finished this up.  When I say this was an involved sew, please believe me that it was.  I had to rethink everything to make the border print work the way I saw it.  All of this took time and since my sewjo was weak, those things took longer than normal.

Then it sat while I waited to get the urge to sew the buttons and buttonholes on the dress.  It sat almost a year before I decided I needed to wear it to church one really hot July Sunday. Then and only then was I motivated to do the last 2 steps!

Tie Band:

As you know, I've lost quite a bit of weight, and I didn't want this dress to sit in the closet or get packed away. I decided to add a ribbon tie to the bodice side seams to remove some of the fullness of the top. 

  • I thought I had a solid green wider ribbon in my trims stash.
  • However, the green I had was a 1/2" wide and would get lost on the dress. 
  • There was a 2" pink ribbon on hand. 
  • I cut a 15" length of both ribbons.
  • Then I laid the green ribbon on top of the pink ribbon and used 1/2" steam-a-seam 2 to iron the two pieces together.
  • I didn't want to stitch the two ribbons together because they both have a distinctive stitch on their edges. 

A few pictures of the dress in 2025. I wore it to work the other day and my co-worker graciously took the photos below:


I'm calling the sewing I'm doing now, "Art Teacher Chic" cause I'm all about the fabric.  How can I manipulate it.  How I can make something unusual and different. I know I will make another Myosotis because it's my go to pattern.  

I know it's a lot of photos but we took them near my job at Broadway & 39th Street at the Art Installment, I'm calling the bones. I only wore this beauty only once last summer and I received so many compliments. I'm glad I finally got to wear it to work this summer and document that fact.  This was such a complicated sew, I'm glad I posted it in case I want to refer to it in the future.


...as always more later!


Sunday, June 29, 2025

I can sew but can I fit?

Y'all I can sew but fitting is becoming a challenge!  Let me explain.  I've been sewing for years and I sewed through all of my weight gains and small losses. But this time I've lost a significant amount of weight in a short period of time. I've lost the weight and inches but in different places than times past. In this instance you would think that losing weight and experience would work for me.  Well I'm here to tell you that it isn't.

Actually experience is making it harder to produce a well-fitting, well-sewn garment. I make what I think are amateurish mistakes, which frustrates me, and sends me back to the couch and a book. After years of sewing, I finally remember what new sewists feel like. How overwhelming the process of getting a garment correct is.

See, I've been attempting to sew...and choices have frustrated me.  Pattern choices...fabric choices...fit choices...have all stymied me. If I didn't have actual proof, I would wonder if I actually could sew. But I've hung in there. Even though I'm moving slower, it's because I'm taking my time and working out what's wrong.  That's where I differ from a new sewist.  I do have some experience. 😏

I'm presently working on OOP Vogue 2647

I originally made this dress back in 2016. I'm attracted to the pattern because my weight is the same now as it was then.  The challenge, my body is different. I'm also looking for simple and easy to sew because I'm still not ready for complicated.

I reread the blog post.  Greatful that I'd included so much information.  I cut out not one but two versions of the dress.  I sew it up, try it on, and WTF! It was tight on my body even with my Spanx on. Now it fit but it was close-fitting. Not since my 30s have I been a close fitting clothing kinda woman.

What to do?  What to do?  As always the answer came to me when I was waking up. But and it's a very important but, it was a complicated solution that a few years ago I would have done no problem.  Now, I'm weary of the alteration. I've decided to finish the dress, after altering the seams and gaining another 1.5 inches. I will let it hang in the closet. Maybe if I lose more weight it will fit next summer.

The second version, I will make as a tunic to go over capris or jeans. I've figured out how to get it to fit my abdomen without a lot of work.

My third will be from another linen I pulled from the collection.  Because after weeks of thinking about it, I realized what I did wrong with the original two.

1. I didn't add ease to my measurements.  I'm chalking that up to the slight body dysmorphia I have.

2. I didn't double check the measurements before I cut. Would have saved so much heartache.

See rookie moves! I'm changing up my cutting layout and hopefully I will get a dress that fits...cause the sewing was easy!

In the next blog post will I share the finished pieces and of course more thoughts!  Just wanted you to know that I am sewing...slowly...but I'm sewing.

*I know Blogger has made it more challenging to sign in but would you kindly sign your name if you use anonymous.  It makes it easier to talk back to you.  Thanks so much!*


...as always more later!


Saturday, May 10, 2025

It's Been A Minute

I started January off so strong!  I blogged several outfits, wrote some draft blog posts for two shirts I was working on and then nothing. I literally stopped sewing again...but this time for a couple of reasons:

1. Working on the shirts and getting them to look like I wanted was hard.  The sewing didn't come easy to me and I wondered if I had lost my touch.  Then I got to the part where it was time to add the buttons and buttonholes and I really stopped.  Like months later both shirts need buttons and buttonholes. Hopefully I will get my act together and get them added.

2. I've managed to lose 40 lbs. My primary care physician has made it her mission to get me back to good health.  Along with good health has come weight loss because regardless of what I wanted to believe, losing weight did affect my body's systems.  As you know I had a health crisis in 2020 in the midst of the pandemic, and I resigned myself to the weight gain.  Hey I was still alive and I could sew pretty things to cover the weight gain so I was good. But being 40 lbs lighter has really realigned everything and I do feel better daily.

3.  However, the weight loss has really triggered me on a couple of levels.  Not only do I not have a desire to sew, because all of the clothes I was too lazy to get rid of now fit.  But even though I can see the body changes, I still feel fat. I'm not sure if it's that I think I should look thinner than I am or if I don't see enough change in my body.  To be completely honest, the whole thing trips me out. I've never really cared much about how "fat" I presented. So this new thought process is hard for me.

Anyway, I'm not sewing.  I own so many clothes in several sizes that I'm looking for holes to fill to sew some of the fabric that I'm still accumulating.  Accumulating at a much slower rate because I didn't buy fabric from January until just recently. But it is 10 pieces of additional fabric that's just sitting...

So why am I posting, because I did find some well loved pieces over the last several months, that I've been wearing again.  I wanted to share a few candid photos with you of garments I've worn over the last couple of months for the first time in years...

Jacket made in 2016.  Haven't worn since before Covid.

Cardigan made in 2017

Blouse made in 2017

Sienna Maker Vest made in 2019.

Me giving a presentation at work in a jacket made in 2019.

Formal Myostis made in 2019.

Basically, wearing all my pre-Covid clothes that I saved when I moved in 2020.  So, what do I want to make for summer?  Easy things...a couple of Cashmerette t-shirt dresses (since everything I previously made didn't survive), a duster or two, maybe a Style Arc Nova because I have some amazing rayon challis', and a button front straight dress.  Not a lot.  Though I'm mourning the dresses I made last summer, they're way too big now and besides a fix for the 2 myostis dresses, I don't have a fix yet for the others.

Hopefully, I will get the two shirts I started finished and shared here.  Also, hopefully, I will get a few more t-shirt dresses added to the closet. I'm still only working 2 days a week in NYC so I have plenty to wear!

Just an update before my 66th birthday occurs!  Can't believe I'm here at this age...


...as always more later!


Thursday, January 16, 2025

A Fall Hope

This is the last garment that I made in 2024 and haven't blogged.  BTW, this garment was shared on my Instagram page during it's first wearing. I was lazy and just didn't blog it. However, since the Hope extended pack has become an important TNT to me, meaning you should expect to see more versions in 2025, I wanted it shared here.


Supplies ~

4 yards of a poly blend border print purchased from Fabric Mart

Construction ~

This was my fifth Hope Dress using the extension pack. While the original pattern is pretty and I made a version of it, the extension pack really ignited my creative juices. 

Here are some construction and layout pictures...

Laying out the sleeve to get a good placement of the border for the hemline

Another view...

Stitching down the bias band on the neckline which is discussed in this post.

Checking how the border print is working on the dress bodice.

There are no construction changes. I made it exactly as the pattern states.

A few photos ~

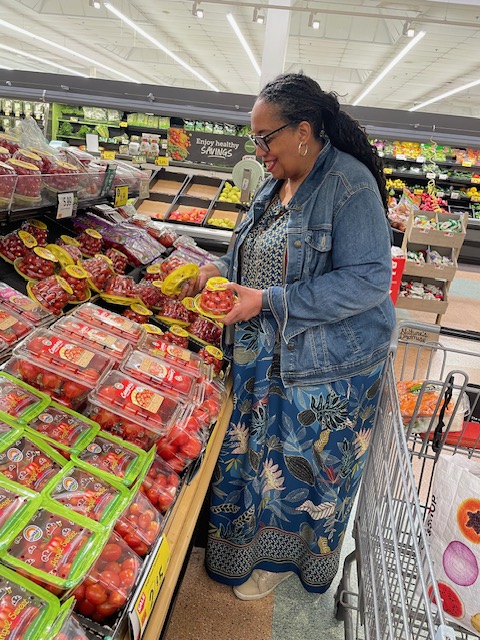
A note...getting my daughter scheduled to take pictures is challenging.  When she picked me up from the train station after work we headed to the grocery store.  It was the perfect opportunity to get some pics so we took it.

Worn with my denim jacket

I love the large raglan sleeves on this pattern.  
This print really highlighted them.

...and a back view

I'm not done with this pattern. You will see it again. I have a few ideas for fall/winter tops that I will hopefully get to this year.  And I will definitely make this as a summer dress again.

This was my last catch up post. New makes will be in future posts.


...as always more later!


Friday, January 10, 2025

Fabric In...Fabric Out

Quick Note:

If you're commenting using "Anonymous" and I understand because google is not playing nice with blogger - would you kindly sign your name at the end of your comment.  That way I know who I'm replying too!  Thanks...

Now to the blog post...

While I only made 6-7 garments in 2024, I bought a lot of fabric and notions...especially buttons. It didn't help that M&J Trimming in NYC is going out of business. 

Some fabric was purchased because I got really excited when I started sewing again in the middle of the year. Then after the election, I bought ALOT more. I bought a lot of everything that America imports from China and Mexico.  All because I truly believe that prices are going to rise on everything during the next administration and I want to be prepared.

So I bought.  Then I bought some more.  Because honestly when you start shopping it seems like it activates a chemical in your brain that encourages you to continue. *smile* That's my theory and I'm sticking to it whether it's an actual fact! Anyway, I allowed myself to buy in 2024 so I wouldn't buy in 2025. 

Now I know I will probably need to purchase something because as hard as you try to prepare, you're never ready for everything. But my goal is to NOT have to buy to create. I want to create from what I already own, especially since I now own so much!  

That leads me to this...do I track fabric in and out (hopefully primarily out) for 2025. My concern is that it will add pressure to my desire to sew.  Because my desire to sew while consuming, it's not all consuming like it use to be. Before sewing was my primary creative outlet...but now, I read, I crochet and I venture out into the world more. Well I did in 2024, let's see what 2025 brings.

I've decided to try tracking.  I want to know what I'm using and hopefully encourage me to sew more of my collection. Yes, I'm trying everything to "encourage" me to sew consistently. More complicated projects, more challenging garments, things that stretch my creativity.

So tracking tentatively begins this month. My only question is, and your thoughts would be appreciated here, do I track fabric that was ordered in 2024 but delivered in 2025.  It's just 8 yards and I've already offset it with the 8 yards I've used so far in 2025. But do I track it?  Also, do you track your in and out fabric usage?

This is my first Question of the Day in 2025 and the first since 2023.  I hope you will talk back to me because I'm truly interested in your opinion.

....as always more later!


LinkWithin

Related Posts with Thumbnails