Friday, July 01, 2016

It's all about the numbers...

A couple of weeks ago I sat down to figure out how much fabric I've bought so far this year, how much fabric I've sewn and how many garments I've made. Why you ask? Well one, because I've made a conscious decision to sew as much as possible from the fabric collection. For another, I wanted to see if it made a difference in the fabric in/fabric out situation. Finally, it's taking time to build a new wardrobe and to figure out what to wear.

Let's start with garments made and fabric used:
Garments sewn~
I've sewn 27 garments since the start of the year. First I'm amazed at that number because some years I would only sew 30-35 pieces and I'm close to that already. However, since I did a lot of unselfish sewing in March, I'm sure that's why my totals are so high! Four of the garments in that number haven't been photographed yet so expect to see a couple of them later on.

On that note, I've decided that I'm not blogging any more versions of my TNT dress. I have nothing new to contribute regarding their construction so no need to share. I will probably show a photo of them on Instagram, so if you follow me there, you will see them.

On the fabric side ~ 
I've used 52.5 yards of fabric since the beginning of the year! This is major! Again more than I've probably sewn in previous years and it's encouraging me to continue to sew from the collection. Now here is the downer to that number ~ the number of yards in. I bought 45 yards in Seattle to kick the year off...cause I'm not counting Christmas fabric that came in during January. Then with my birthday money/gift cards I bought another 24.5 yards and finally on my trip to Philly I bought 14 MORE yards...so grand total 82.5 yards in the last six months. I was feeling good about that 52.5 yard total until I added up those fabric buys. Geeze!


I really thought I'd done better than that because fabric doesn't arrive weekly like it has in years past. I also haven't been on many fabric shopping trips...I guess all that birthday celebrating really blew it out of the water! *LOL* Since I have plans to use quite a bit of fabric for the summer from what I've already bought I guess I will even those numbers out.

Wardrobe building:
This late spring/summer, I'm wearing more me-made. I think it helps that I started working this job last June so I have a previous season of me-mades on hand. Before we started summer fridays, I was wearing me-made 4 out of 5 days. However, I want to lose that RTW day because I feel like that's when I'm most sloppiest. How do women who don't sew do it?  Seriously!

So I went to Macy's to snoop shop and I did something I don't usually do, I tried on a couple of dresses. How do retailers sell things to plus size/curvy women? Never mind that the assortment is just deeper with more variety on the other floors than is available for plus size women. But let's factor in that whole dressing room atmosphere - Gawd I'm glad I sew!

INC ITY dress with zipper in the front

Handkerchief hemmed halter type dress

I also went to Macy's to get some more perspective on what I want to sew for the rest of the summer. One of the things that I just don't have enough of a handle on is "What is my Style Now?" I have a list of things I don't want it to be and I kinda have an idea of what I'd like it to be but it's not cohesive. I'm still seeking the cohesion.

I will be sewing some new pieces this four day weekend. Yes, I'm off today (it begins the first of my five fridays off - or my month of three day weekends) through Monday which is Independence Day (July 4th) here in The States. Originally I'd decided to work on just two major projects but I've changed my mind in the last couple of days. I need to have enough garments to wear me-made every day I go to work.

So this long behind rambling post is to talk a little about the numbers and a little about what I'm going to sew...but mostly to say that I'm drilling down and coming up with more separates. Yes, a dress or two will show up 'cause I am a dress girl, but several different types of garments will show up soon.

...as always more later!


Sunday, June 26, 2016

Remaking A RTW Dress

I've honestly forgotten how long and involved it is to sew a wardrobe. I've been sewing for so long that I've grown accustomed to my almost totally made by me wardrobe. I'm also spoiled. I've sewn so much in the past that I had many outfits to chose from on any given day. That is no longer true...

So while I continue to sew more garments, I caught a sale at Jessica London and thought I would add a dress or two to my closet. They were really reduced and so inexpensive that I thought even if I need to make some adjustments to them, it would be worth it.

Two dresses arrived this week. After trying them on I realized that neither fit particularly well and so I decided to make some changes.

Black cotton lace with black gauzy like body

The first one I fixed is the black cotton lace and silky like fabric which was not that in real life. The bodice was made from the black cotton lace but the skirt was too short and made with a really cheap cotton broadcloth that stuck out at the sides ~ totally unappealing and not worth the $26 I paid for it. 

Here is my finished maxi dress ~

Construction ~
Since I was really only interested in the black cotton lace bodice I cut it off of the skirt bottom and set the bottom aside. Then I also took the sides in a little to snug it up against my body because it had the requisite RTW ease.


I added this knit that I recently purchased from Fabric Mart to the bottom of the top to make a new maxidress.


  • To get the skirt bottom I cut a piece 45" long and left the full width.
  • Then I sewed up the back seam.
  • There are gathers in the front to make it fit a little softer and tucks in the back to make the fit better over my backside. 
  • I serged the hemline of the skirt piece and then stitched it to the bodice top.
  • Sewed the skirt to the bodice using a 5/8" seam allowance.
  • Pressed the seam up.
  • Pressed a 1" hem on the bottom of the skirt.
  • Added stitch witchery to the hem and pressed flat.
  • Stitched the hem down and pressed it.

A Couple of Photos ~


Conclusion ~
I made this in about two hours. The total cost of my new and improved dress is $29.60. For the cost of my finished dress, I'm using the full price of the dress for the bodice plus $3.60 for a yard of fabric. If I were to make this from scratch, I think it would have cost about the same amount of money. So in the end this was a good investment and well worth the time to transform it.

The second dress I bought won't be altered as much. The changes are more simple and it will show up here soon. I wanted this maxi dress to wear to an afternoon barbecue yesterday. Since my daughter and the grandkids were going with me, we snapped a few quick pictures while we waited for the rest of the family to join us.

Finally I don't know if I'm on the tail end of this trend or not...however...I can tell you that I love wearing maxi dresses and will probably be wearing them for many more seasons. They are so comfortable to wear and give me that casual yet well put together look I'm striving to achieve. There will be more variations of maxidresses here on the blog sooner rather than later!

...as always more later!


Wednesday, June 22, 2016

A Boho Skirt

I wore my pinstripe denim skirt to work a couple of weeks ago and I decided that I needed a Boho Gathered Skirt. 'Cause like Marcy says, the more fabric at the bottom of a skirt the better. Okay I'm paraphrasing but the gist is that I wanted a swishy skirt with a lot of fabric at the bottom of it, too.

I knew that I had Simplicity 4605 in my pattern stash because I'd paired it with a piece of black 'n white seersucker last summer. So I pulled the combination back out figuring it would make a great skirt. Then as I pulled pattern piece after pattern piece out of the envelope, I realized why I hadn't made the skirt last summer...there were too many dayum pattern pieces to make a simple boho skirt!

So I ditched that pattern but kept my fabric and tried to figure out what I wanted.  This is what I came up with...
Notice that remote in my hand -
that means I took all of my own pictures for this post!

Supplies ~
  • 3 yards of a black/white plaid/print seersucker purchased from Fabric Mart last summer
  • 1" non-roll elastic
  • Waxed dental floss for gathering the tiers 
Now before I get into the construction of the skirt, can I say that I made a couple of these at 17 in the 70s and I remembered why I only made one or two...all that dayum gathering!  Seriously...too...much...gathering!

Cutting and Construction ~
My first challenge was how to get the skirt I saw in my head. I knew I didn't want a bunch of tiers - they wouldn't work with my fabric. I also wasn't sure if I wanted a maxi length or a midi length. I decided to let the fabric and the tiers work for me.

Finally I decided to use my TNT flare skirt pattern to get the skirt I was seeing in my mind.  The pattern I used to make this skirt. I cut the fabric for the skirt so that it ended at my knee. 

1. Then I measured to the floor and divided that number in half to get 2 panels. 2. It worked out that each panel measured 10" wide. 
3. Because I knew the bottom 2 tiers should be wider than the skirt bottom, I cut 3 panels for the first tier and 4 for the second.

Now came the hard part - gathering those two tiers so that they would fit the skirt. Honestly, this was the longest part of making the skirt. After discussing with Gaylen, the best ways to gather the skirt, I went with the dental floss method.  But not before checking to make sure that I didn't have a gathering foot for my serger - no - but I'm going to rectify that with a quickness!

Applying the dental floss with a zigzag stitch (3 width/3 length setting) was easier than I thought it would be. I did have to sew slowly and try to be precise but it wasn't difficult. Would definitely recommend this method if your sewing machine or serger doesn't have a gathering foot.  One tip though - I pulled the floss a little every couple of inches to make sure that I wasn't catching it in the stitching.

Adding the dental floss was the easy part, now pulling the floss to gather the skirt was another story. It took several days to do each tier (because I did them after work each evening) and apply it to the skirt. Halfway through I thought that I'd made a mess of the skirt but I preserved and I love my new skirt. Seriously...love...my...new...skirt!

A few pictures ~


Worn with a cardigan ~

Conclusion ~
When I first wrote this post, I was determined that I would not make another one. These were the reasons why - one because it was just too much gathering and pulling for a simple skirt. Two because it's such a distinctive skirt, that I just don't need another one.  And three, it's finally summer here and I have so many things that I want to sew that I'm not sure I want to make another one.
Wearing it to the Vlisco Exhibit

However, I've worn this skirt twice since making it and it's so fun and easy to wear! I've gotten several compliments on it and while it's a dressier look for my office, I felt like I fit in. So I may make another one, now that I know what it takes to get it done! *LOL*

I'm ending with as twirly a shot as I could get taking my own pictures!
  

...as always more later!


Monday, June 20, 2016

A Museum Exhibit + Sewing Friends + Fabric Shopping = A Wonderful Day

I love museums. I especially love clothing and textile exhibits at museums. So when Claudine and I started talking about meeting up and she mentioned the exhibit at the Philadelphia Museum of Vlisco textiles I was onboard. The actual exhibit is called, "Creative Africa" and the Vlisco textiles are just one part of the exhibit. See more information about it here.


Okay I will admit that I don't know much about Vlisco's textiles, except the fact that there is a lot of interest in them in the sewing internet community.  I've seen some of the garments made using African prints but they've primarily been skirts which I've admired and then moved on.

However, after walking into the exhibit space and seeing this ~


I'm now sold on these textiles. When you enter the space, there is an exhibit stand with about two dozen outfits. The outfits are so awe-inspiring and such a creative assault on your senses, that I had to take a breathe before I could step into the space.


The walls of the space are lined with different versions of the textiles. It was intriguing to walk around the space and see how many items have been memorialized in the textiles. There were computer screens with videos of the fabric and information on the computer, as well as, each textile was given a plaque which described the how, whats and whys of it.

Sewing Friends ~


The day was made even more amazing because of the sewists I went with ~ Claudine author of the blog, Rolling in Cloth; Andrea author of the blog, Knit-Knac; and Renee who authors Miss Celies Pants. I love sewing conversations and in this case there was also a lot of talk about knitting machines and the process. Now I can knit - don't like it much but I know how - so the knitting machine convos were really interesting to me.

If you're in the area, I would highly recommend that you take an afternoon and head over to Perelman Building of the The Philadelphia Museum and see the exhibit. The exhibit is on view until September 25th!

Fabric Shopping ~
After the exhibit and a leisurely lunch - Claudine and Renee left and Andrea and I headed over to Jomars. I love Jomars and I've shopped there for the last 15-16 years. I went there a lot when my girls were smaller after I was introduced to Jomars by a friend, Julie, when I was a member of an internet sewing group - The Sewing Circle.

I've spent hundreds of dollars there and have wonderful memories of road trips with friends to purchase fabric...so Jomars has a soft spot in my heart. Even visiting it during the PR Philly weekend a couple of years ago. However, the Jomars I visited with Andrea Friday was a sad facade of the amazing fabric palace I remember.  We did root around on the tables and I found a few pieces but it was a truly disappointing visit.


Fabrics left to right:
blue floral chiffon polyester, cable sweaterknit, embossed 
knit remnant, knit pique, ITY knit print

Then we headed off to Joann's because I still had funds left on a gift card and I needed to be rid of the card. I'm trying to get over the horrible event that caused my riff with Joann's cause I'm sure the manager of that Joann's has long since left the store but the episode left such a bad taste in my mouth. Although almost all of my sewing friends that live in suburban areas visit Joann's and have so many positive things to say about them now...that I'm trying...okay only a little but it's still trying! *LOL*

I was determined to purchase some New Look and Simplicity patterns because they are harder for me to acquire. Simplicity patterns were on sale for $1.99 so I bought four including a few "Early Autumn" ones. Though I don't understand how those are out already when Summer arrives on Monday - I'm just sayin'! 

Here are the patterns I bought ~


...and the reason I had a gift card in the first place is because one of the fabrics I'd purchased online wasn't in stock anymore. Though it was in the Willingboro store - so I got four yards of this amazing linen blend!


I had an amazing day, full of fun, good conversation and fabric shopping! It was a good day.

...as always more later!


Saturday, June 18, 2016

Are you right side in or right side out?

I'm referring to when you lay our fabric out to cut it.  Do you lay your fabric with their right sides together inside? Or do you lay your fabric with the right sides facing out?  I know that eons ago when I first learned to sew, that a teacher told me "always lay your fabric with right sides in."  However, somewhere along the way, I developed the habit of right sides out.

I do this because I need to see the pattern, print, stripe or plaid and/or any repeats on the fabric when I'm laying a pattern out.  This allows me to lay the pattern pieces in such a way that I take best advantage of what's happening on the right side of the fabric.  It also allows me to insure that pattern pieces match. I always feel fabric blind when I lay the pattern on fabric that has the right sides on the inside!

This came up because I was reading those scanty directions in a Burda Style magazine ~ yes, I like a design so much that I'm throwing caution to the wind and tracing some pattern pieces out.  And they had this direction, "cut from a double layer of fabric, right side facing in."

So tell me - do you cut with the right side of the fabric facing in or out? This is "The Question of the Day" so talk back to me people!


...as always more later!

Wednesday, June 15, 2016

Joyce Trimmings in the Garment District

Joyce Trimmings is located at 109 West 38th Street which is two blocks from my job. Now I've visited this shop years ago but I barely remembered it since Daytona Trimming and Pacific Trimmings are my go-to trim stores. Gawd, can you imagine how that shows up in Google searches!  Sorry peeps just sewing going on here and nuthin' else! *LOL*


For a shop that's right around the corner from me, you would think that I'd have explored this awhile ago...but no I stuck with my favorites...even visiting M&J Trims which is NOT a favorite of mine. But when I was looking for navy blue lace my favorites and M&J Trim had nothing that I was looking for so I stopped in here.

First can I say that this store is well lit and well stocked. They have everything you need to embellish a garment or even stitch one together - cause the other day I found sewing supplies. 


They have laces, ribbons, zippers, bridal trims, embellished laces...shew! Buttons, boas, fringes...they have a lot of good stuff! I bought the lace for my Ann Taylor skirt here...the rick rack for my Vogue dress and a couple of other pieces that will go in the notions stash.

However, I'm thrilled to have found a new trim resource and it's so close to me that I will be buying more from them...because even though I have a notions stash, I always think of something new that I need.

I hope the next time you're in the Garment District that you will stop by Joyce Trimmings. I'm sure you will be able to find something you need there!

Joyce Trimmings
109 West 38th Street
New York, NY 10018
Phone:  212.719.3110
Website:  www.joycetrim.com

Store Hours:
Mon-Fri:  9am - 6pm
Sat: 10am - 5pm
Closed on Sundays

...as always more later!

Sunday, June 12, 2016

An Eyelet & Lace Skirt

I saw this skirt on the Ann Taylor site months ago. I knew I had a piece of blue cotton eyelet in the collection. All that I would need to make my own version of it would be a similar lace...and for the temperatures to get a little warmer.


Well the temps are finally summer-like here, so over Memorial Day weekend, I made my version of the Ann Taylor skirt.


Worn with a RTW t-shirt 

Supplies ~
2 yards of cotton eyelet from the collection via Fabric Mart
2 yards of rayon bemberg lining from the collection via Michael Levine fabrics
5 yards of embroidered lace trim from Joyce Trimmings 
1 yard of 1" non-roll elastic
Pattern- TNT 4 gore skirt pattern

Construction ~
My first challenge was to determine if I wanted the skirt lined or underlined.  I went with underlined to make it easier to handle the seams. After the pieces were basted together and then serged to finish the edges, the skirt went together easily. I did add rayon seam binding to the edge of the skirt's waistline before folding it over to insert the elastic. I just wanted a clean finish on that edge.


The most important feature of the skirt is the lace at the hemline. To attach mine, there are three rows of stitching to keep it laying flat on the hemline. A lot of thread that's basically invisible but I felt necessary to keep the trim on the skirt. I love the transparency of the lace at the hemline.

Some Pictures of the Skirt ~


One of the reasons that I wait to take pictures with my daughter is because she makes 
me so relaxed and keeps me laughing while we're doing this. Also she thinks 
I'm beautiful and I think it shows in the pictures she takes!


Conclusion ~
I knew when I came across the skirt online that my TNT 4 gore skirt would work for interpreting this look. However, if you want to make one of your own and need a current skirt pattern to achieve this look, try this one:


Burda 6766 (Pattern envelope)

...or this one:


Simplicity 1200

Both of these have the silhouette you would need to interpret the Ann Taylor skirt.

The best thing about this "simple" silhouette is that once again it had some details which made it interesting to sew. I can sew "fast and easy" but it doesn't satisfy as creatively as the more complicated sews do.  This skirt will work fabulously in my work wardrobe with some slip on sneakers or it can be worn hanging out with friends with heels.


I wish I remembered how much the skirt cost because it's no longer on the website, probably in the $99-130 range, since that's an average of skirts presently on Ann Taylor's site. 

My skirt totals are: 
$30 for the fabric & lining 
$40 for the lace trim 
$5 for the notions
total cost $75 

I definitely saved by making my own version but the important thing is that Ann Taylor skirts only go up to a size 14-16, so I couldn't have purchased this anyway. Even though this wasn't a cheap knock-off, I'm thrilled that I've found a way to interpret RTW and/or designer goods again for this stage of my life. 

One thing though, because of the lining and cotton eyelet this skirt is a little heavy and warmer than my normal summer skirts. I know why AT showed this as a spring skirt now. I just couldn't wrap my mind around the fact that it would work in spring like temps. Now that it's officially summer weather here, this might not get worn until September, and I'm fine with that. Hey it gives me a new piece to start my fall wardrobe with...but it is the dangers of not sewing spring garments earlier in the year!

...as always more later!


Friday, June 10, 2016

A Concord Tee & A Pinstripe Denim Skirt

Moving on and sewing more casual outfits for my new lifestyle...this outfit is about as casual as I can get!


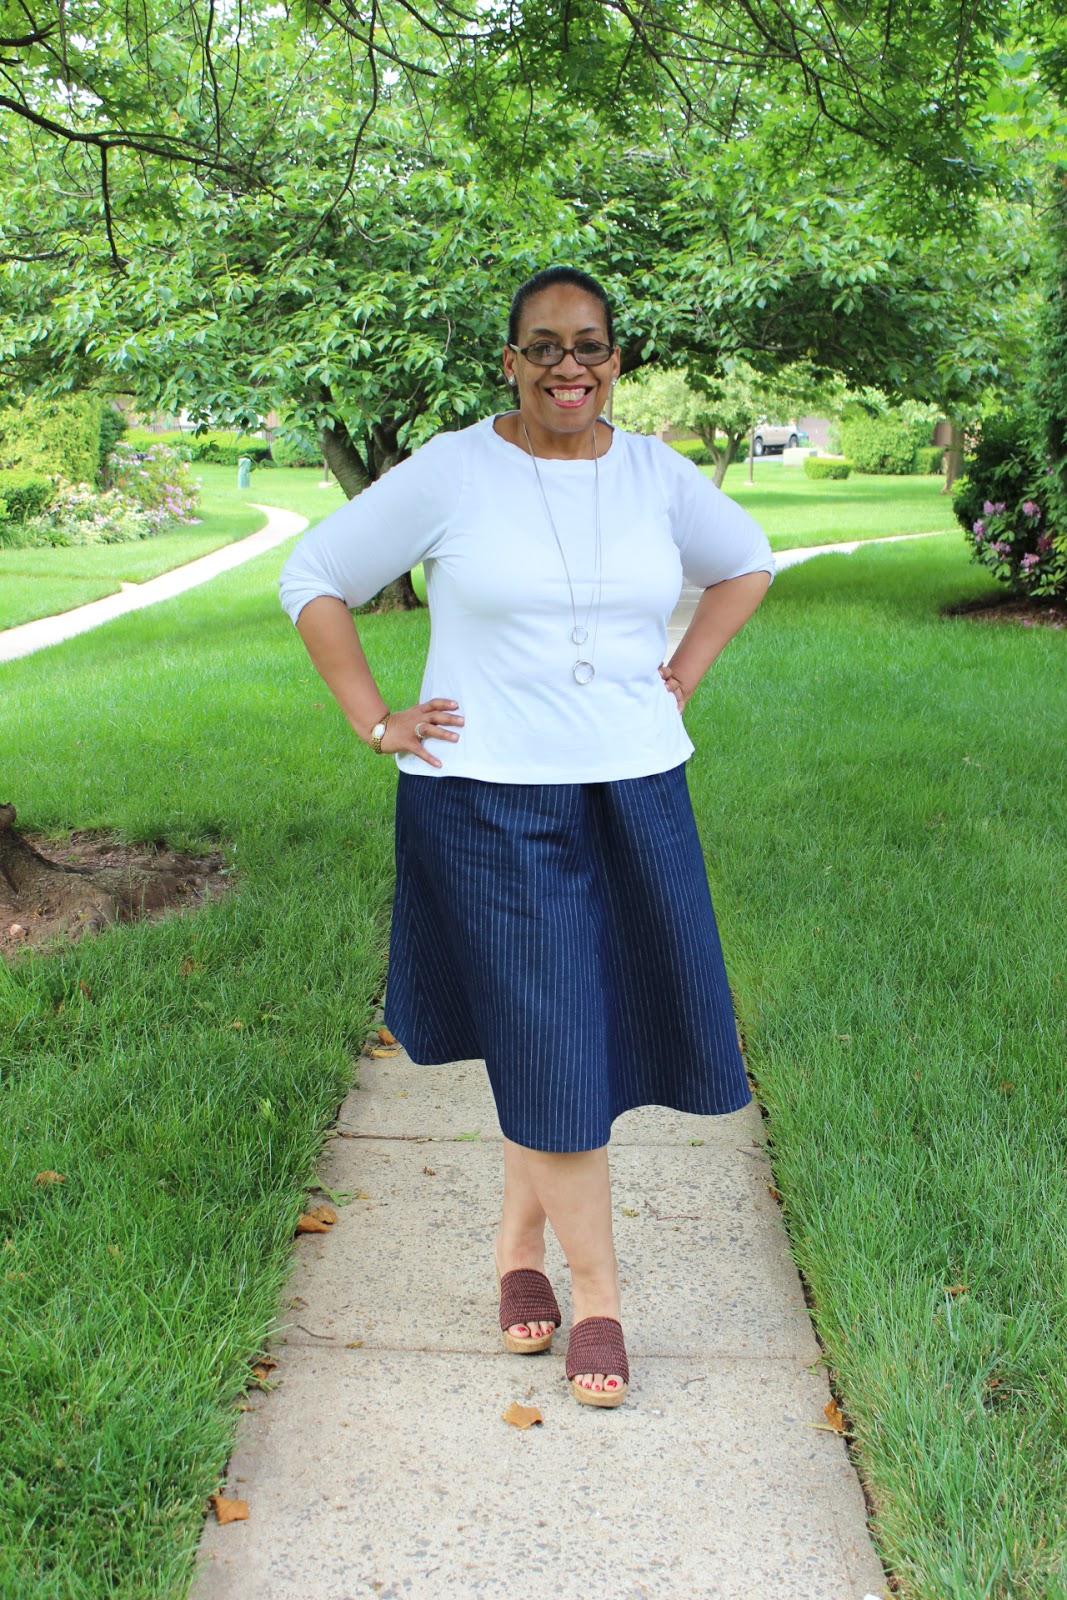
There are two items comprising this totally me made outfit.  The denim skirt from my TNT 4 gore skirt and the Concord Tee. Yes, this is my original tee that I'm still wearing because it's that frigging amazing!


Let's talk about the Concord Tee first. I think the reason it's held up so well is because I wore it under sweaters and cardigans during the winter season. Can I state again that this is an amazing t-shirt pattern for plus size sewists that doesn't need alot of alterations which makes it perfect. For construction and information on the tee, see my original post here.


The second part of this Me Made outfit is my TNT 4 gore elastic waist skirt made in denim. I had a yard and a 1/2 of the pinstripe denim left in the collection. I'd made two little girl dresses from it and decided that the rest should be mine. This is a basic so there are no earth shattering construction details here. It is simple sewing but effective wardrobe building.

There are two great things about this skirt - one it's denim and two the pinstripe gives the fabric distinction. If I'm going to sew basics I want them to at least be special/different/unique...choose your own word to describe them.

I've worn this outfit to work and it was perfect. It wore well and made me wish that I had 5 or 6 more t-shirts and skirts combos to mix and match. I know that it will probably happen sooner rather than later because hey I have a huge fabric collection...I just need time to get there.

A few more pictures ~


Conclusion ~
I will be making this combination again. It works. It's me. It's comfortable and it fits my lifestyle now. 

...as always more later!


LinkWithin

Related Posts with Thumbnails