
I really liked the green glass buttons that I used for the cotton version and didn't want to look for a substitute so I had to come up with a solution for the cuffs. Closing up the side seam and gathering the sleeves into the cuff seemed like a great solution and was easy to do.
However, I kinda upped the ante for the blue & white version because I decided to add piping to the cuffs.

Here's how I made the piped cuffs ~
First I cut four of the cuff pattern and interfaced just one side of each pair.

Then I basted piping 5/8" from the edge to both sides of one of the cuffs.

The second cuff was sewn to one edge of the piped cuffs.

The cuff is then pressed flat and open - I use an organza pressing cloth and my sleeve board for precision.

The cuff once it's pressed flat.
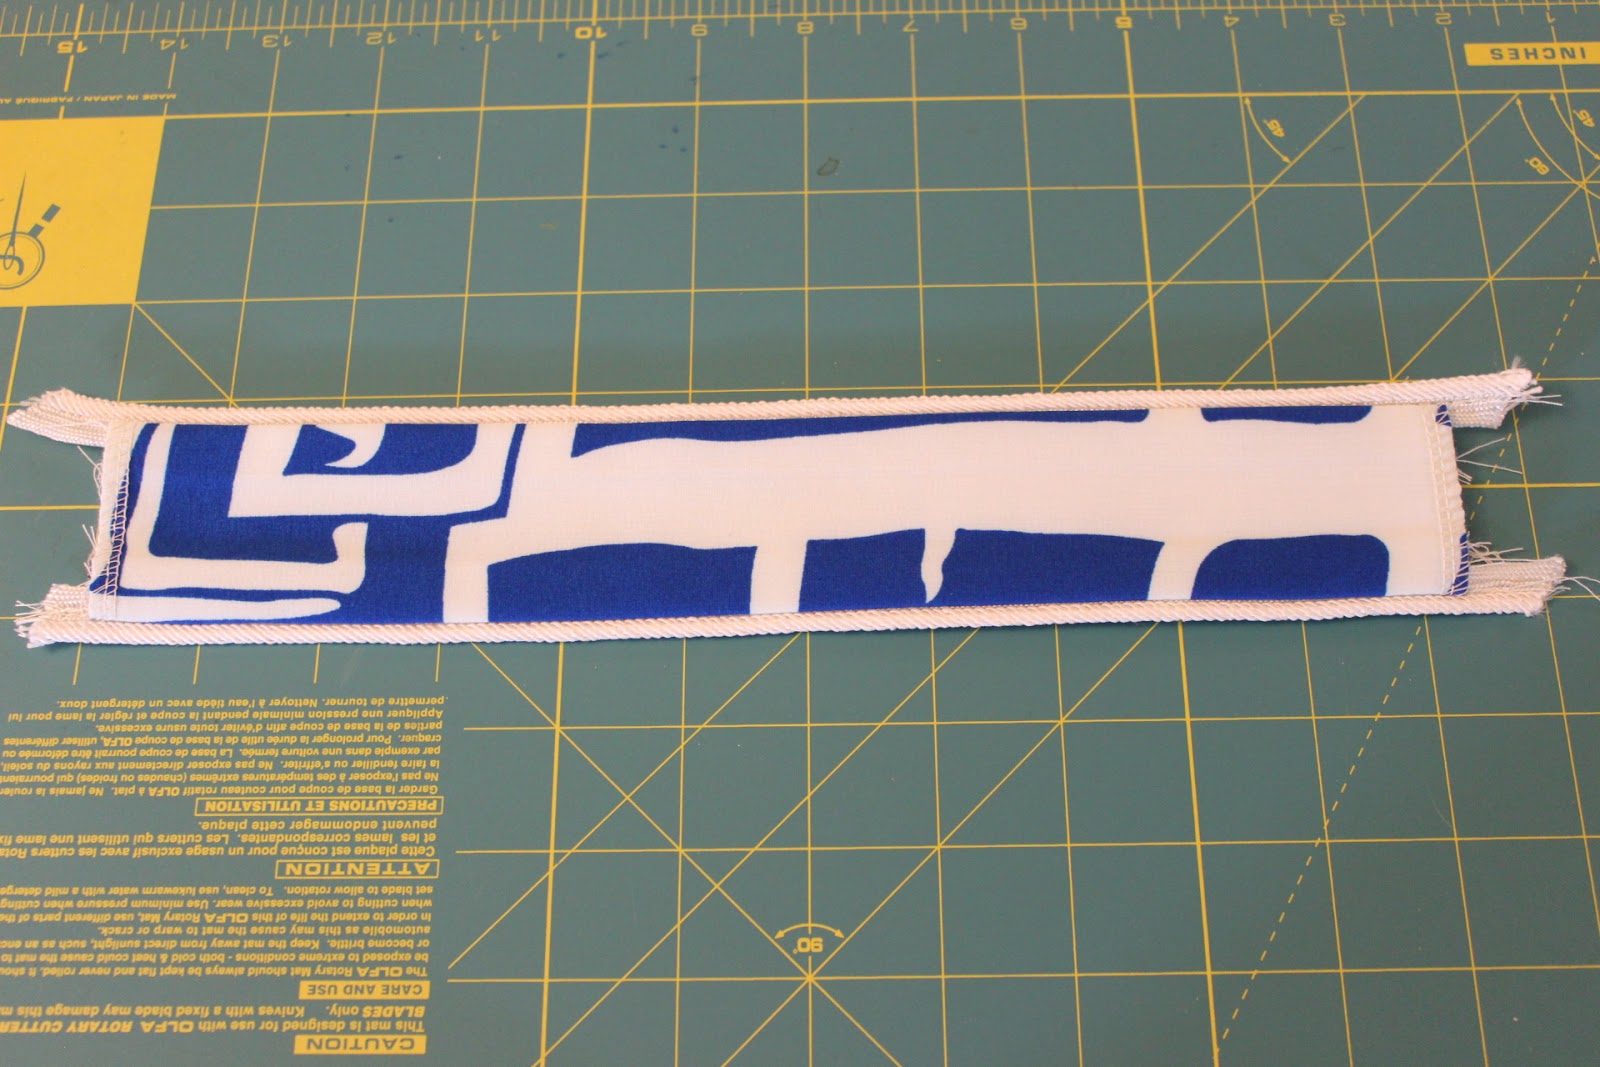
Then the cuff is opened up and the side seam is sewn closed and then pressed open.

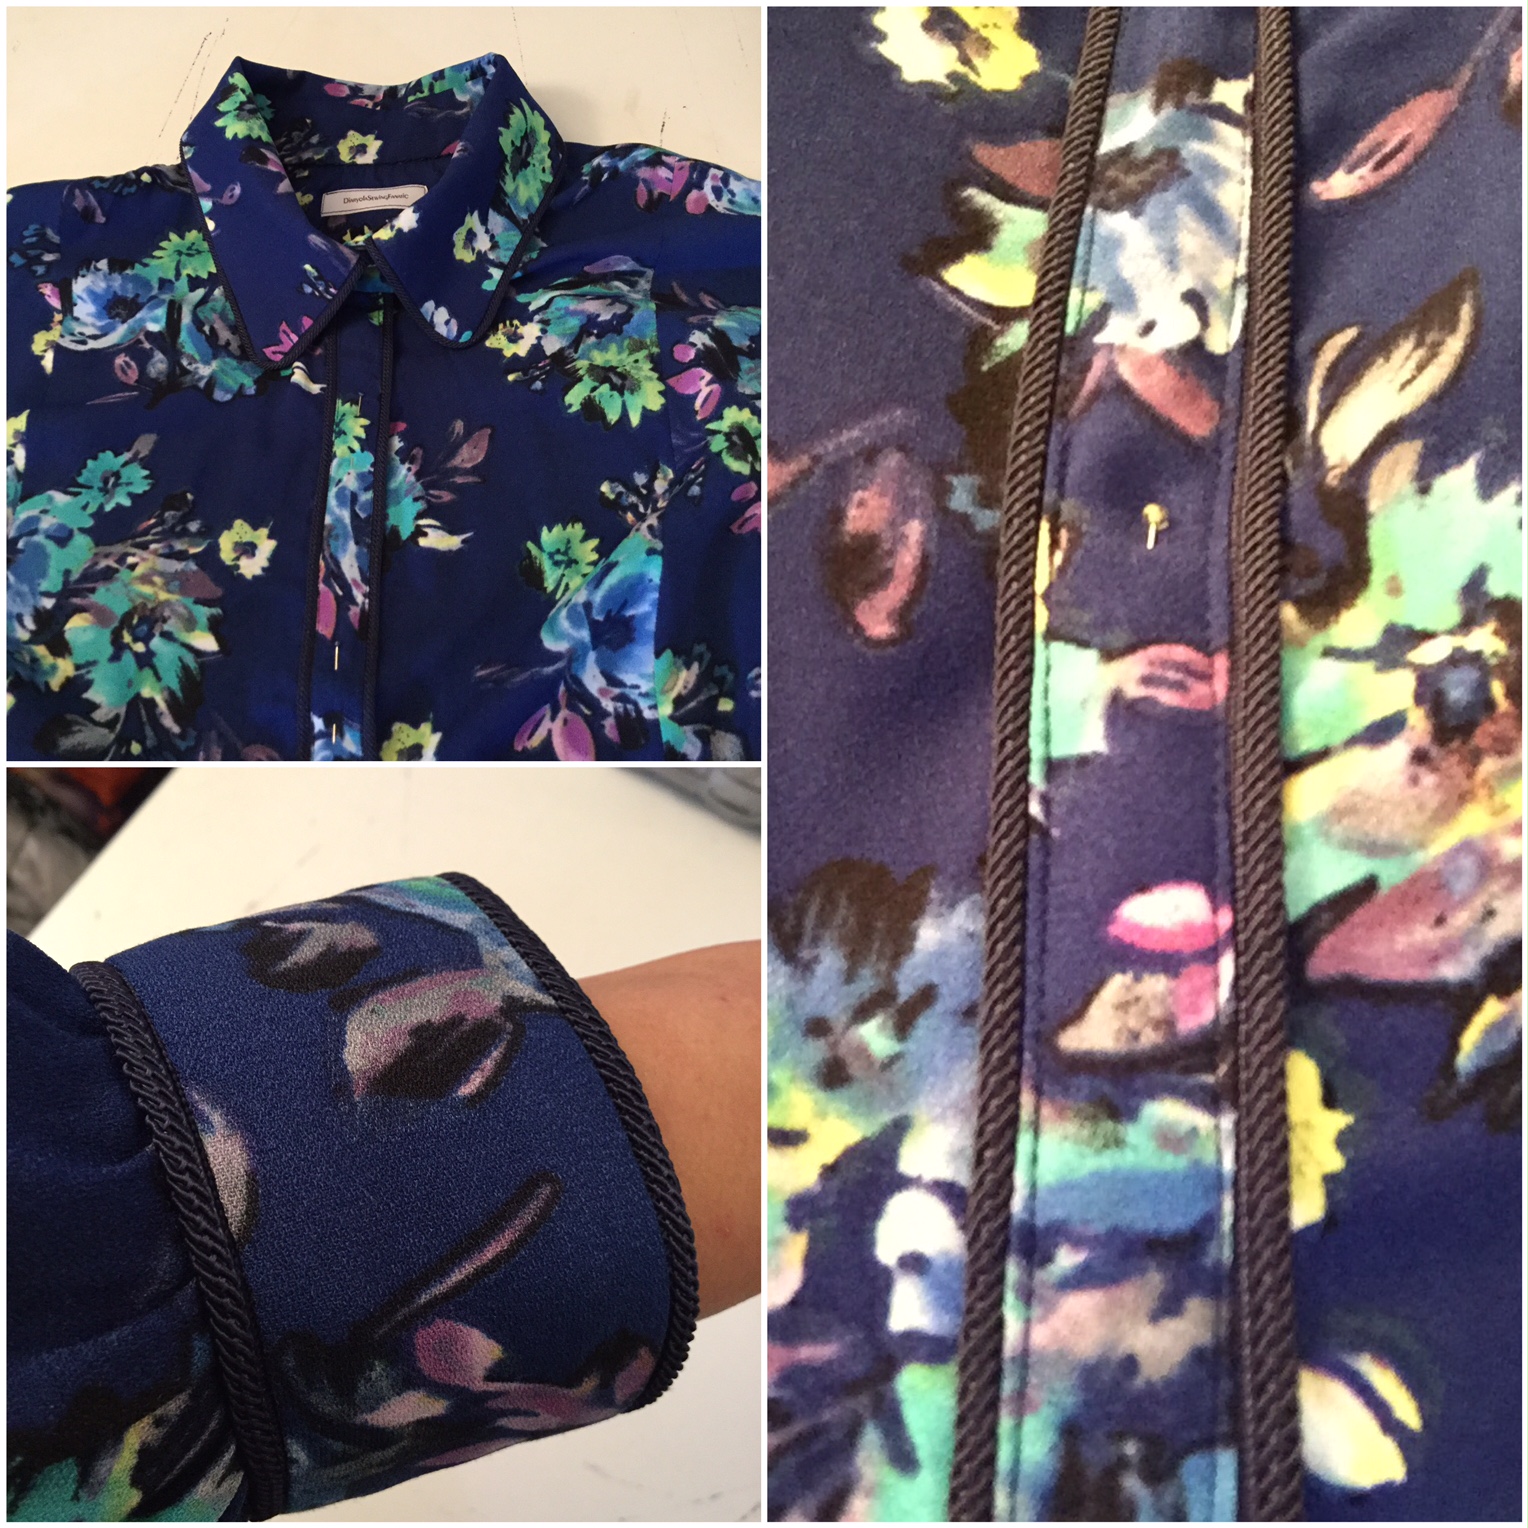
I hand basted the cuff to the sleeve. Then machine stitched it onto the sleeve. I did this so that I wouldn't have pins sticking me as I sewed the two pieces. I used my zipper foot to get as close to the piping as possible when sewing the two pieces together.

The finished sleeve waiting to be inserted into the shirt.

Making the cuffs was the easy part, sewing them to the sleeve was the hard part. Halfway through I wanted to kick myself for picking such a complicated and unnecessary design detail. Between hammering the seams to make them less bulky (yes, I did clip the seams first) and putting the first cuff on wrong then having to take it off...to hand stitching the cuff to the sleeve...those cuffs were a challenge. Let me say that again, A CHALLENGE!
After finishing the first one, I had to take a minute before starting the next one. However, I'm glad I took the time to add the piping to the cuff because the finished button down looks great because of this detail.

Then I completely lost my mind and decided that I needed to add piping to the button placket too on the next version.
So begins the adventure for the next button down...coming soon to the blog!
...as always more later!

Great looking jacket and blue is your color! This is just so bright and happy looking. Love it.
ReplyDeleteYou're so funny! First it's so hard and then you can't wait to make another one, even more complicated, and so quickly. Your are such an inspiration. I love your blog.
ReplyDeleteI know the syndrome: why make something easy if you can add a complication. Brava!
ReplyDeleteGorgeous- I love the piping detail! And that blue and white fabric...!
ReplyDeleteI wondered how you did the piping so found this really interesting. And the shirt looks fantastic, beautiful fabric and yes the piping really gives a great finish.
ReplyDeleteI think you mentioned that this fabric was one of the FM pre-cuts. Is it polyester and how did you like sewing with it? I got a couple in a free bundle and am not sure what to do with it.
ReplyDeleteI like the piping detail and your shirt is very nice.
Bright blue and white is a favorite color combo of mine. The white piping and trim adds a great accent to this top. Well worth the extra work. Did you take the piping cord out of the ends of the piping that extended into the cuff seam, before sewing the seam?
ReplyDeleteAudrey - that is such a couture technique that of course I never thought about it until you asked. Then after some thought I realize that normal piping is wrapped around a cord but I used a rayon one and it's all kinda one. I serge finished the edges and then pounded them with the hammer to flatten them. My new favorite method to eliminate bulk. Also since all the piped edges are enclosed, it really wasn't a challenge. But I will take note of the technique in the future. Thanks for reminding me of it!
DeleteBeautiful as always! Thanks for explaining the fun you had with the piping it's nice to know I'm not the only who can get frustrated with a project.You are such a hoot your sense of humor comes through on your posts so well.
ReplyDeleteYour details really elevate your makes. Kudos on your patience and vision.
ReplyDeleteLooks cool! Like you are wearing bracelets to match your shirt!
ReplyDeleteTaking the time to insert some piping is always worth the effort. Looks beautiful!
ReplyDeleteWonderful shirts. I am now ready to take on this challenge myself. You are an inspiration with the attention to detail.
ReplyDeleteLove that fabric!
ReplyDeleteyou did an amazing job and I love that shirt in that fabric. Thanks for giving new design ideas with the piping.
ReplyDeleteSuch a great detail that really adds a lot to the finished garment. Great tutorial and photos too.
ReplyDeleteI LOVE the piping. It adds so much to the shirt - especially in the bright white against the print. So nicely done.
ReplyDeleteIt's those little details, like piped sleeve cuffs, that takes a garment from 'ordinary' to 'extraordinary' and 'interesting'! This is my favorite version you've made! LOVE the blue on you! :)
ReplyDeleteGORGEOUS! (And, yes, I am very very behind on my blog reading. sigh)
ReplyDelete